-20250819-084018.svg)
Branching steps allow workflows to be transitioned along multiple paths.
What are branching steps?
Branching steps are similar to page statuses, representing a stage in the document workflow. Unlike page statuses, branching steps give users a choice of where to transition next.
Each branch (i.e., transition) exiting a branching step can execute separate actions and arrive at separate page statuses. Conversely, different branches can execute separate actions but lead to the same end status.
There is no restriction on the number of branches that can exit a branching step.
Each branch must be given a unique name. This will be displayed in the byline when users are selecting which branch to follow when transitioning.
One of the branches exiting can be designated as the default branch. The default branch will be displayed separately from other branches in the Confluence page byline.
Similarly to page statuses, automatic transition of branching steps can be configured – such as transitioning when the page is edited, or when it expires after a configured period of time. These can be set up to transition to the default branch, provided one has been chosen.
Again, similarly to page statuses, restrictions can be placed on who can transition out of a branching node. This can either be configured to be the same across all branches, or differently for each separate branch.
How branching steps display on Confluence pages
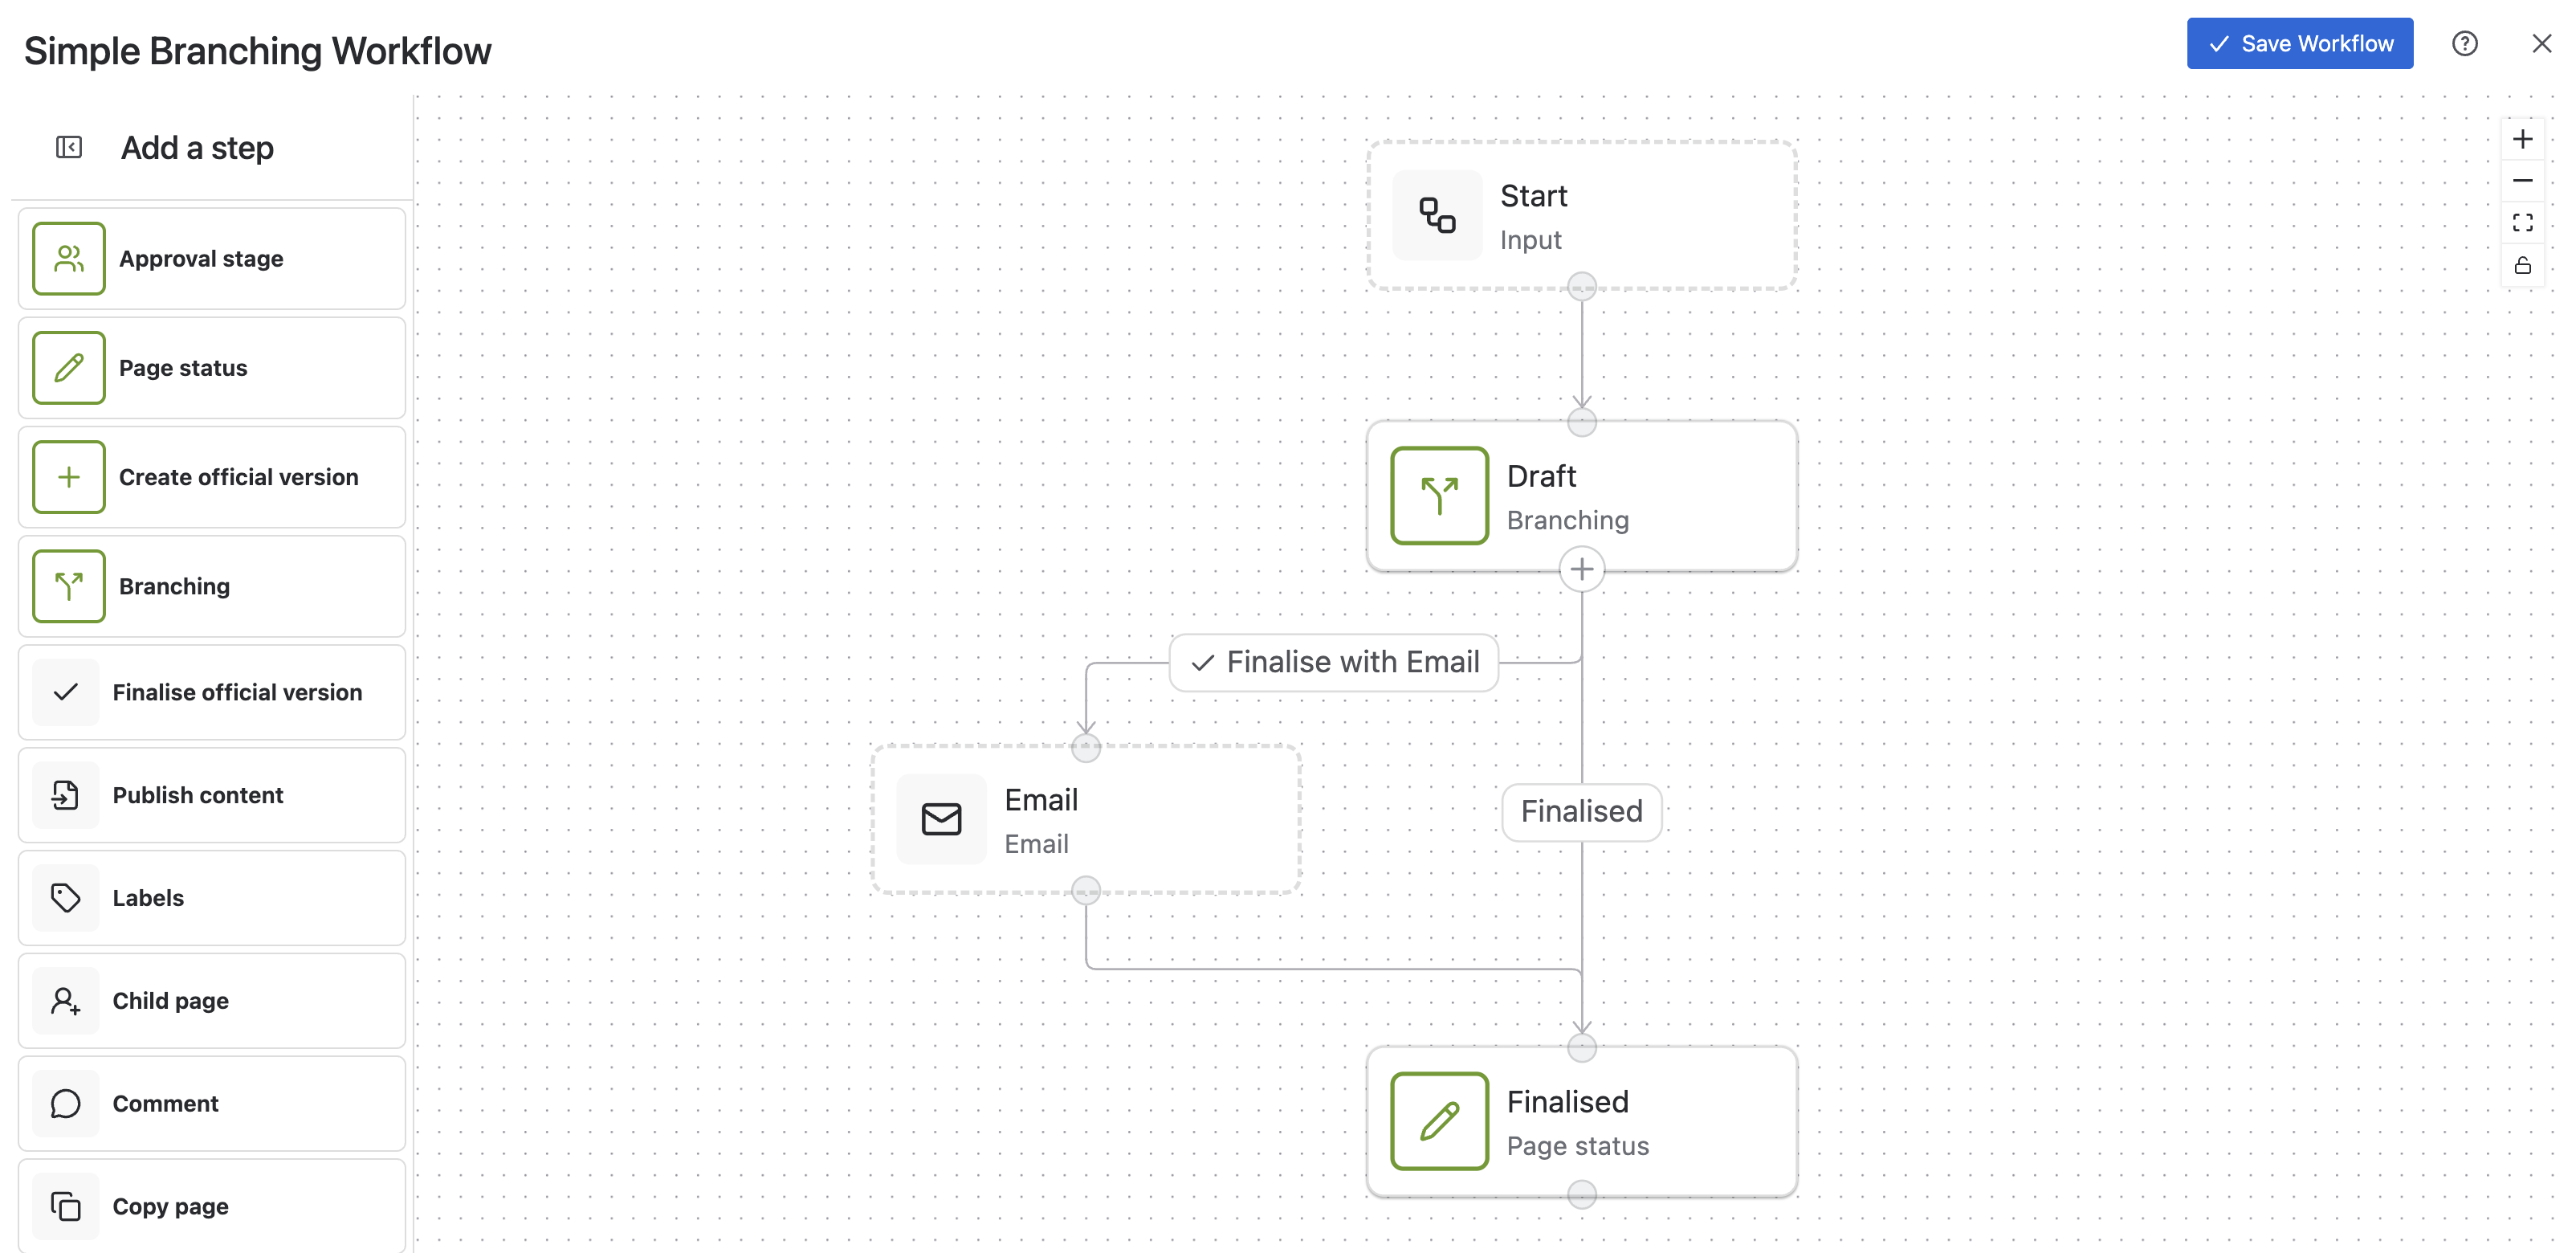
When a branching step is reached, the name given will be displayed in the Confluence page byline. In the below example, the branching step has been named ‘Draft’. This is what is displayed in the byline, the same as status and approval steps.
Clicking this opens the byline, where the user can to select a branch to transition through. For more information, see Branching Workflows.
Configuration settings
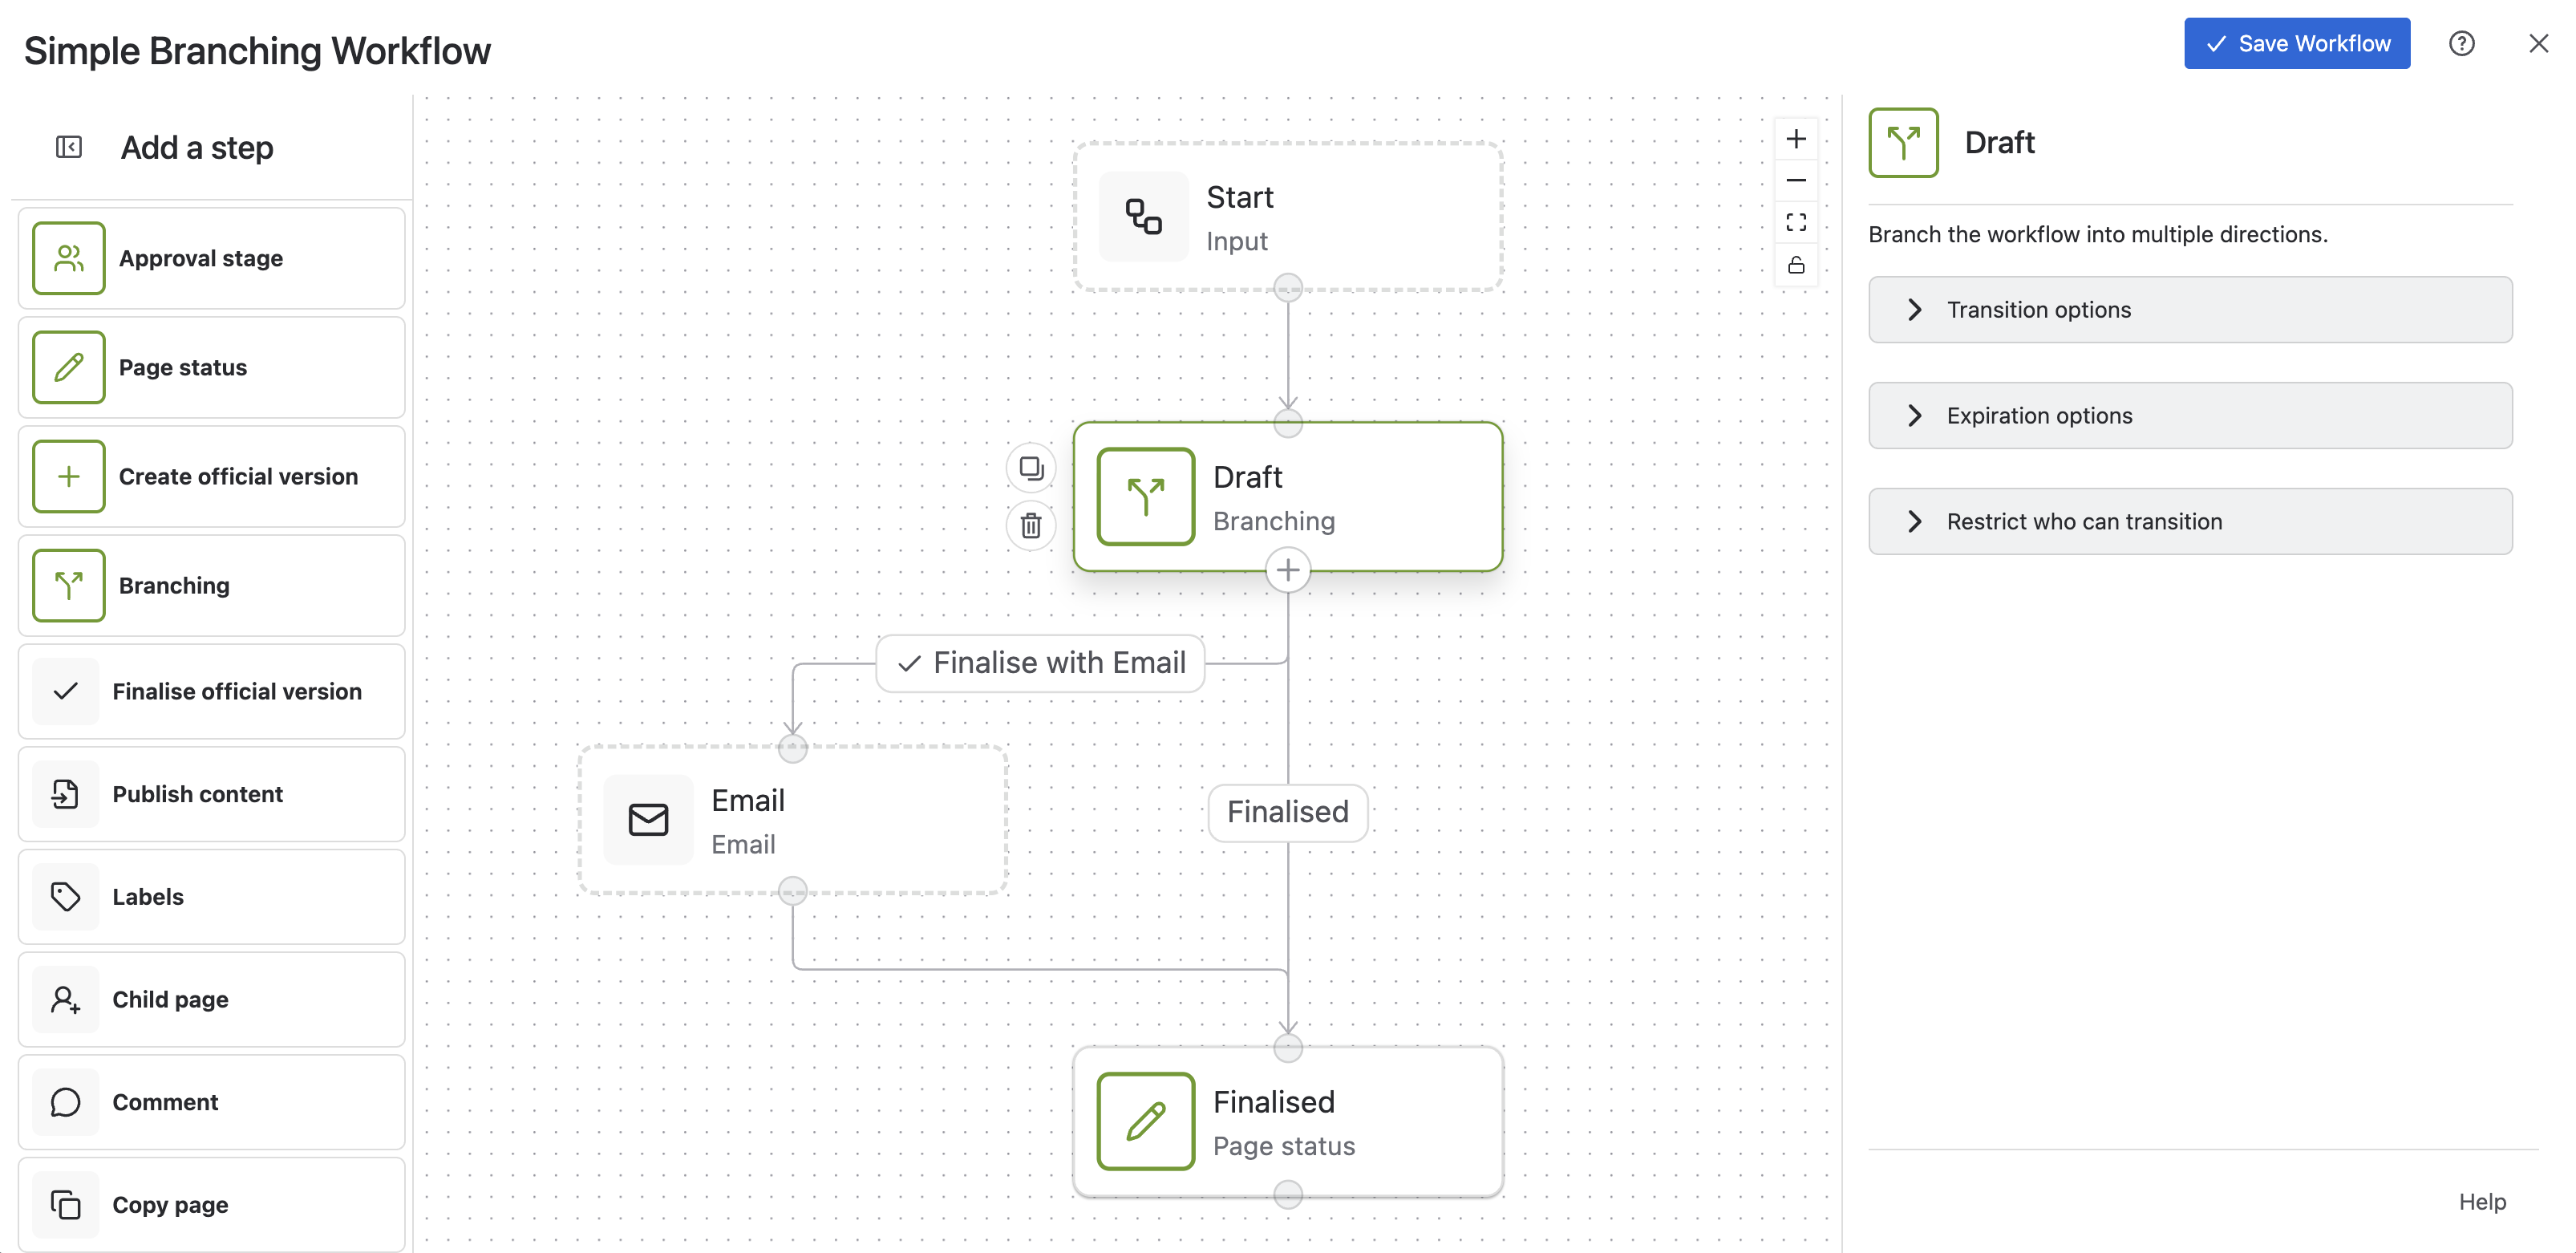
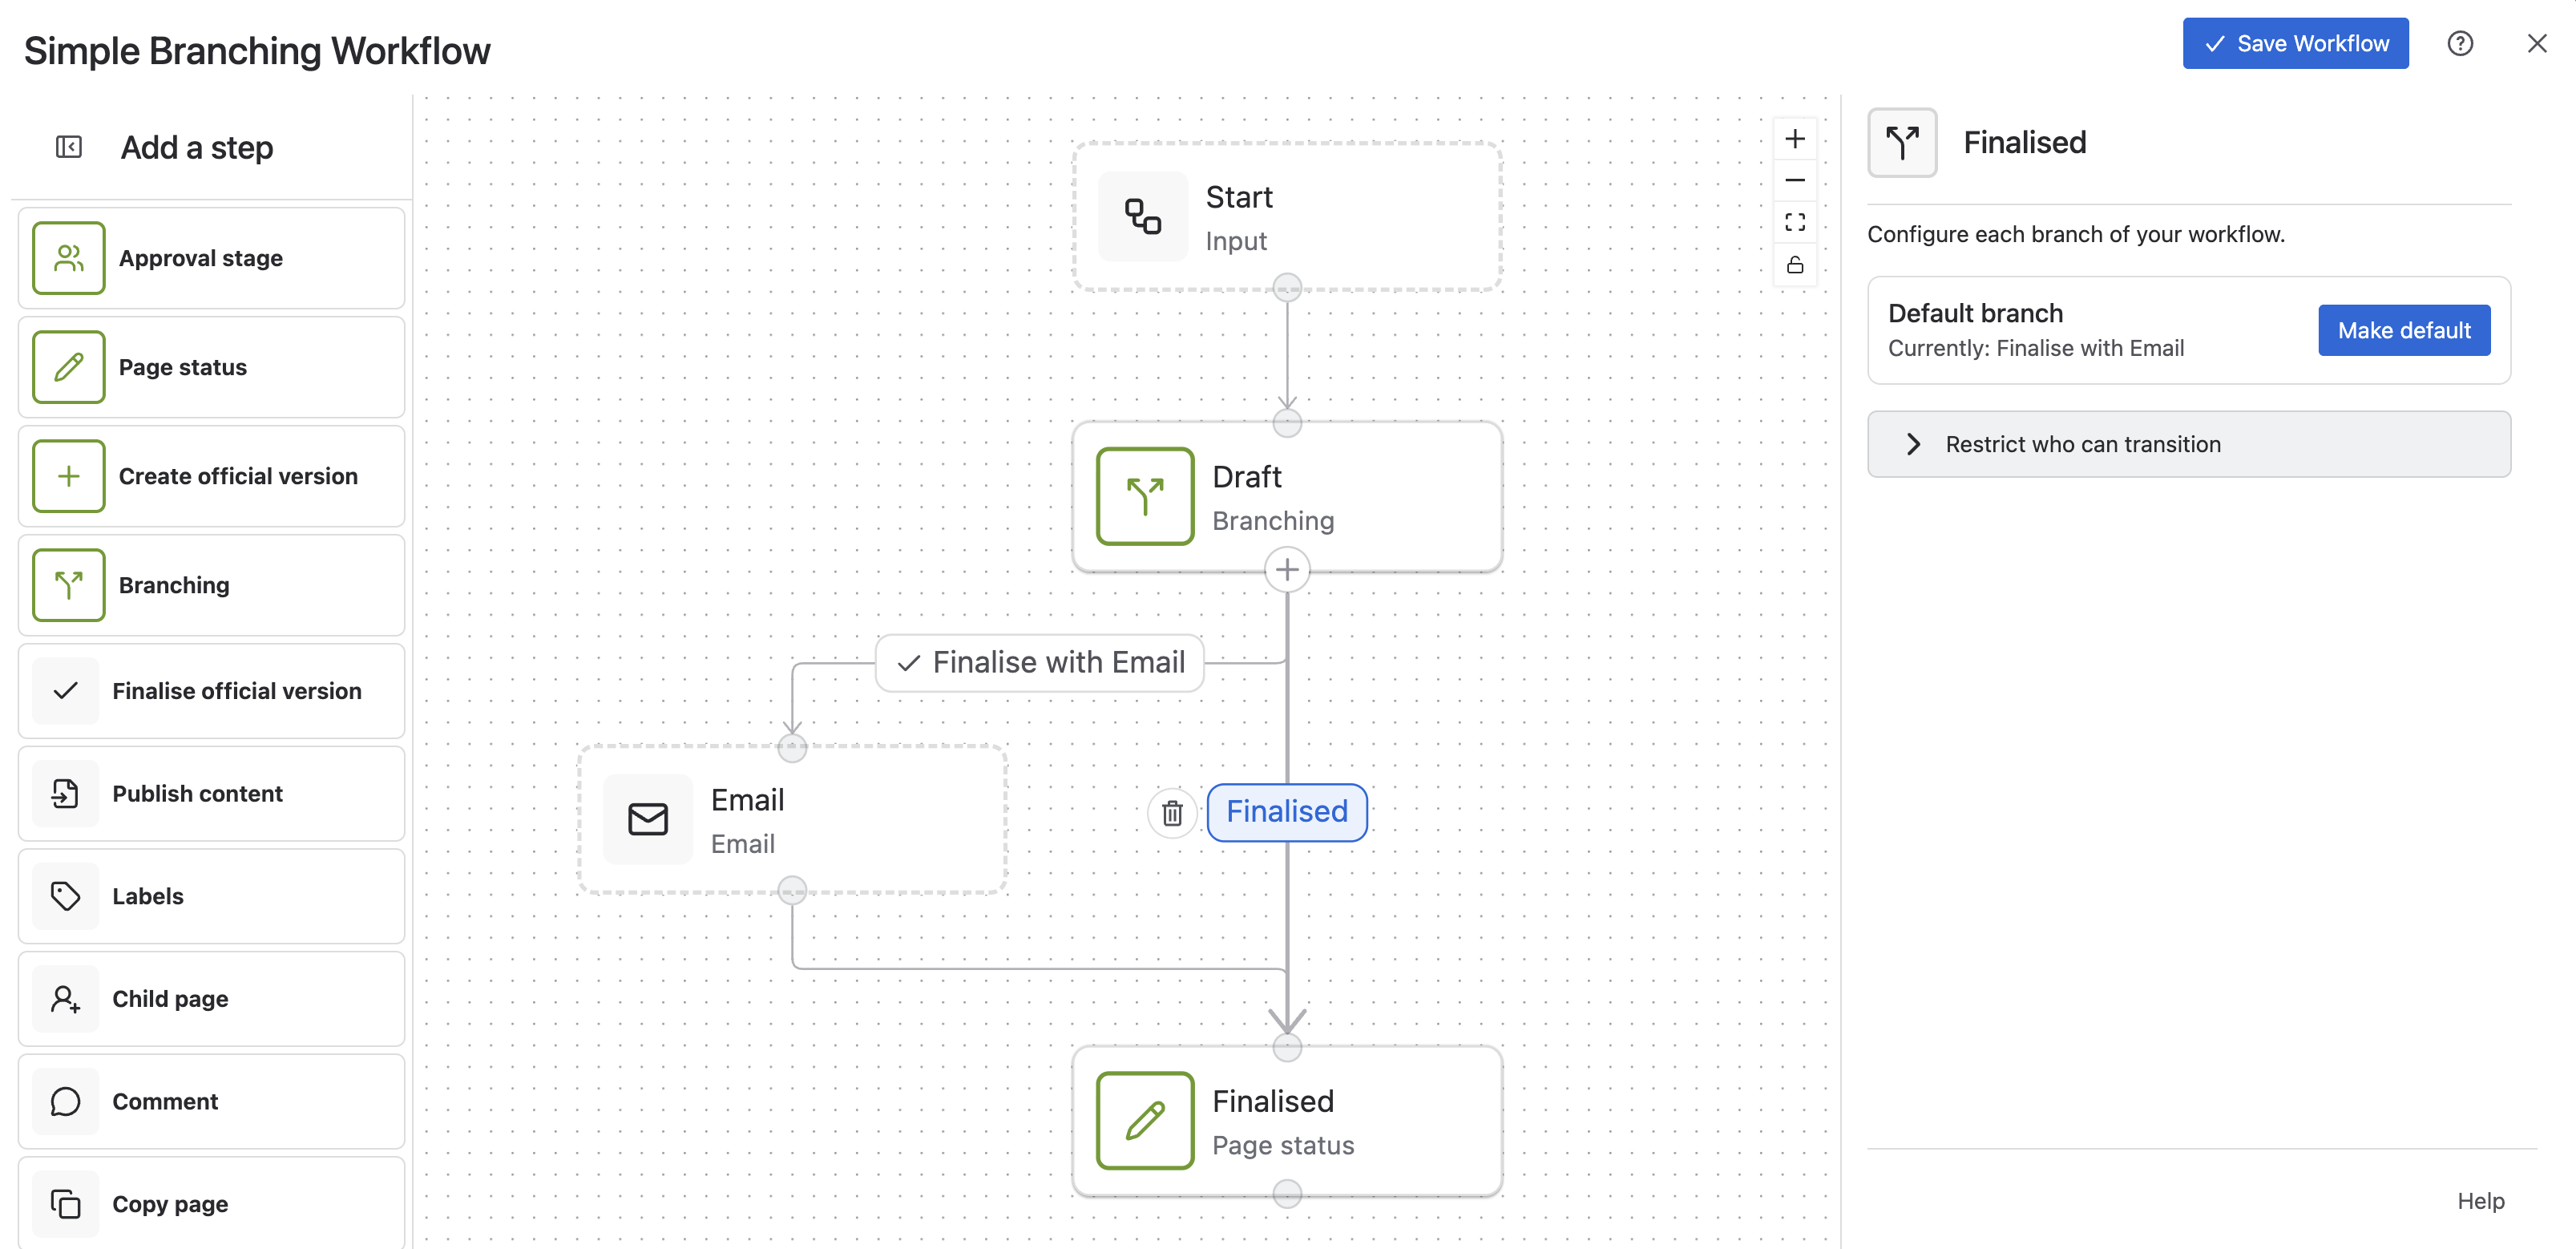
Both the branching step and exiting branches themselves can be configured. Clicking on the branch step, or clicking on any exiting branch, will open the corresponding configuration menu on the right-hand side.
Node configuration
|
Configuration Section |
Configuration Setting |
Description |
|---|---|---|
|
Transition options |
Transition on page edit |
If checked, this will enable automatic workflow transitions when the page is edited, and enable the below configuration option. Note: For Live Docs, transitions triggered by a page edit will take up to 15 minutes to occur after an edit session ends. |
|
Transition options |
Transition to status |
Select which workflow status you want the page to transition to, from the current branch status, when it is edited. You will be able to select from the following options:
If you choose the “Default branch” option, the workflow will progress to the next status given via the default branch. Please ensure a default branch has been set. |
|
Transition options |
Email on page transition |
When a page transitions to the next stage of a workflow you may want specific people to be notified. This setting allows you to choose which users are notified when a page moves to the next stage of a workflow. These emails will be sent for user triggered transitions, page edit triggered transitions, and time-based expiry triggered transitions. |
|
Expiration options |
Expire status after set time |
If checked, this will enable automated workflow transitions based on a time period after entering the status, and enable the below configuration options. |
|
Expiration options |
Time until expiration |
You can select the time period after which you want the workflow to expire using the dropdown. |
|
Expiration options |
Transition to status on expiration |
Select which workflow status you want the page to transition to, from the current branch status, when it expires. You will be able to select from the following options:
If you choose the “Default branch” option, the workflow will progress to the next status given via the default branch. Please ensure a default branch has been set. |
|
Expiration options |
Email on page expiry |
Once a page has expired, you may want specific people to be notified. This setting allows you to choose which users are notified when a page expires. |
|
Restrict who can transition |
Apply restrictions to all branches |
You can restrict who can transition a workflow to the next stage. When configuring this for a branching step, you may choose to apply the same restrictions across all branches here. If instead you wish to apply different restrictions to different branches, edit the configuration of each branch separately. |
|
Restrict who can transition |
Users and groups who can transition |
Transitions can be restricted by listing specific users and groups. Enter the name of the user(s) and/or group(s) in this field if you want to restrict the transition permission to them. |
|
Restrict who can transition |
Roles which can transition |
Transition can also be restricted by choosing specific roles. Select the role(s) in this field if you want to restrict the transition permission to them. |
Branch configuration
|
Configuration Section |
Configuration Setting |
Description |
|---|---|---|
|
Default branch |
Default branch |
This branch can be made the default branch by clicking “Make default”. Each branching step can have at most a single default branch. When selected, the default branch is the one that is highlighted amongst all configured branches in the byline, and determines which route to follow for automatic transitions such as those configured for page edits and time-based expiries. |
|
Restrict who can transition |
Users and groups who can transition |
You can restrict who can transition via each branch. In the parent branching step, “Apply restrictions to all branches” must be disabled to configure this. Transitions can be restricted by listing specific users and groups. Enter the name of the user(s) and/or group(s) in this field if you want to restrict the transition permission to them. |
|
Restrict who can transition |
Roles which can transition |
Transitions can also be restricted by choosing specific roles. Select the role(s) in this field if you want to restrict the transition permission to them. |
Need support? We’re here to help 🧡
As you can see from the page above, there are many configuration options in Workflows for Confluence. If you have any questions or would like assistance with any of these configuration options, please don’t hesitate to contact our Support team.