Skip table of contents

Logic

The Logic section of the Workflow Builder is the real engine room in Workflows for Confluence. It gives you the ability to build workflows that are fully customized to your organization and ultimately ensures the document management process in Confluence aligns with the way you work.
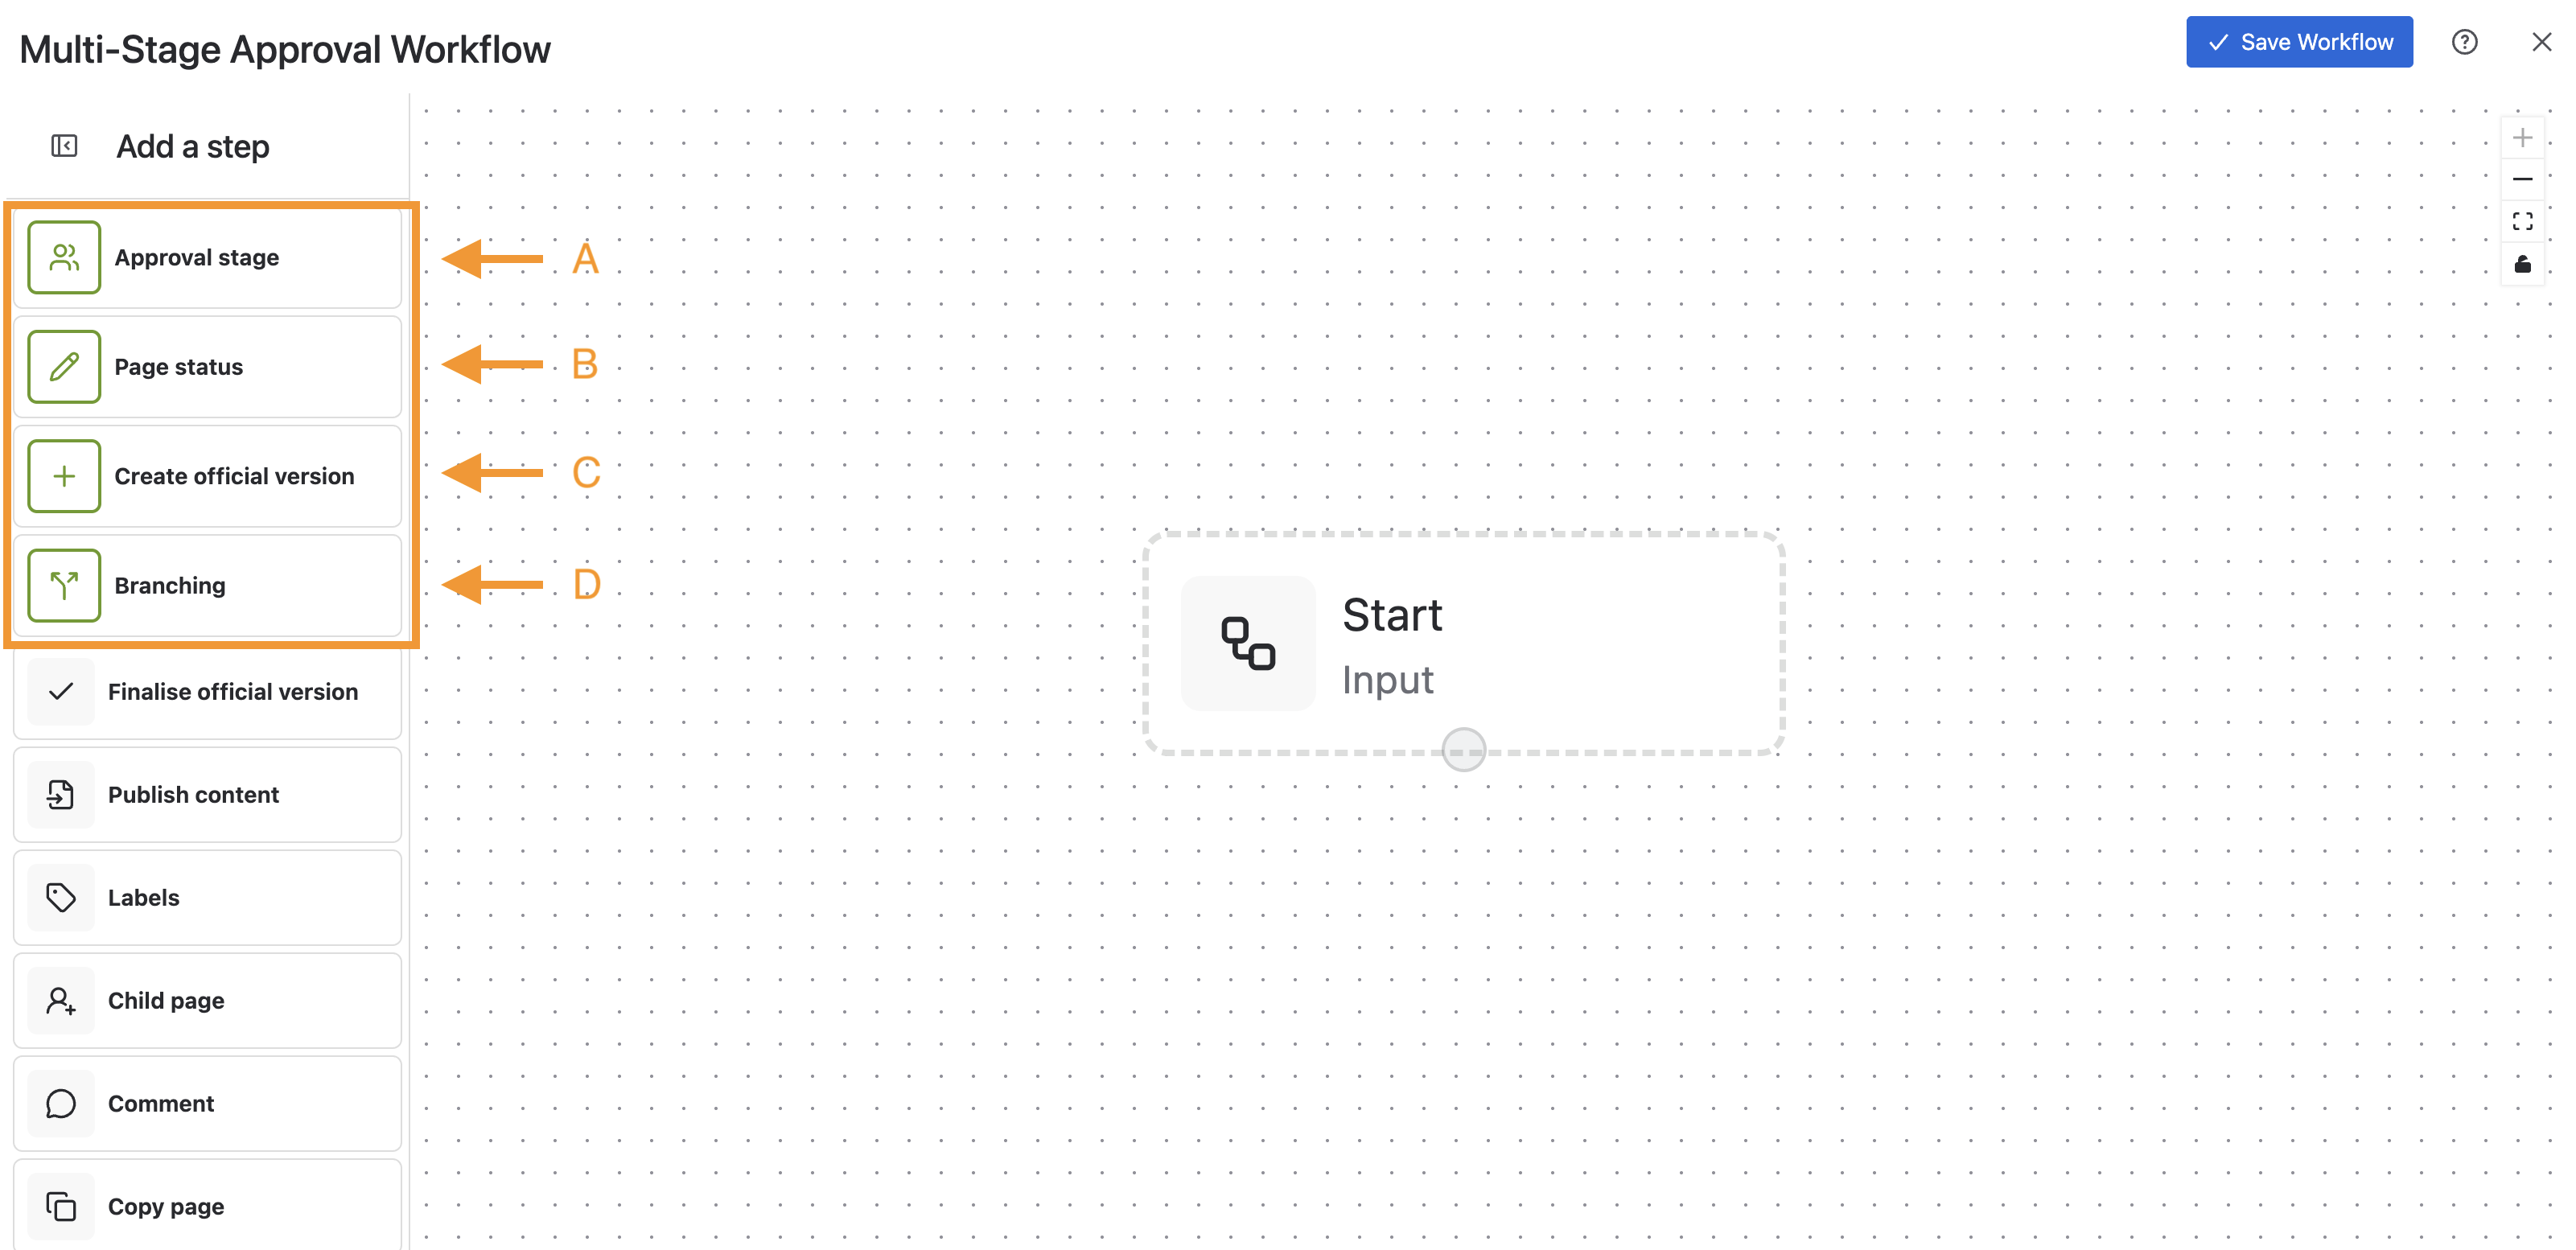
There are three different Logic options to choose from:

  • Page Statuses (A)

  • Approval Cycles (B)

  • Official Document Versions (C)

Let’s explore each one of these options in more detail:

Page Statuses

Statuses are the key part of Workflows for Confluence, and all your document workflows require at least one.

These statuses are the different stages a document workflow can transition through, and you can customize their name so they align with the document management processes in your organization. For example, you may want documents to start in the Draft status before they begin proceeding through the workflow, and this is easy to do with the Page Statuses feature.

How statuses display on Confluence pages

Once a workflow has been applied to a Confluence page, the status will automatically update in the Confluence page byline (D).

If you move your page through the various statuses of the workflow, you will notice the page status automatically updates so you get a real-time of its progress. This also makes it really clear for other users what stage of a workflow the page is currently in.

Configuration settings

Workflows for Confluence has been built to be flexible so you can adjust workflows to your needs. As a result, there are a bunch of configuration options that you can use and these are all optional. To open the configuration menus, click on the status (E) and the menu will open on the right-hand side (F).

General

The General configuration settings are where the majority of options can be found.

Let’s take a look through each one in detail.

Configuration Setting

Description

On Page Edit Options

Select which workflow status you want the page to transition to if it is edited. You will be able to select from the following options in the drop down menu:

  1. Stay on Current Status

  2. Transition to Previous Status

  3. Transition to Initial Status

  4. Transition to Next Status

Please note, this “On Page Edit” configuration will only be active for this stage of the workflow so you will need to configure the other statuses in a similar way if you want this to apply throughout your workflow.

On Page Expiration Options

Select which workflow status you want the page to transition to once it expires. This expiration occurs on a timed basis (see the Time to Page Expiration setting below) and you will be able to select from the following options in the drop down menu:

  1. Stay on Current Status

  2. Transition to Previous Status

  3. Transition to Initial Status

  4. Transition to Next Status

Please note, this “On Page Expiration” configuration will only be active for this stage of the workflow, so you will need to configure the other statuses in a similar way if you want this to apply throughout your workflow.

Time To Page Expiration

You can select the time period you want the workflow to expire using the selector.

Email on Expire

Once a page has expired, you may want specific people to be notified. This setting allows you to choose which users are notified when a page expires.

Email on Transition

When a page transitions to the next stage of a workflow you want want specific people to be notified. This setting allows you to choose which users are notified when a page moves to the next stage of a workflow.

Conditions

Conditions allow you to control which users or groups can transition pages to the next stage of a workflow once it's in the status.

Configuration Setting

Description

Users to Transition

You can restrict who can transition a workflow to the next stage to specific users. Enter the name of the group(s) in this field if you want to restrict the transition permission to them.

Groups to Transition

You can restrict who can transition a workflow to the next stage to specific Confluence groups. Enter the name of the group(s) in this field if you want to restrict the transition permission to them.

User must be Page Creator

This will allow only the Page Creator to transition the page to the next stage of the workflow.

Top tip: if you use multiple options in the Conditions settings, such as the group, user and Page Creator, then it behaves as an “OR” operator. If the user fits any of the criteria then they will be able to transition. Alternatively, if you leave all the fields empty then any user will have the ability to transition the page.

Extra

The Extra tab allows you to select the colour for this status in the workflow. This colour will appear on the Confluence page once the workflow reaches this status

Approval Cycles

The Approval Cycle option (G) in the Workflow Builder is where the review and approval process comes into the picture. This is a critical part of many document workflows, and with Workflows for Confluence, you can easily customize the approval process to include the right people at the right stage of the document management lifecycle.

If you would like a walkthrough of how to create a single or multi-stage approval workflow, please check out the videos listed below:

How approval cycles display on Confluence pages

When a document reaches the approval cycle in a workflow, the status will be clearly visible on the Confluence page (H). As you can see in the image below, if you click the workflow status, it will show you more information about the current approval (i.e. who has approved/rejected the document and who is yet to review it).

Configuration settings

There are a range of configuration options for Approval Cycles, and in this section, we’ll go through these in more detail.

General

The General configuration settings are where the majority of options can be found.

Let’s take a look through each one in detail.

Configuration Setting

Description

Email on Action

Notify specific people when an approver has approved or rejected the Confluence page.

On Page Edit Options

Select which workflow status you want the page to transition to if it is edited. You will be able to select from the following options in the drop down menu:

  1. Stay on Current Status

  2. Transition to Previous Status

  3. Transition to Initial Status

  4. Transition to Next Status

Please note, this “On Page Edit” configuration will only be active for this stage of the workflow so you will need to configure the other statuses in a similar way if you want this to apply throughout your workflow.

On Page Expiration Options

Select which workflow status you want the page to transition to once it expires. This expiration occurs on a timed basis (see the Time to Page Expiration setting below) and you will be able to select from the following options in the drop down menu:

  1. Stay on Current Status

  2. Transition to Previous Status

  3. Transition to Initial Status

  4. Transition to Next Status

Please note, this “On Page Expiration” configuration will only be active for this stage of the workflow, so you will need to configure the other statuses in a similar way if you want this to apply throughout your workflow.

Time To Page Expiration

You can select the time period you want the workflow to expire using the selector.

Email on Expire

Once a page has expired, you may want specific people to be notified. This setting allows you to choose which users are notified when a page expires.

Email on Transition

When a page transitions to the next stage of a workflow you want want specific people to be notified. This setting allows you to choose which users are notified when a page moves to the next stage of a workflow.

Approval

In the Approval settings, you can configure how an approval process runs and if there are any specific requirements.

Configuration Setting

Description

Approvers (Users)

Select the people you want to be approvers for this document. Please note, this field will display any users in your Confluence instance.

Approvers (Groups)

Select the Confluence groups that you want to be added as approvers for this document. Please note, this field will display any groups in your Confluence instance.

Exclude (roles)

Select the roles that you want to be excluded from approving/rejecting an approval stage for instances of your workflow. For example, adding the ‘Page Creator’ role will exclude the page creator from approving/rejecting the approval stage, so this user will differ depending on the page that the workflow is applied on.

  • Page Creator - Confluence role

  • Author of the Last Edit - Confluence role

  • Official Version Owner - Workflows for Confluence role. This is the creator of the latest official version for the workflow applied to your page.

  • Page Owner - Confluence role

Note: When using this feature, it is important to carefully consider the quorum sizes for approvals/rejections. If a numerical quorum size is given that turns out to be greater than the number of non-excluded approvers, the approval stage won’t be able to progress. For example, if you have an approval stage with following settings:

  • 3 approvers set;

  • A numerical, approve quorum of 3 (rather than using a quorum of ‘All’);

  • 1 excluded role

If the workflow is applied to a page and one of the approvers has the excluded role, the approve quorum won’t be able to be met as there are only 2 'available' approvers in this scenario. So, this approval stage can’t transition to approved in its current state. This logic also applies to ‘Per Group’ quorum sizes (see below for details).

  • Enabling ‘Allow Additional Approvers’ would allow the above scenario to be rectified (if ‘Per Group’ quorum sizes are not being used).

  • If a quorum size is set to ‘All’, the quorum will change dynamically if there are excluded approvers; the excluded users don’t need to approve for the quorum to be met.

    • If the approve/reject quorum is set to ‘All’, and all approvers become excluded, the approval stage will be ‘stuck’ (unless additional approvers are allowed).

    • If the approve quorum is set to ‘Per Group’, and an individual group quorum size is set to ‘All’, and all approvers become excluded, the group will be ‘stuck’ (also, adding additional approvers won’t allow the group’s quorum to be met).

Allow Additional Approvers

Allows a user to add additional approvers to an approval cycle for a specific instance of a workflow, via the byline window on a Confluence page.

Approved Quorum Size

The quorum allows you to select the minimum number of approvals required before a page can transition to the next status in a workflow.

  • If you select "All" then all the users must approve the page for it to transition.

  • If you choose at least one user group, “Per Group” will also be available. This option will allow you to set approved quorum size for each user group selected, e.g. you could define your approval to require 2 users from hr-users and 1 user from finance-users for the transition to take place.

Rejected Quorum Size

The quorum allows you to select the minimum number of rejections required before a page can transition to the next status in a workflow (e.g. Rejected).

Await all Approvers

If this option is enabled, the approval cycle cannot be completed without all the approvers completing their review and selecting “Approve” or “Reject”.

Require Comment on Action

This will require all approvers to add a comment to a page when making their approval decision.

Require Token on Approval

This will require all approvers to use an Approval Token when making their approval decision. This option is particularly useful for organizations that need verified or authenticated approvals.

Email Assigned Approvers

Send an automated email to the assigned approvers when a document requires their approval.

Please note, this option is on by default and we would strongly recommend it remains activated so your approvers know when documents require their approval.

Email Page Creator on Action

Send an email notification to the Page Creator once any approval or rejection has been made on the page.

Extra

The Extra tab allows you to select the colour for the approval cycle status in the workflow. This colour will appear on the Confluence page once the workflow reaches this approval cycle status.

Official Document Versions NEW

The Official Document Version feature in Workflows for Confluence goes beyond the inbuilt (native) page versioning that is available in Confluence. It allows you to mark documents as a major or minor version (I) depending on the level of changes made.

This feature is particularly useful if you manage regulated or controlled documents where the version numbers are used as a key reference point.

Using Official Document Versions

In the Workflow Builder, you must add the Create Official Version option to your workflow, as shown below (J). This will allow you to select a major or minor version increment (i.e., 1.0 → 2.0 and 1.0 → 1.1 respectively) during that part of the workflow.

You will also be required to give a description for each version which will be retained in the Workflow History and made visible to all approvers. This is particularly useful for audit purposes.

There are no configuration options available for the Create Official Version aside from changing the status colour.

Once your page has transitioned through the Create Official Version part of the workflow, it will create a draft version of the page initial which will be referred to in the Workflow History as “Draft”. To publish the version and remove the draft tag, you must use the corresponding action ('Approve Official Version') within the workflow as shown below (K).

When the page transitions through this action, it will mark the version as published and remove the draft tag. This allows for a series of Confluence page edits to be bundled together into a single document version.

How Official Versions display within a Confluence page

Once a document is approved as an Official Version, you can see the version number within the workflow status window (L).

You can also see the Official Version number on the Workflow History page (M).


Need support? We’re here to help 🧡

As you can see from the page above, there are many configuration options in Workflows for Confluence. If you have any questions or would like assistance with any of these configuration options, please don’t hesitate to contact our Support team.

JavaScript errors detected

Please note, these errors can depend on your browser setup.

If this problem persists, please contact our support.