-20250819-084018.svg)
How to manage HR publishing workflows in Confluence
Overview
HR teams often use Confluence to share important internal content like policies, announcements, onboarding materials, and process documentation.
In many cases, the priority isn’t complex workflows or multiple approval stages.
It’s making sure that:
-
content can be worked on safely
-
updates don’t go live before they’re ready
-
employees only see final, accurate information
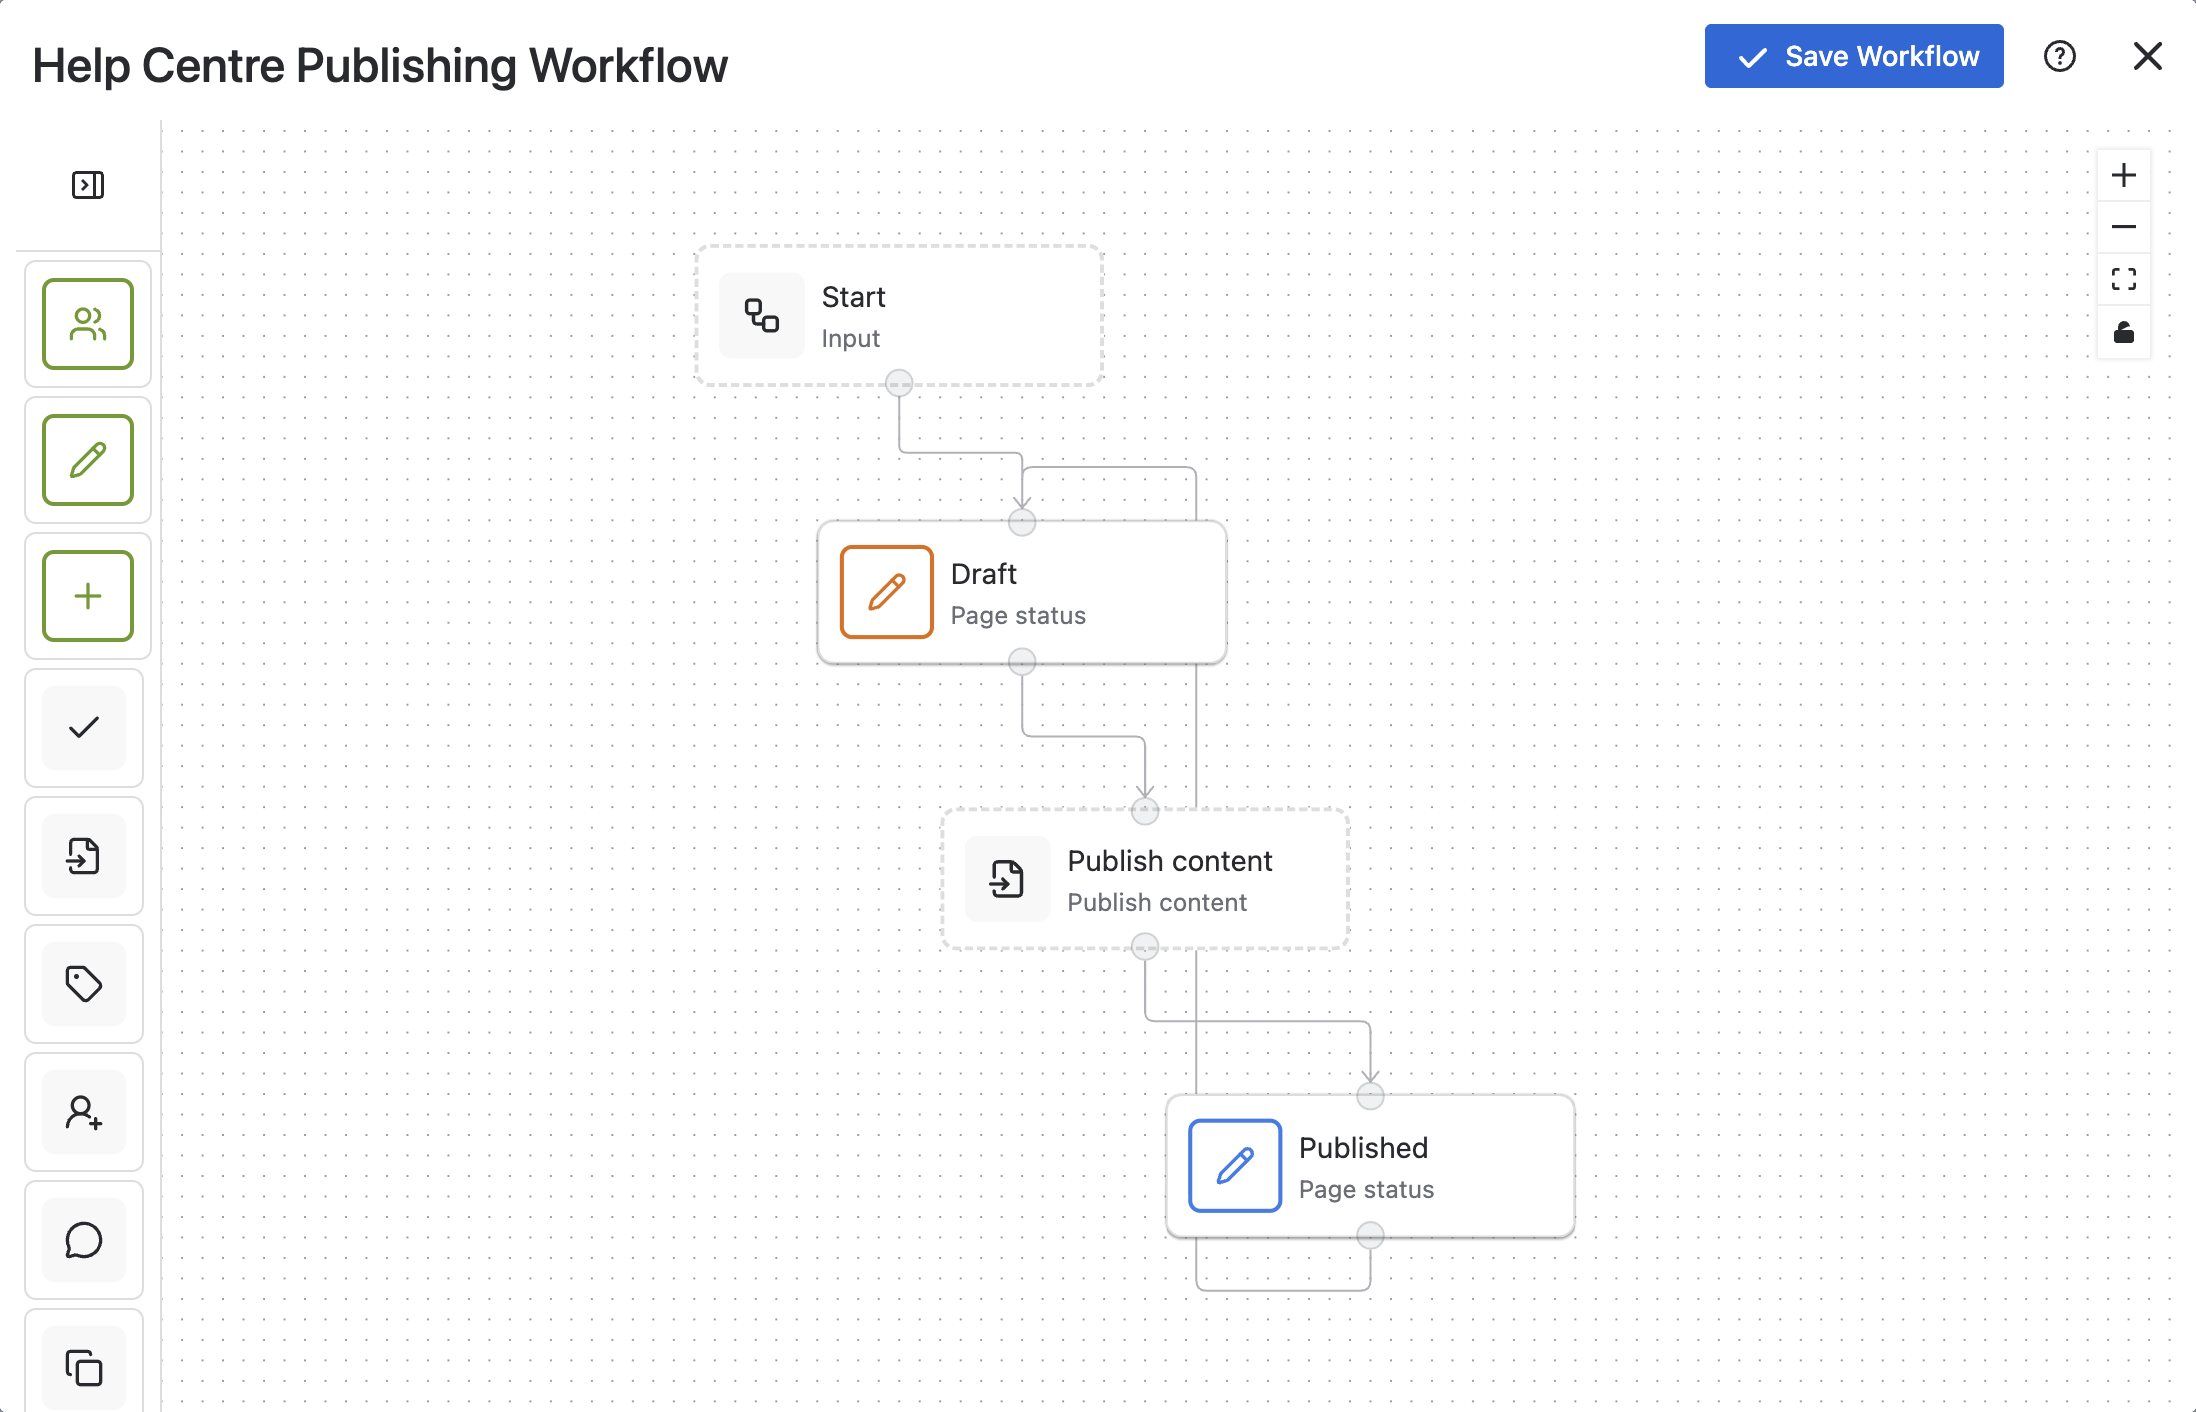
This guide shows how to set up a simple HR publishing workflow in Workflows for Confluence, using a draft → publish approach that keeps content controlled without slowing teams down.
When do you need a publishing workflow?
You’ll benefit from a publishing workflow if your team:
-
updates policies or internal documentation regularly
-
wants to avoid publishing incomplete changes
-
needs a clear separation between draft and live content
-
manages content that is widely visible across the organisation
This is especially useful for:
-
HR and People teams
-
internal communications teams
-
operations teams
The recommended workflow structure
For most HR use cases, a simple draft → publish workflow is enough.
A typical structure looks like:
Draft → Published
How this works in practice
-
Content is created and edited in a private or restricted space
-
Changes remain in draft while being worked on
-
When ready, content is published to a shared or company-wide space
This ensures that:
-
employees only see final, approved content
-
work-in-progress updates aren’t accidentally shared
-
HR teams can make changes without disrupting live information
How to set this up in Confluence
Option 1: Start with a publishing workflow template (recommended)
The quickest way to implement this is with a publishing workflow template.
When creating a new workflow:
-
select the publishing template, when prompted
-
define your draft (working) space and published (live) destination
-
assign who can trigger publishing
-
apply the workflow to your content
This gives you a simple, controlled publishing process without needing to design a workflow from scratch.
Option 2: Build from scratch
If you want to configure this manually:
-
Create statuses:
-
Draft
-
Published
-
-
Define transitions:
-
Draft → Published
-
-
Set permissions:
-
restrict editing in the published state if needed
-
control who can trigger publishing
-
This approach offers flexibility, but takes longer to set up and maintain.
Common HR publishing use cases
This workflow is commonly used for:
-
Policy updates
Work on changes privately, then publish in a separate Space once final -
Internal announcements
Prepare communications in advance without exposing drafts -
Onboarding content
Keep materials up to date without disrupting live content -
Employee handbooks and help centres
Maintain a clean, reliable version for employees
When to add approvals
In some cases, HR teams may still need formal sign-off before publishing.
You can extend this workflow by adding an approval stage, for example:
Draft → In Review → Approved → Published
This is useful when:
-
policies require legal or leadership approval
-
multiple stakeholders need to review content
-
auditability is important
For simpler use cases, however, the draft → publish workflow is often enough.
Best practices for HR workflows
To keep things simple and effective:
-
separate working content from published content, across different Spaces
-
limit who can publish changes using permission change stages in your workflow
-
review your structure as your processes evolve
-
make sure relevant stakeholders understand their roles in the workflow
The goal is to maintain control without slowing down content updates.
Getting started
If you’re introducing workflows into your HR processes:
-
start with a publishing template
-
define your draft and live spaces
-
control who can publish
-
add approvals only where needed
This approach gives you immediate structure, while keeping workflows easy to manage.