-20250819-084018.svg)
This can only support POST requests. For more information, check out the Jira Cloud API Documentation
It can be really beneficial to integrate automated Jira actions into your Confluence document workflows. This could be used to create a Jira issue at a certain stage of the workflow. If your team manages projects in Jira, then this is a real time advantage.
Pre-requisites
Before you can setup a Jira webhook within the workflow builder, you will need create an API token for your Atlassian Account. Once you have done that you can then add Jira actions to your workflow.
Creating a Jira Issue
In this example we will show you how to create a Jira issue using the authenticated webhook action. To begin, follow the steps below:
-
Create an API token for your Atlassian account
-
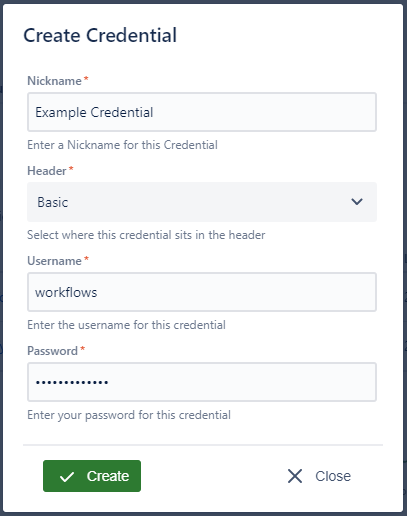
Head to the Workflows Credential Manager and add a basic auth credential with your email and API token.
-
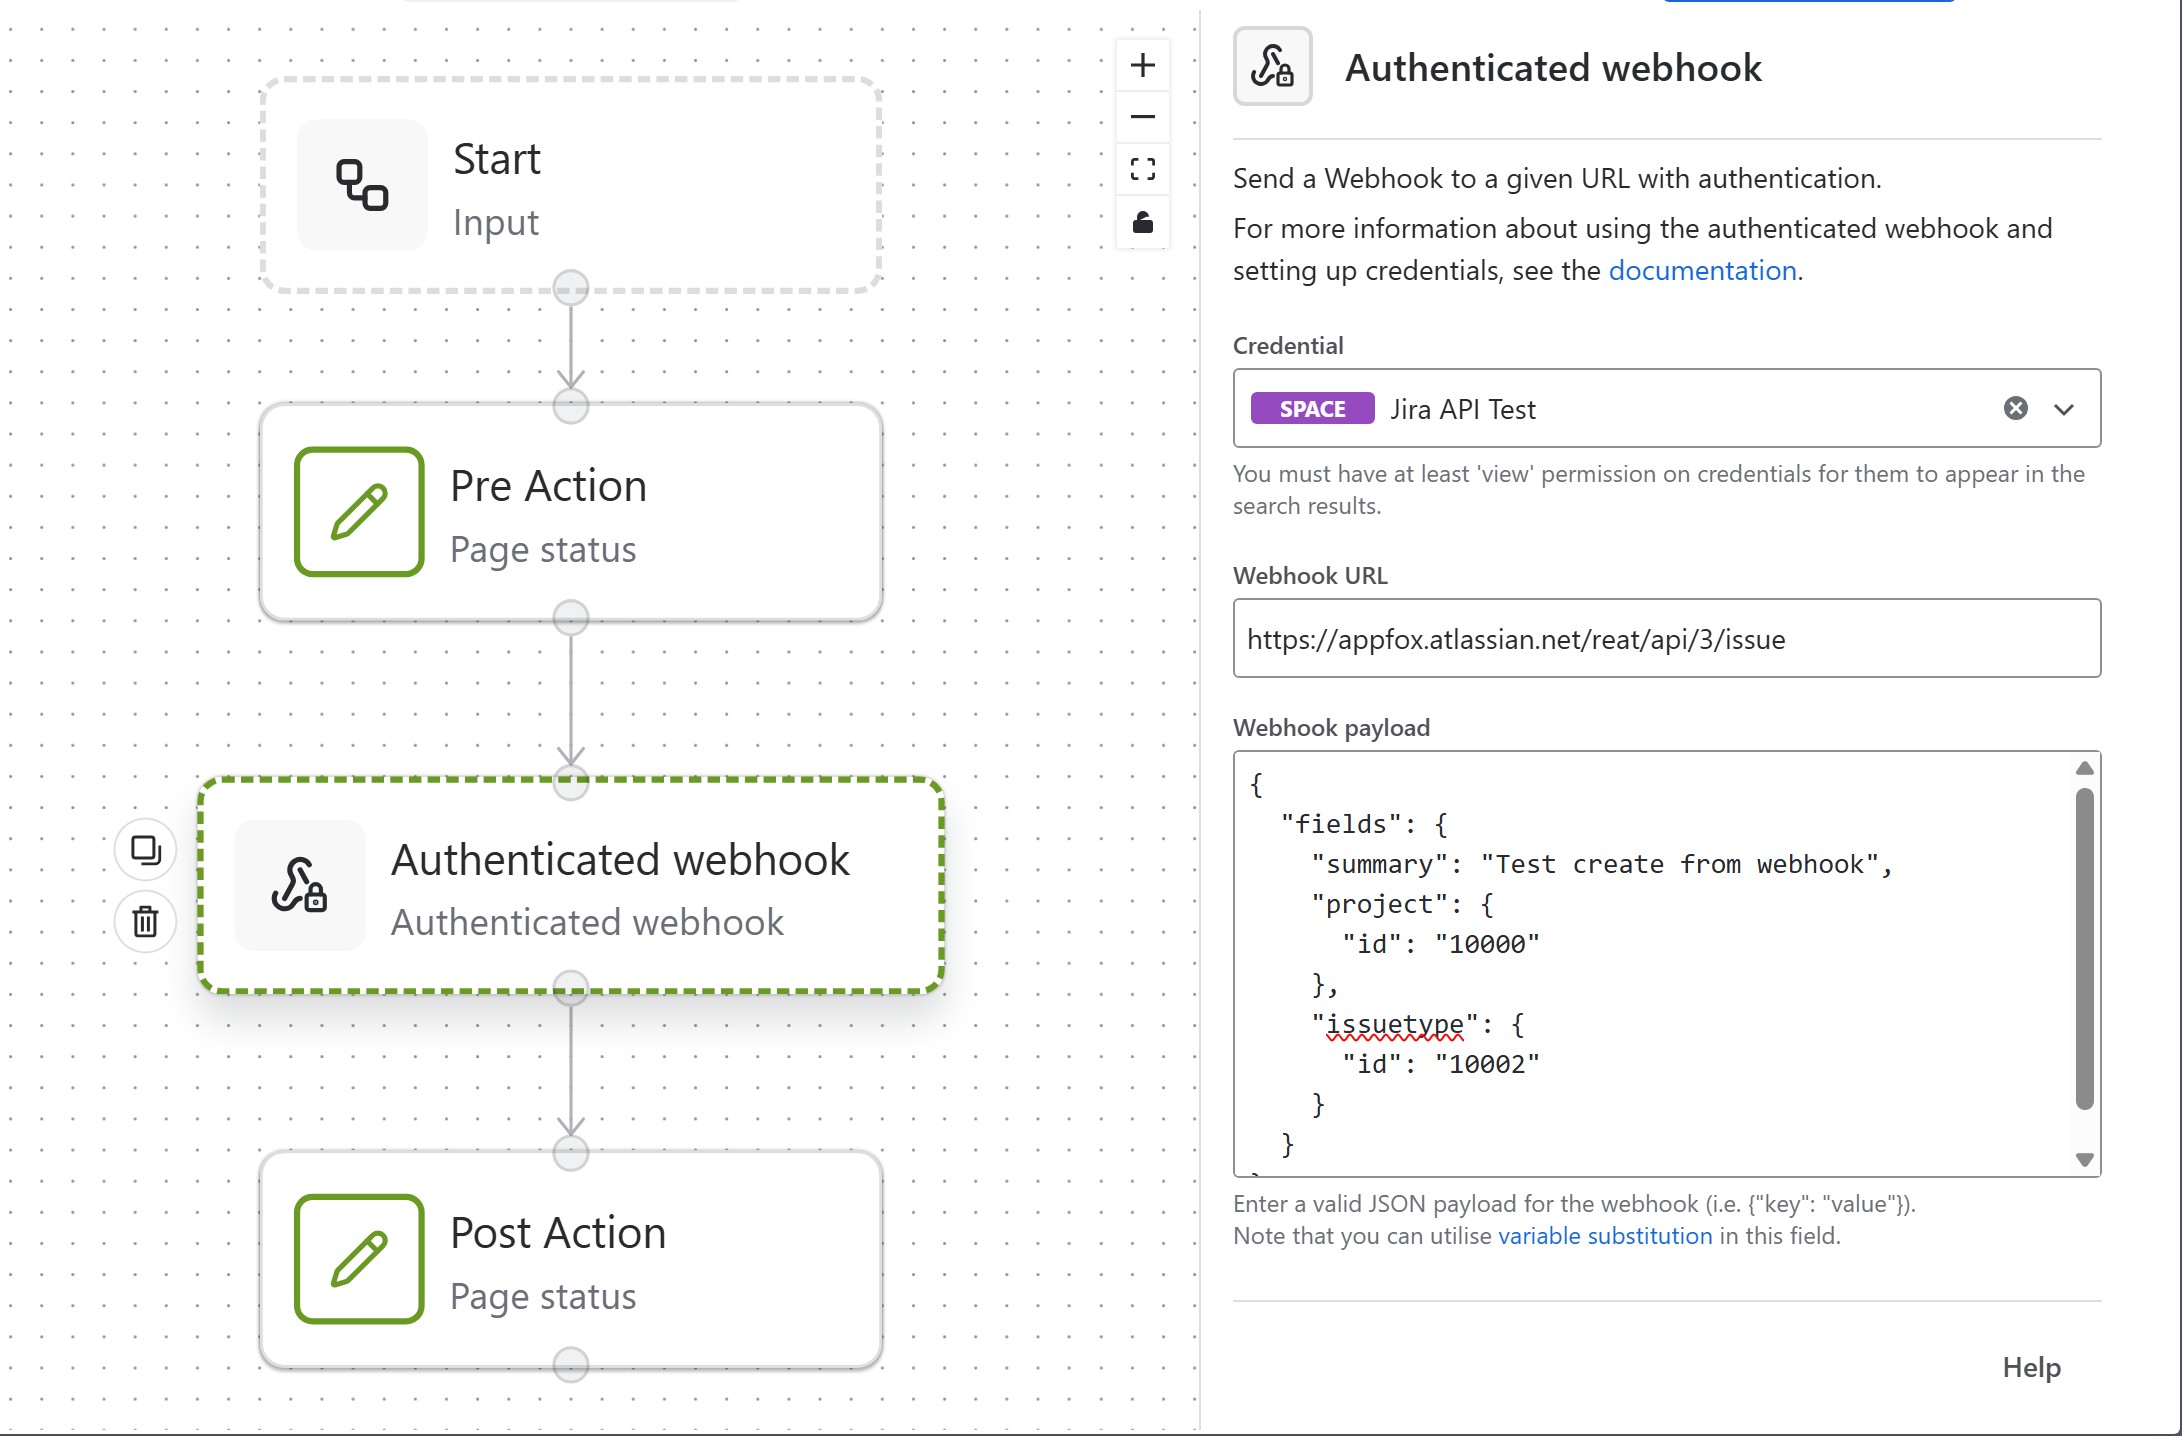
Add the Authenticated Webhook action to your workflow and configure it as follows:
-
the webhook url would be: https://${yoursite}.atlassian.net/rest/api/3/issue
-
The JSON Payload is heavily customisable. For more information, please look into the Jira REST API Documentation on creating an issue. An example of a basic payload would be:
JSON{ "fields": { "summary": <Summary of Jira Issue>, "project": { "key": <key of project> }, "issuetype": { "id": <id of issuetype> } } }
-
Once you have set up your webhook configuration and the workflow is ready, click Save Workflow. This is now ready to use.
Need support? We’re here to help 🧡
If you have any questions or would like to speak with us about Workflows, please don’t hesitate to reach out to our Customer Support team.