-20250819-084018.svg)
Many documents in Confluence will require some form of review and approval before they can progress or be shared with a wide audience (e.g. employees or external stakeholders).
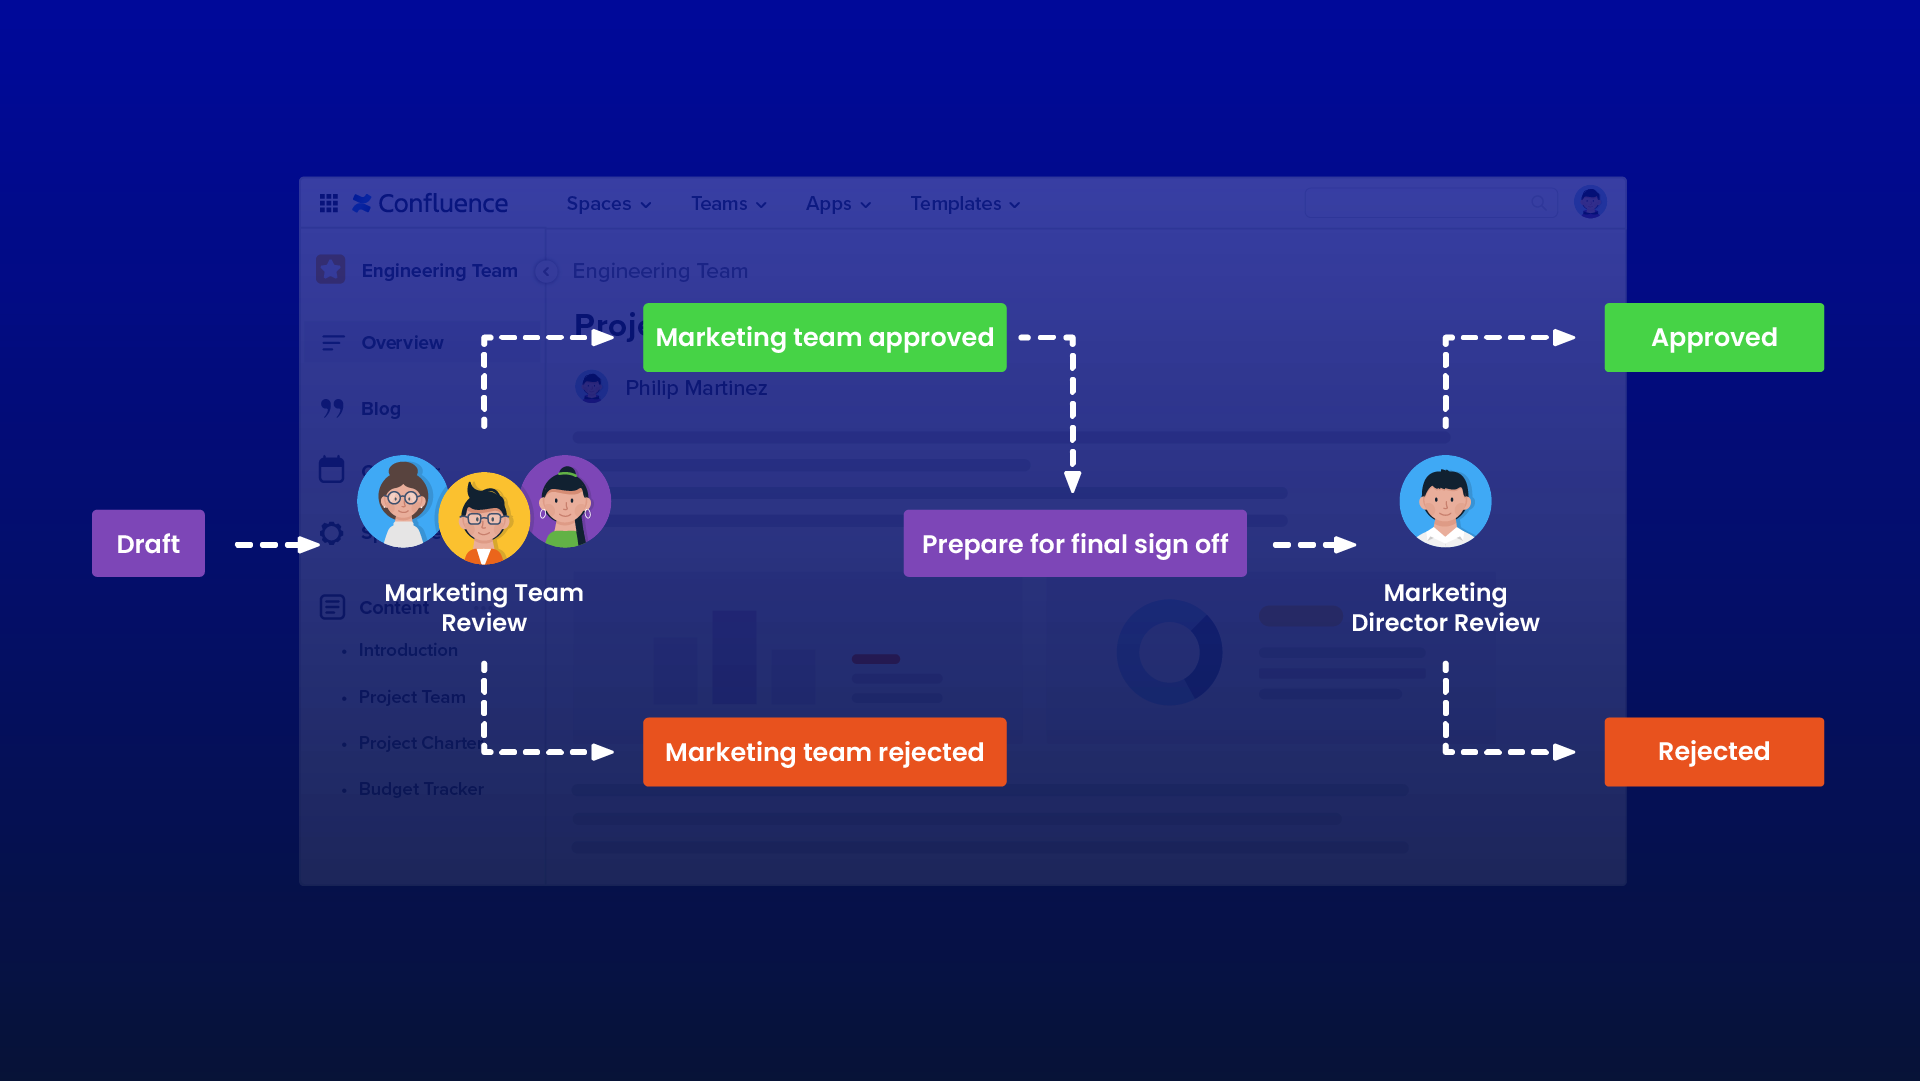
Workflows for Confluence enables you to build highly customized single or multi-stage approval processes so you can ensure content has been reviewed and approved by the right people. In this guide we’ll show you to create a multi-stage approval process like the one illustrated below.
You’ll also see how to add this to a Confluence page and move the document through the workflow until it reaches the final step, ‘Approved’.
Benefits of using Workflows for this use case
Workflows for Confluence allows you to create document workflows with an unlimited number of review and approval rounds. Whether you need three, four, five or more rounds of approvals, Workflows will make the process of creating this workflow a breeze.
You can further customize each round of approval to require a minimum number of approvals or request approvers to leave comments with every approval decision - the choice is yours.
Workflows features used
-
Multi-stage approval process
-
Automated email notifications
-
Workflow history and audit log
Use Case In Action: Content Review and Approval Processes in Confluence
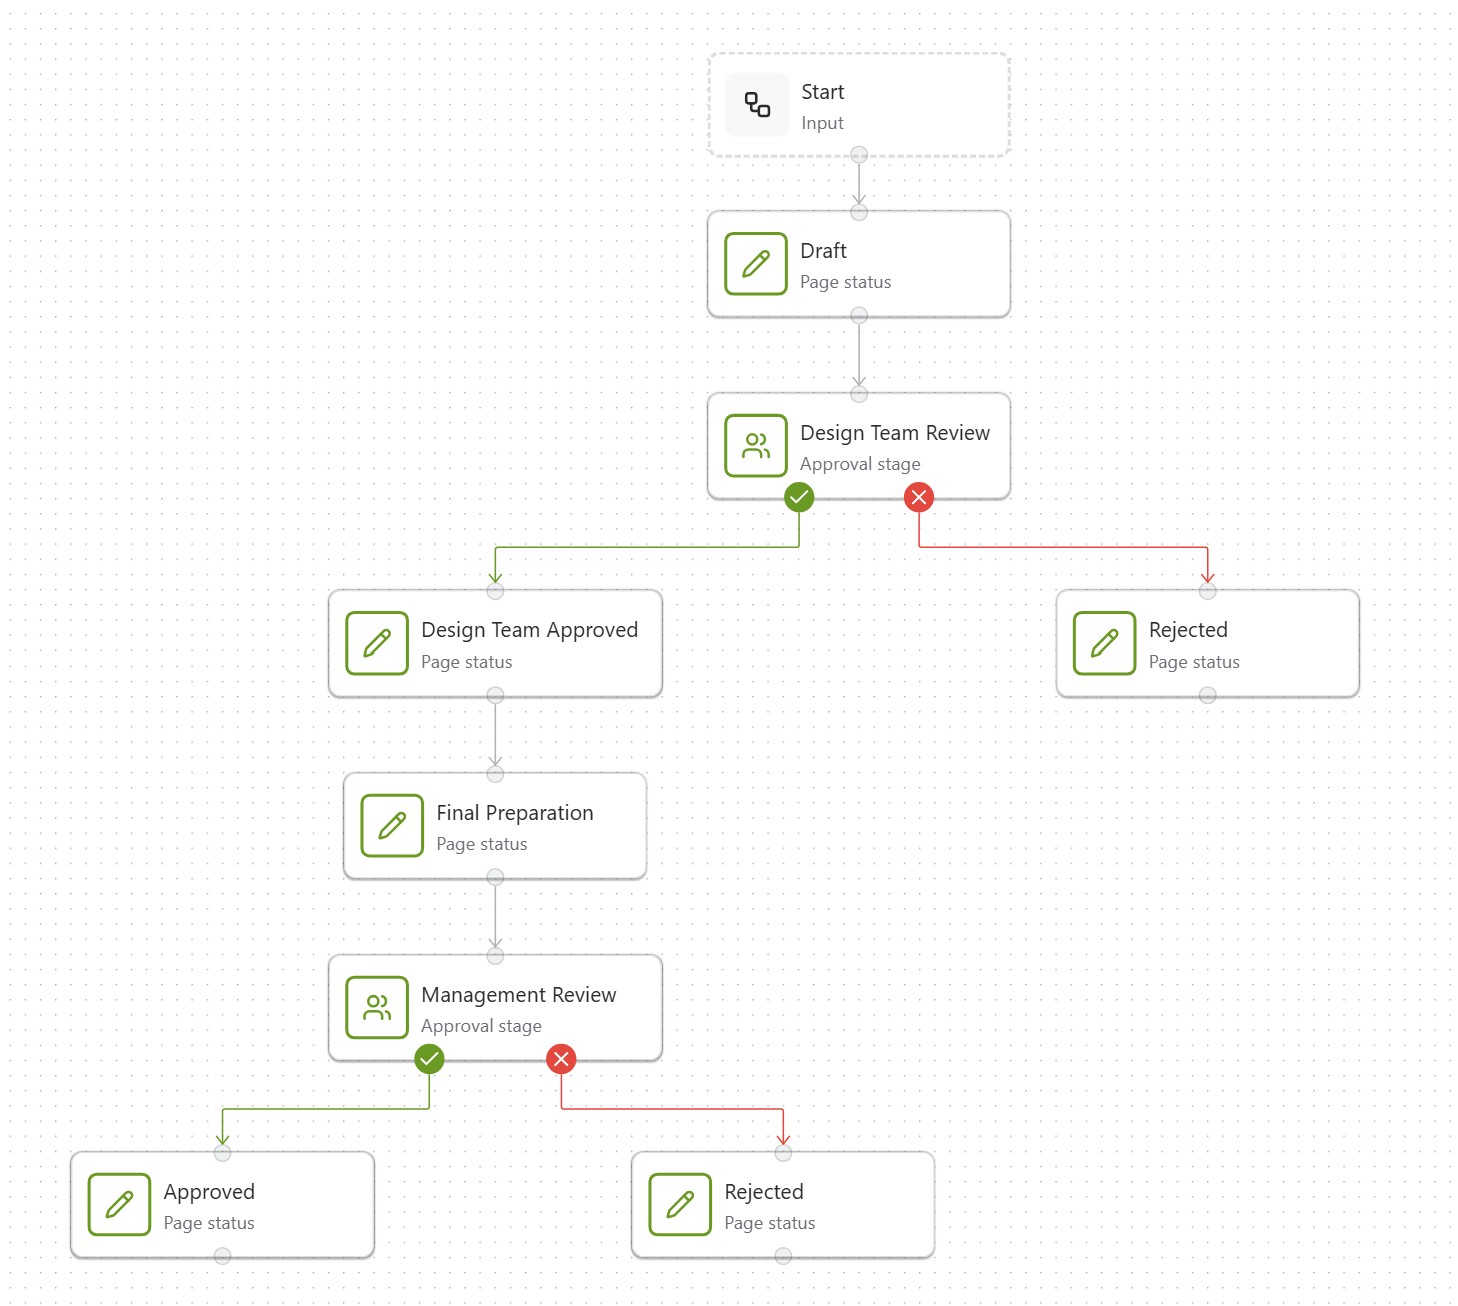
In this example, we’ll create a multi-stage review and approval workflow with 2 different approval rounds; (1) Design Team Review and (2) Management Review.
How to set up the workflow
To create a workflow in Workflows for Confluence, we need to access the Workflow Builder. You can find this through the Site Administration or Space Administration settings.
In this example, we’ll create the workflow from the perspective of a Site Administrator.

Once you have accessed the Confluence Site Administration settings, navigate to the Workflows for Confluence app settings and look for the Workflows option.
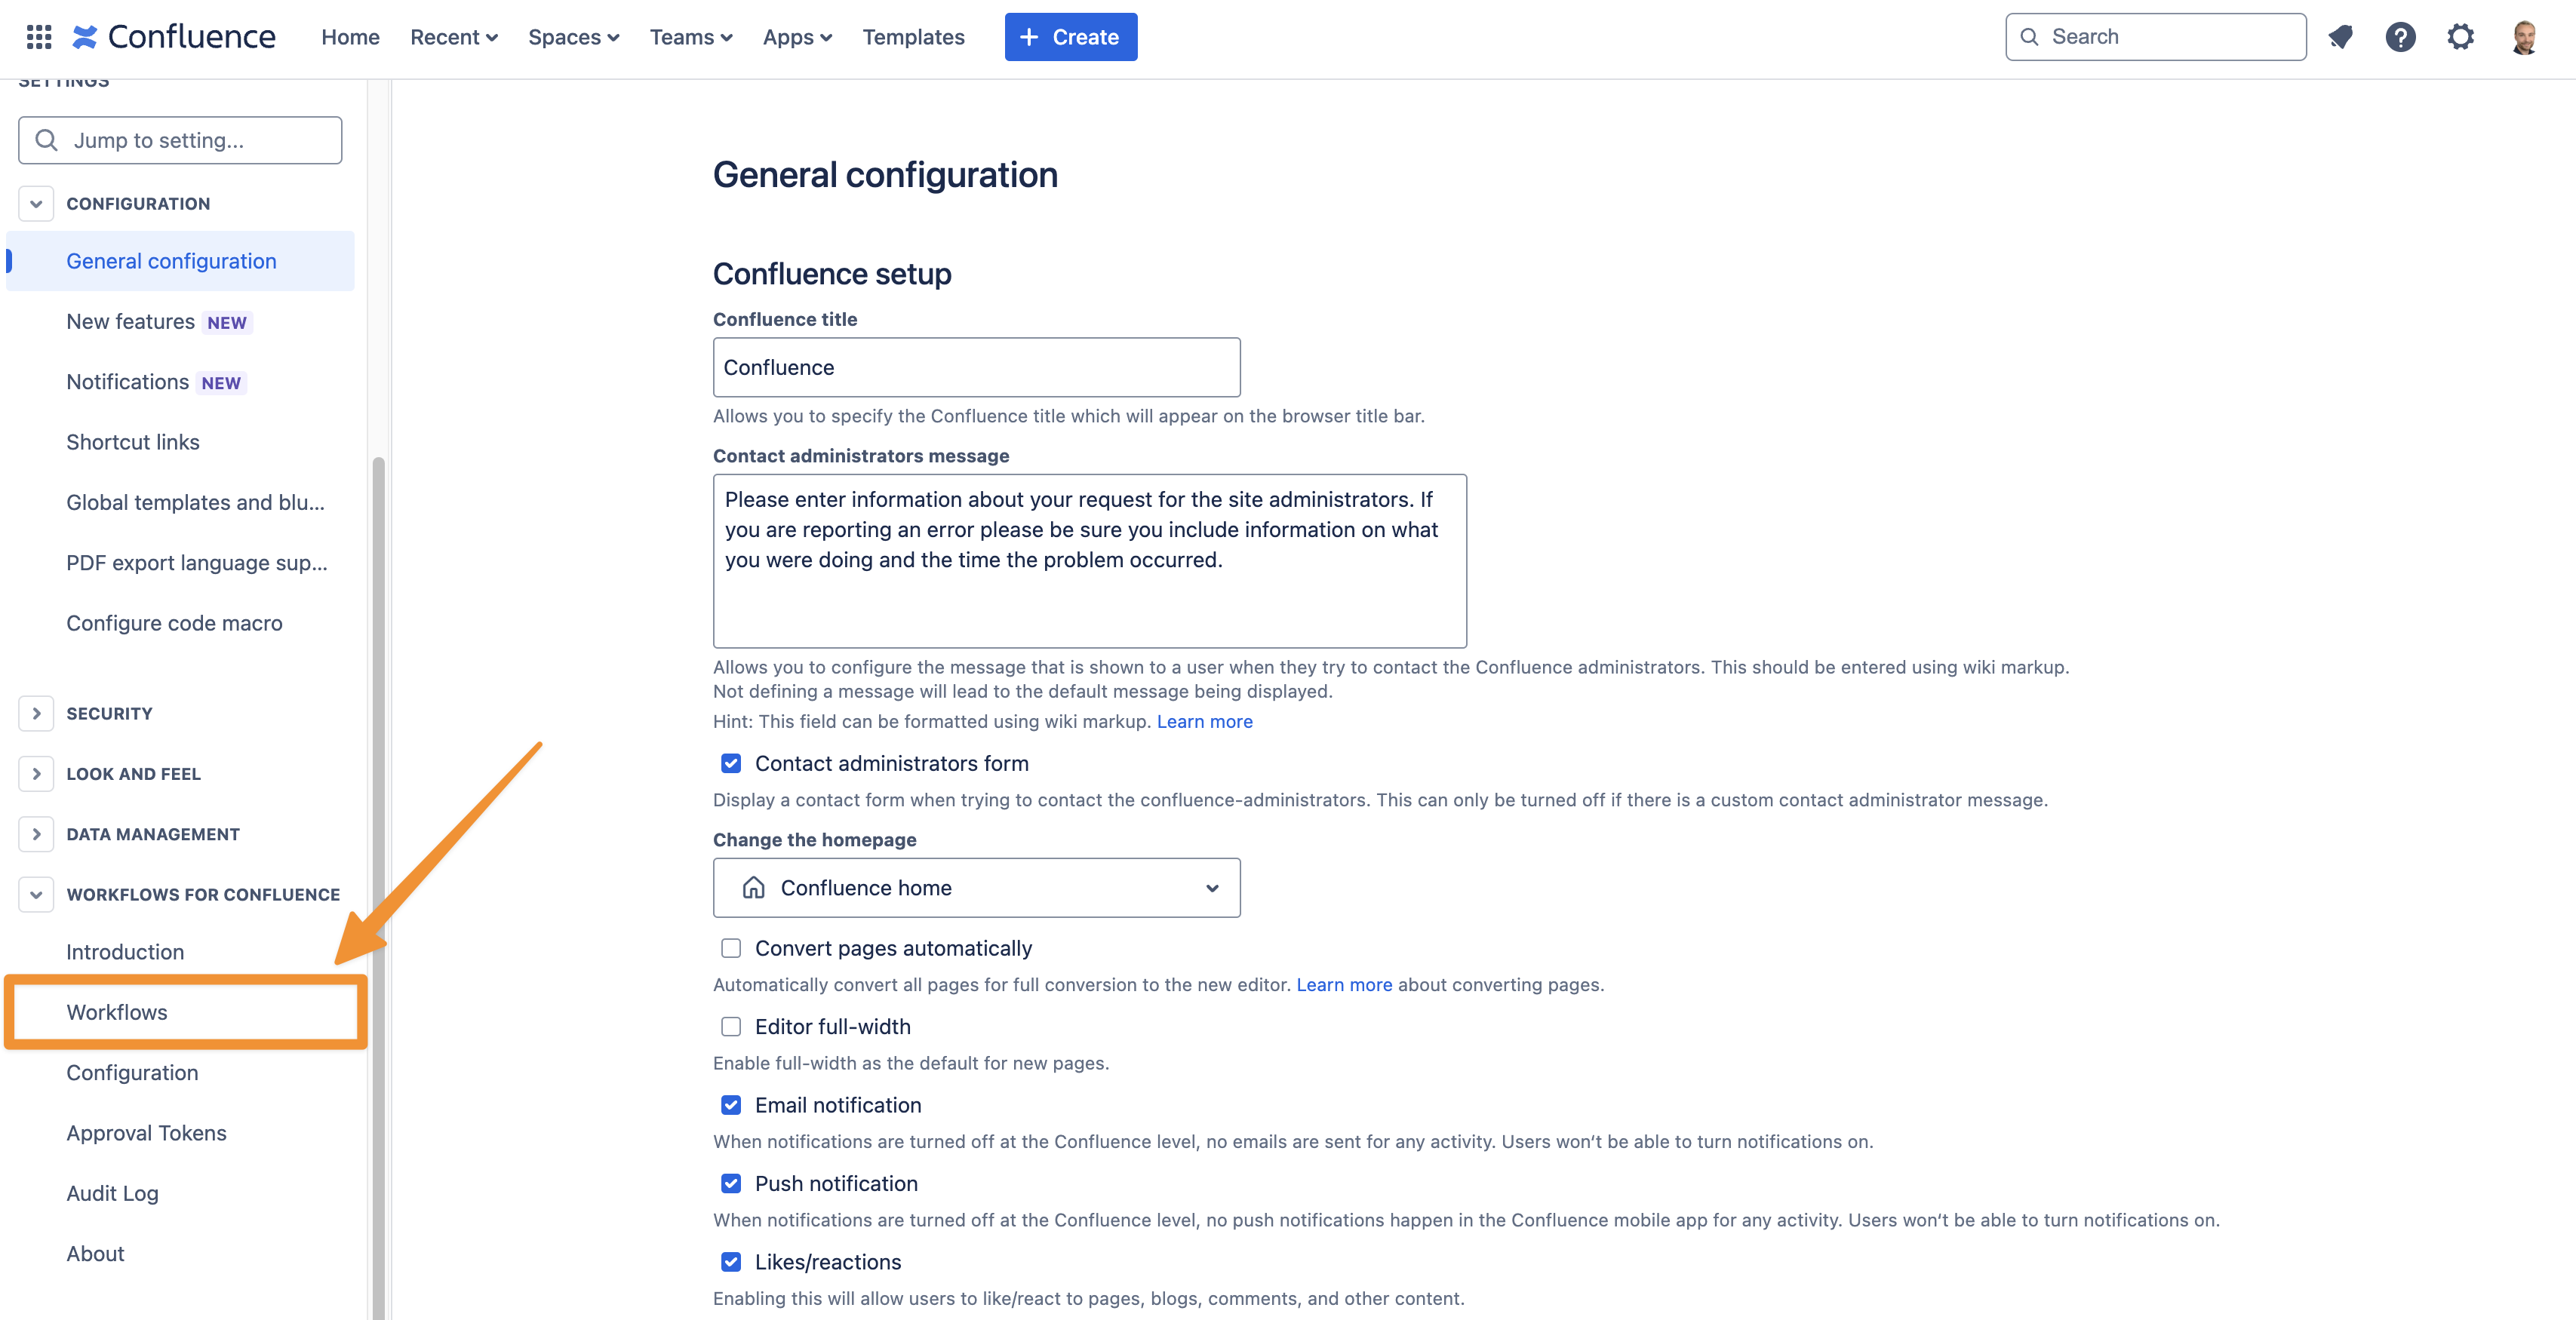
This will open the workflow manager in Workflows for Confluence, and this is where you can create, edit, and delete document workflows.
Next, click Create to start creating the document workflow.

You will need to give your workflow a name and description, as illustrated below.
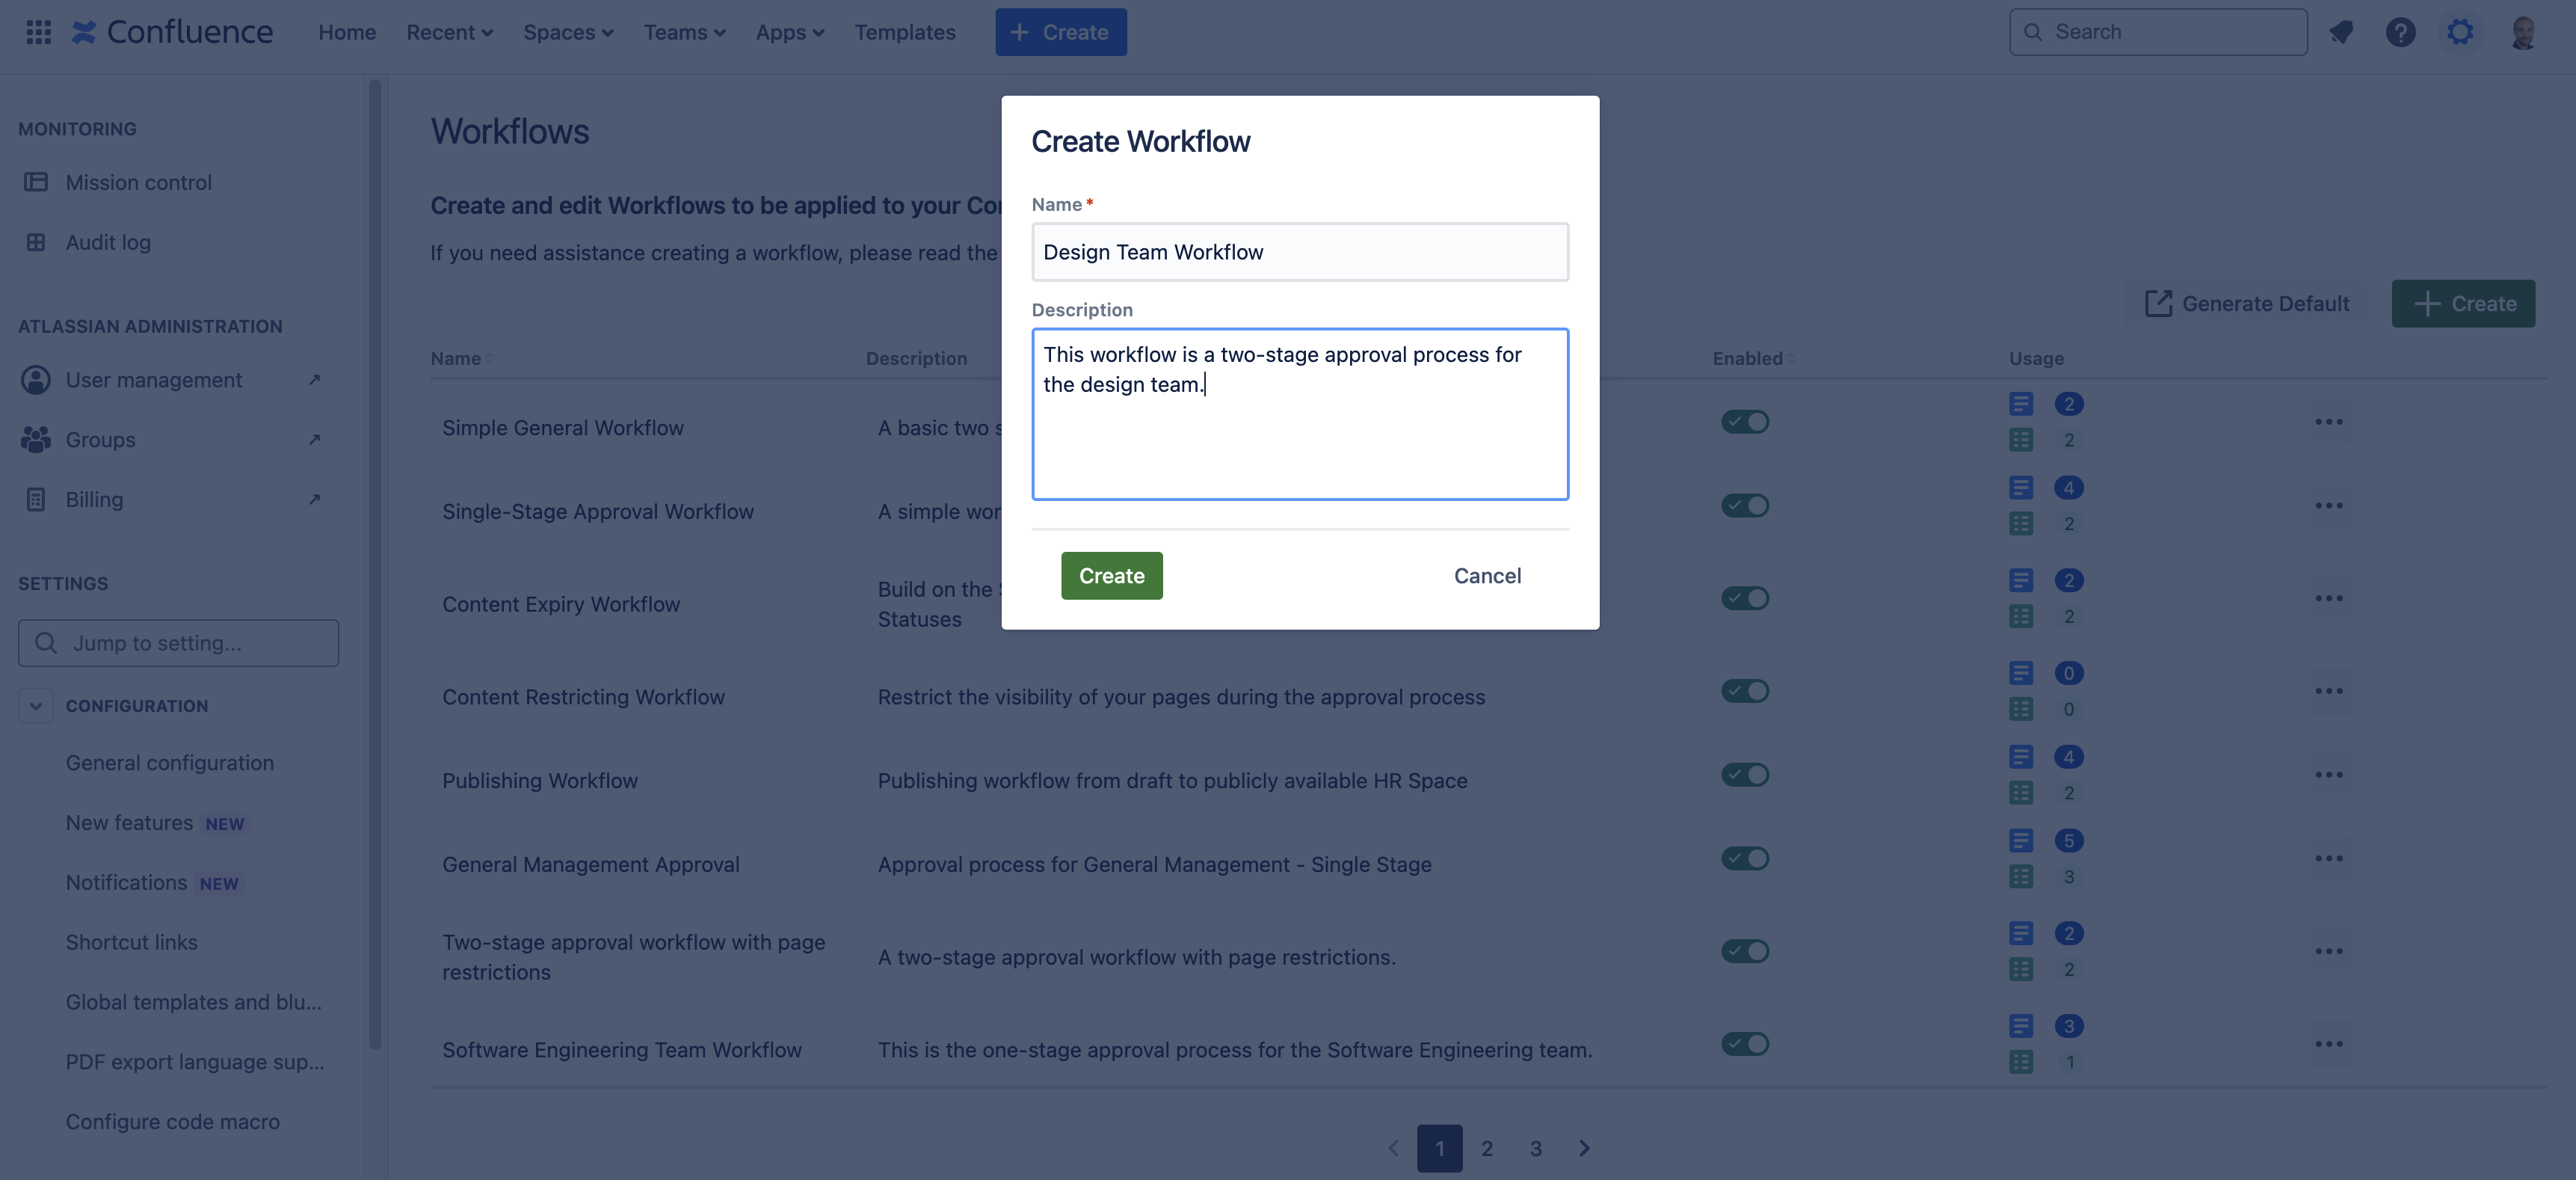
Once completed, press Create, and this will open the Workflow Builder.
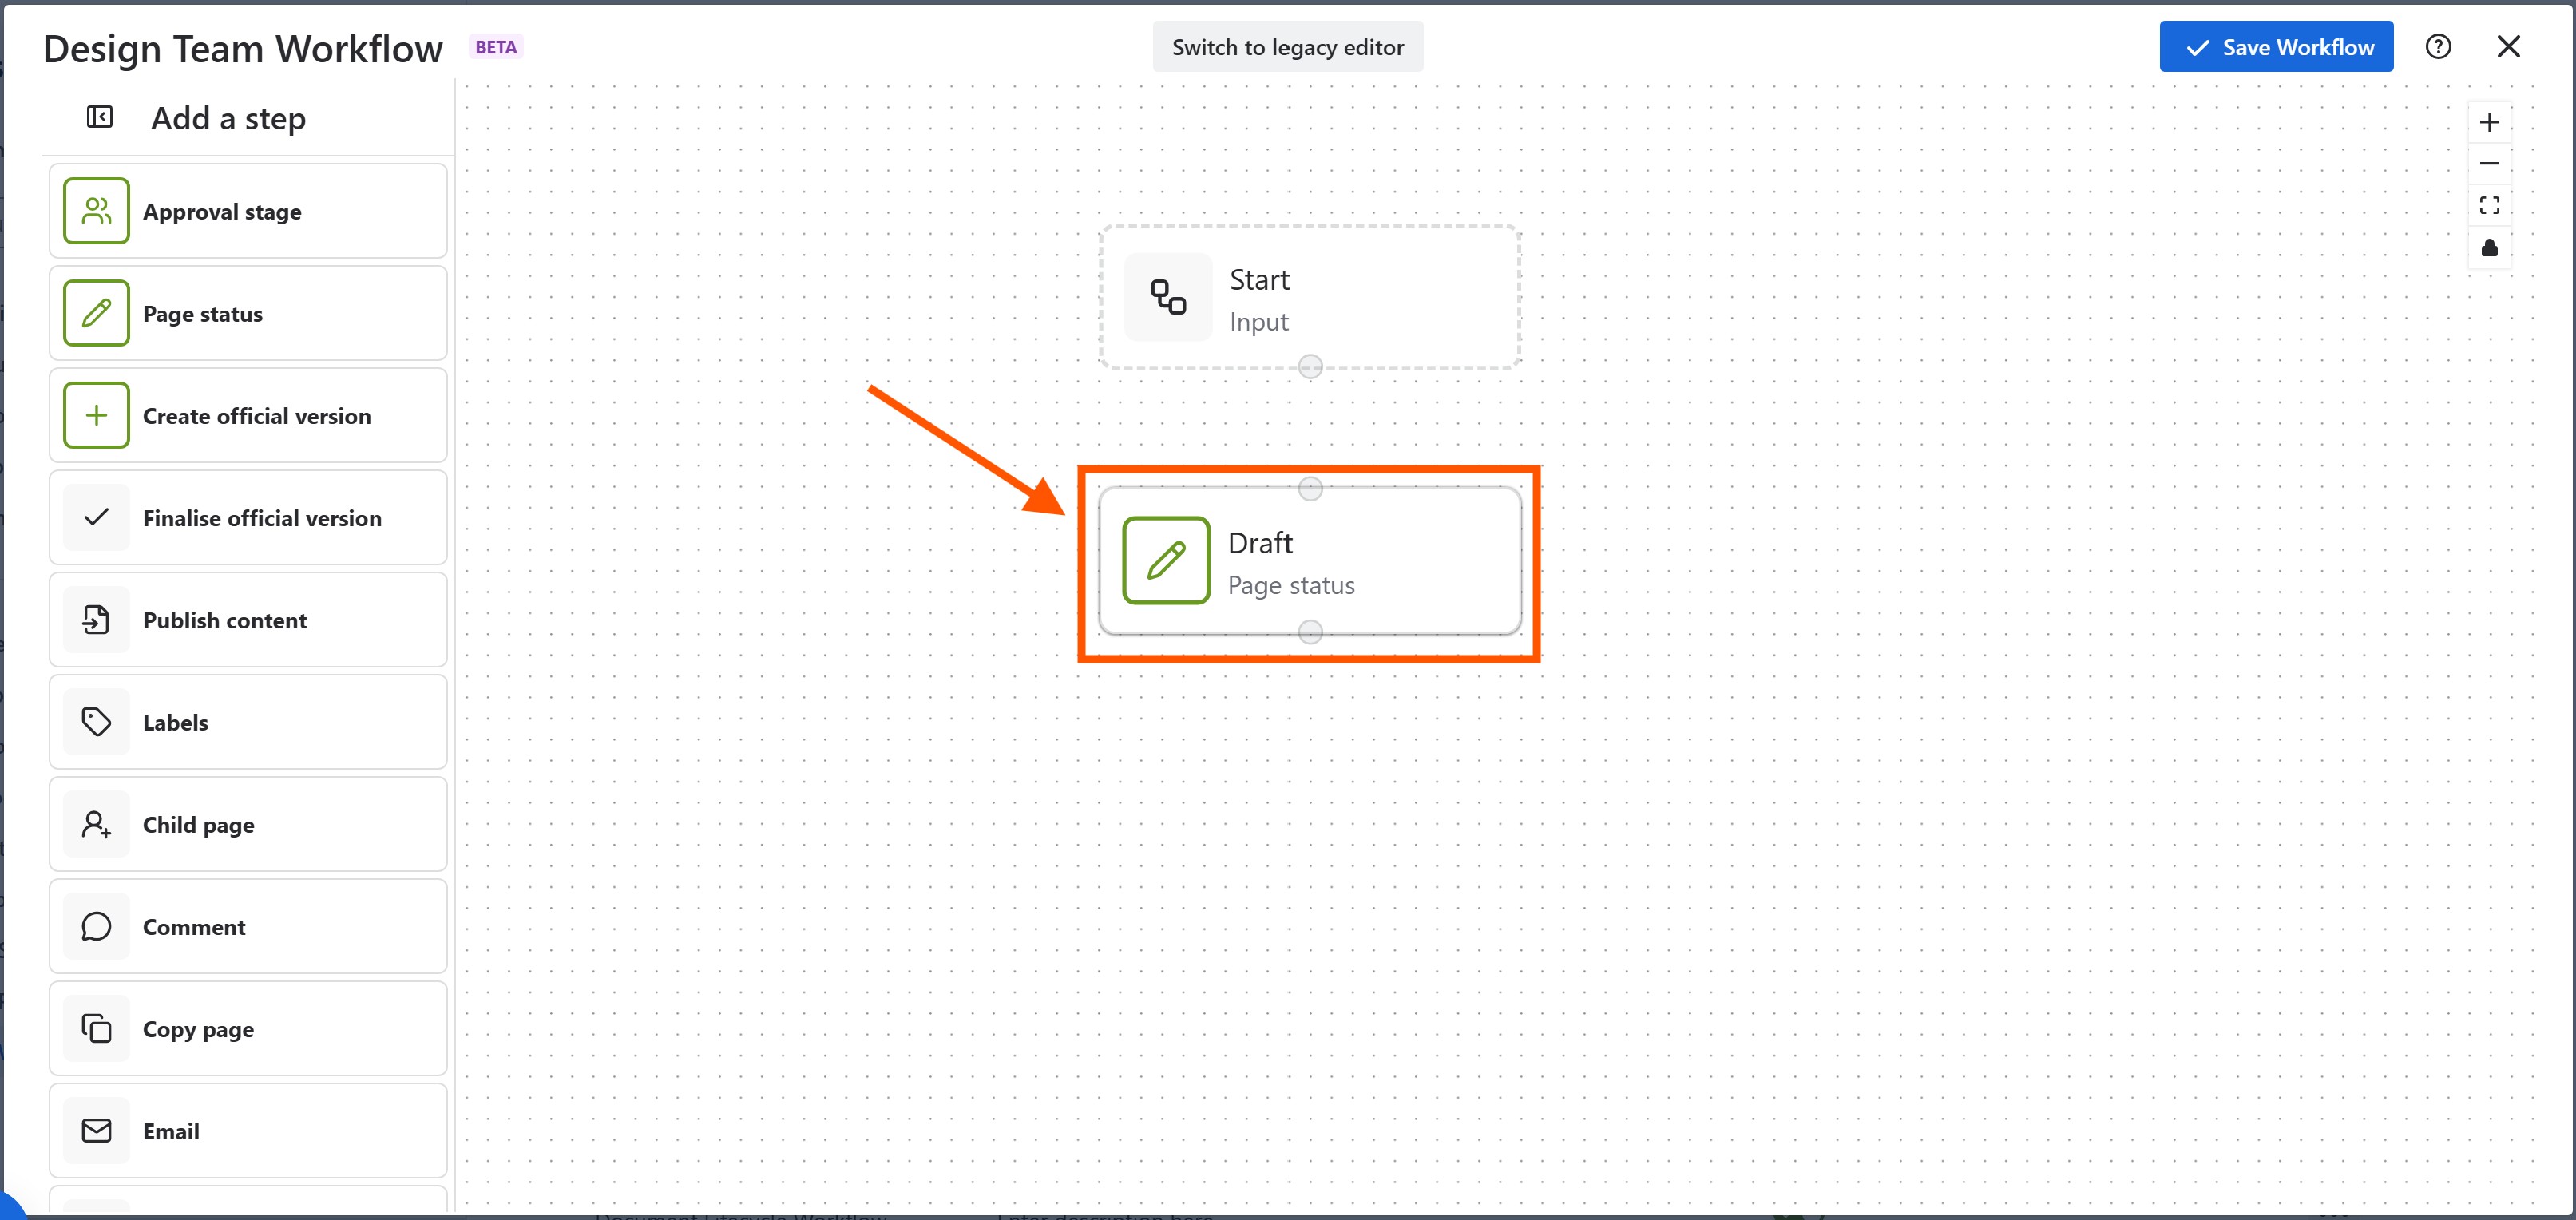
The Workflow Builder is a drag-and-drop, no-code interface that allows you to create bespoke document workflows with ease. To create a workflow like the example above, drag and drop a few Page Statuses onto the canvas and name them accordingly.
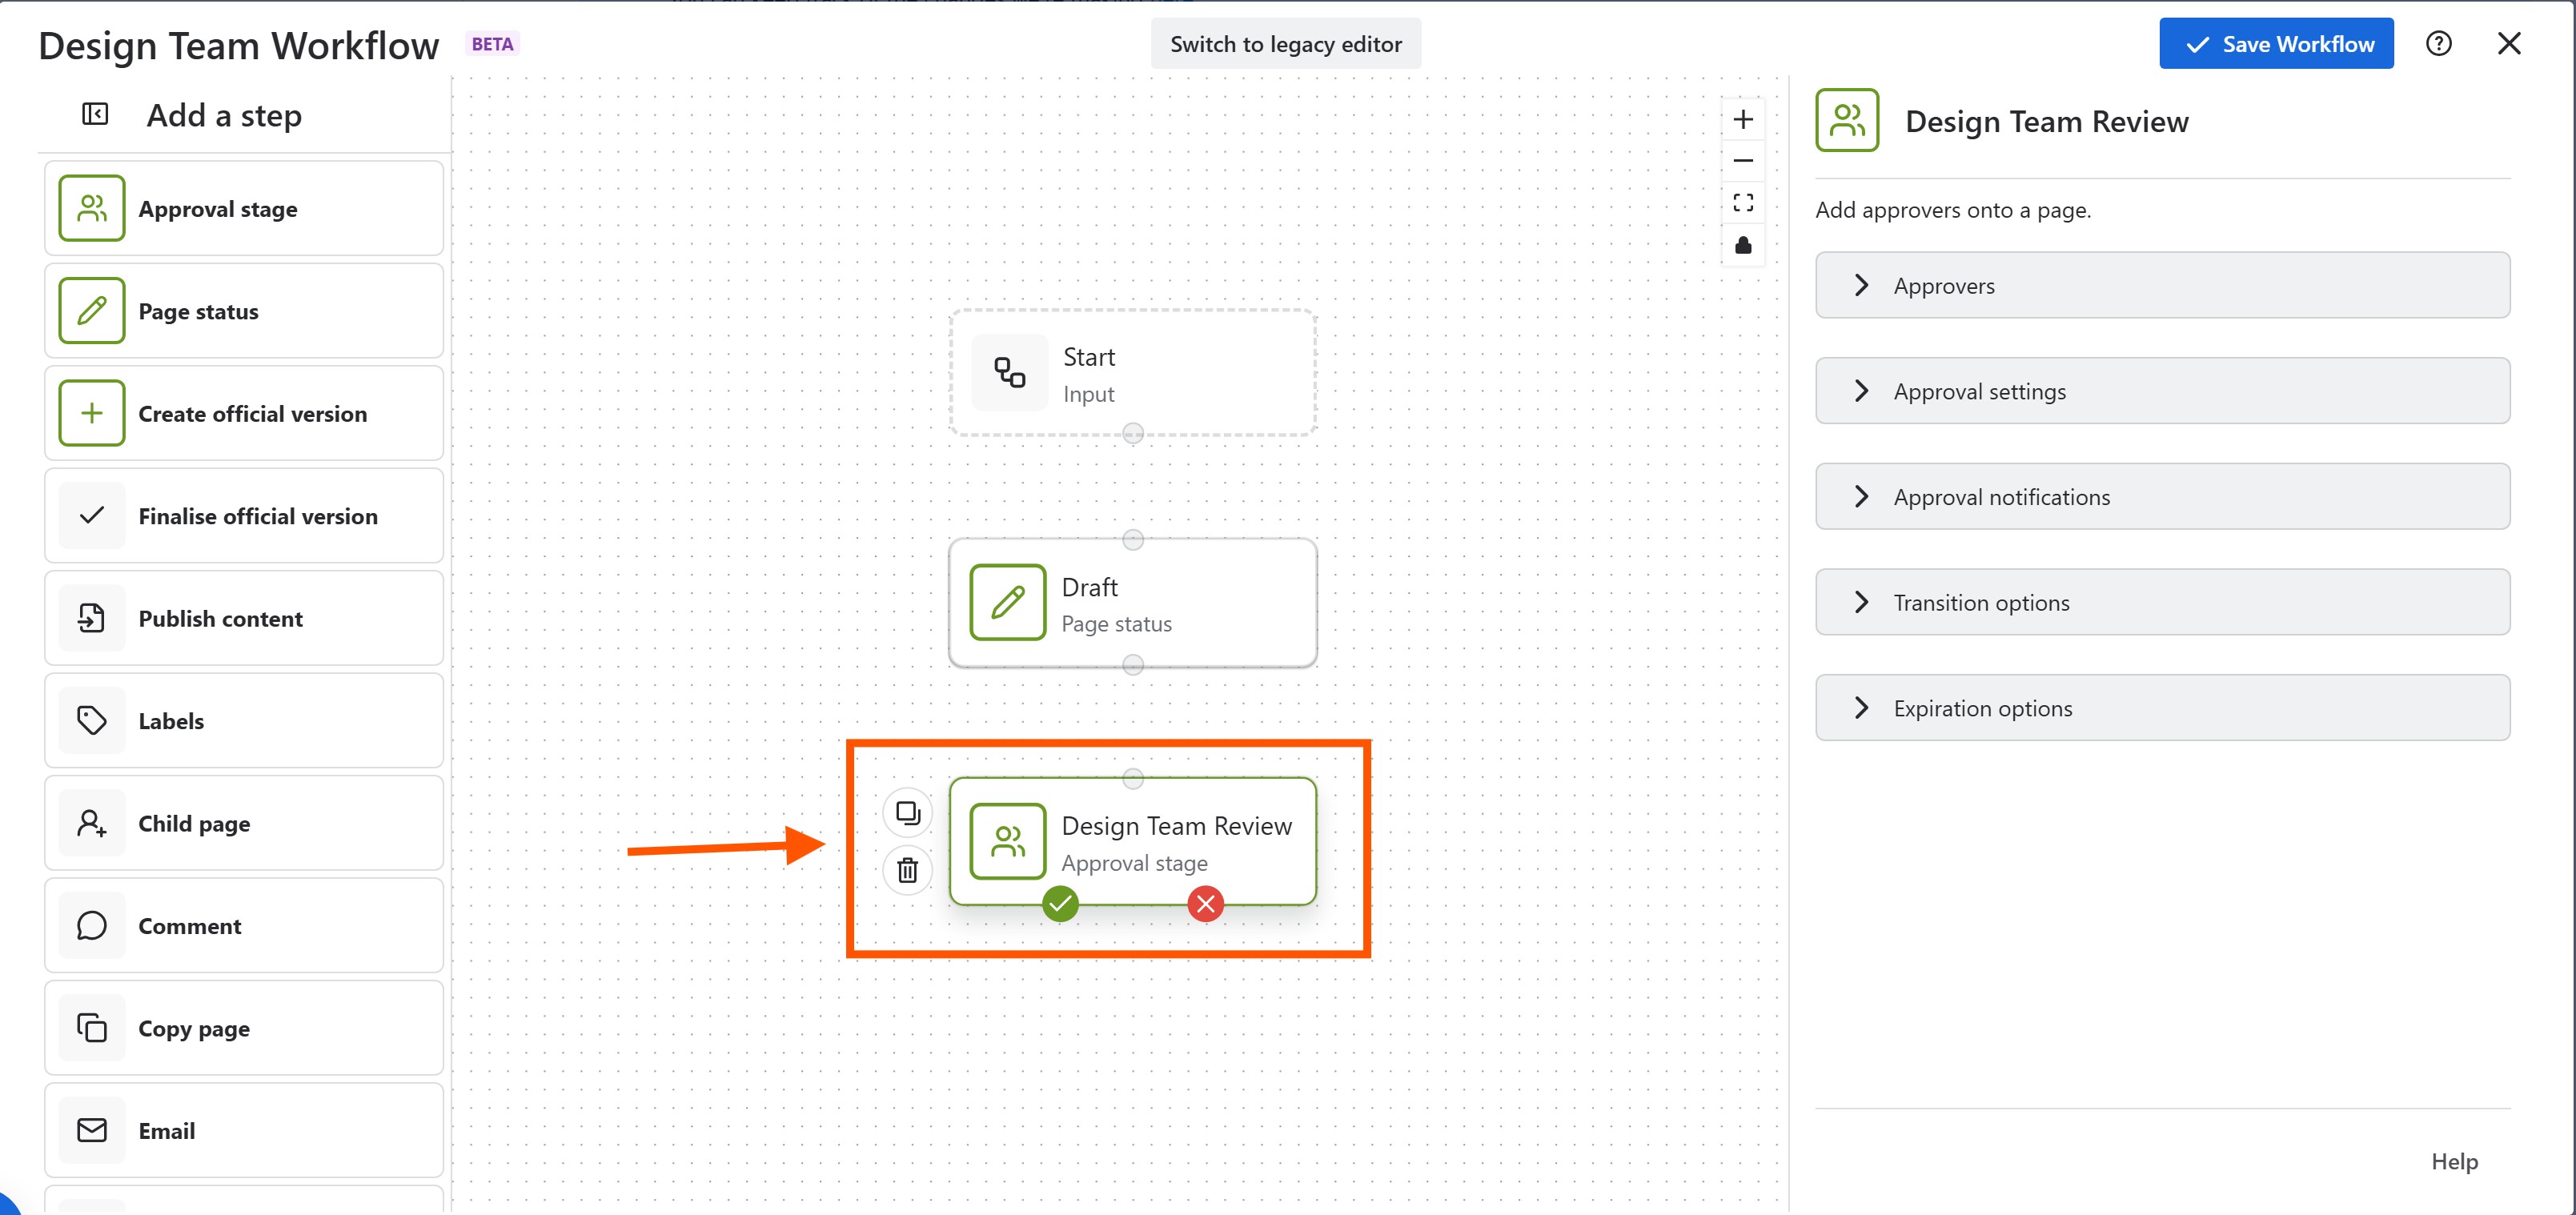
We also need to include the first Approval Stage and name it 'Design Team Review'.
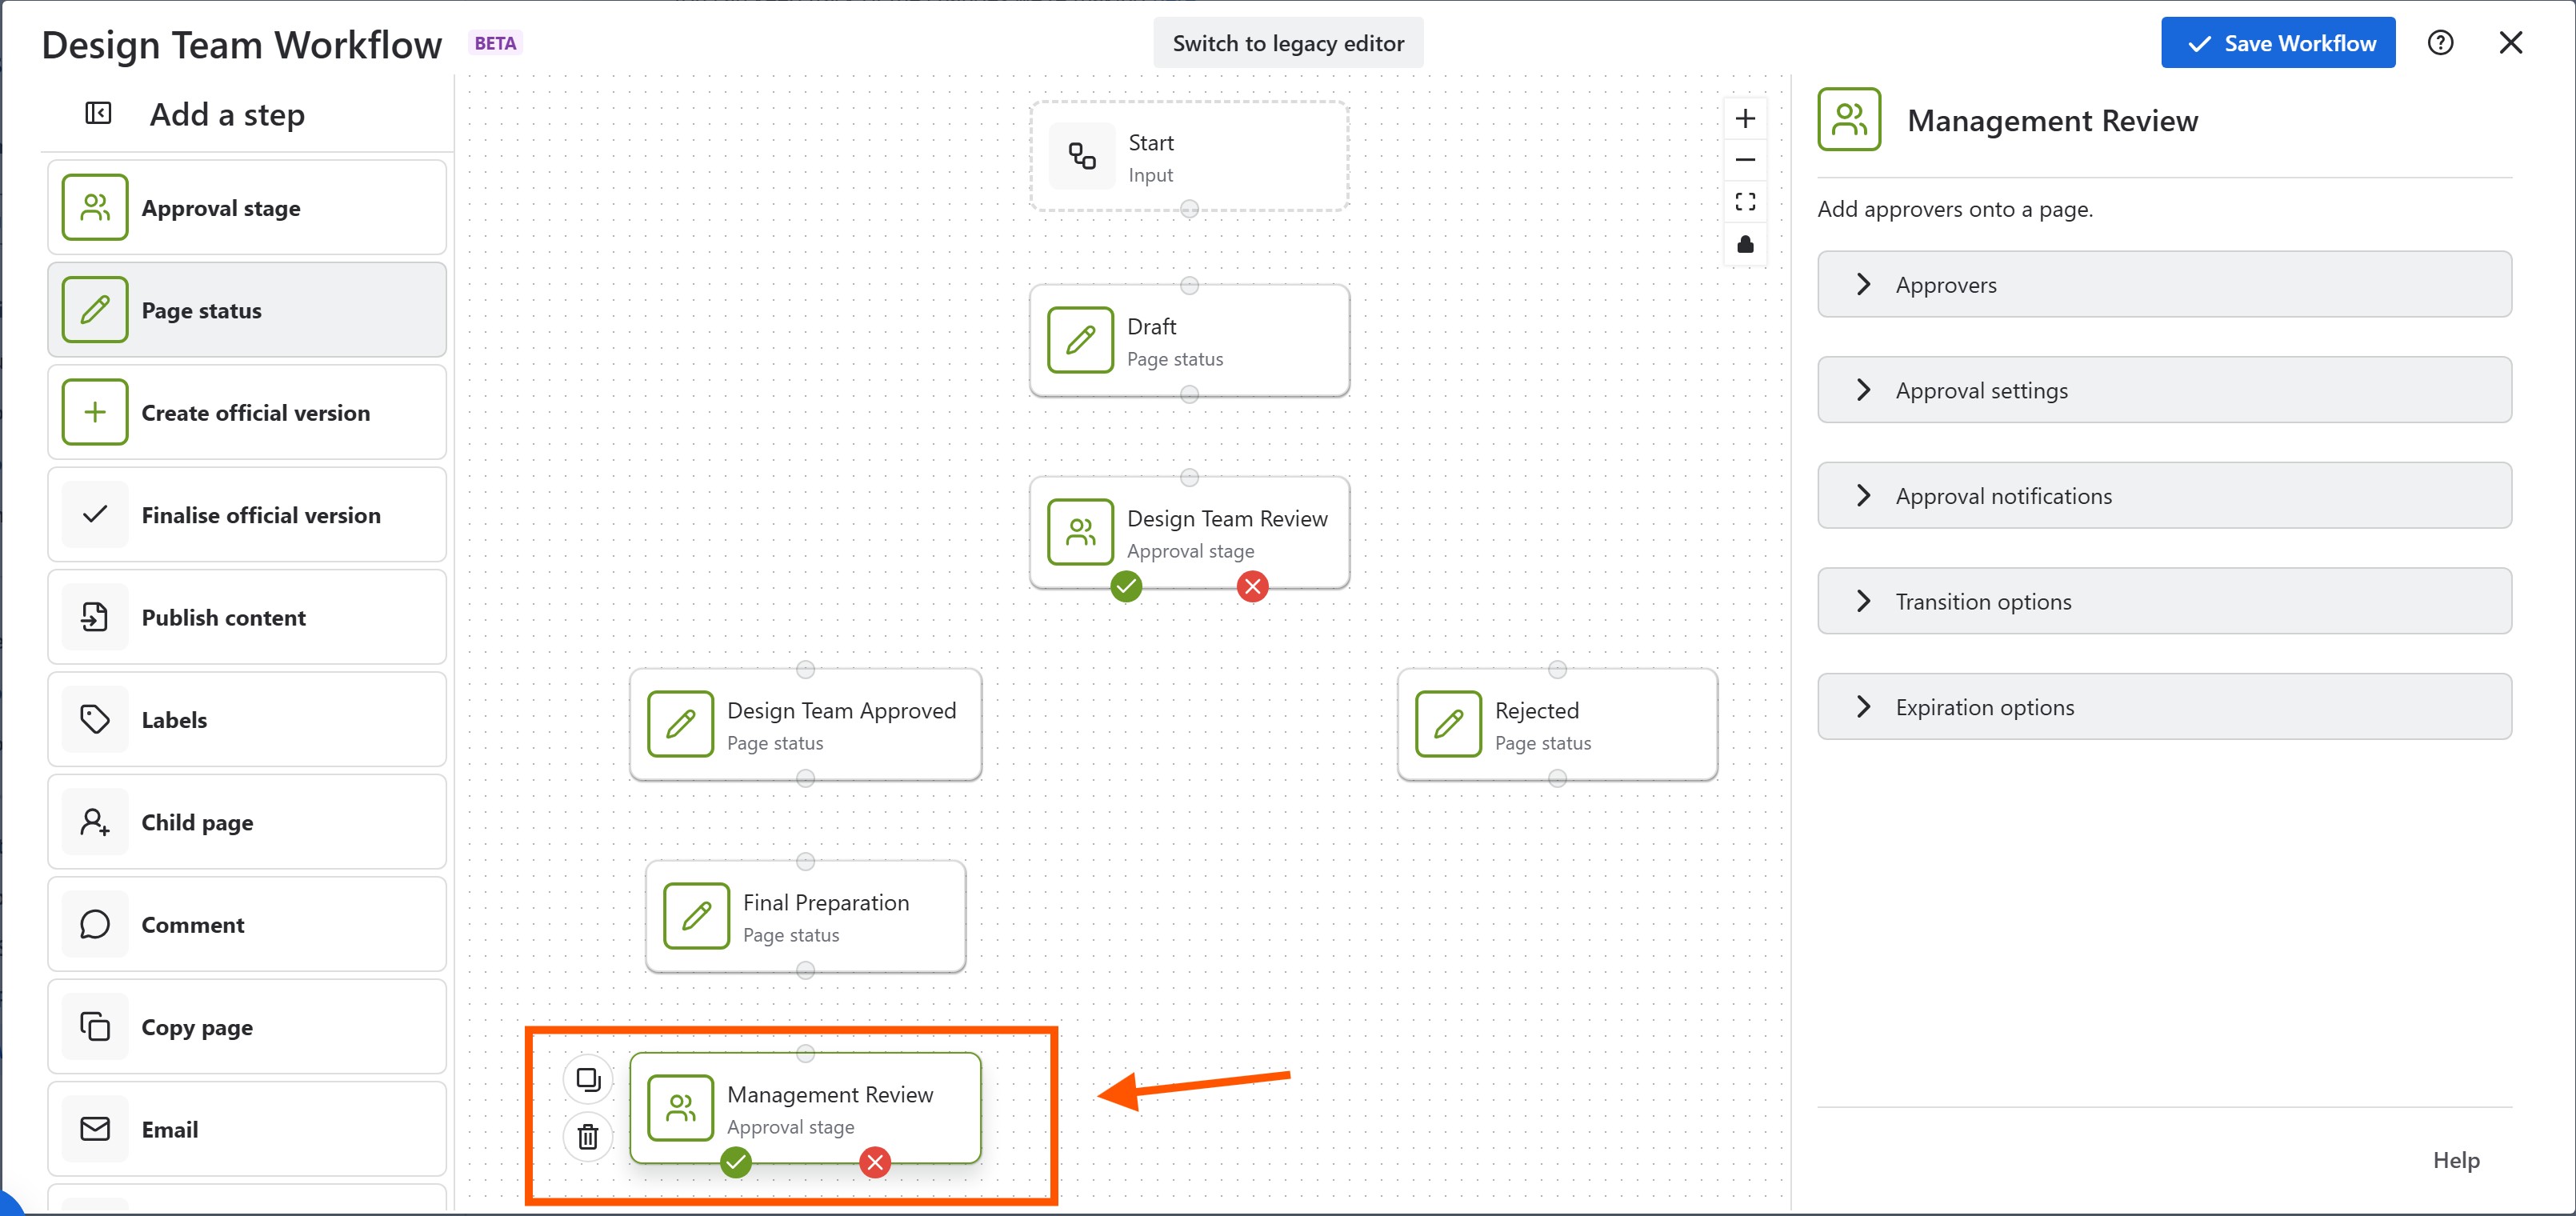
Let’s quickly add the second Approval Stage and name it ‘Management Review' to finish off the review and approval process.
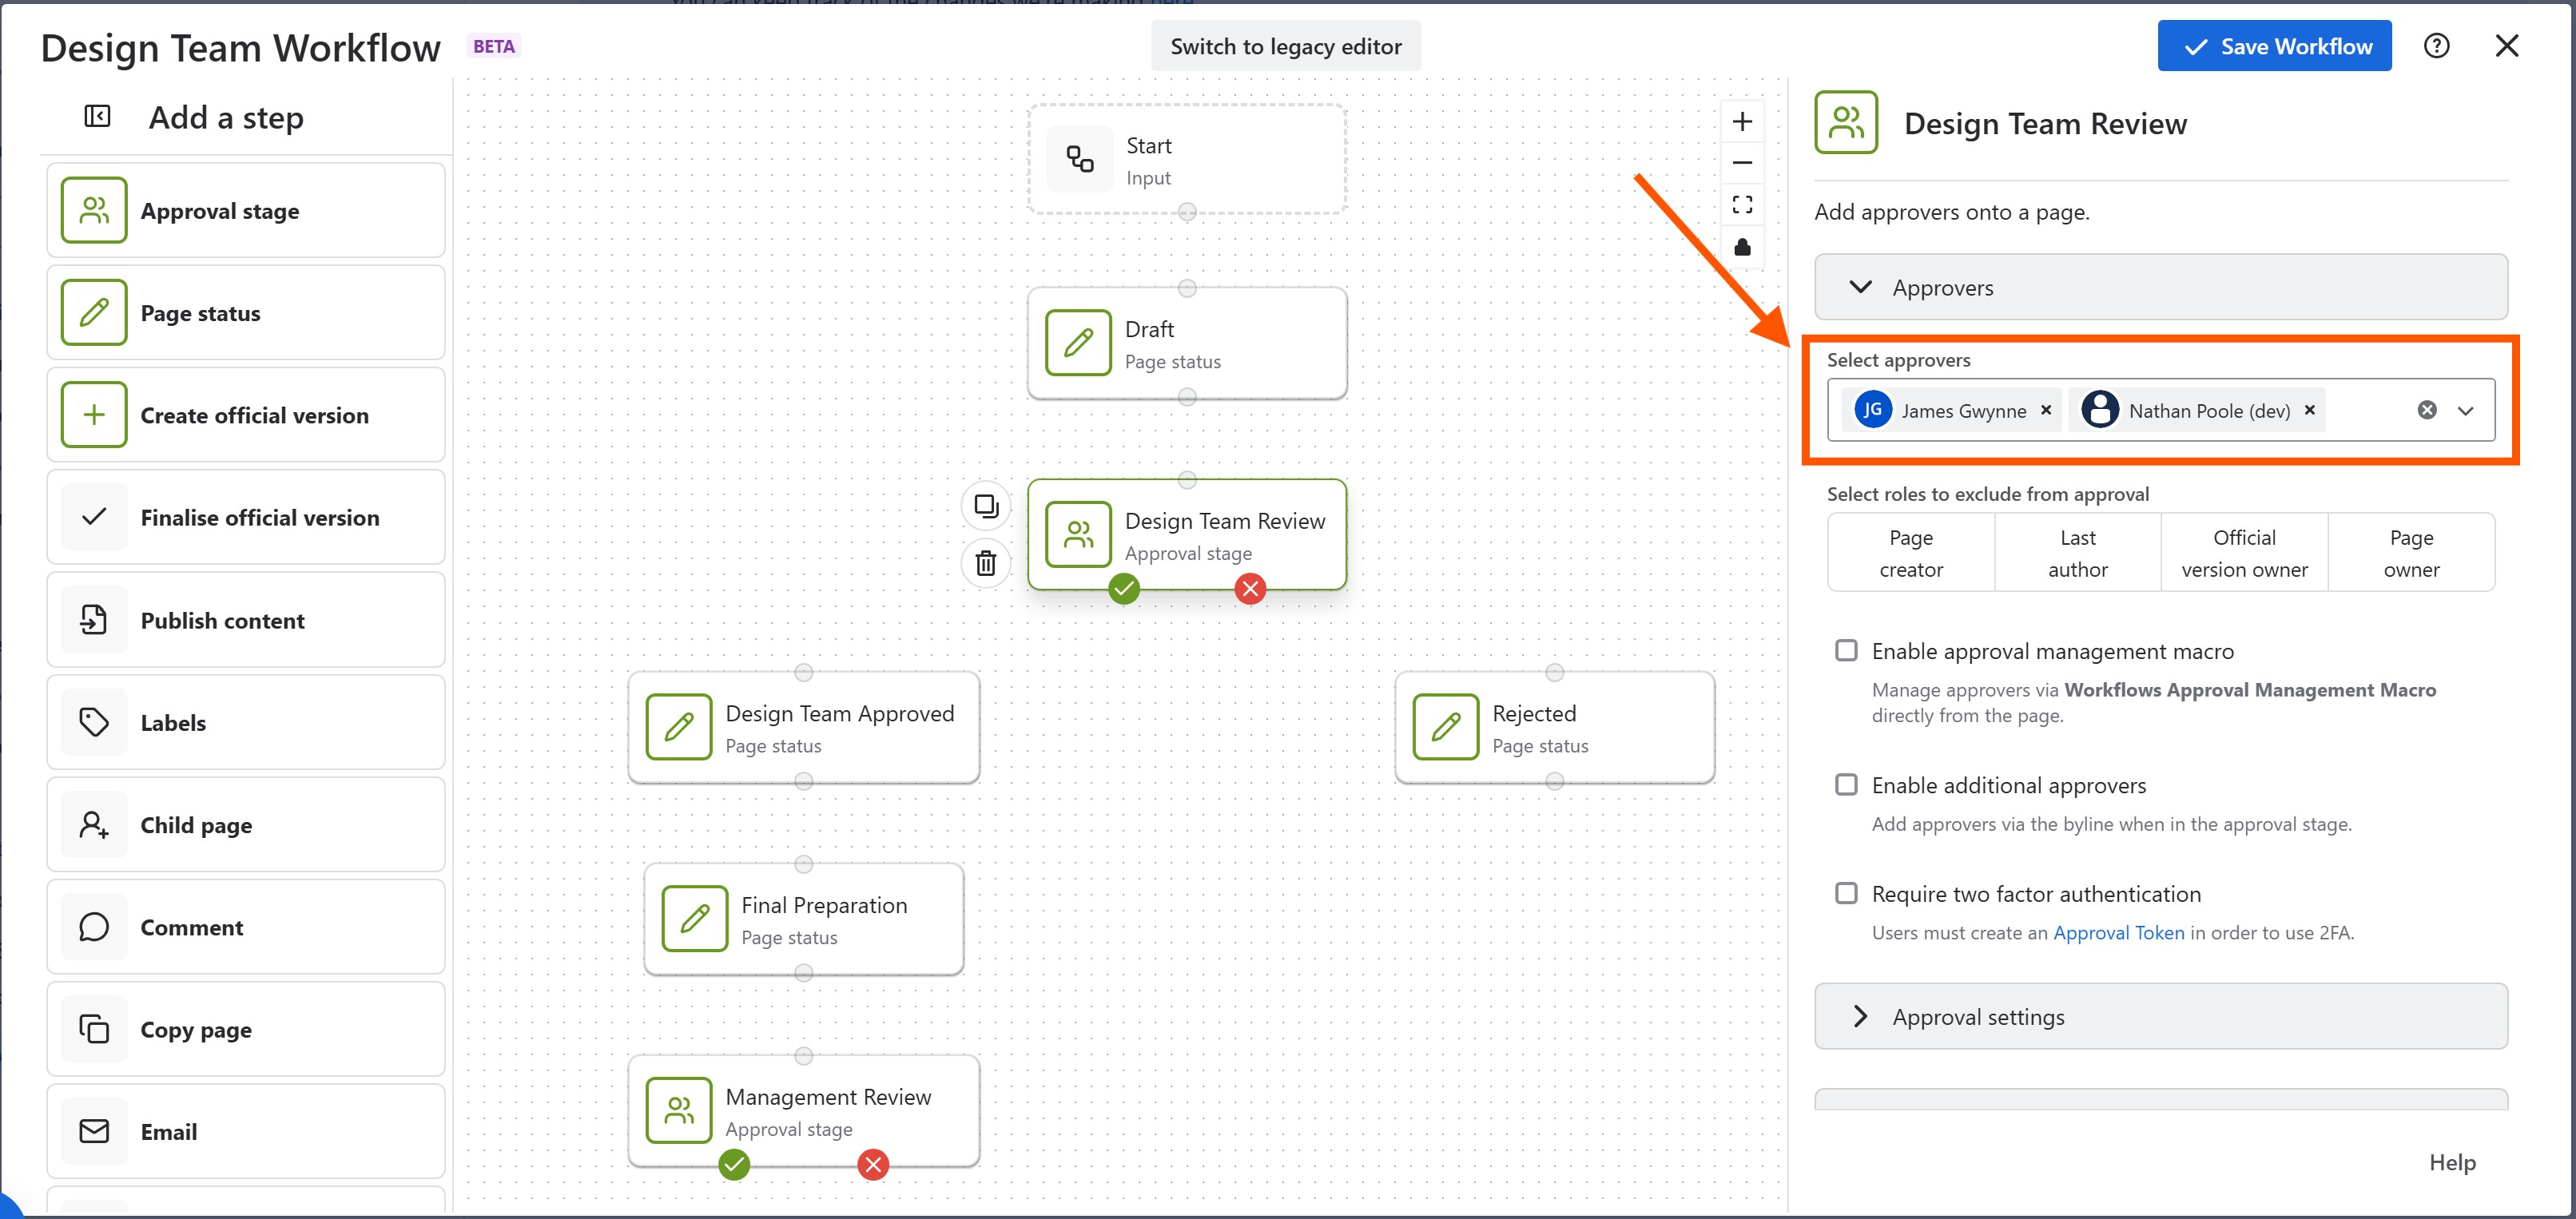
Once we have added the Approval Stage and remaining Page Statuses, its time to add the approvers to the workflow. You can do this by clicking on the Approval Stage and adding the users or groups within the right-hand configuration settings.
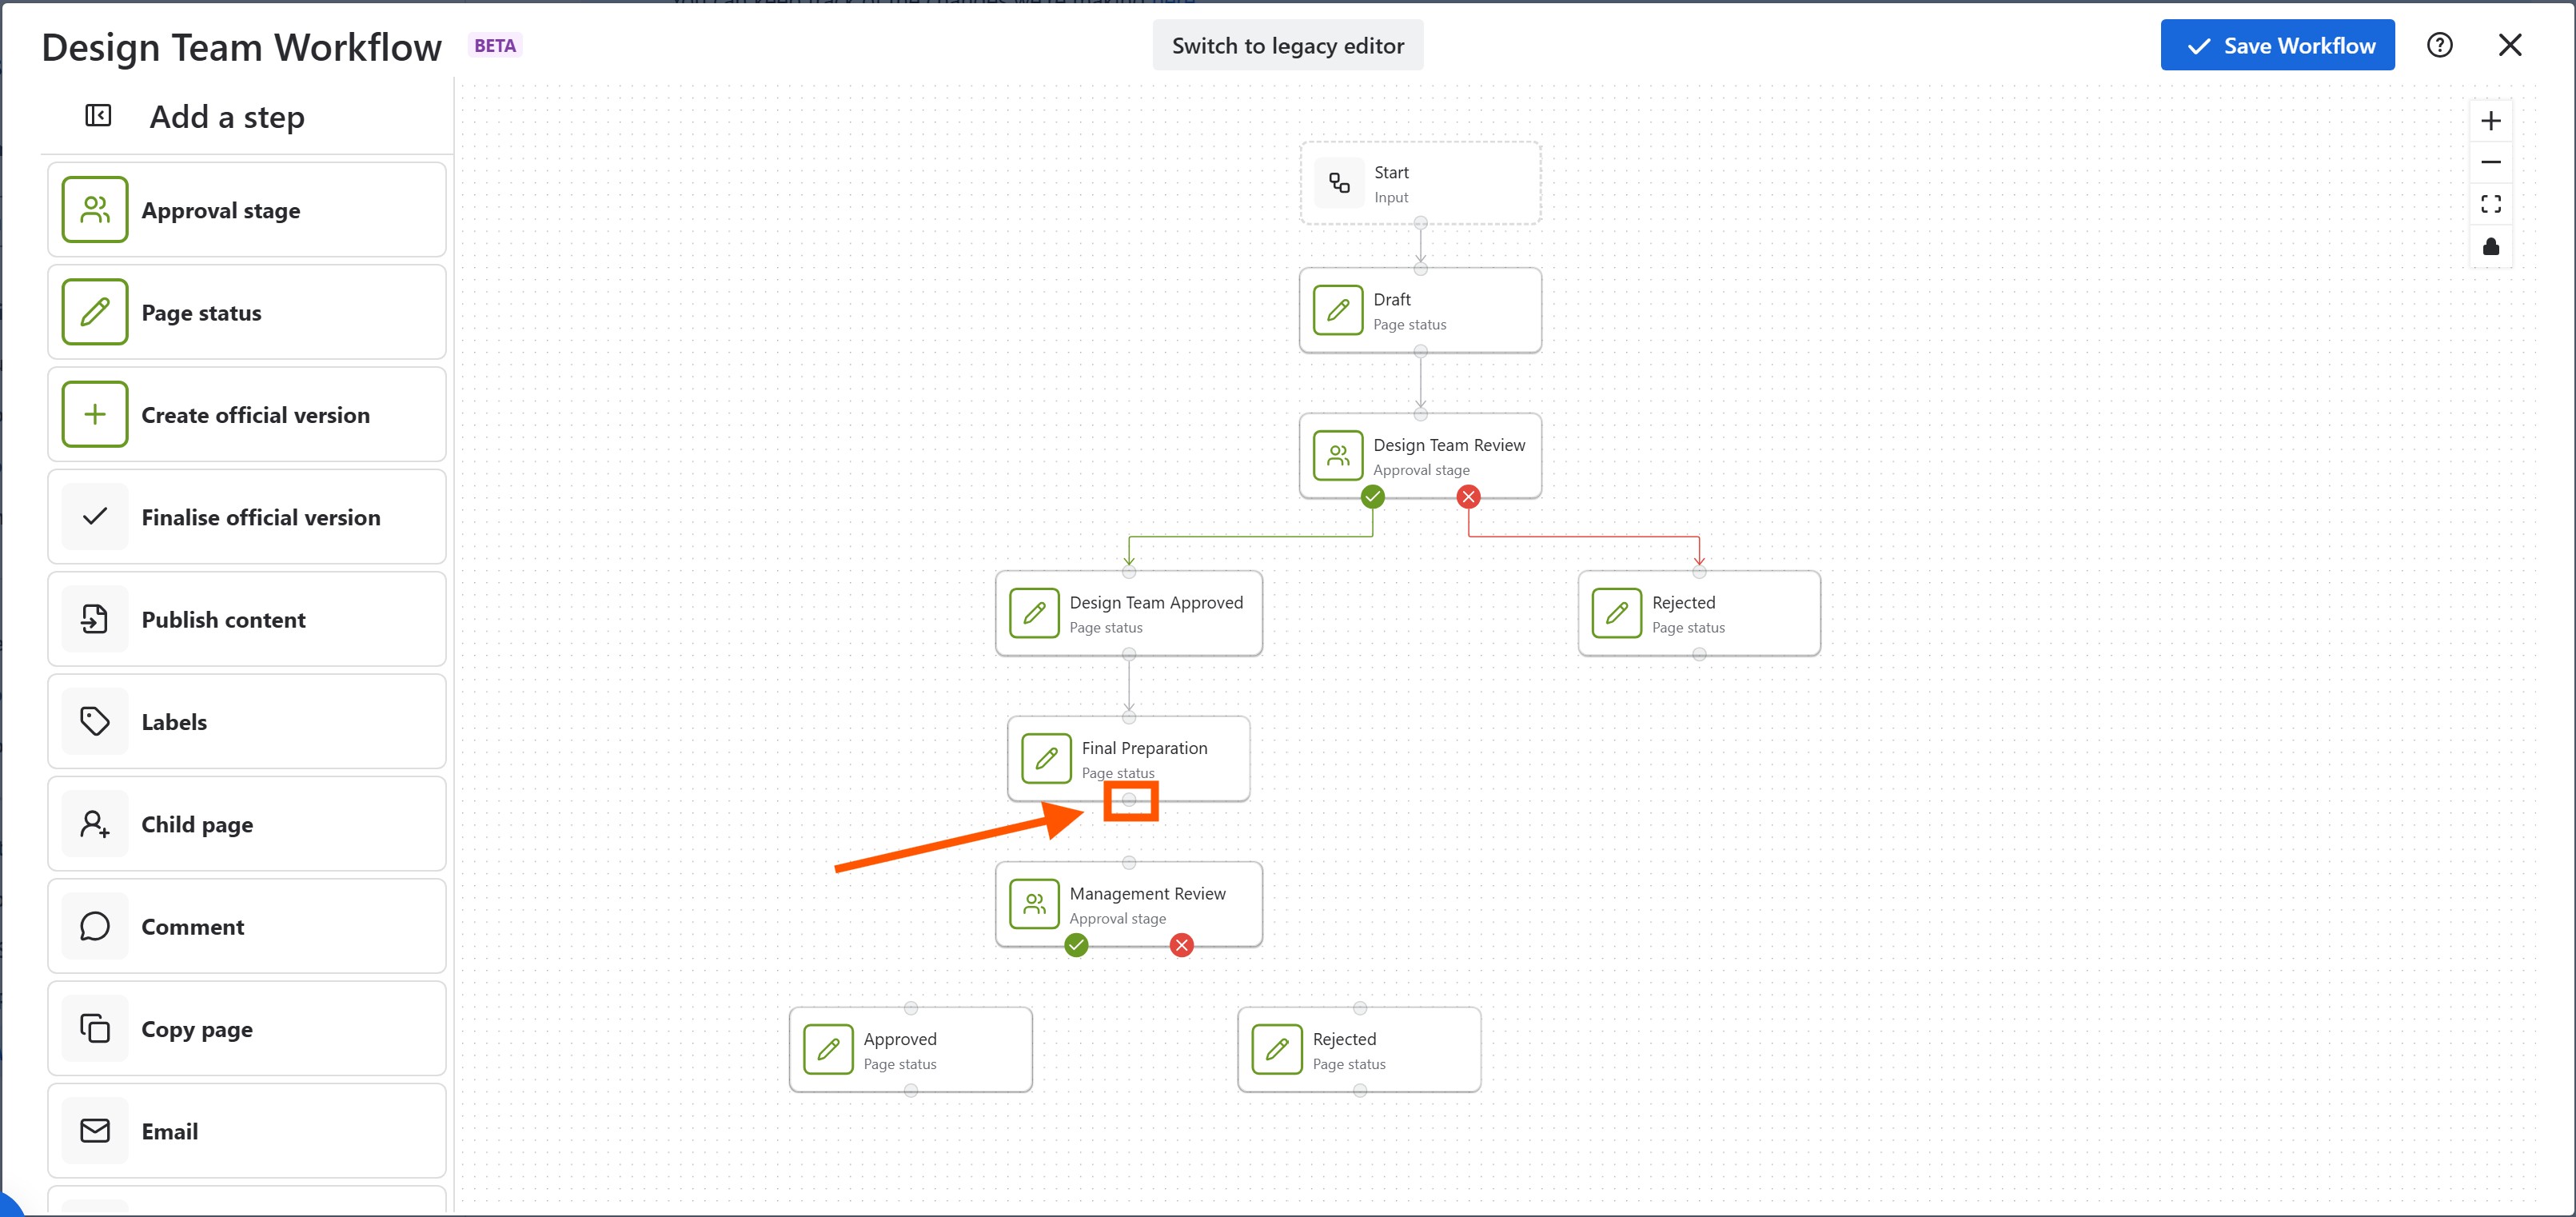
Now that we have all the steps included in the document workflow, it is time to connect them all together. You can do this using the little connectors at the top/bottom of each step.
Connect them as illustrated below until the entire workflow is connected together.
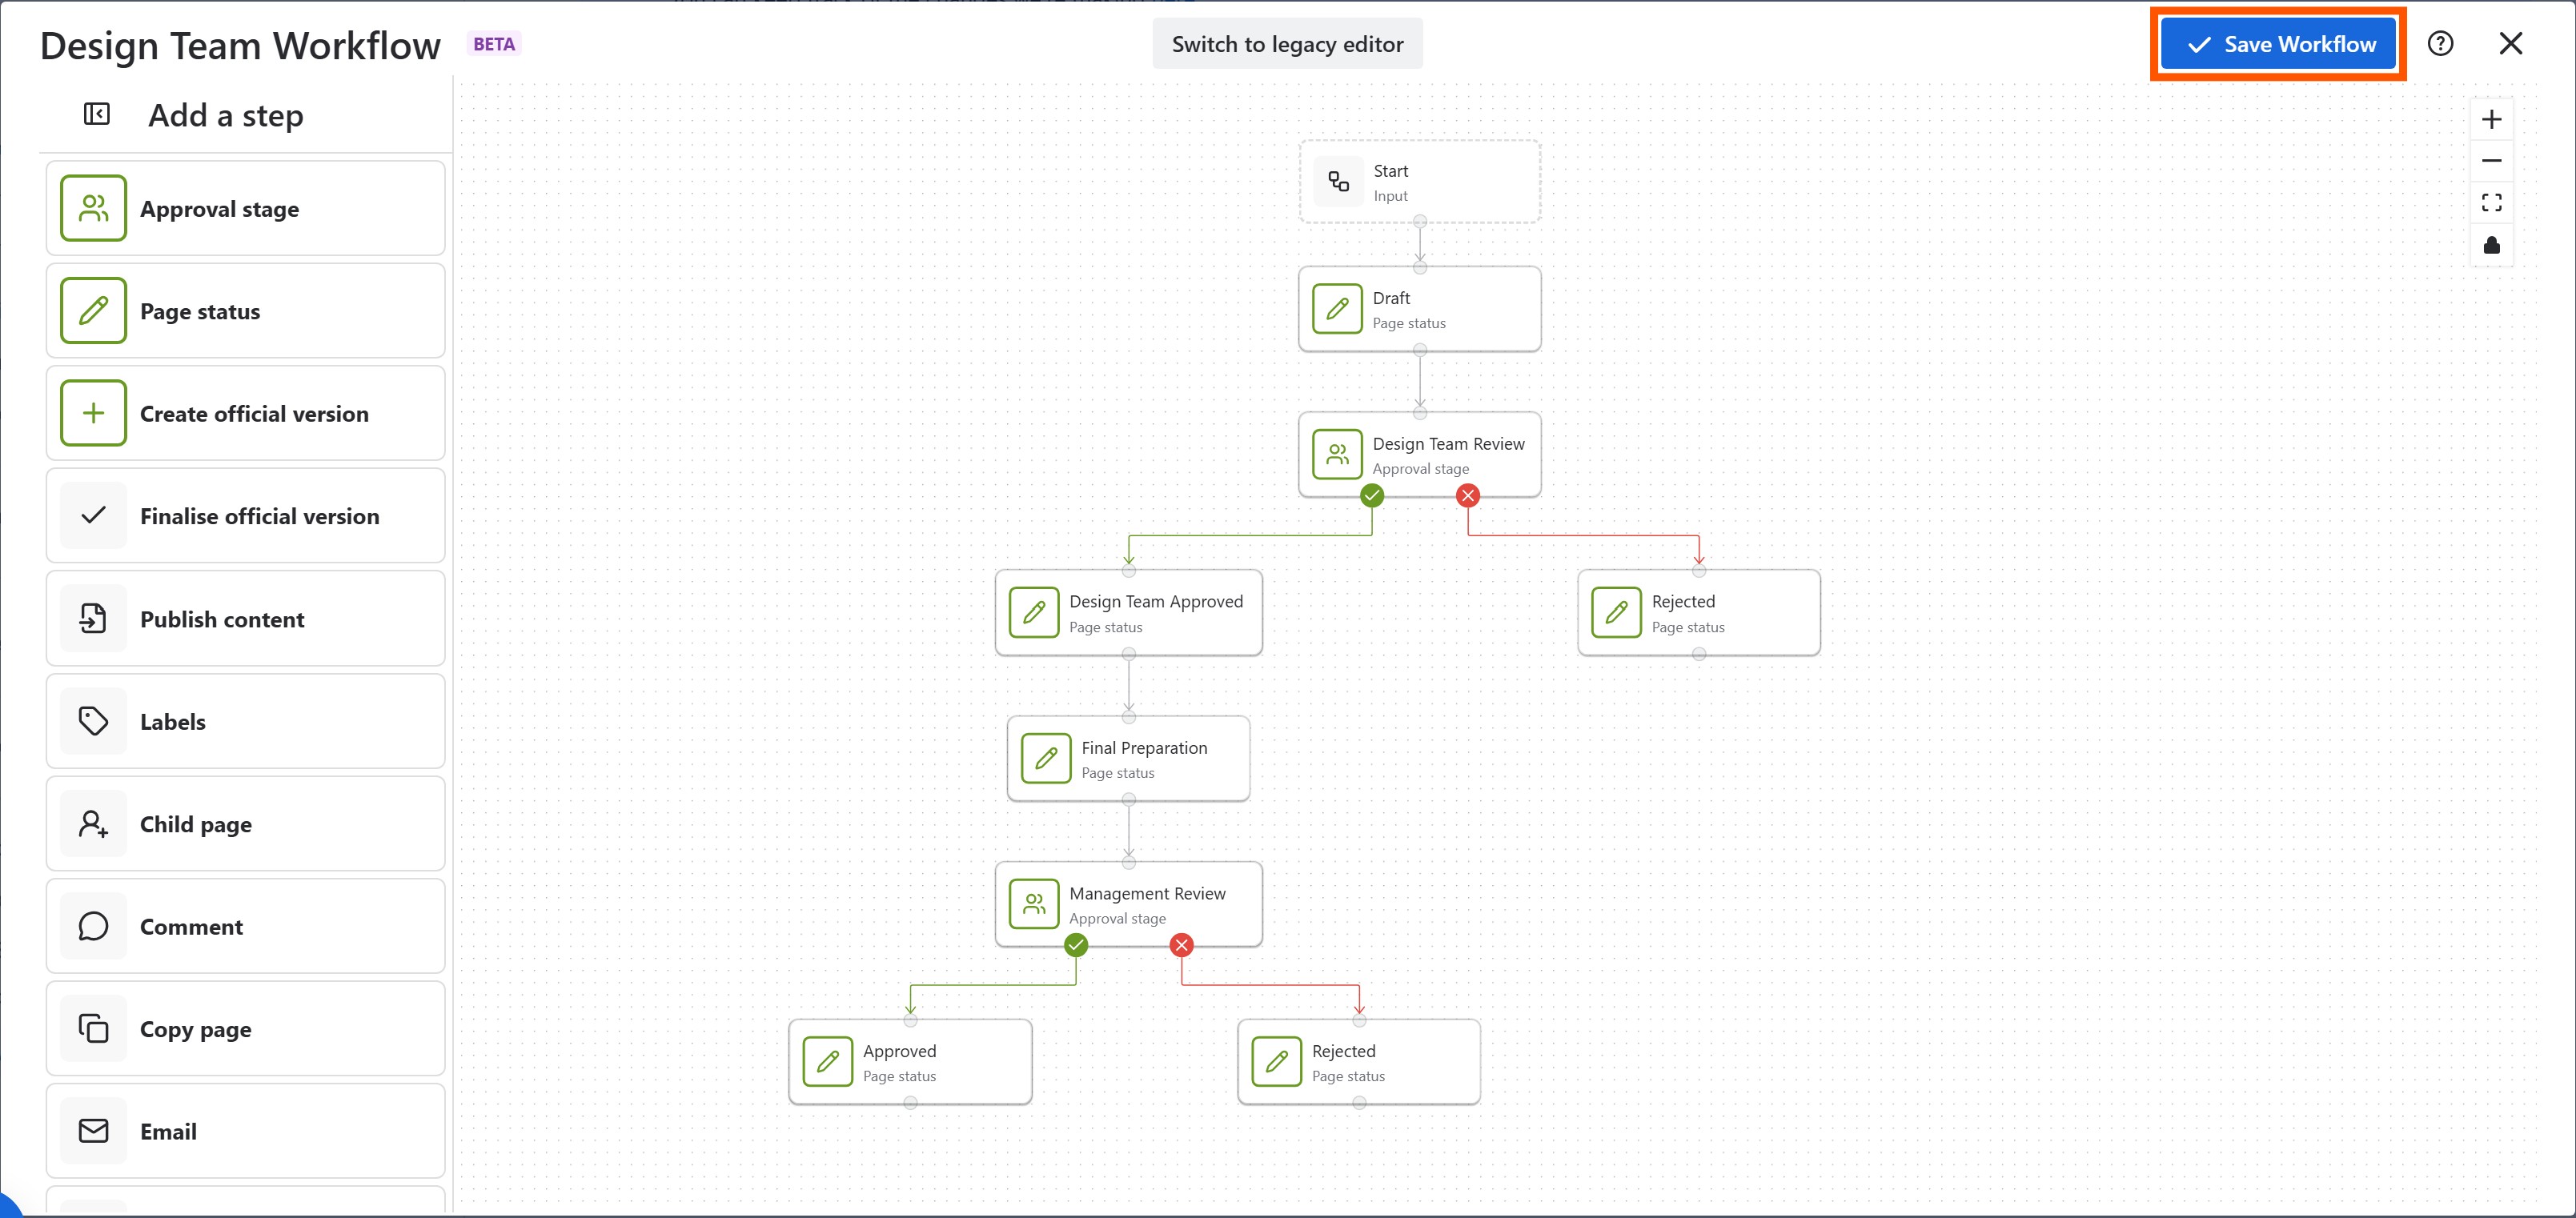
With that last stage complete, the workflow is now ready to be saved 🎉
You can save it by pressing the Save Workflow button in the top right corner of the workflow builder.
How to apply the workflow to your Confluence page
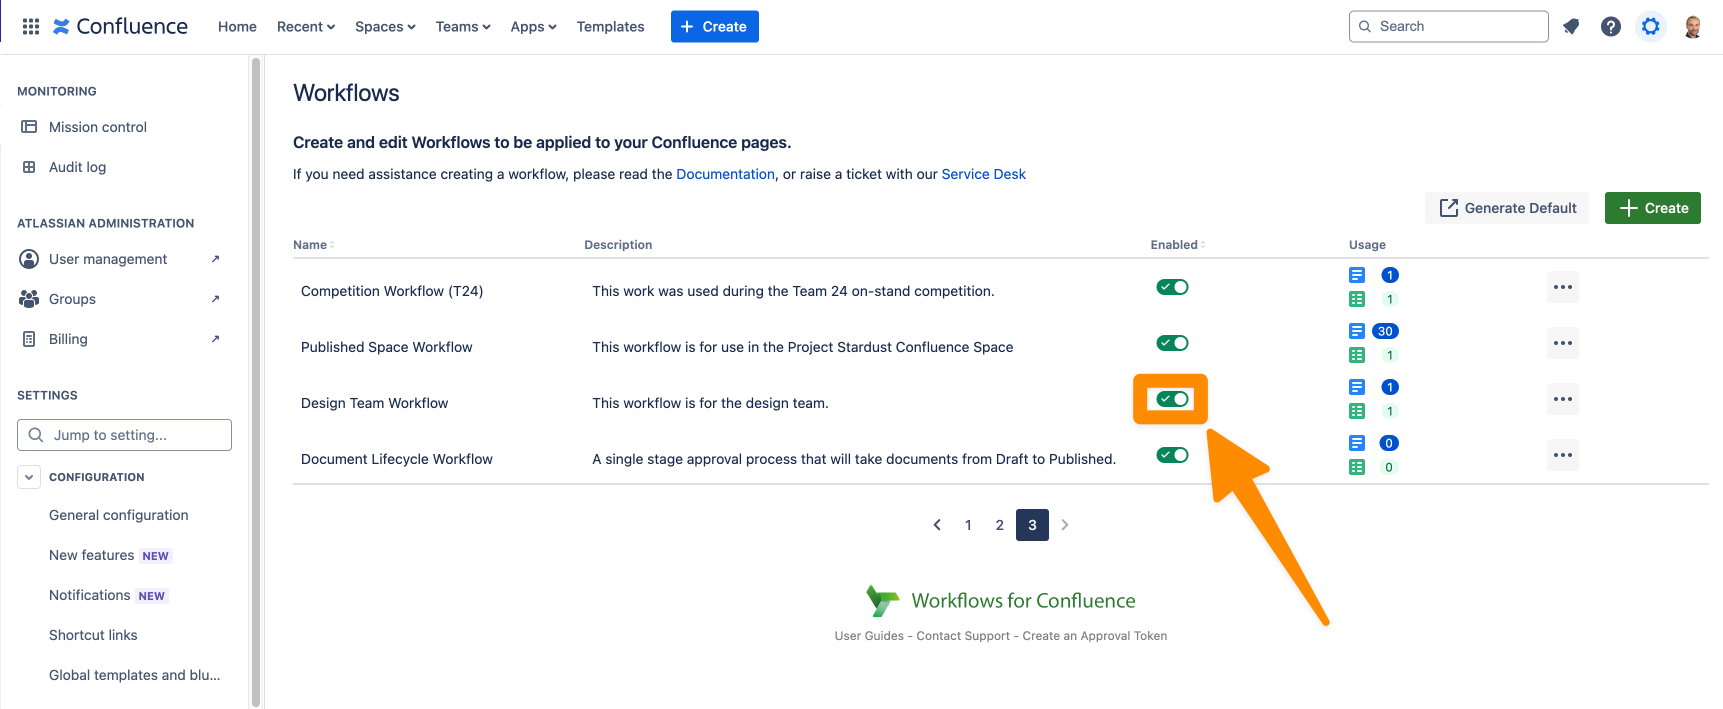
Once the workflow has been created, we need to ensure it has been activated and is available throughout Confluence. You can activate any workflow by visiting the Workflows Manager in the Site/Space Administrator settings under Workflows and ensure the toggle is activated, as shown below.
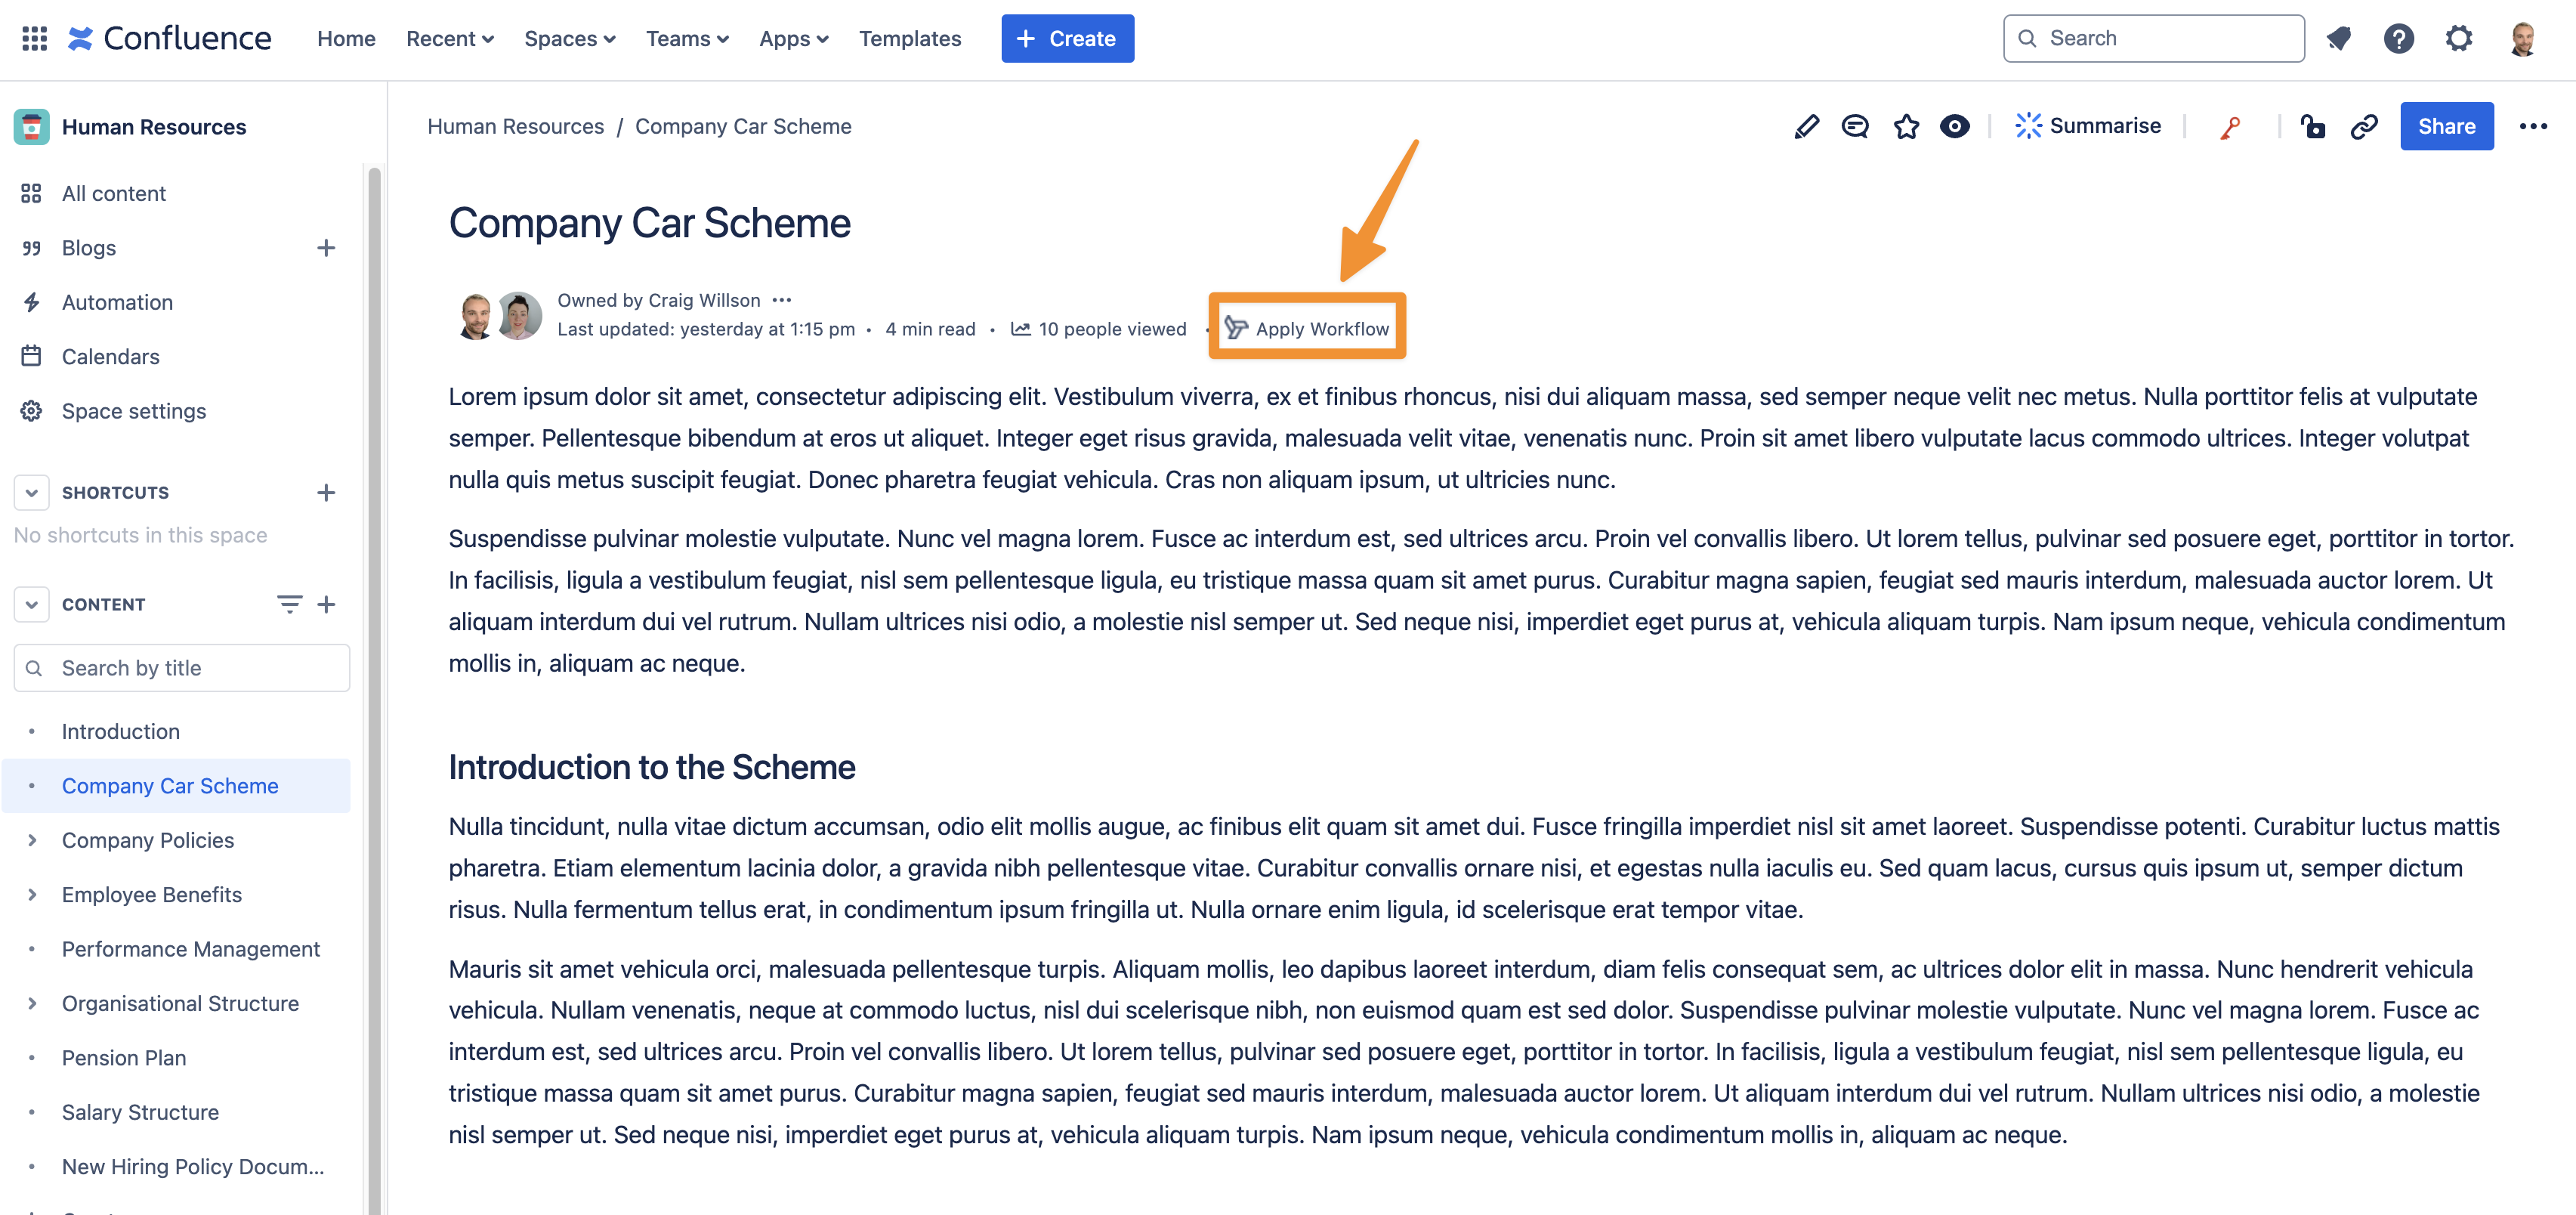
Now that the document workflow is active, its time to add it to the Confluence page. Choose any Confluence page on your site where you want to add this workflow.
Once you have navigated to the page, select the Apply Workflow option as shown below.
Select the workflow from the drop-down list and press Apply.
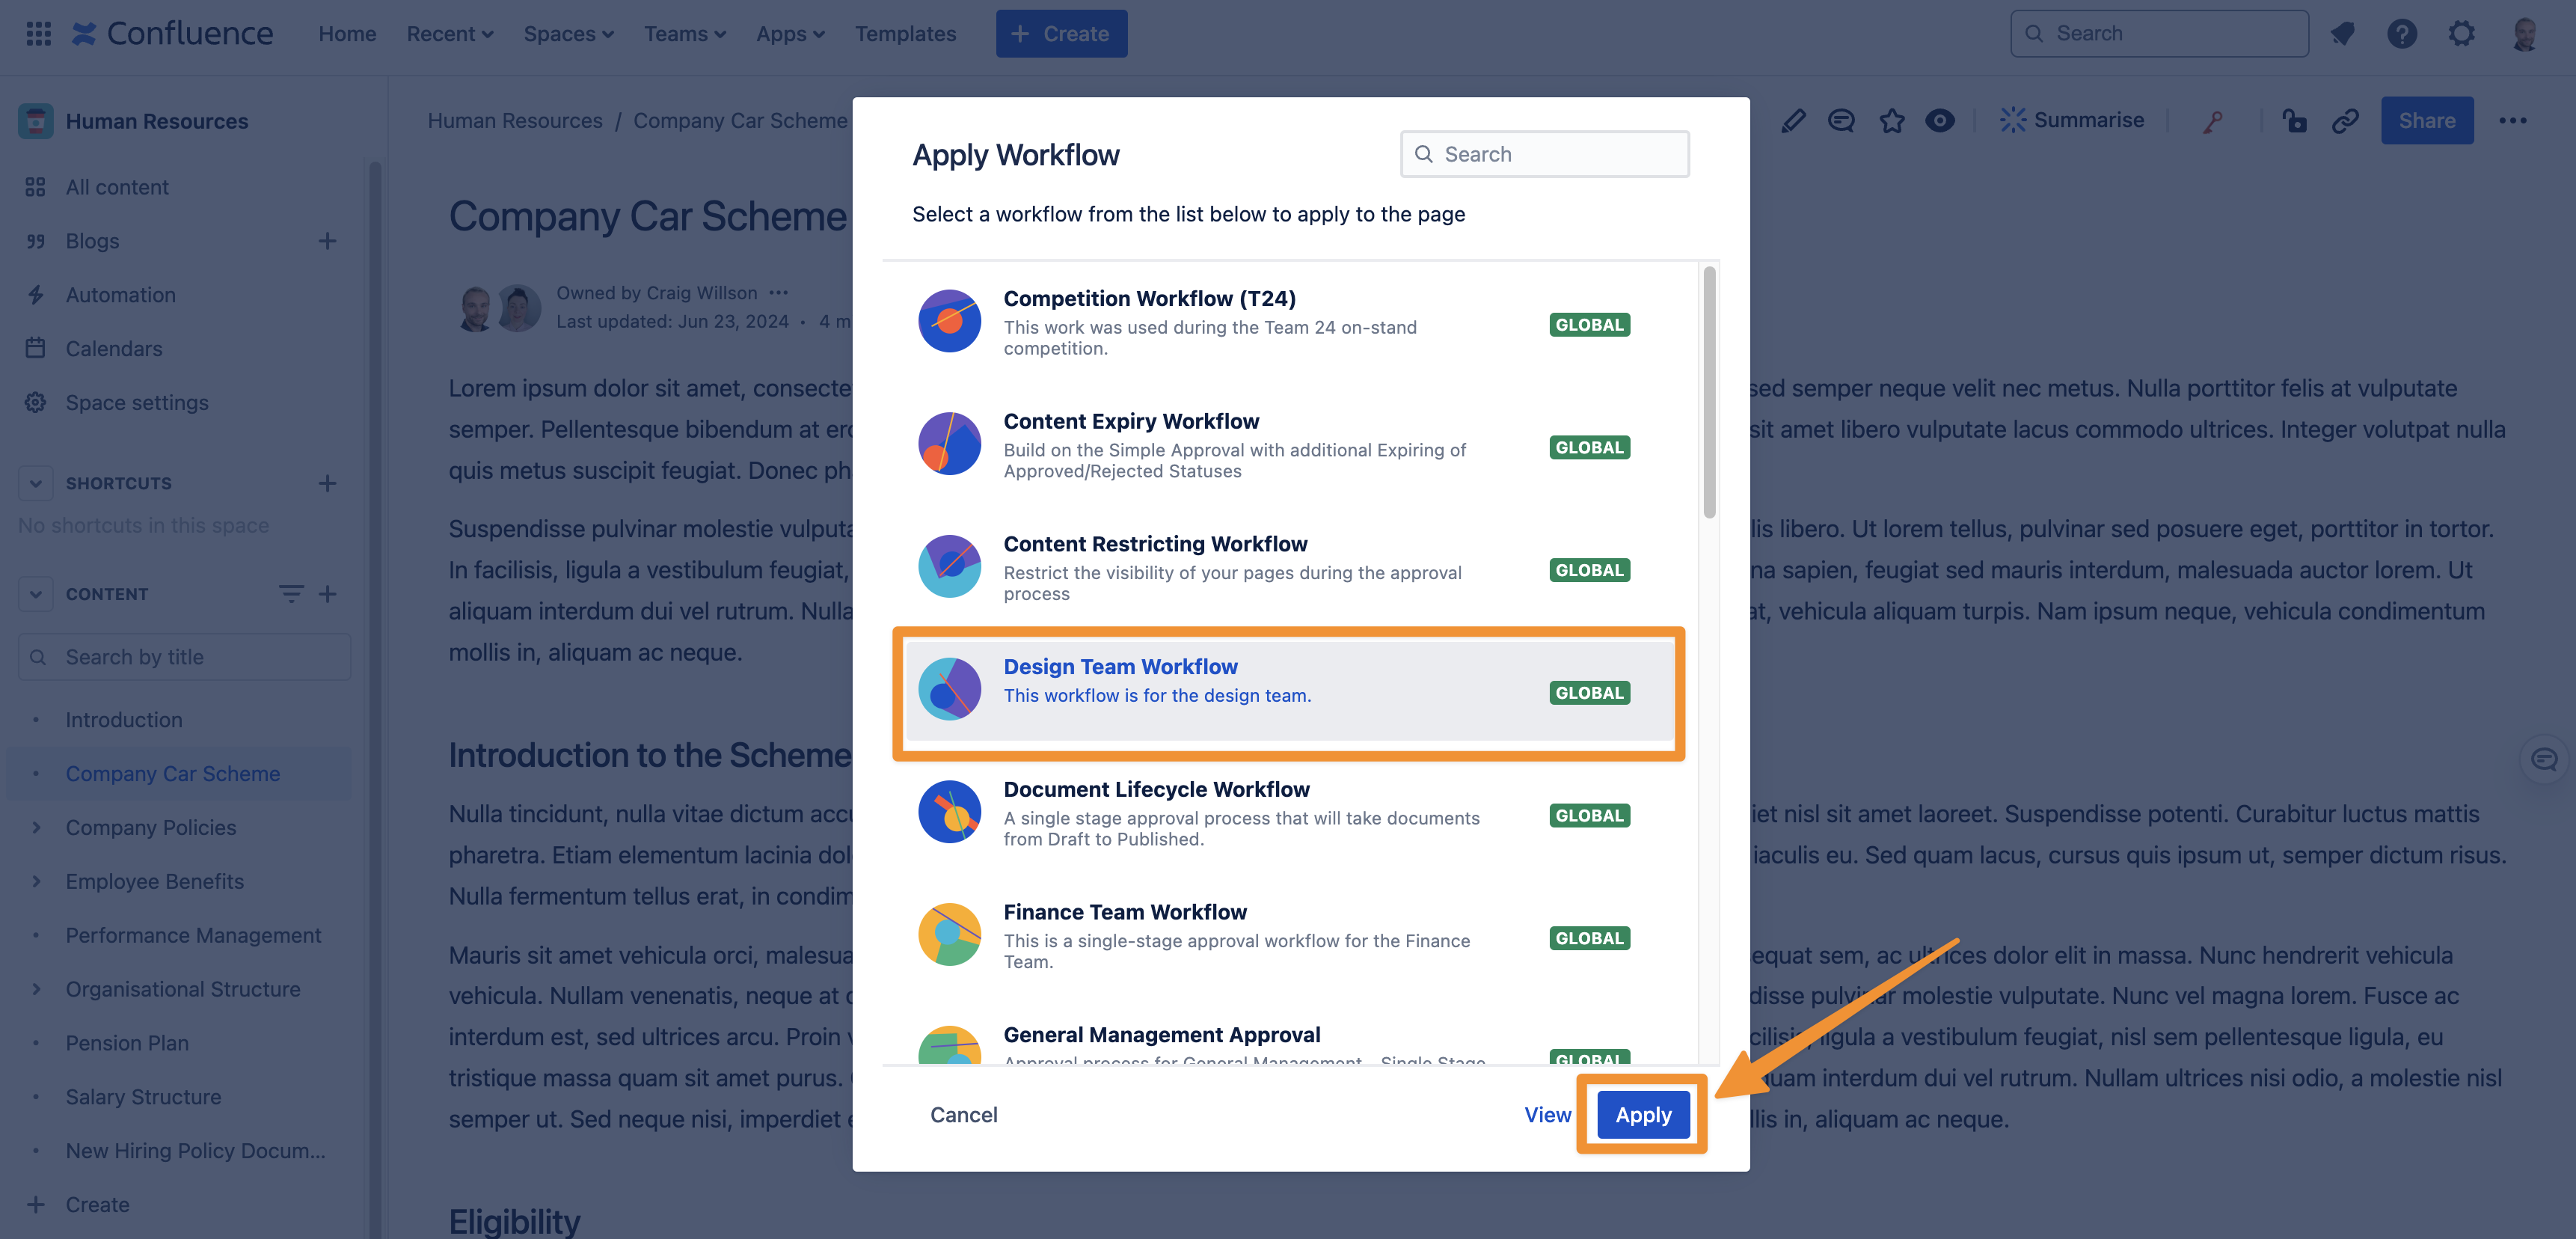
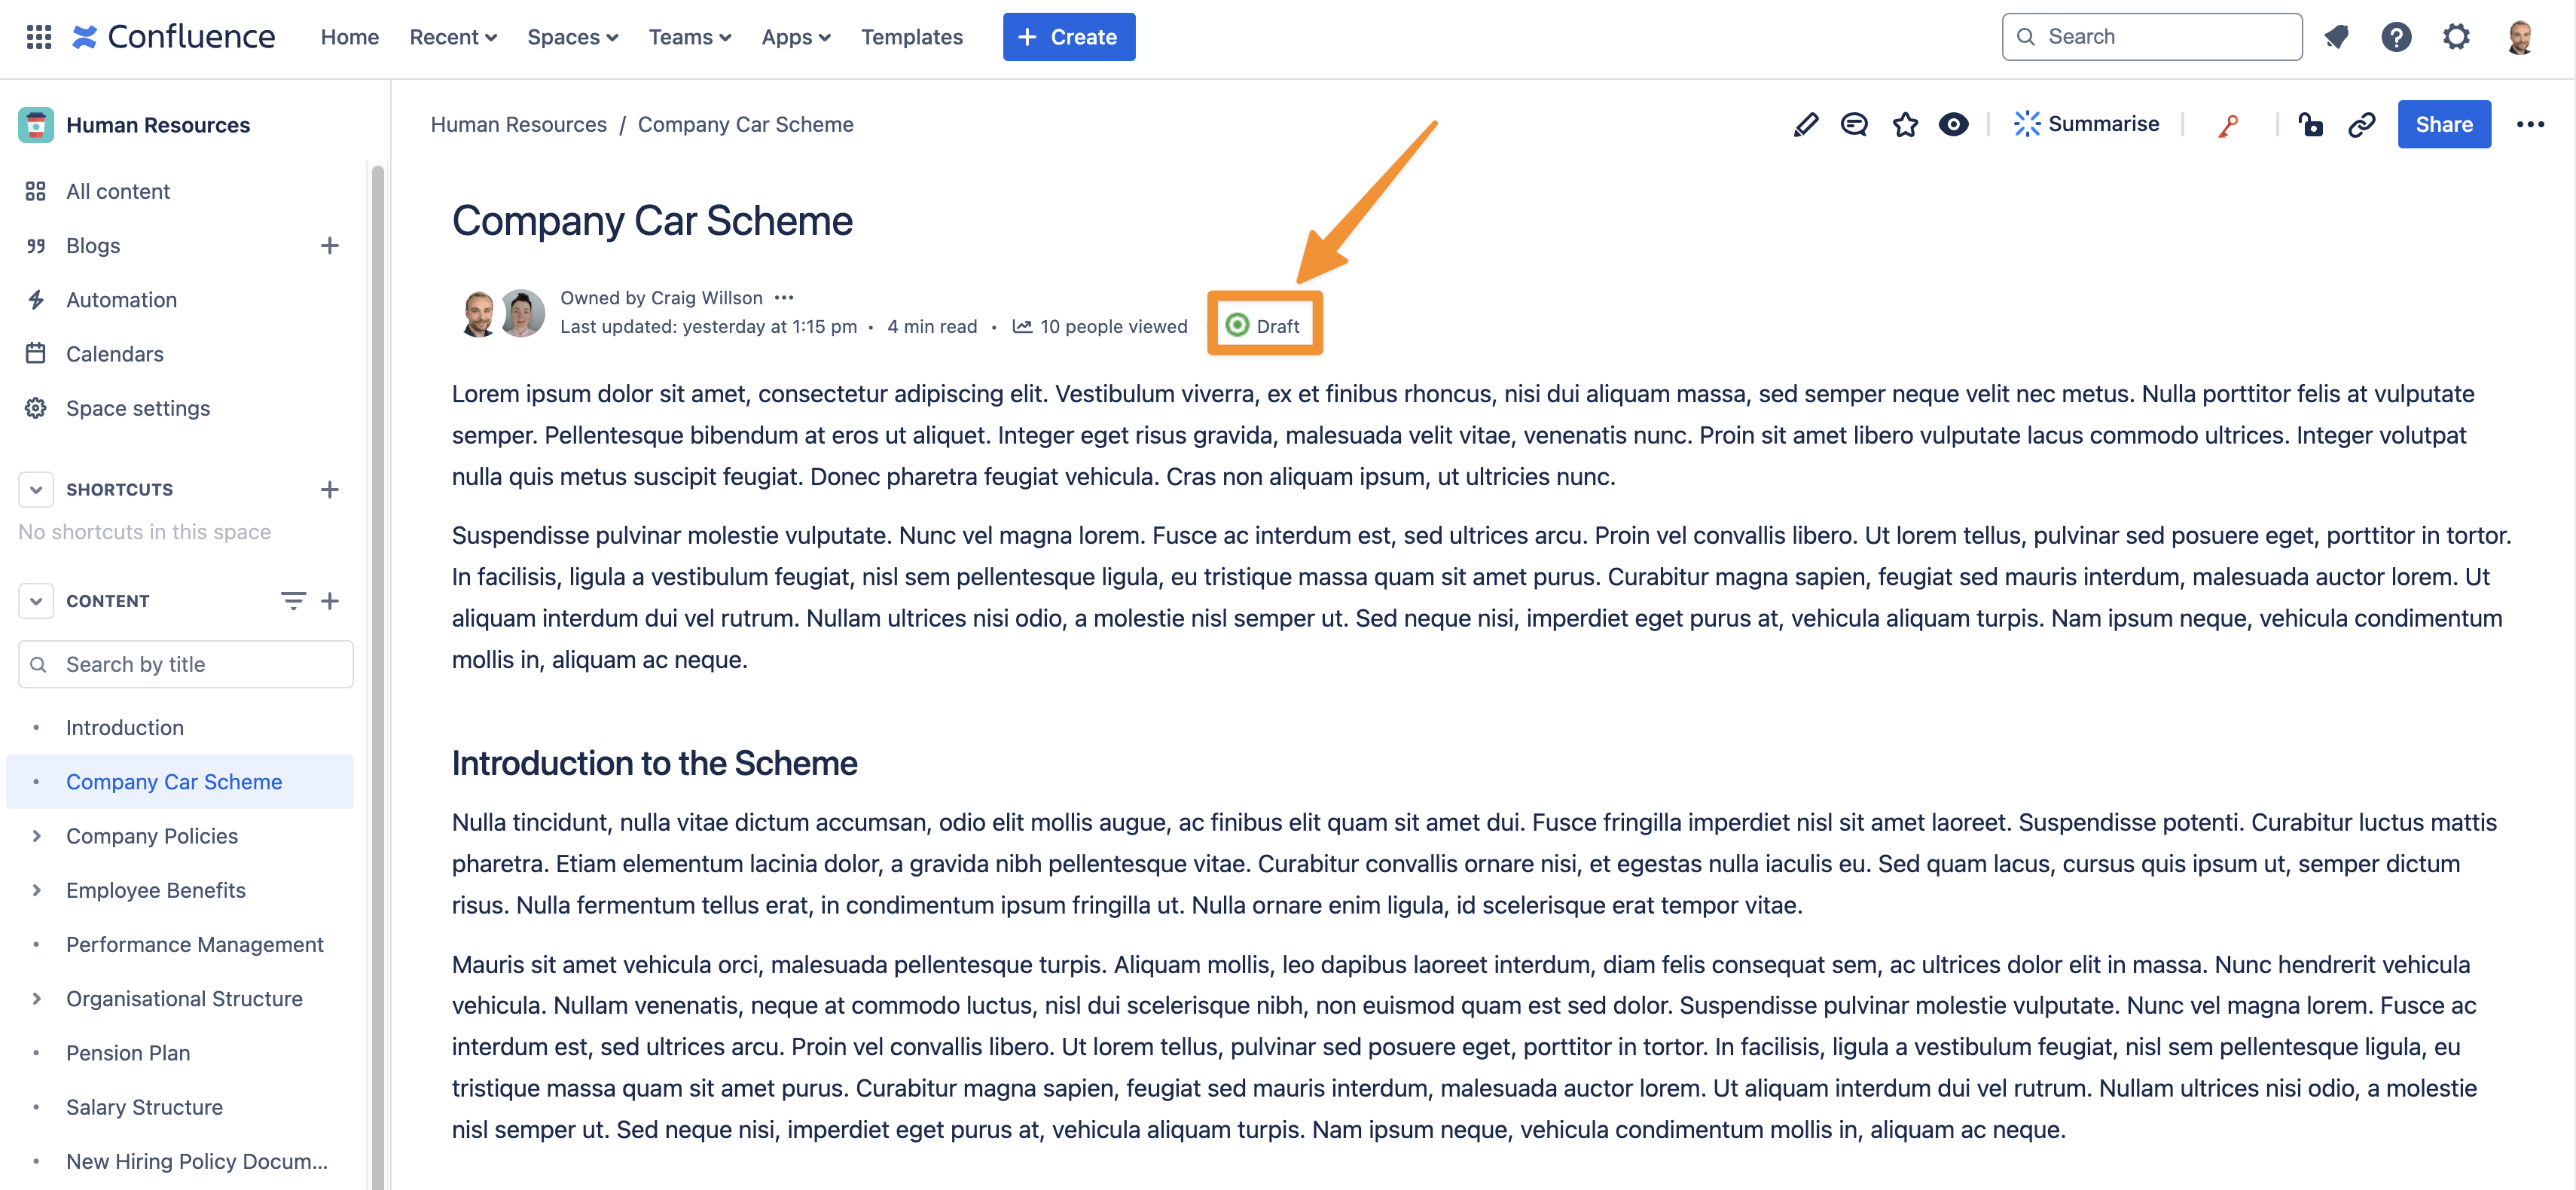
The workflow is then applied to your Confluence page and it should begin at the first status, which in this case is Draft. It’s as easy as that!
How to move the document through the workflow
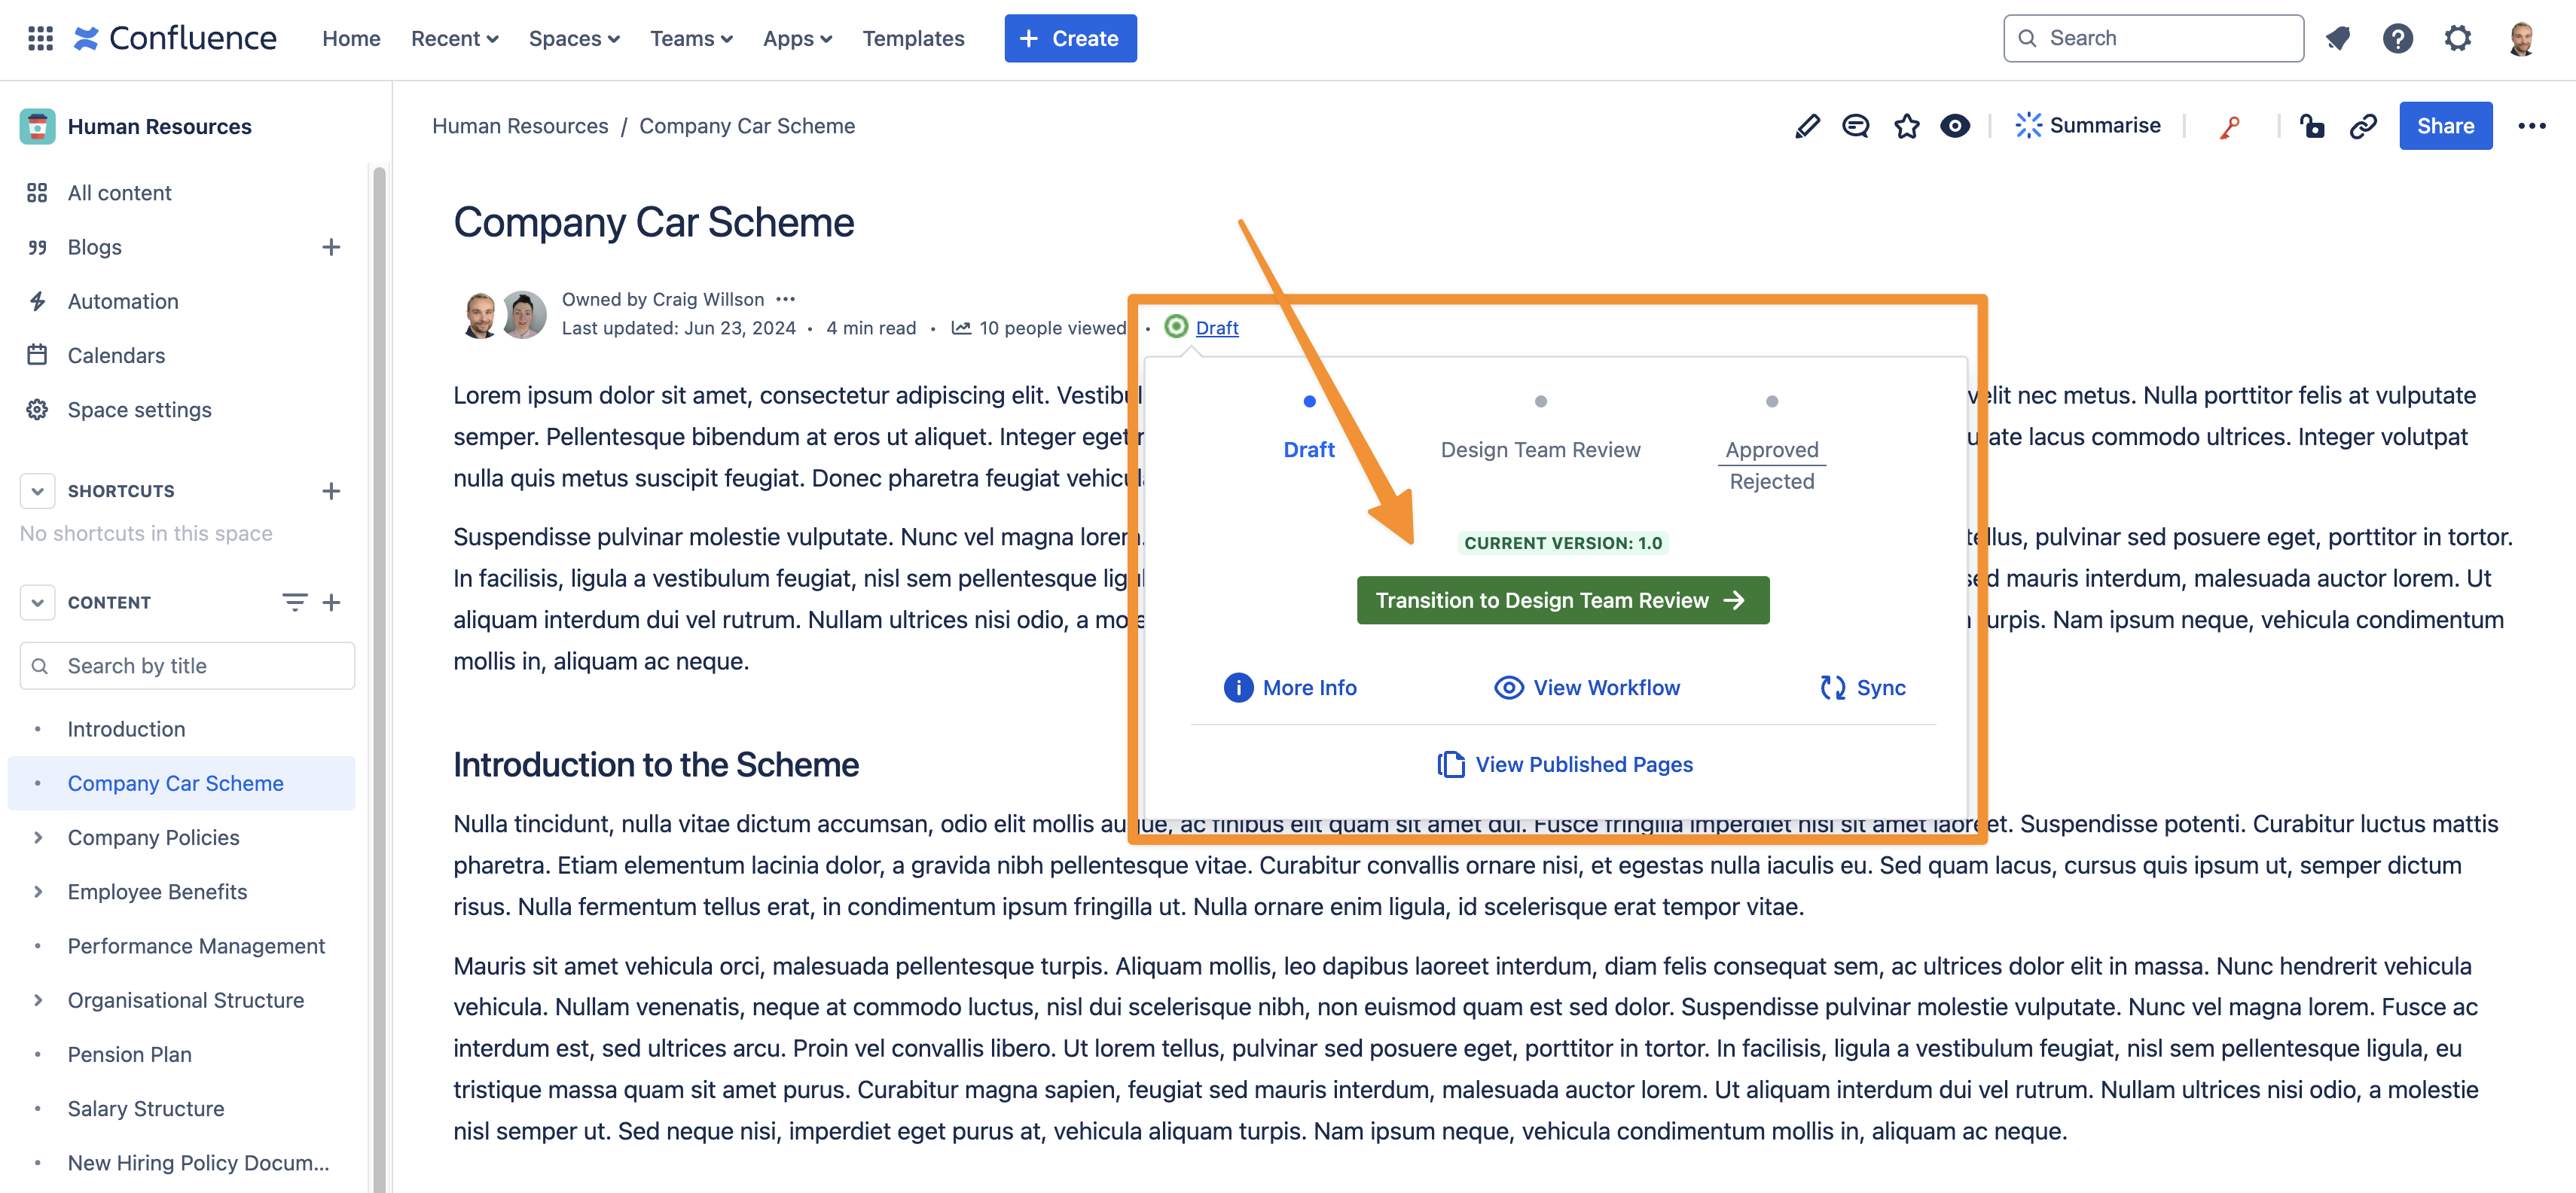
Now that the workflow has been added to the Confluence page, we just need to open the workflow status by clicking in the Confluence page byline, as illustrated below.

You then need to select the next step with the workflow and the page will move forward once clicked.
Need support? We’re here to help 🧡
If you have any questions or would like to speak with us about Workflows, please don’t hesitate to reach out to our Customer Support team.
Looking to automate your content review and approval processes inside Confluence?
You can begin your 30-day free trial of Workflows for Confluence on the Atlassian Marketplace here.