Document lifecycle management in Confluence
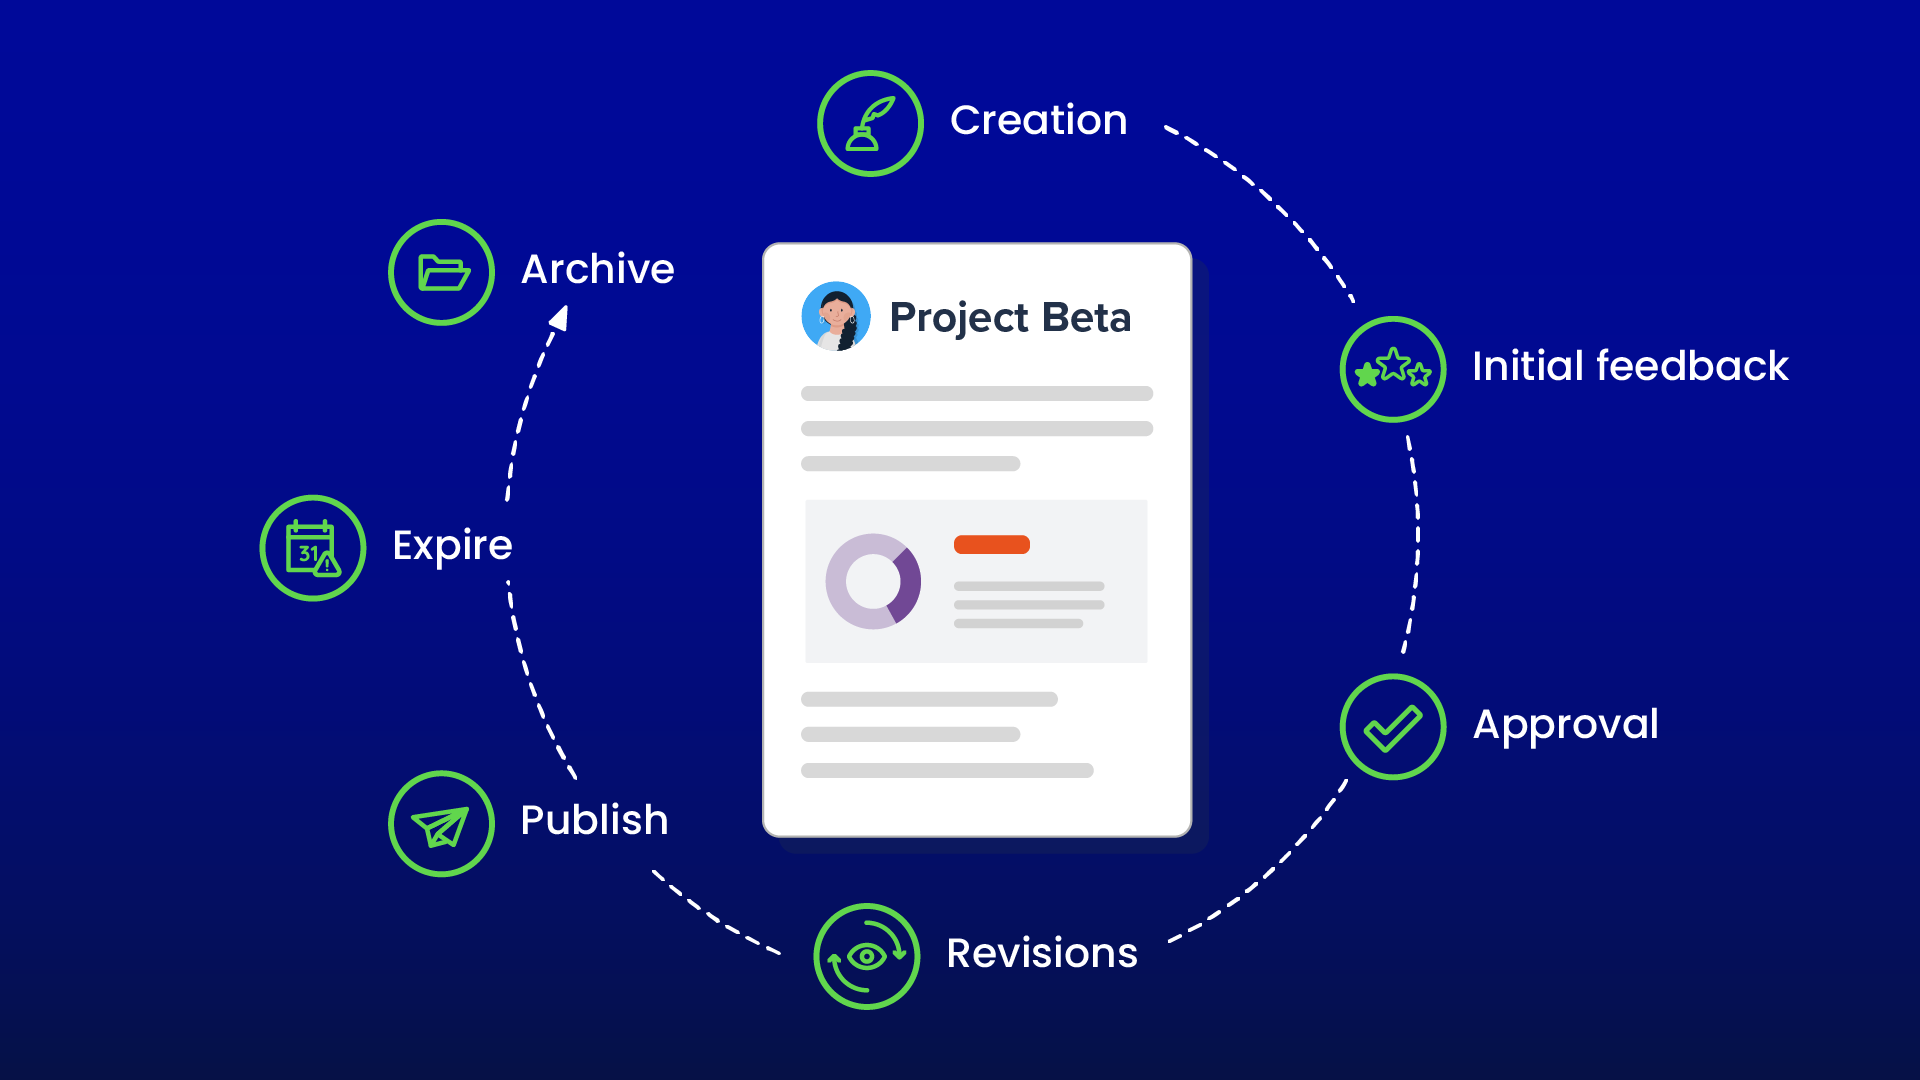
Every document in Confluence is different, and appropriately managing the entire lifecycle, from creation to final publication, is important for most organizations.
With Workflows for Confluence, you can create highly customized workflows for your Confluence pages and ensure documents are created, managed, and approved the right way. These workflows can be customized to align with your specific business processes, and in this guide, we’ll show you how to create a single-stage approval process like the one illustrated below.
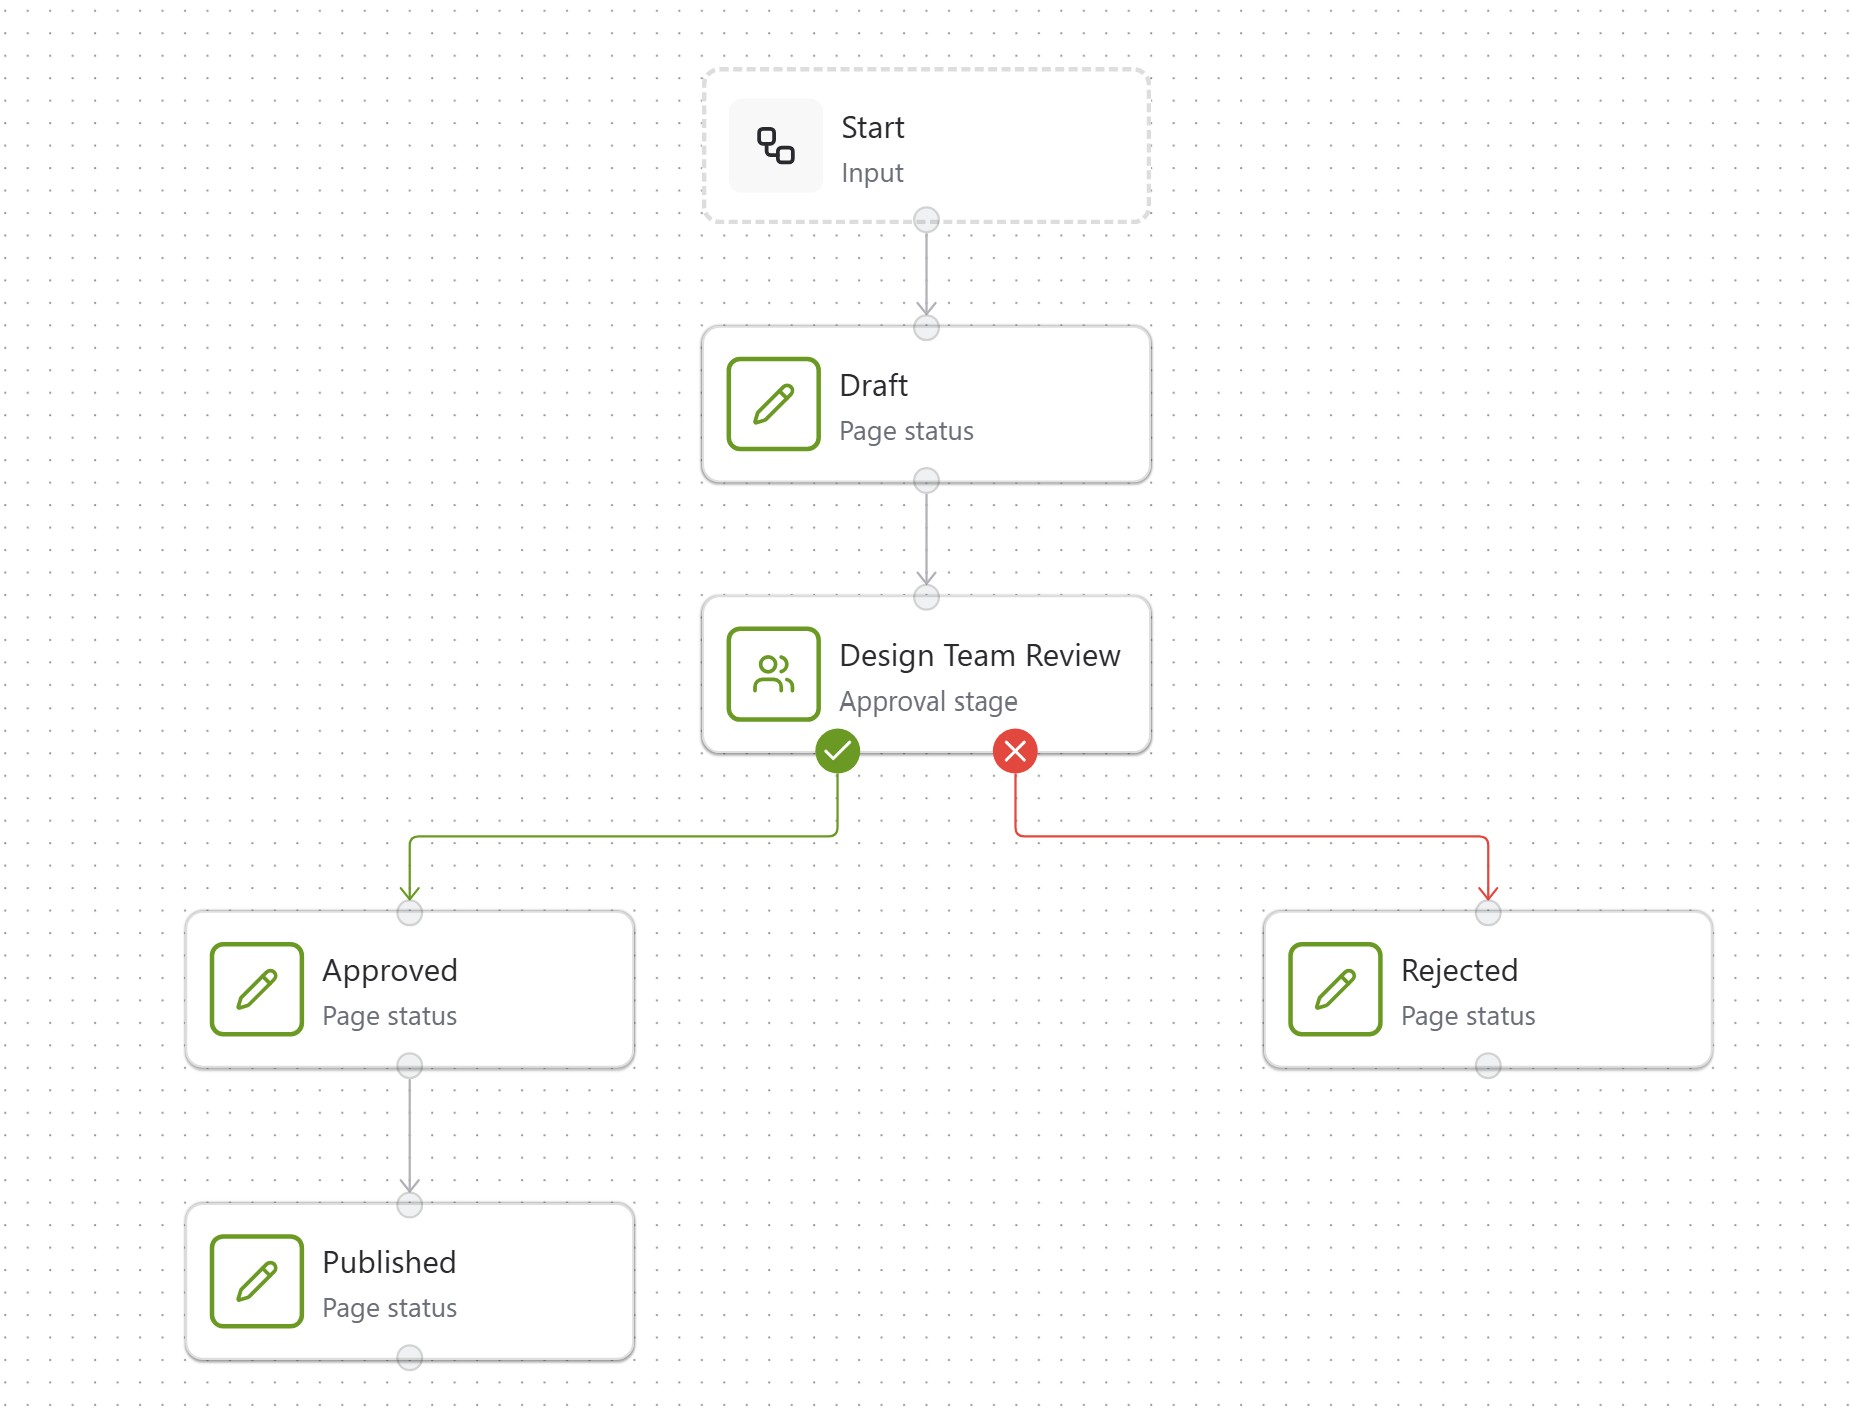
A single-stage approval process created in Workflows for Confluence
You’ll also see how to add this to a Confluence page and move the document through the workflow.
Benefits of using Workflows for this use case
Workflows for Confluence allows you to create an unlimited number of highly customized document workflows for any document, project, or team.
You can use the breadth of functionality in Workflows to design bespoke document workflows and use them on any page in Confluence. The level of customization and flexibility in Workflows ensures you can manage documents throughout their entire lifecycle in a way that's right for your organization.
Workflows features used
Workflow Builder
Multi-stage approval processes
Automated email notifications
Workflow history and audit log
Use Case In Action: Document Lifecycle Management in Confluence
In this example, we’ll create a single workflow that will take a document from the initial stage of Draft through to it being Published after a single round of approval. In addition, we will configure the workflow to expire the document after 12 months, ensuring that the content is reviewed annually.
How to set up the workflow
To create a workflow in Workflows for Confluence, we need to access the Workflow Builder. You can find this through the Site Administration or Space Administration settings.
In this example, we’ll create the workflow from the perspective of a Site Administrator.

Access the Site Administration settings in Confluence
Once you have accessed the Confluence Site Administration settings, navigate to the Workflows for Confluence app settings and look for the Workflows option.
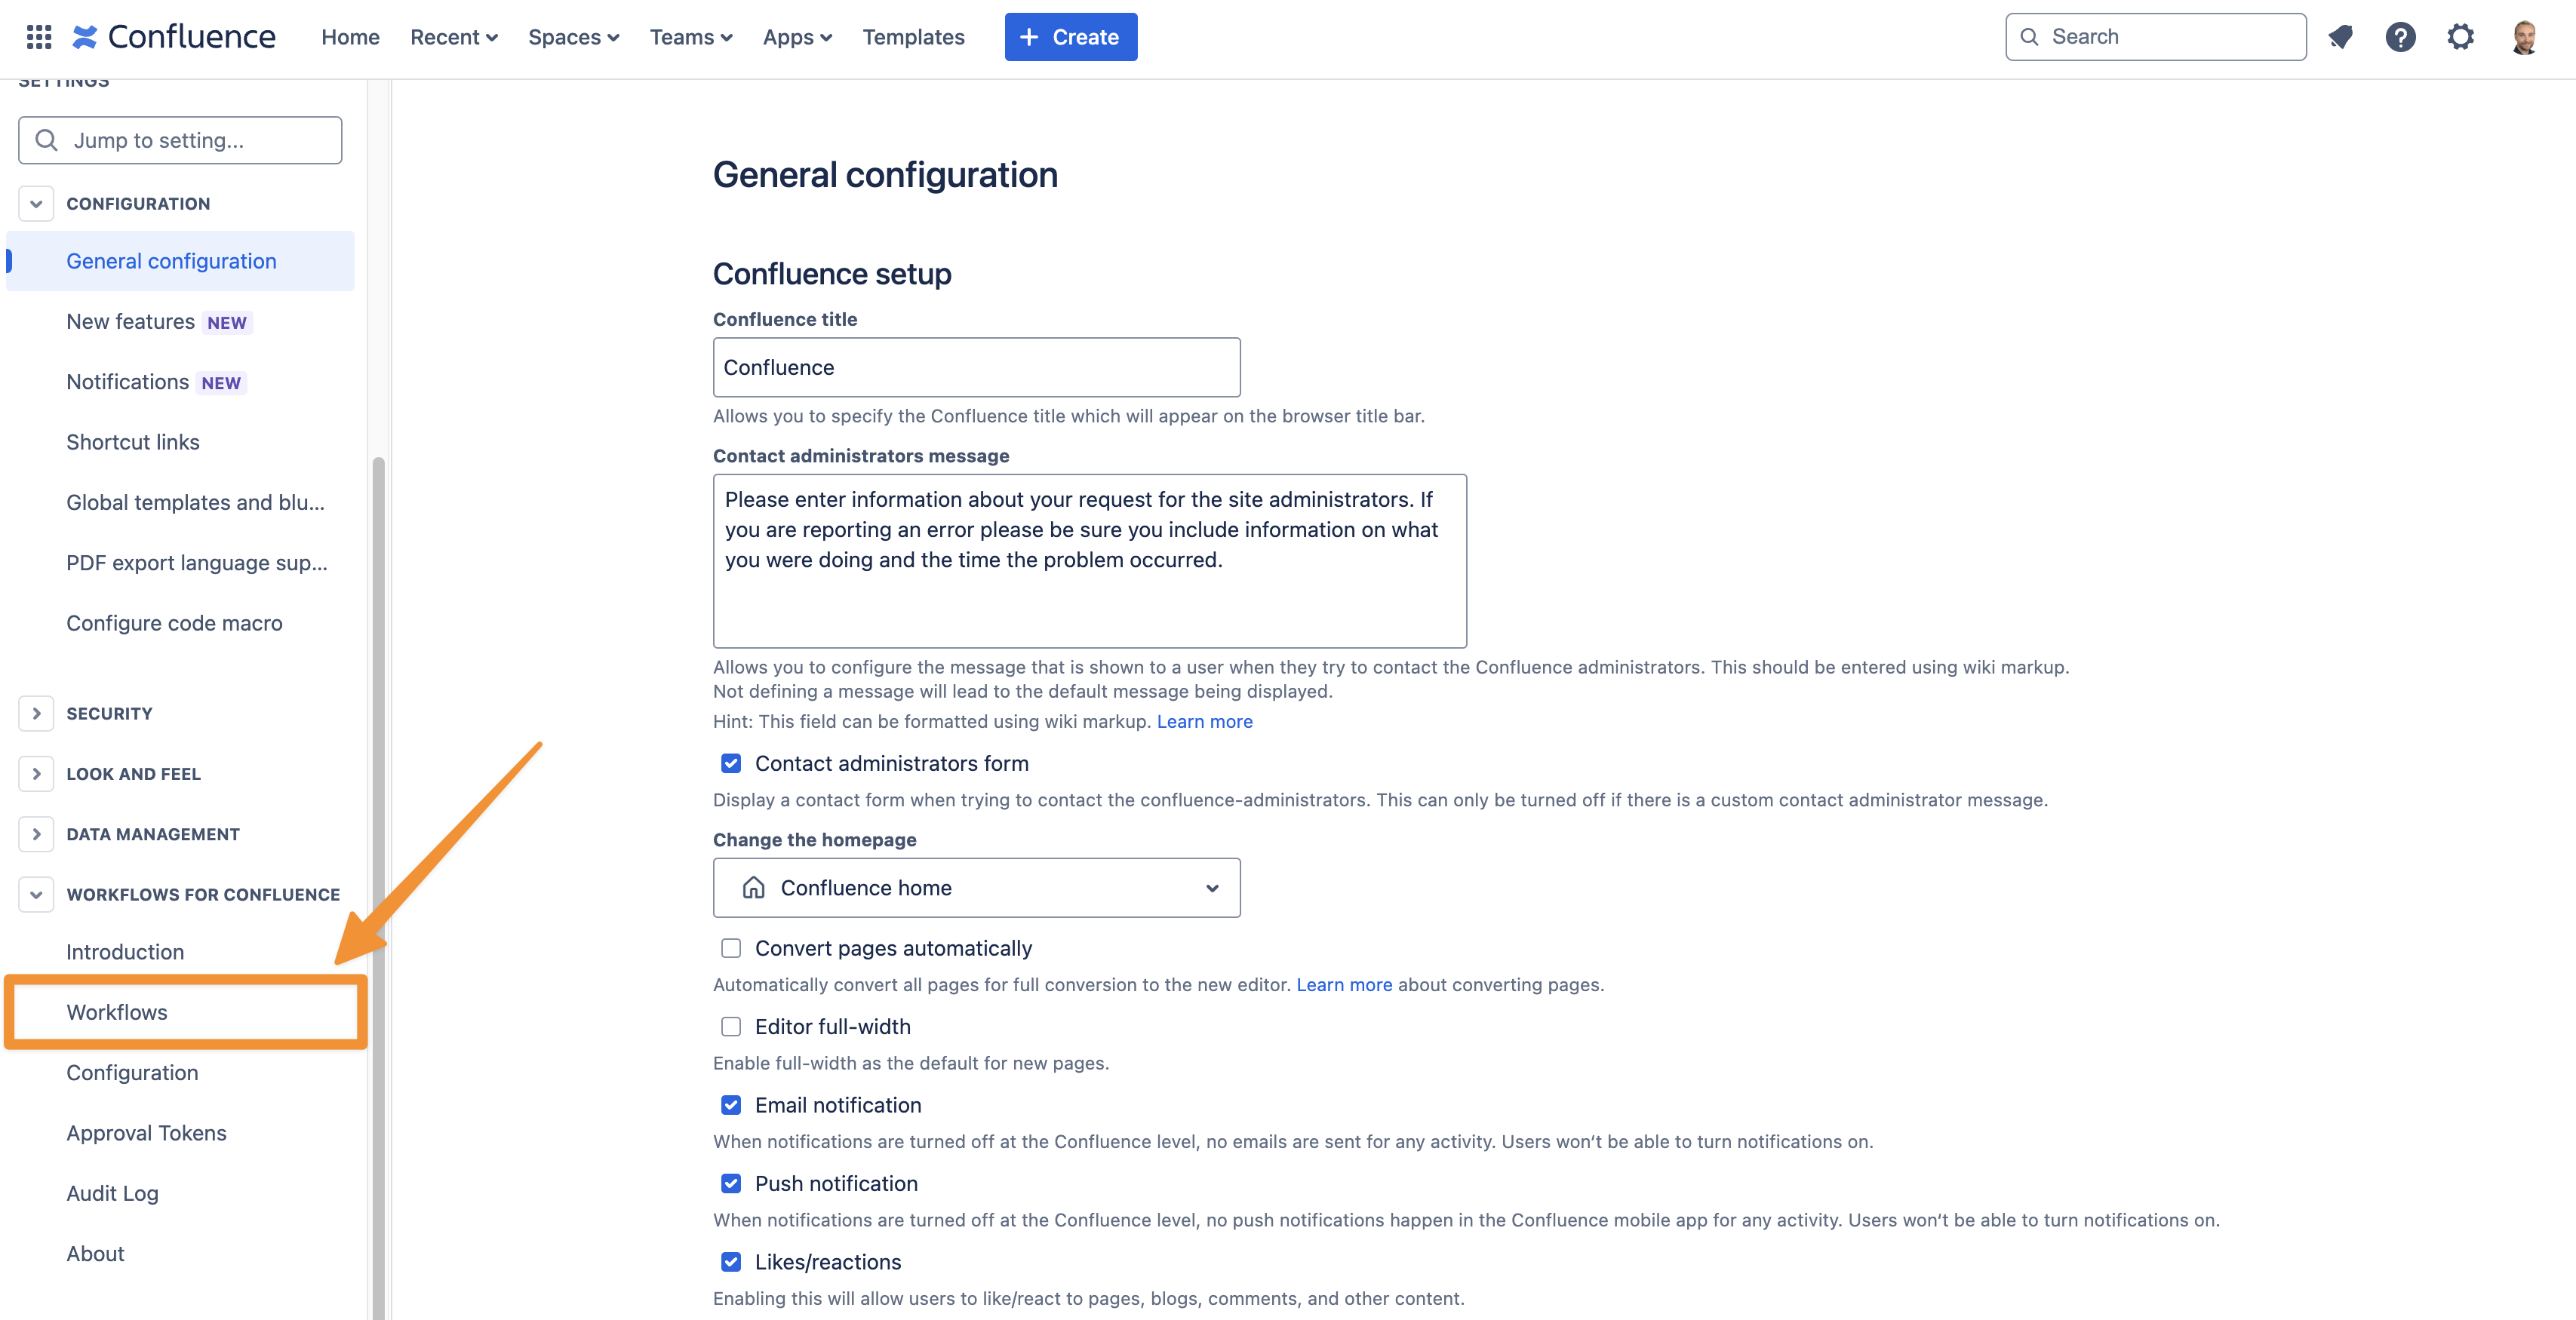
Navigate to Workflows within the Confluence Site Administration settings
This will open the workflow manager in Workflows for Confluence, and this is where you can create, edit, and delete document workflows.
Next, click Create to start creating the document workflow.
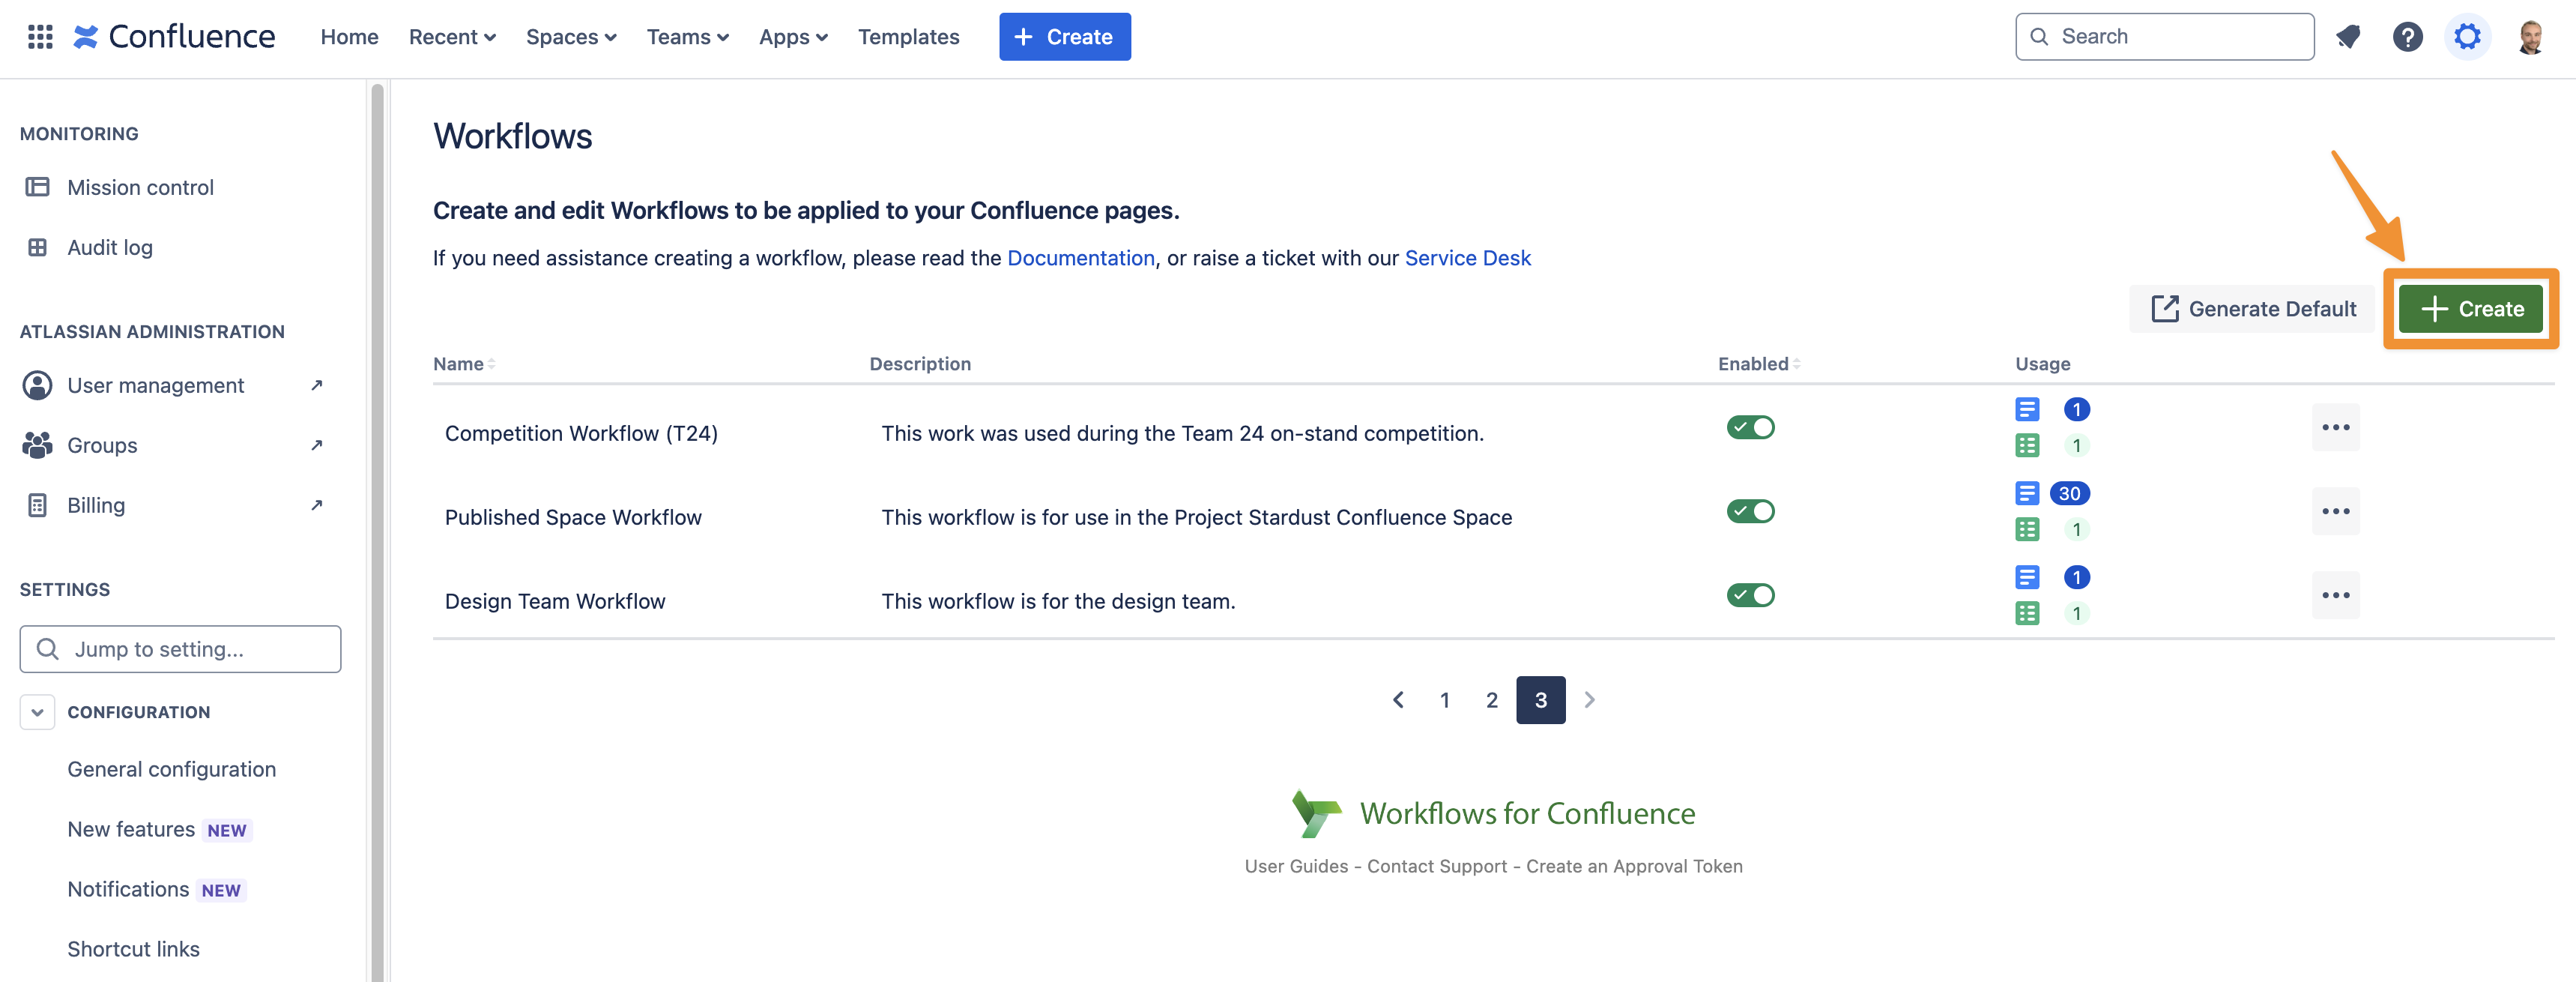
Select Create to start creating your document workflow
You will need to give your workflow a name and description, as illustrated below.
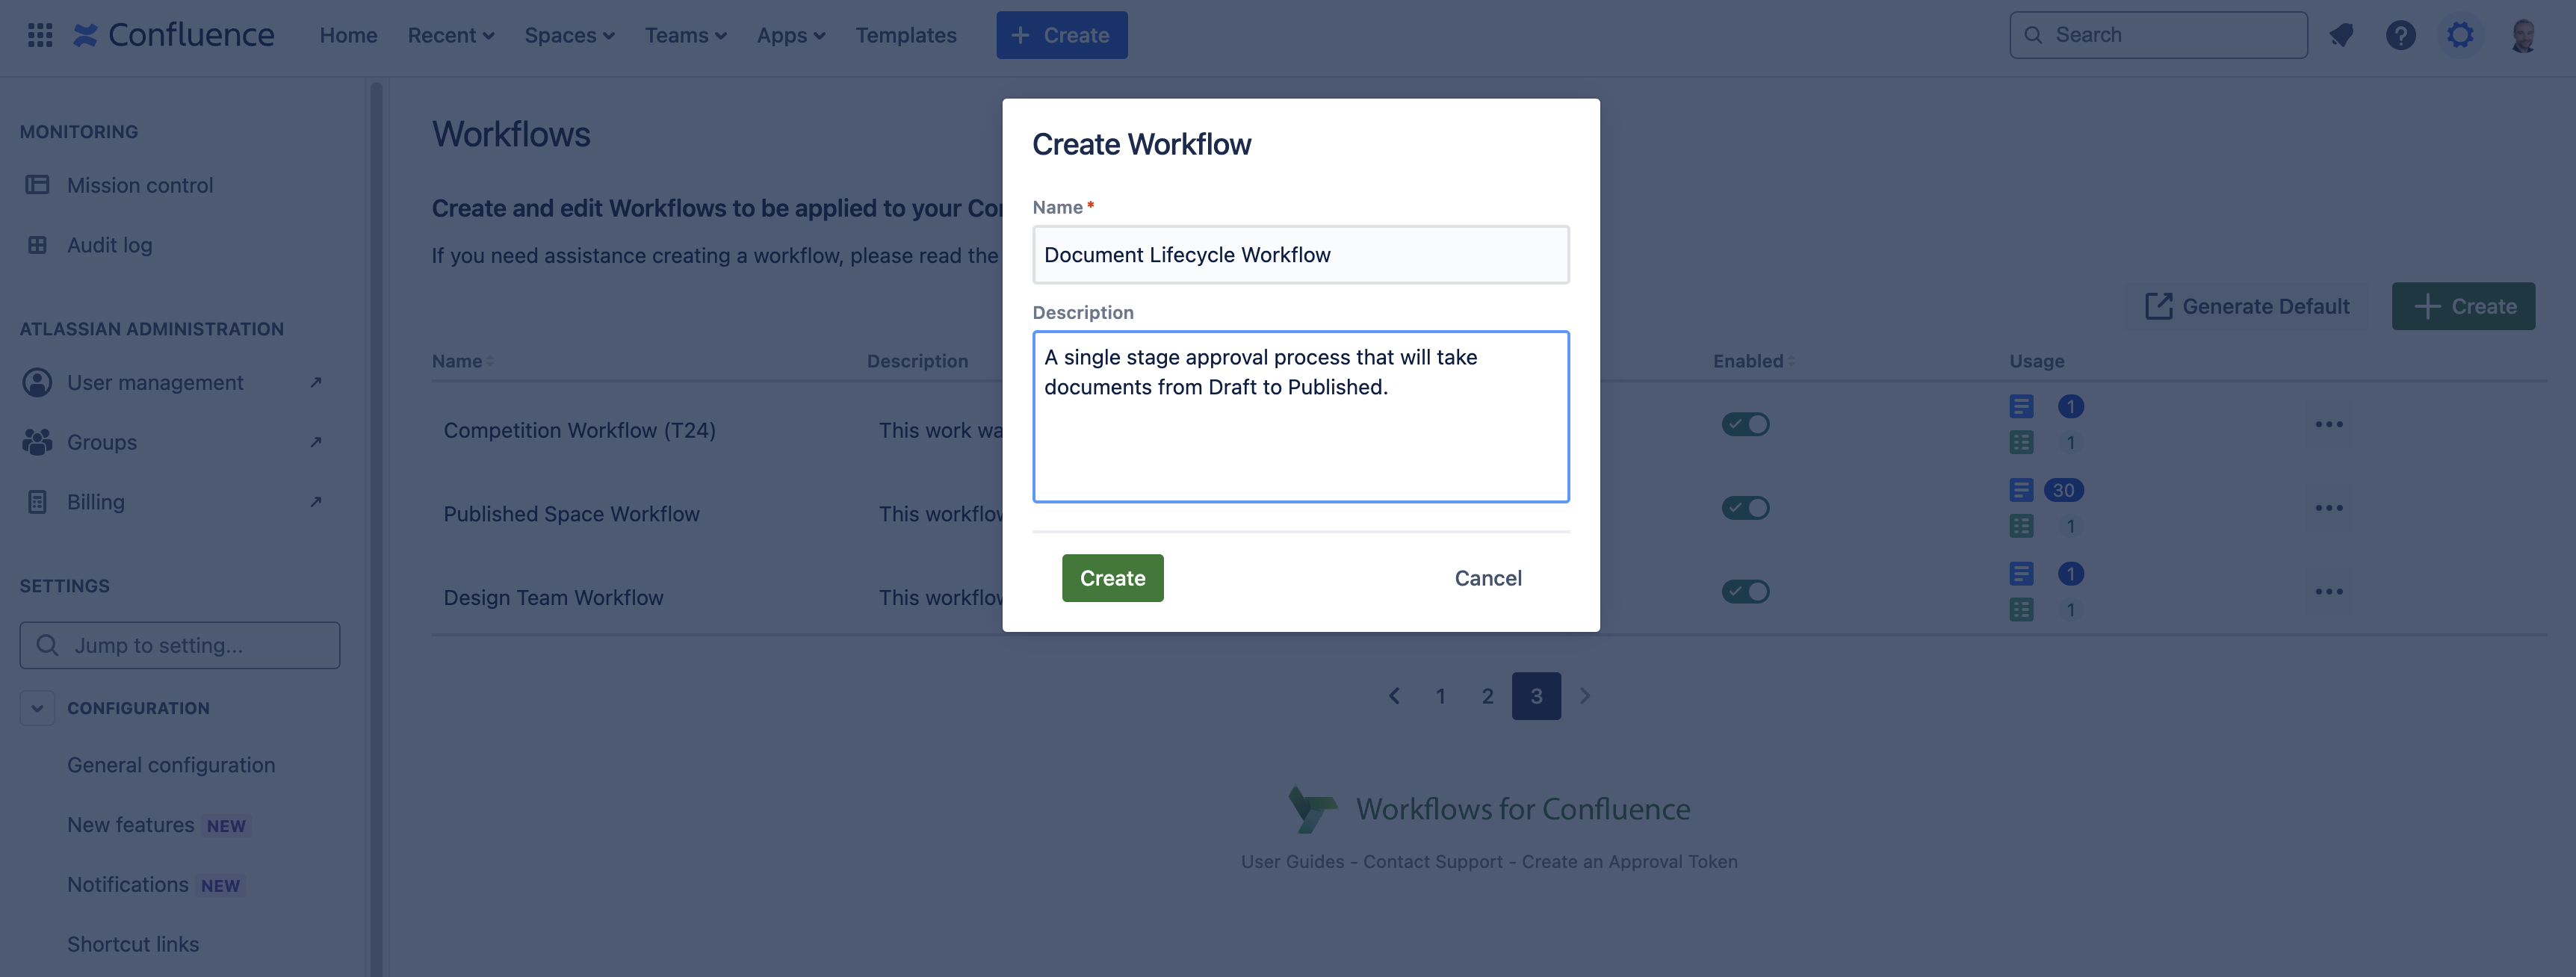
Give your workflow a name and description
Once completed, press Create and this will open the Workflow Builder.
The Workflow Builder is a drag-and-drop, no-code interface that allows you to create bespoke document workflows with ease. To create a workflow like the example above, drag and drop a few Page Statuses onto the canvas and name them accordingly.
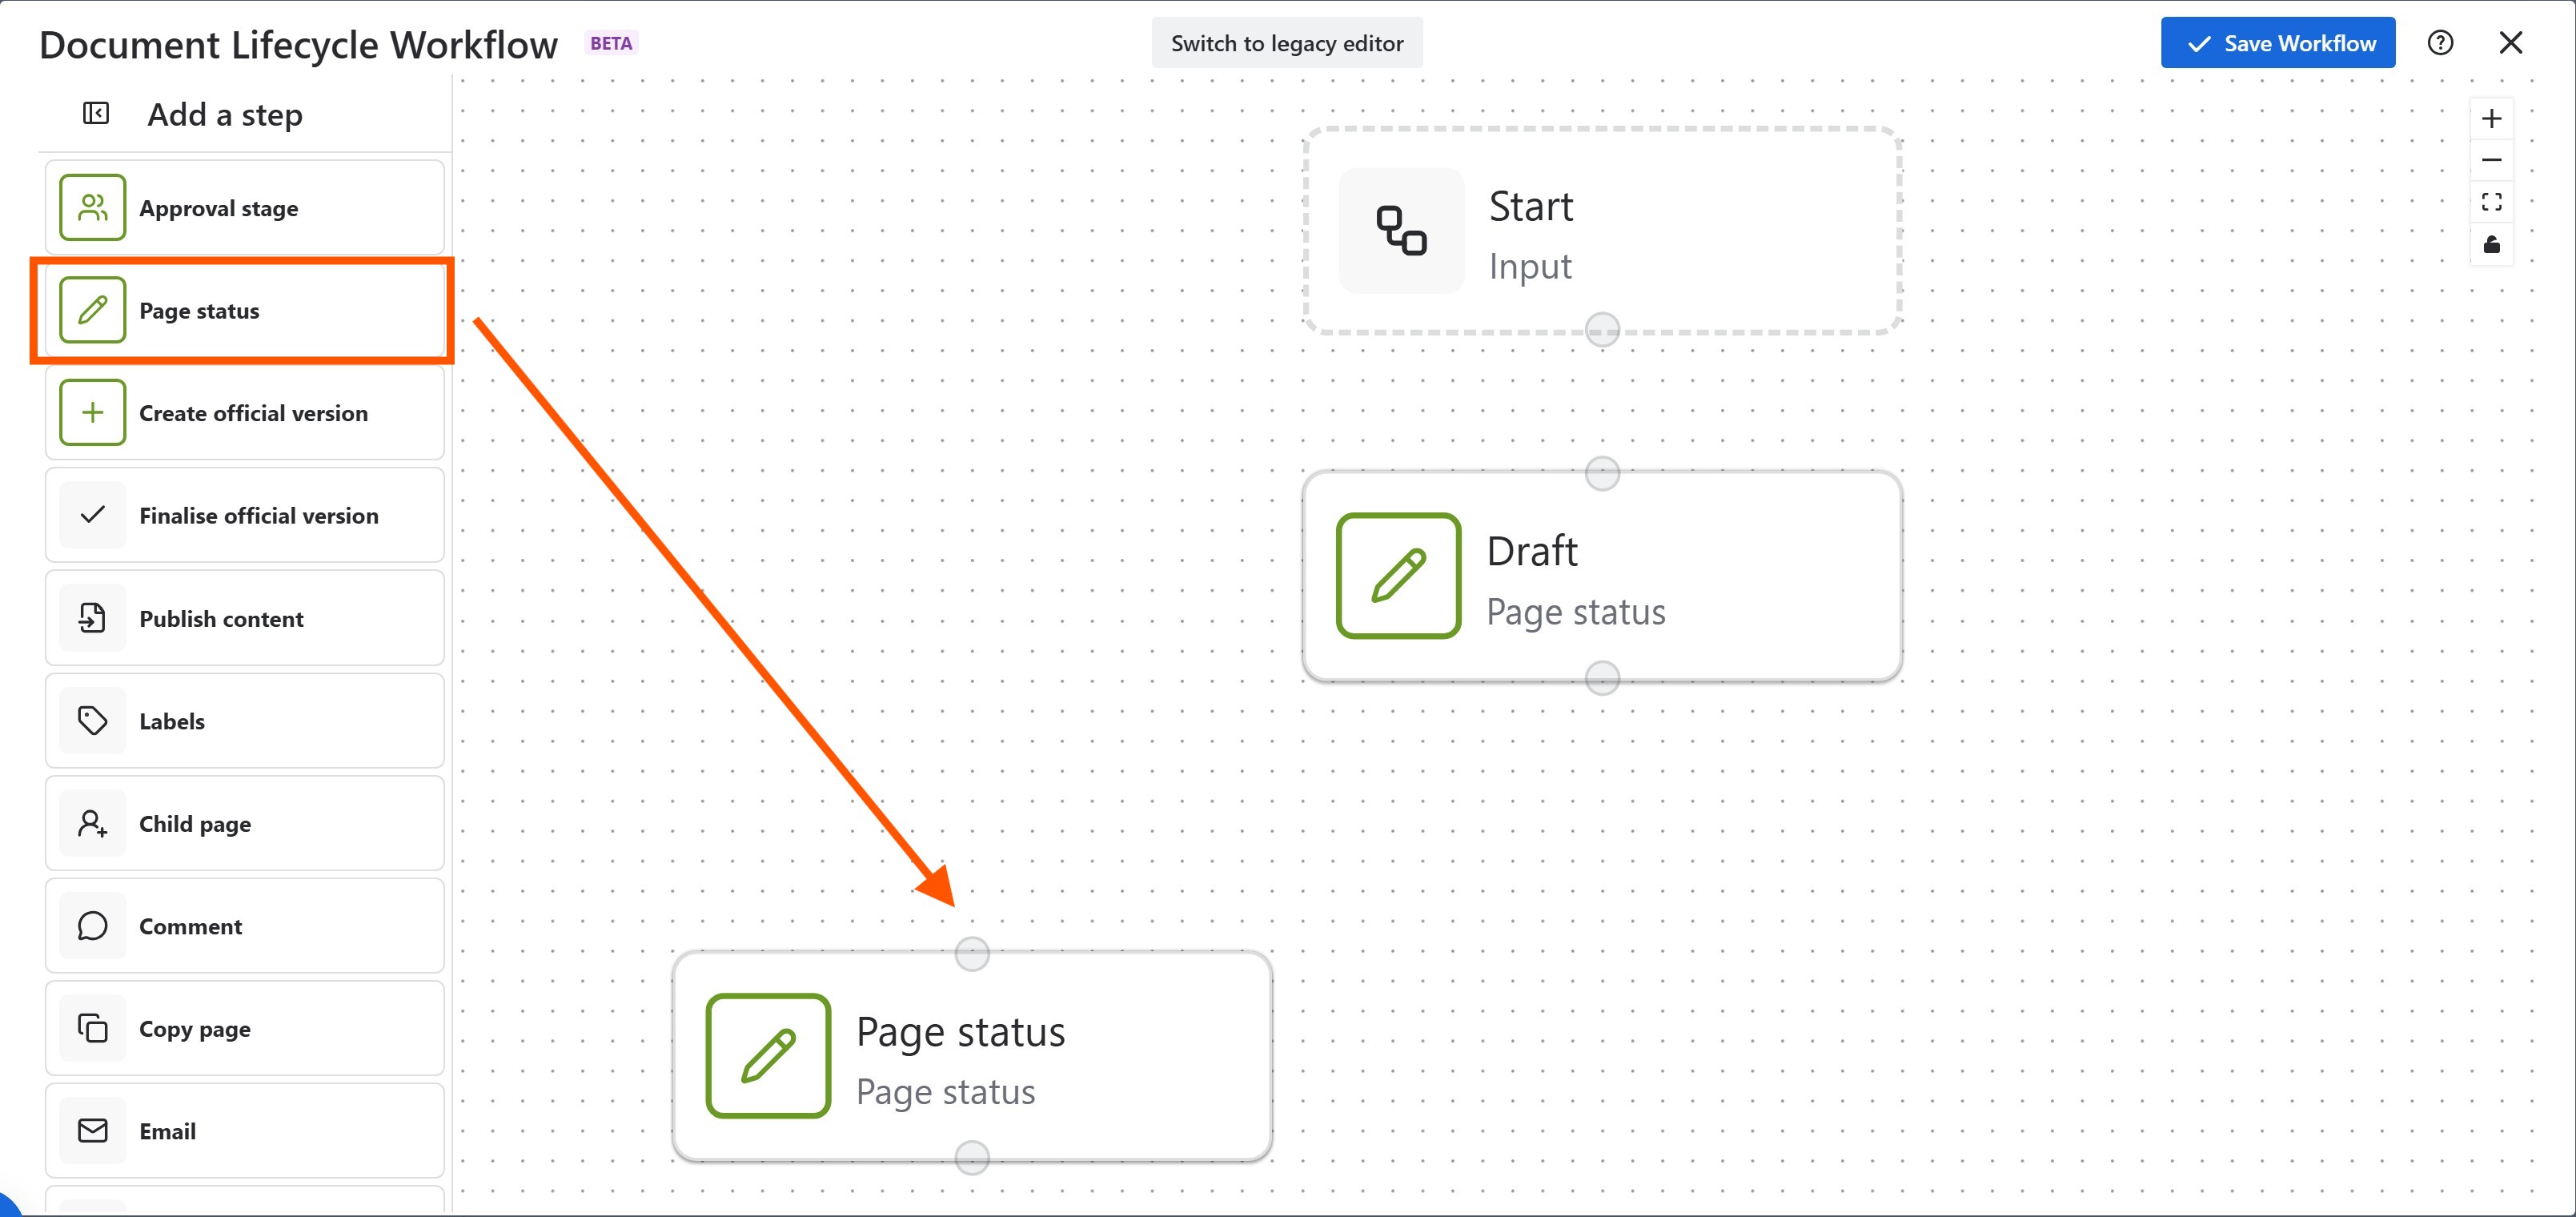
Drag and drop the page statuses into the Workflow Editor canvas
We also need to include one Approval Stage and name it 'Design Team Review'
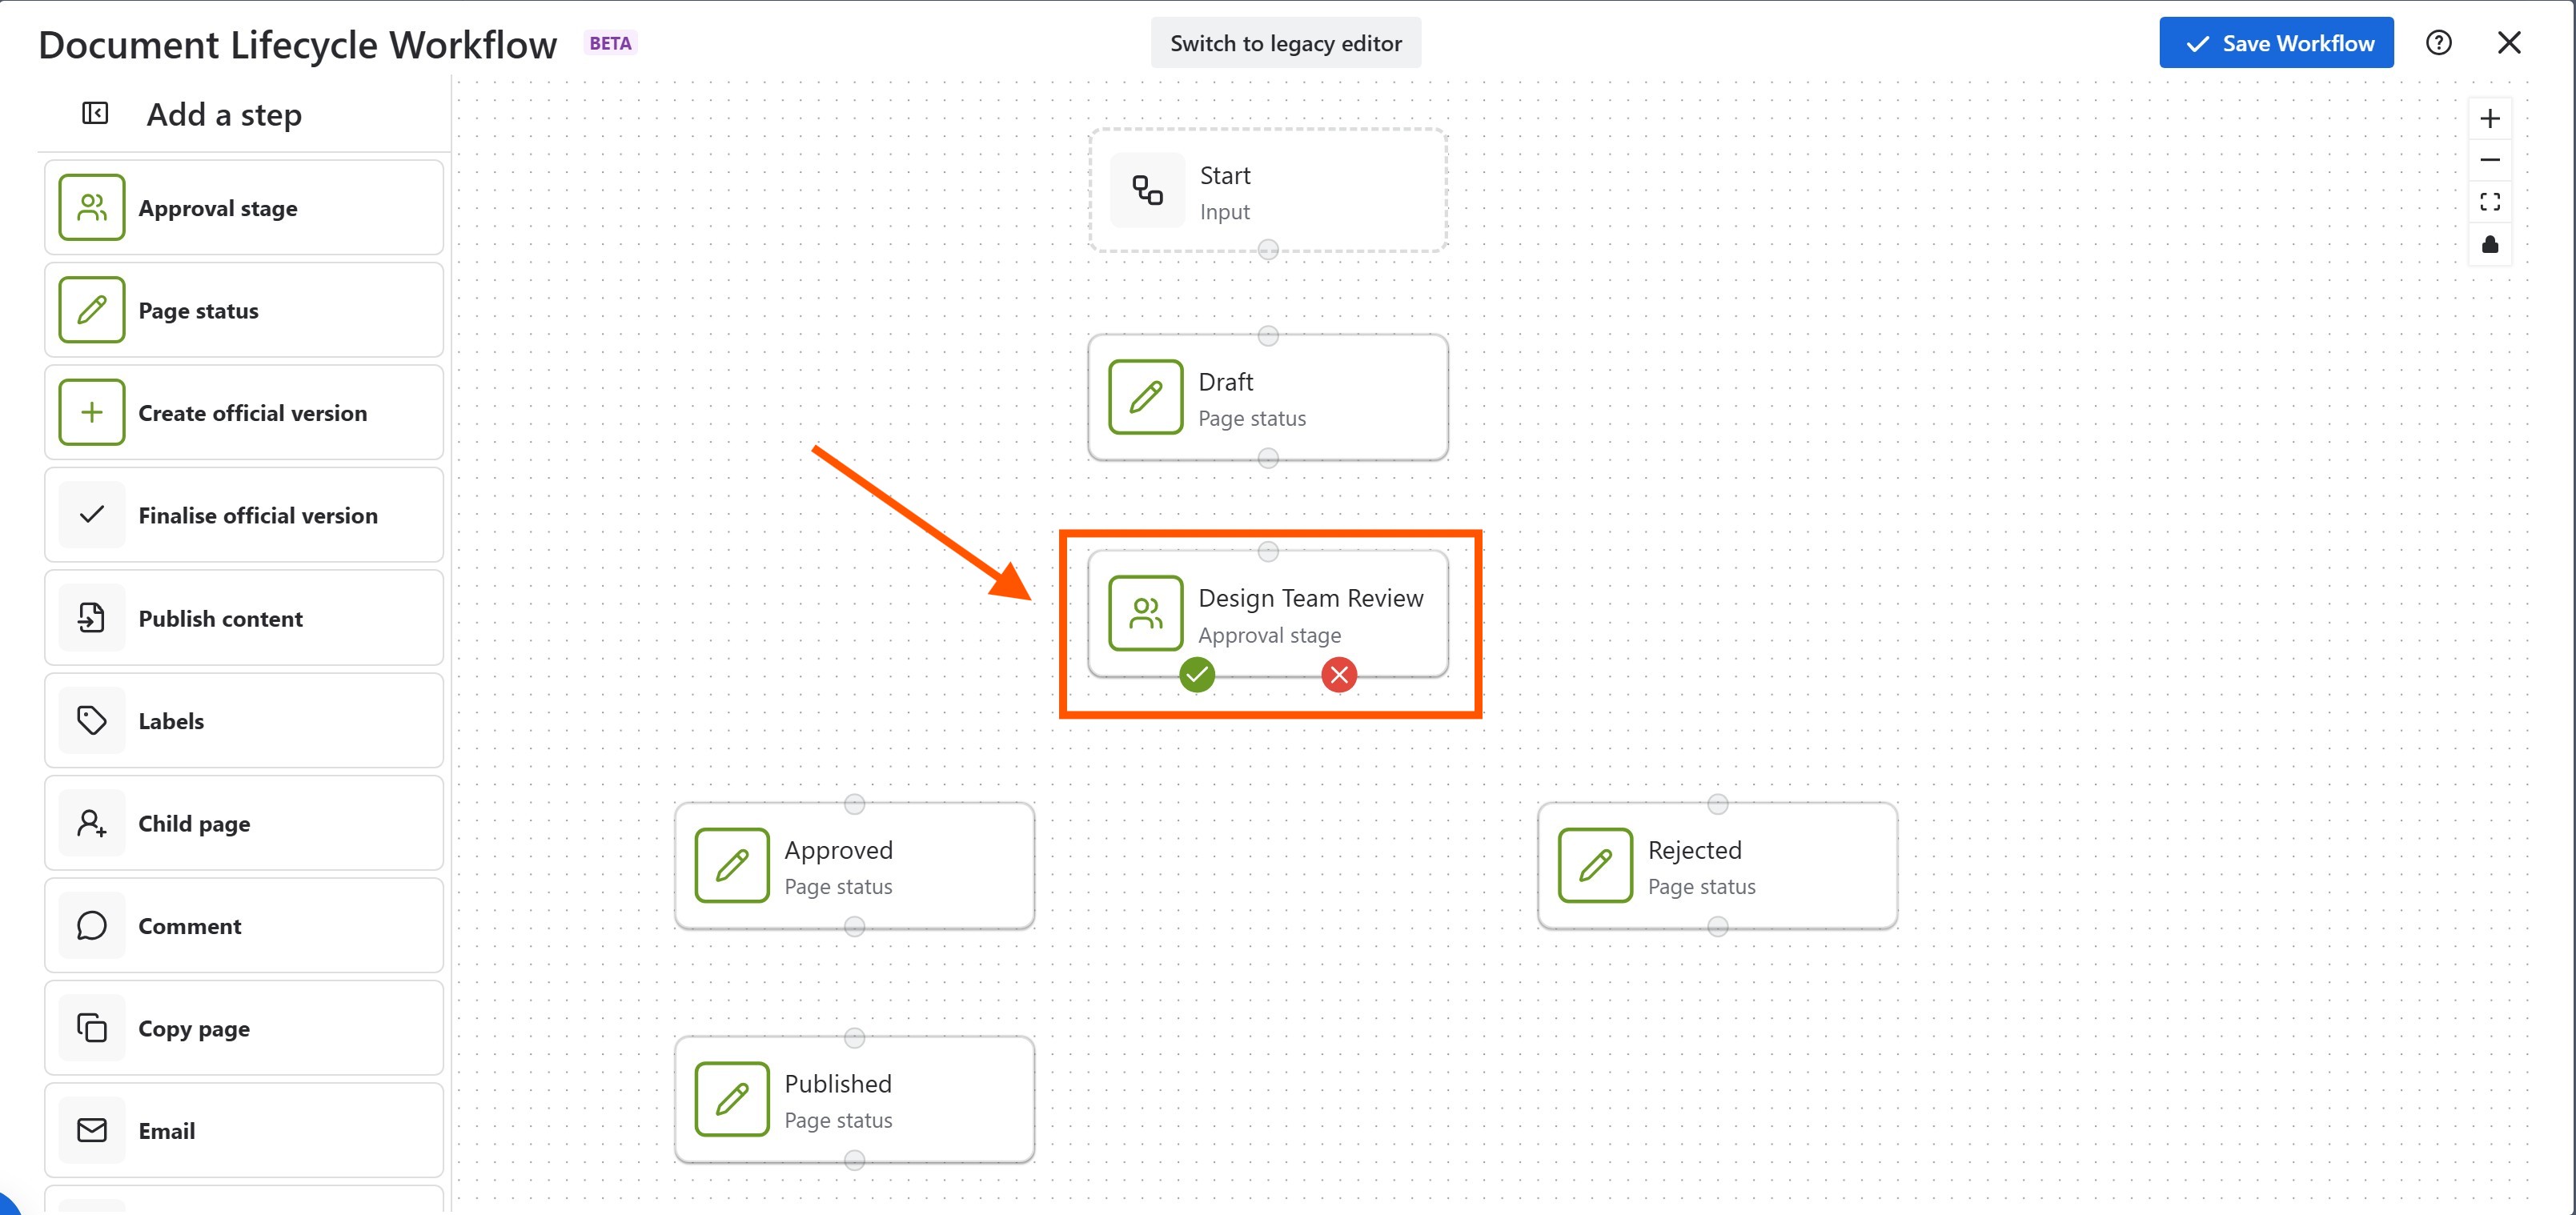
Add an Approval stage and name it ‘Design Team Review’
Once we have added the Approval Stage and remaining Page Statuses, its time to add the approvers to the workflow. You can do this by clicking on the Approval Stage and adding the users or groups within the right-hand configuration settings.
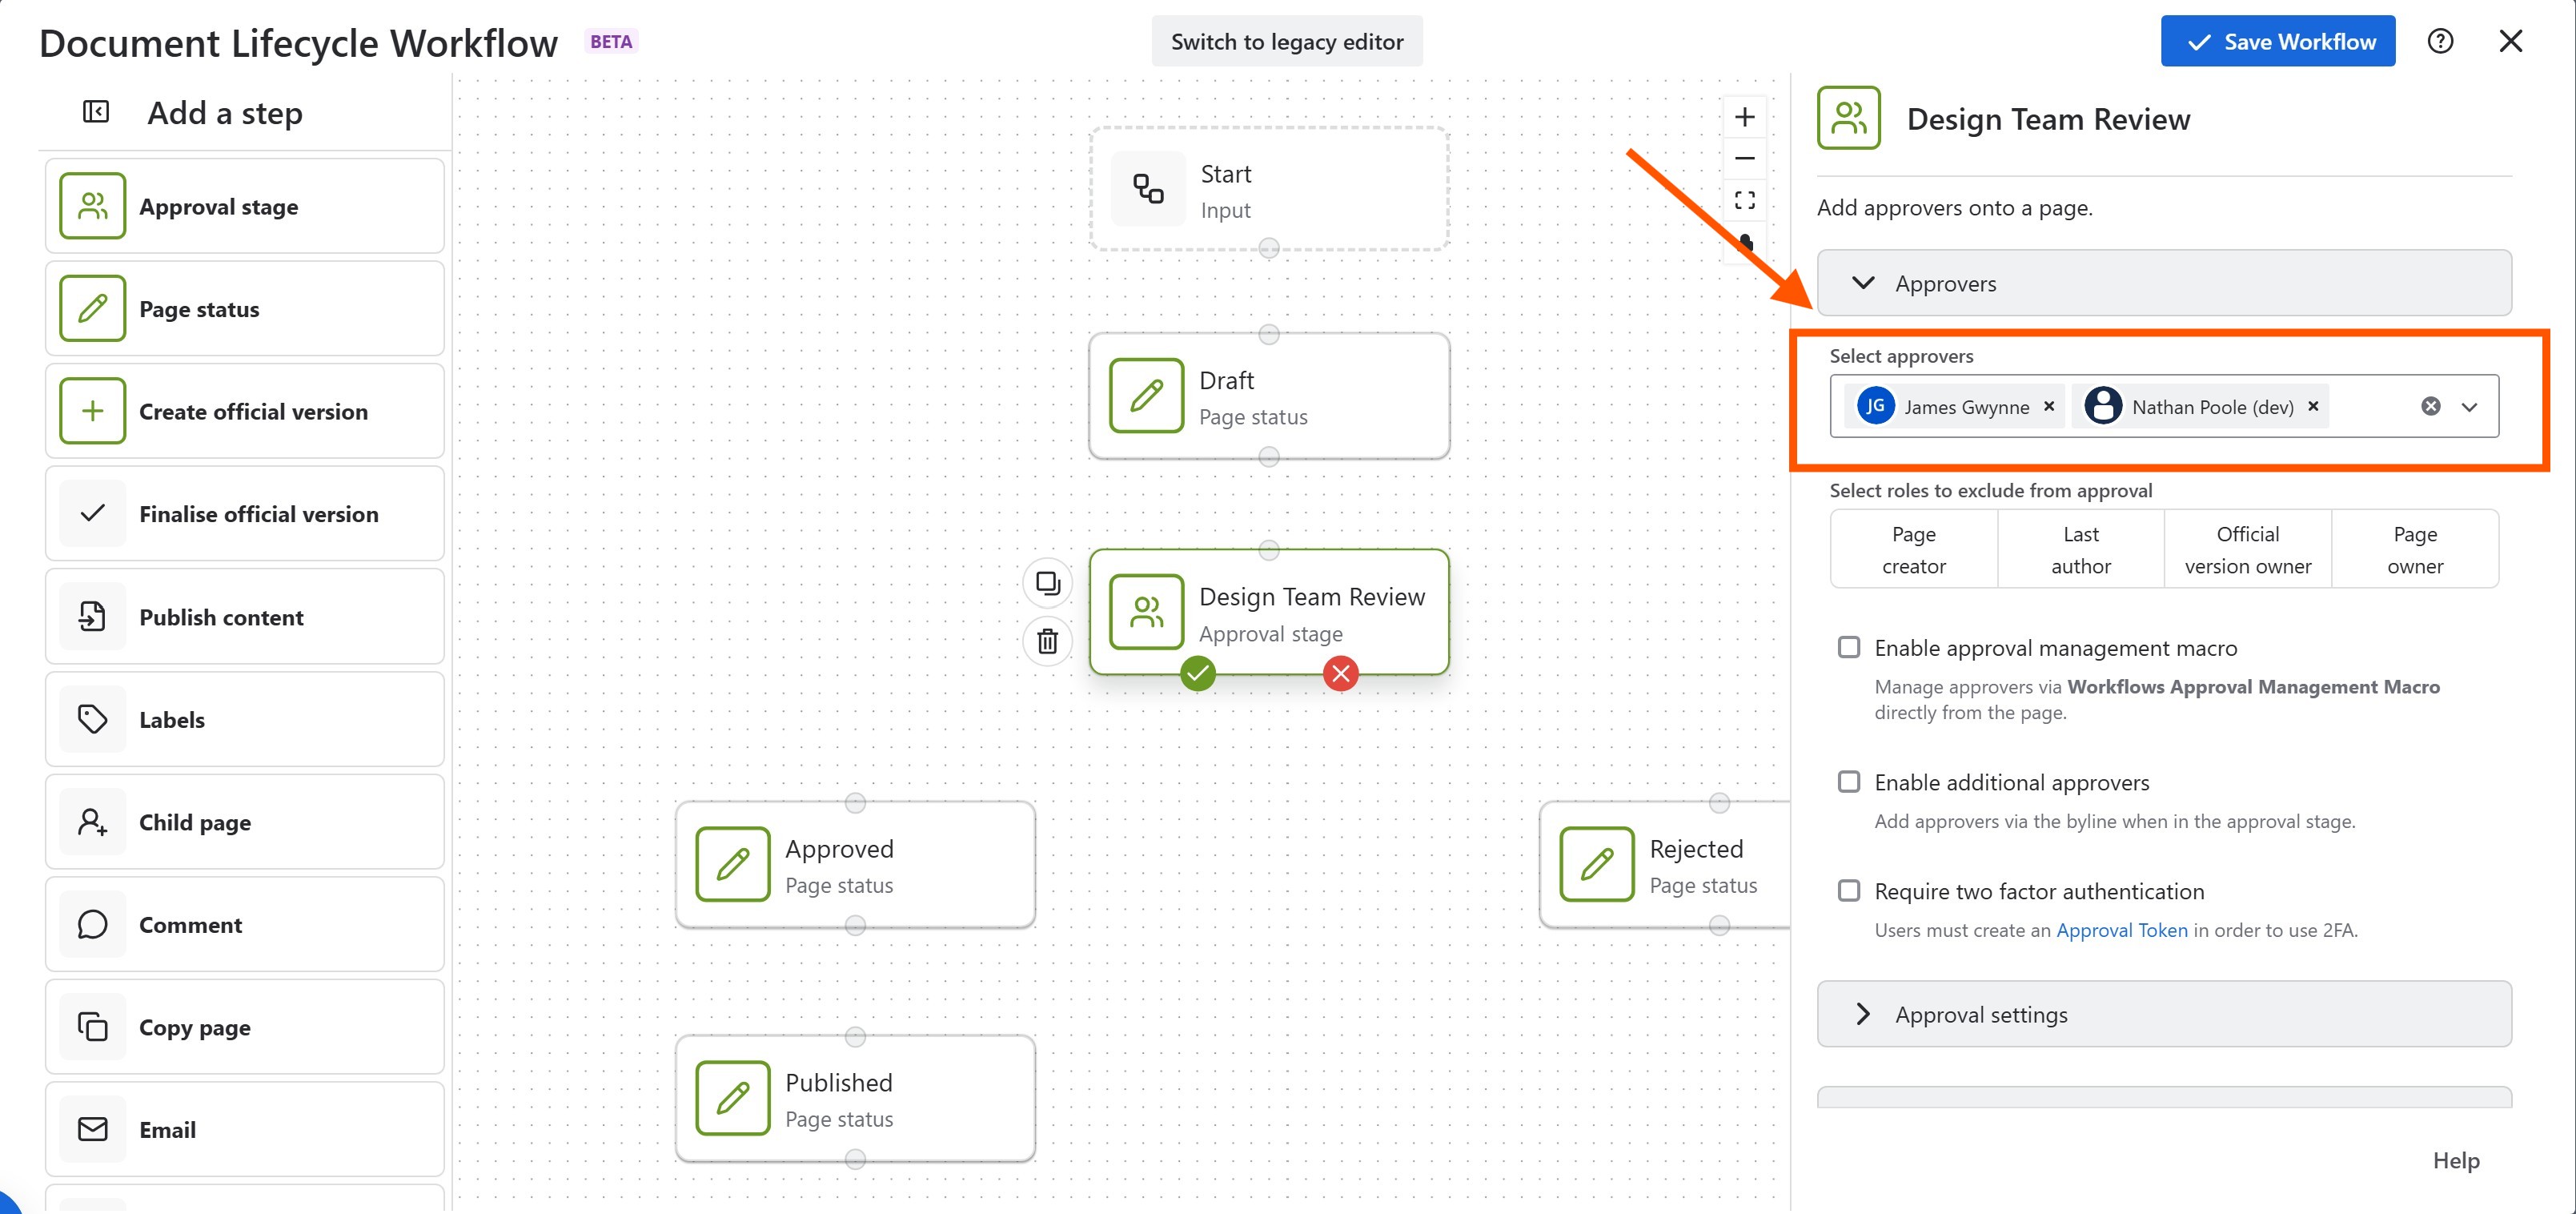
Add your approvers to the Approval stage
Now that we have all the steps included in the document workflow, it is time to connect them all together. You can do this using the little connectors at the top/bottom of each step.
Connect them as illustrated below until the entire workflow is connected together.
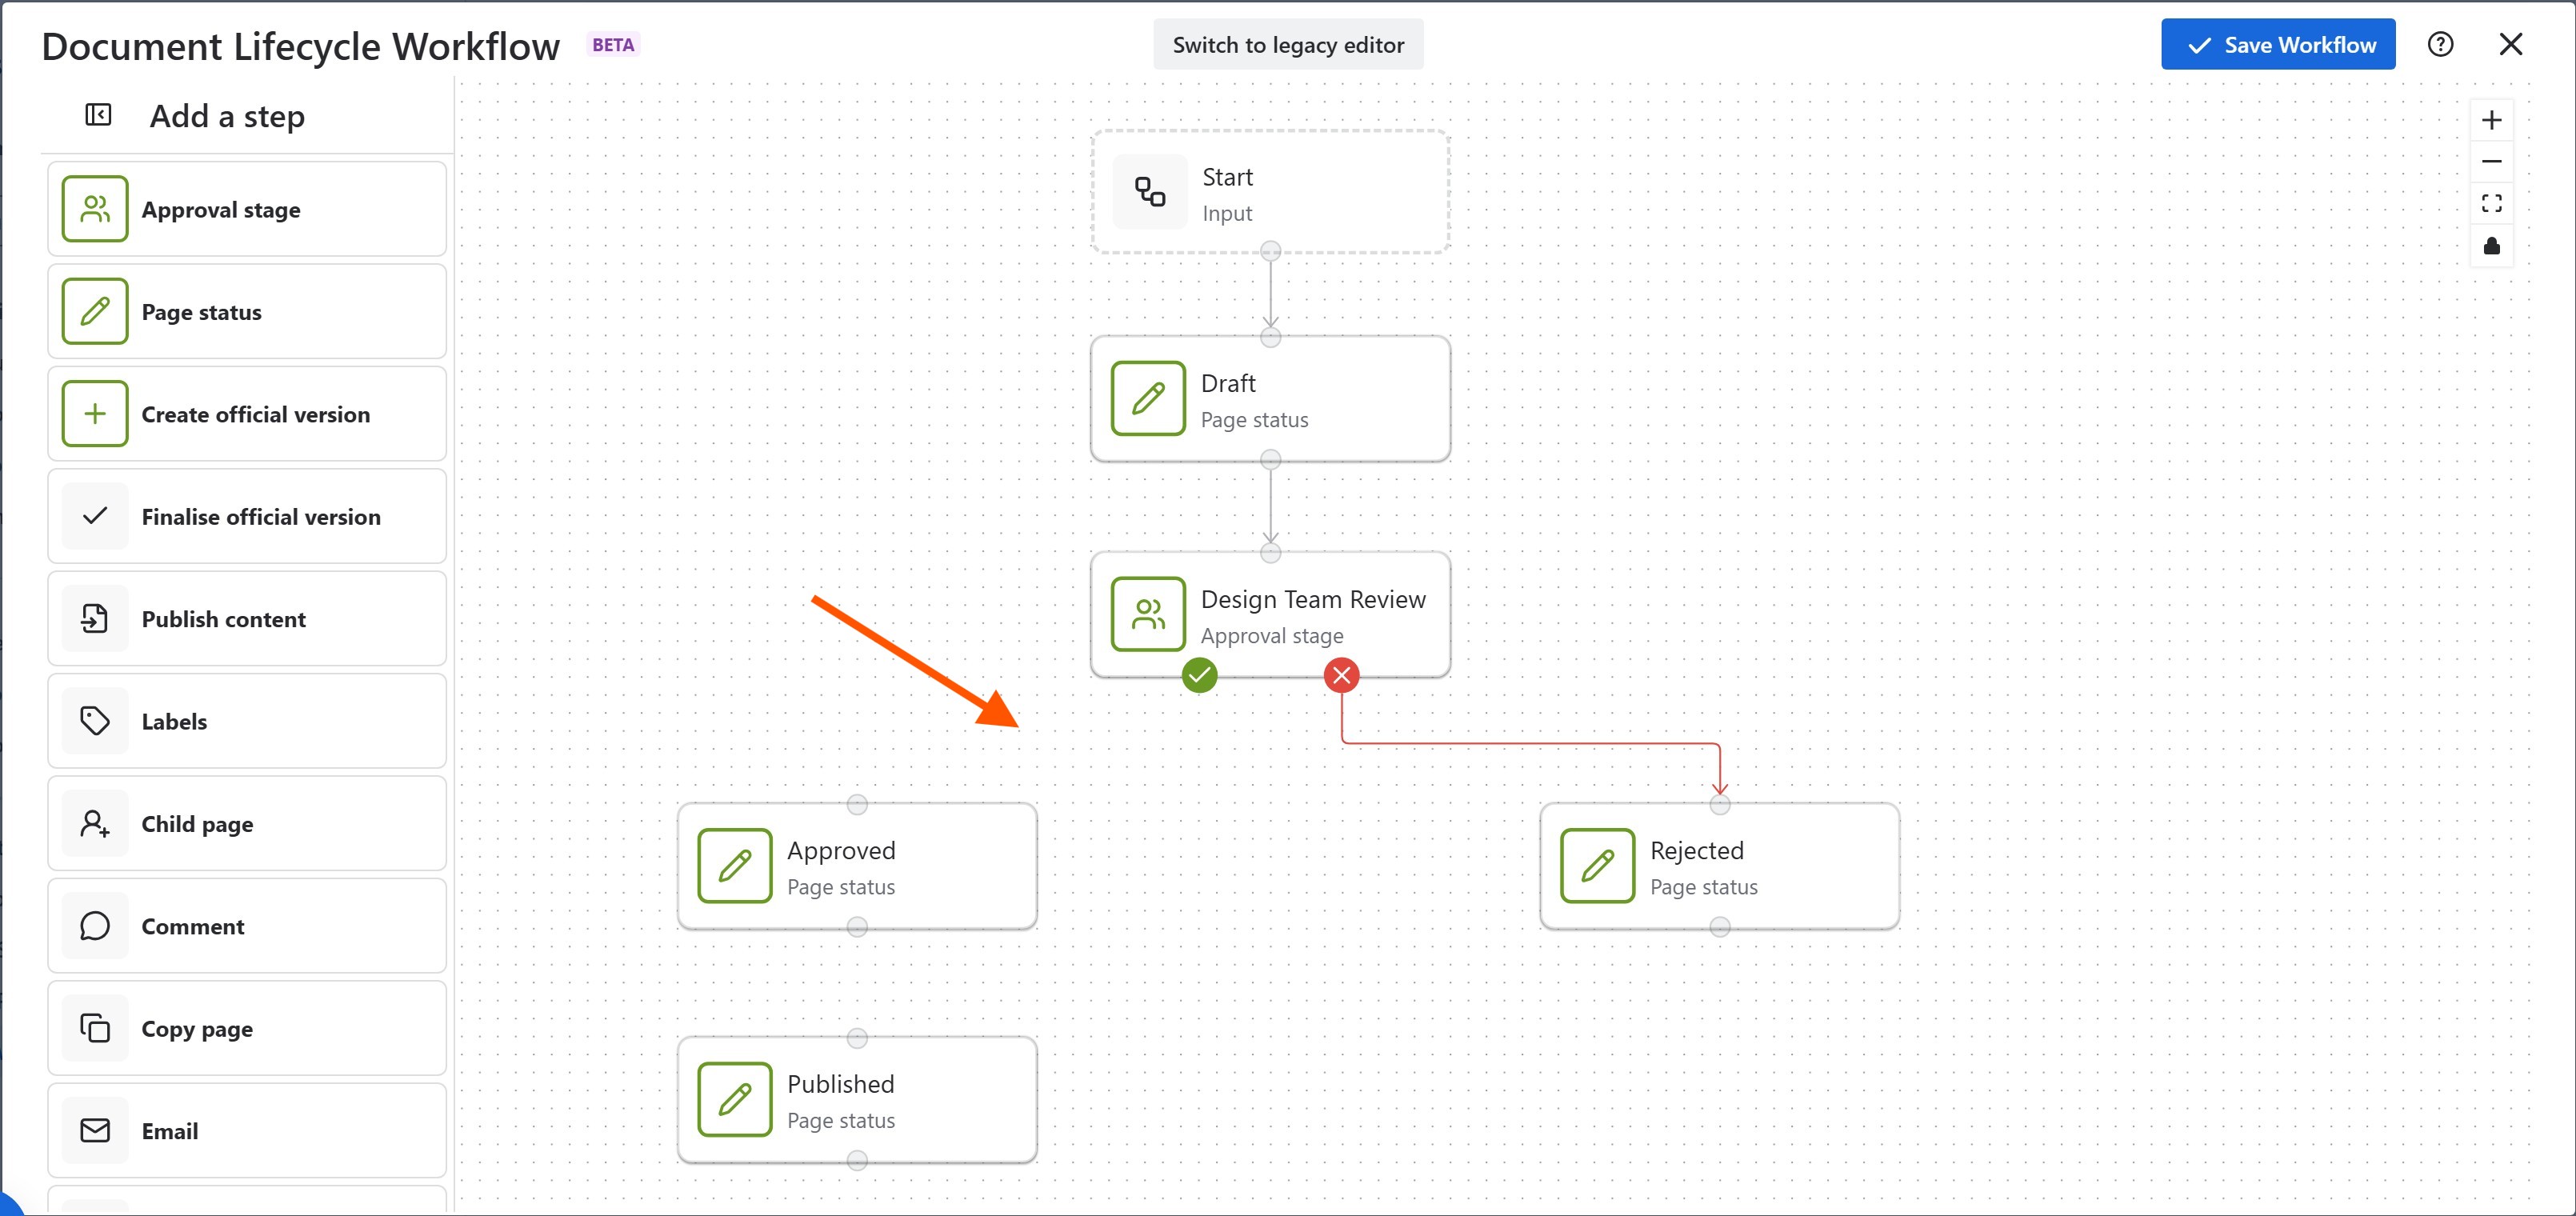
Connect the document workflow together before it is saved
With that last stage complete, the workflow is now ready to be saved 🎉
You can save it by pressing the Save Workflow button in the top right corner of the workflow builder.
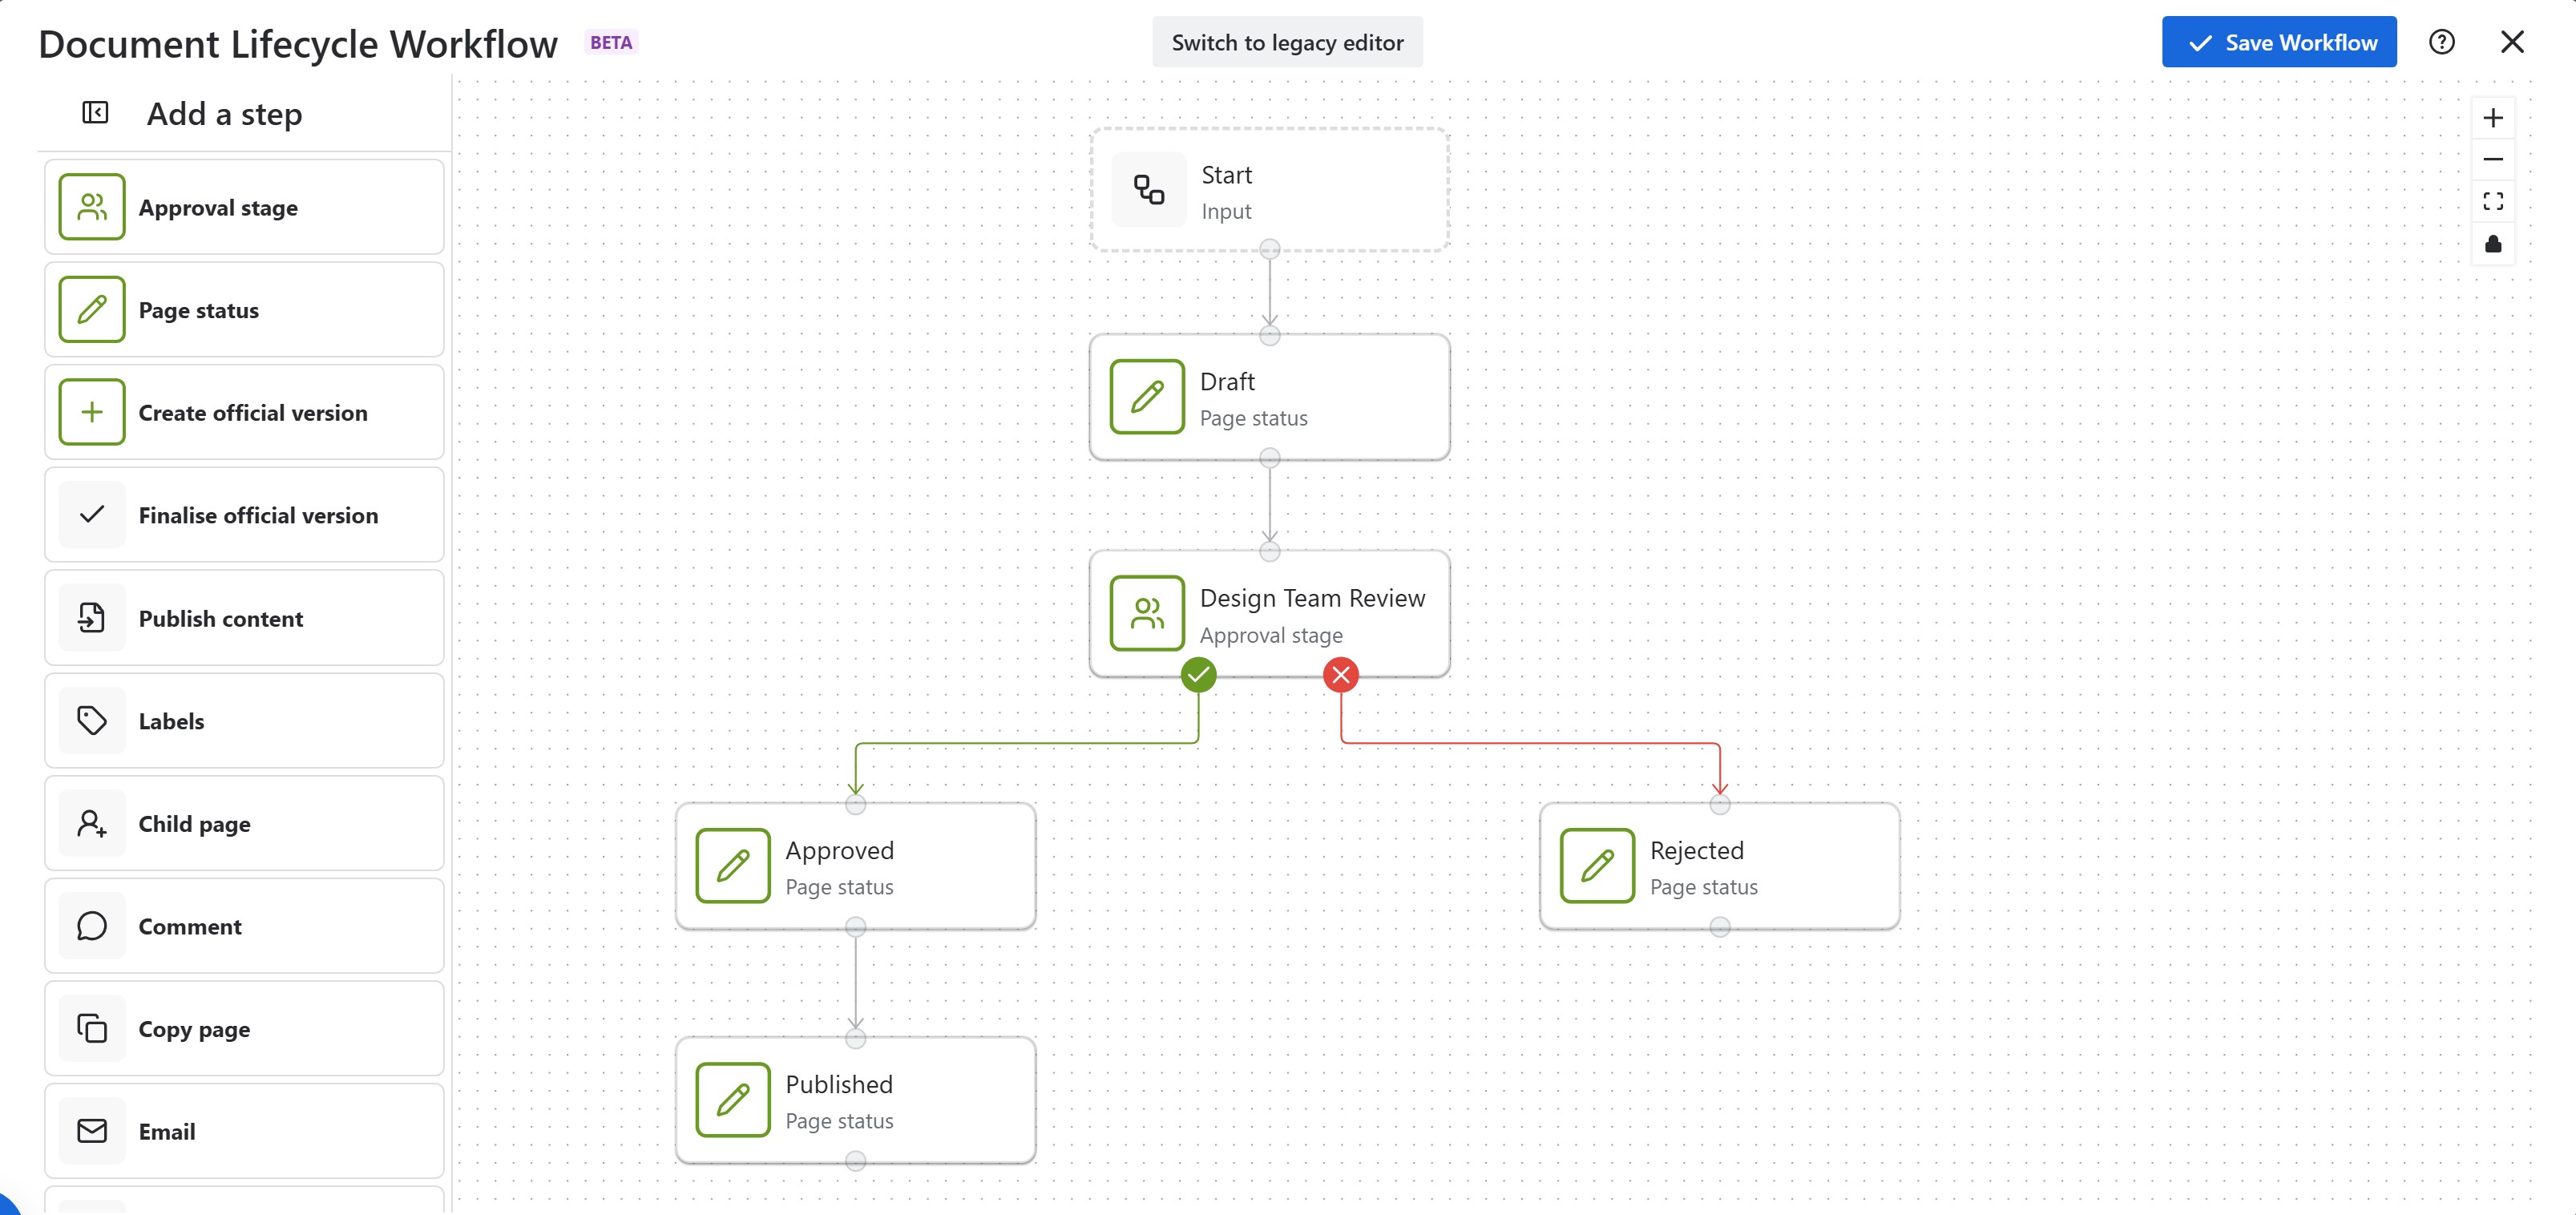
How to apply the workflow to your Confluence page
Once the workflow has been created, we need to ensure it has been activated and is available throughout Confluence. You can activate any workflow by visiting the Workflows Manager in the Site/Space Administrator settings under Workflows and ensure the toggle is activated, as shown below.
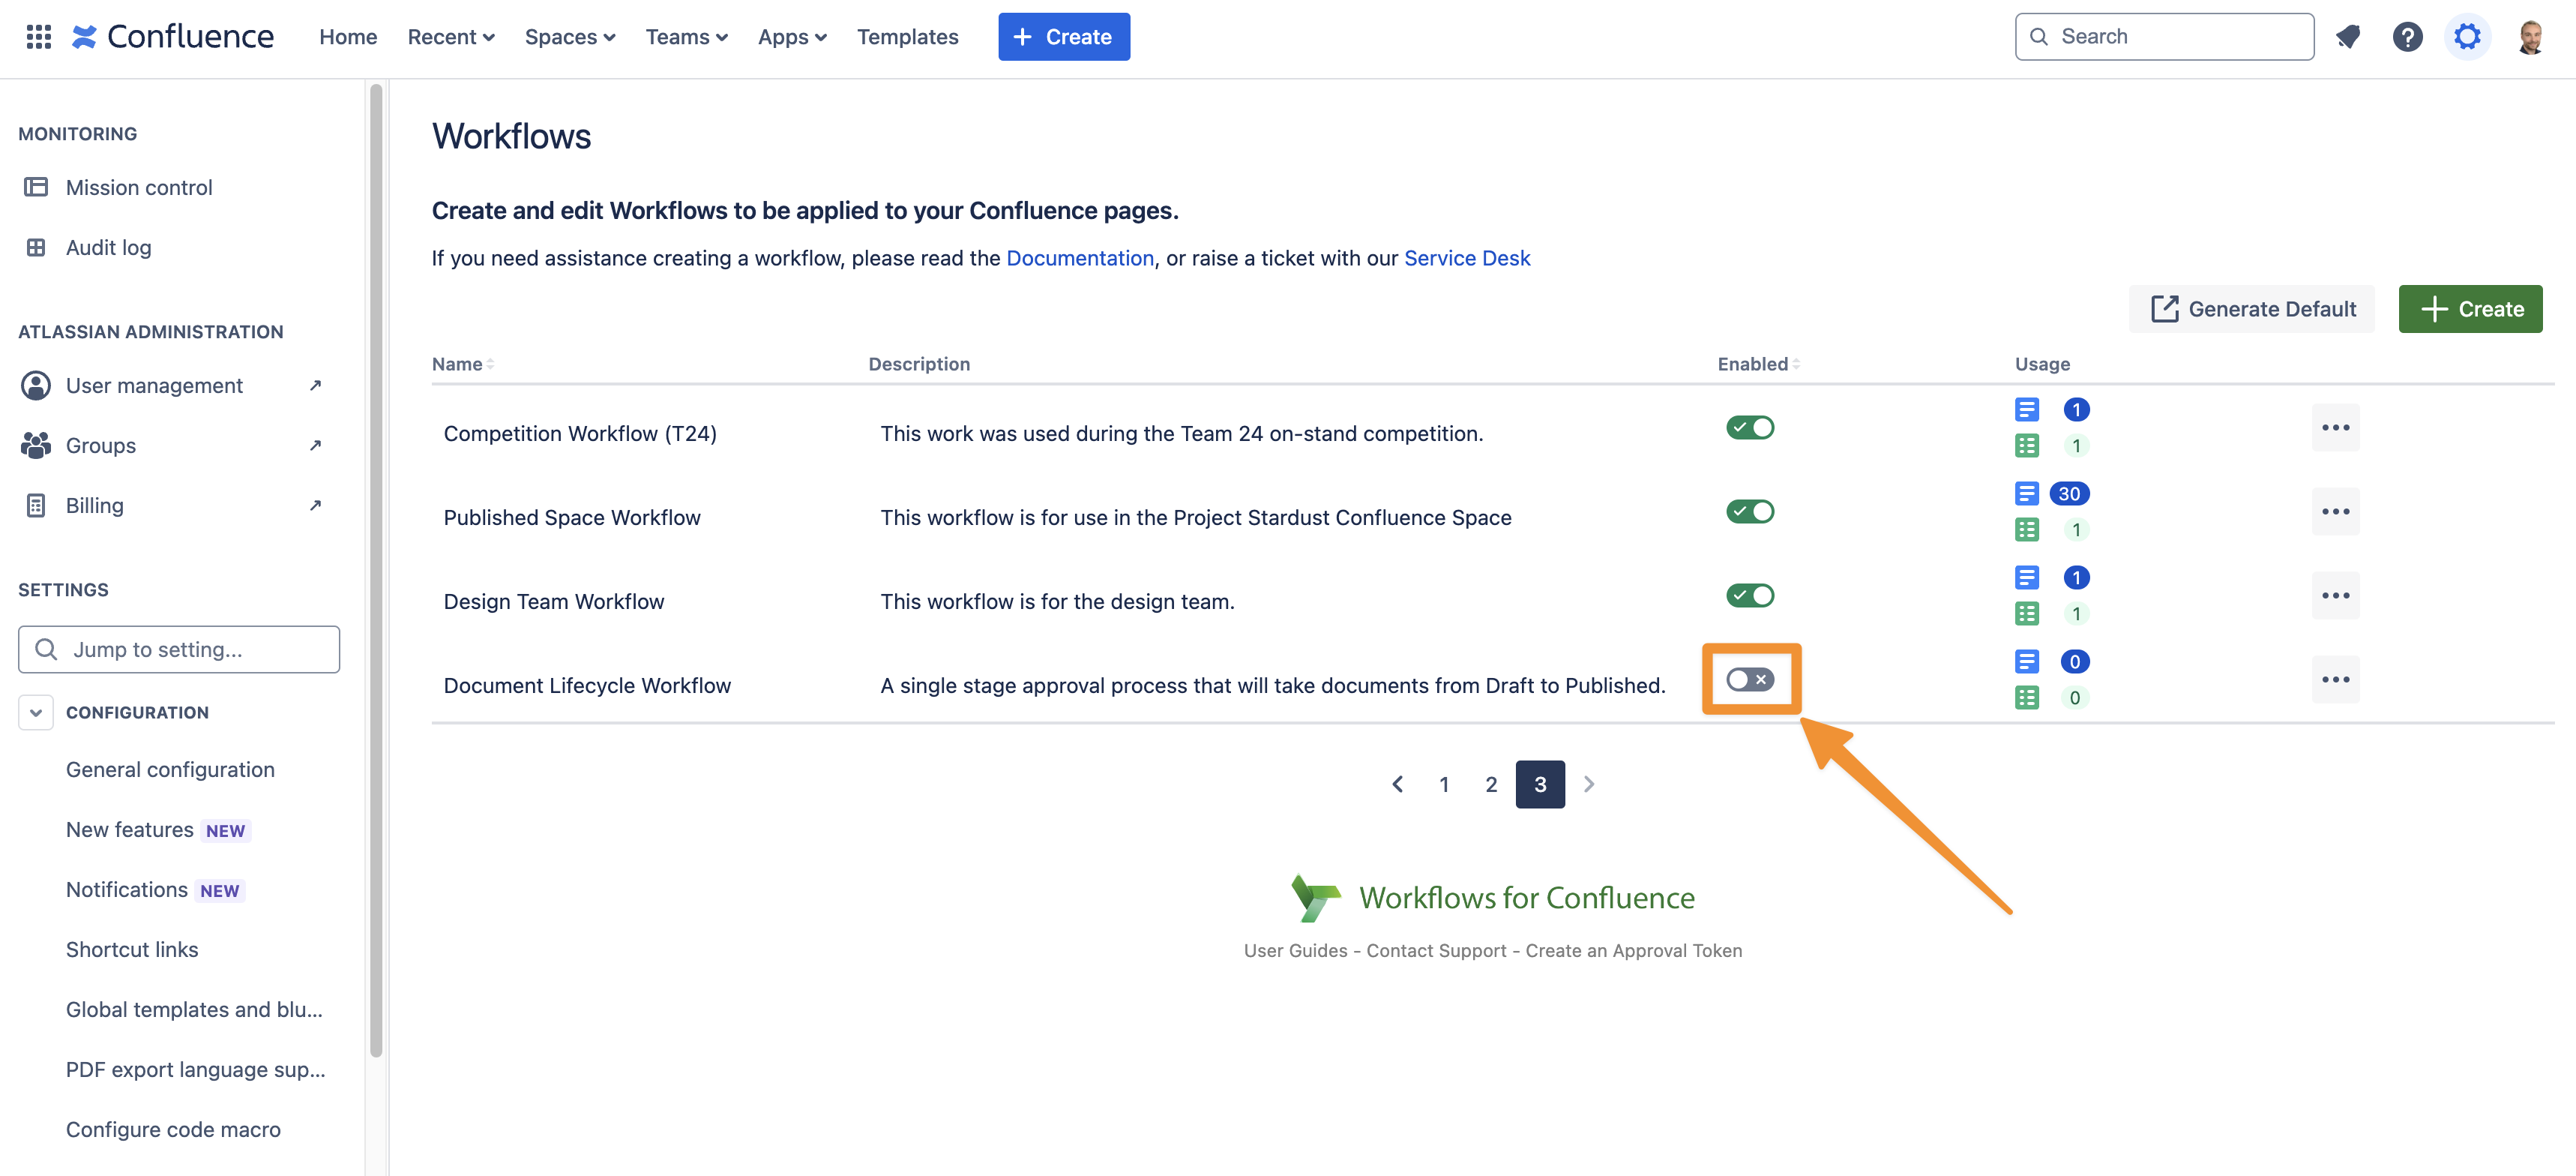
Activate your document workflows for use throughout Confluence
Now that the document workflow is active, its time to add it to the Confluence page. Choose any Confluence page on your site where you want to add this workflow.
Once you have navigated to the page, select the Apply Workflow option as shown below.
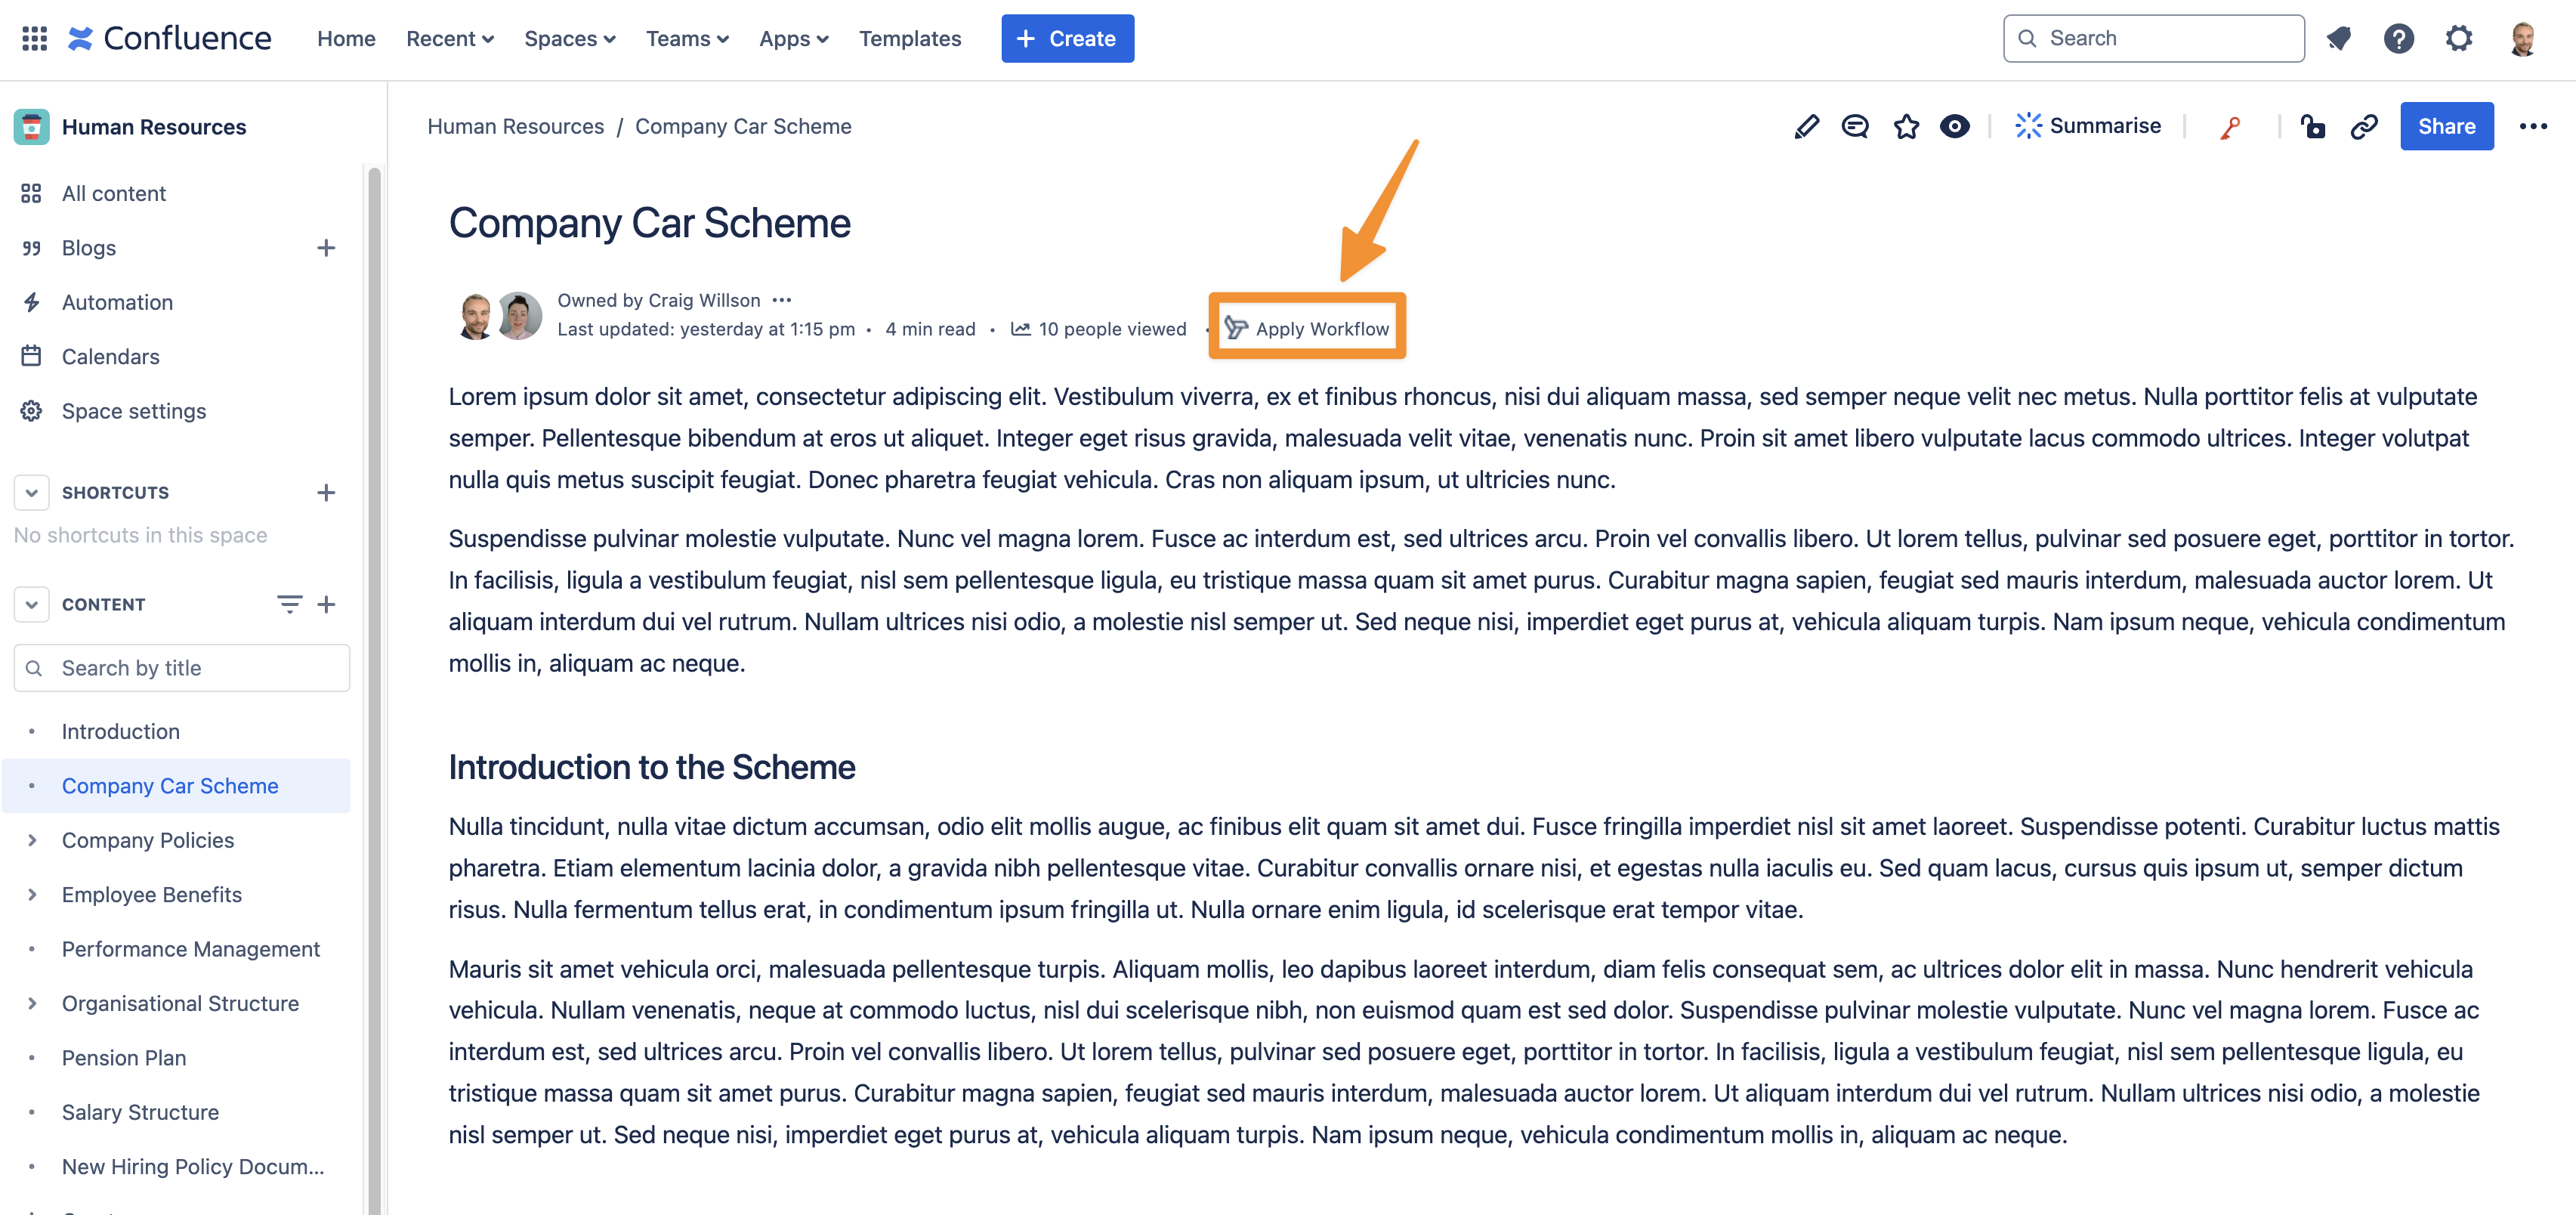
Select the Apply Workflow button to add a workflow to your Confluence page
Select the workflow from the drop-down list and press Apply.
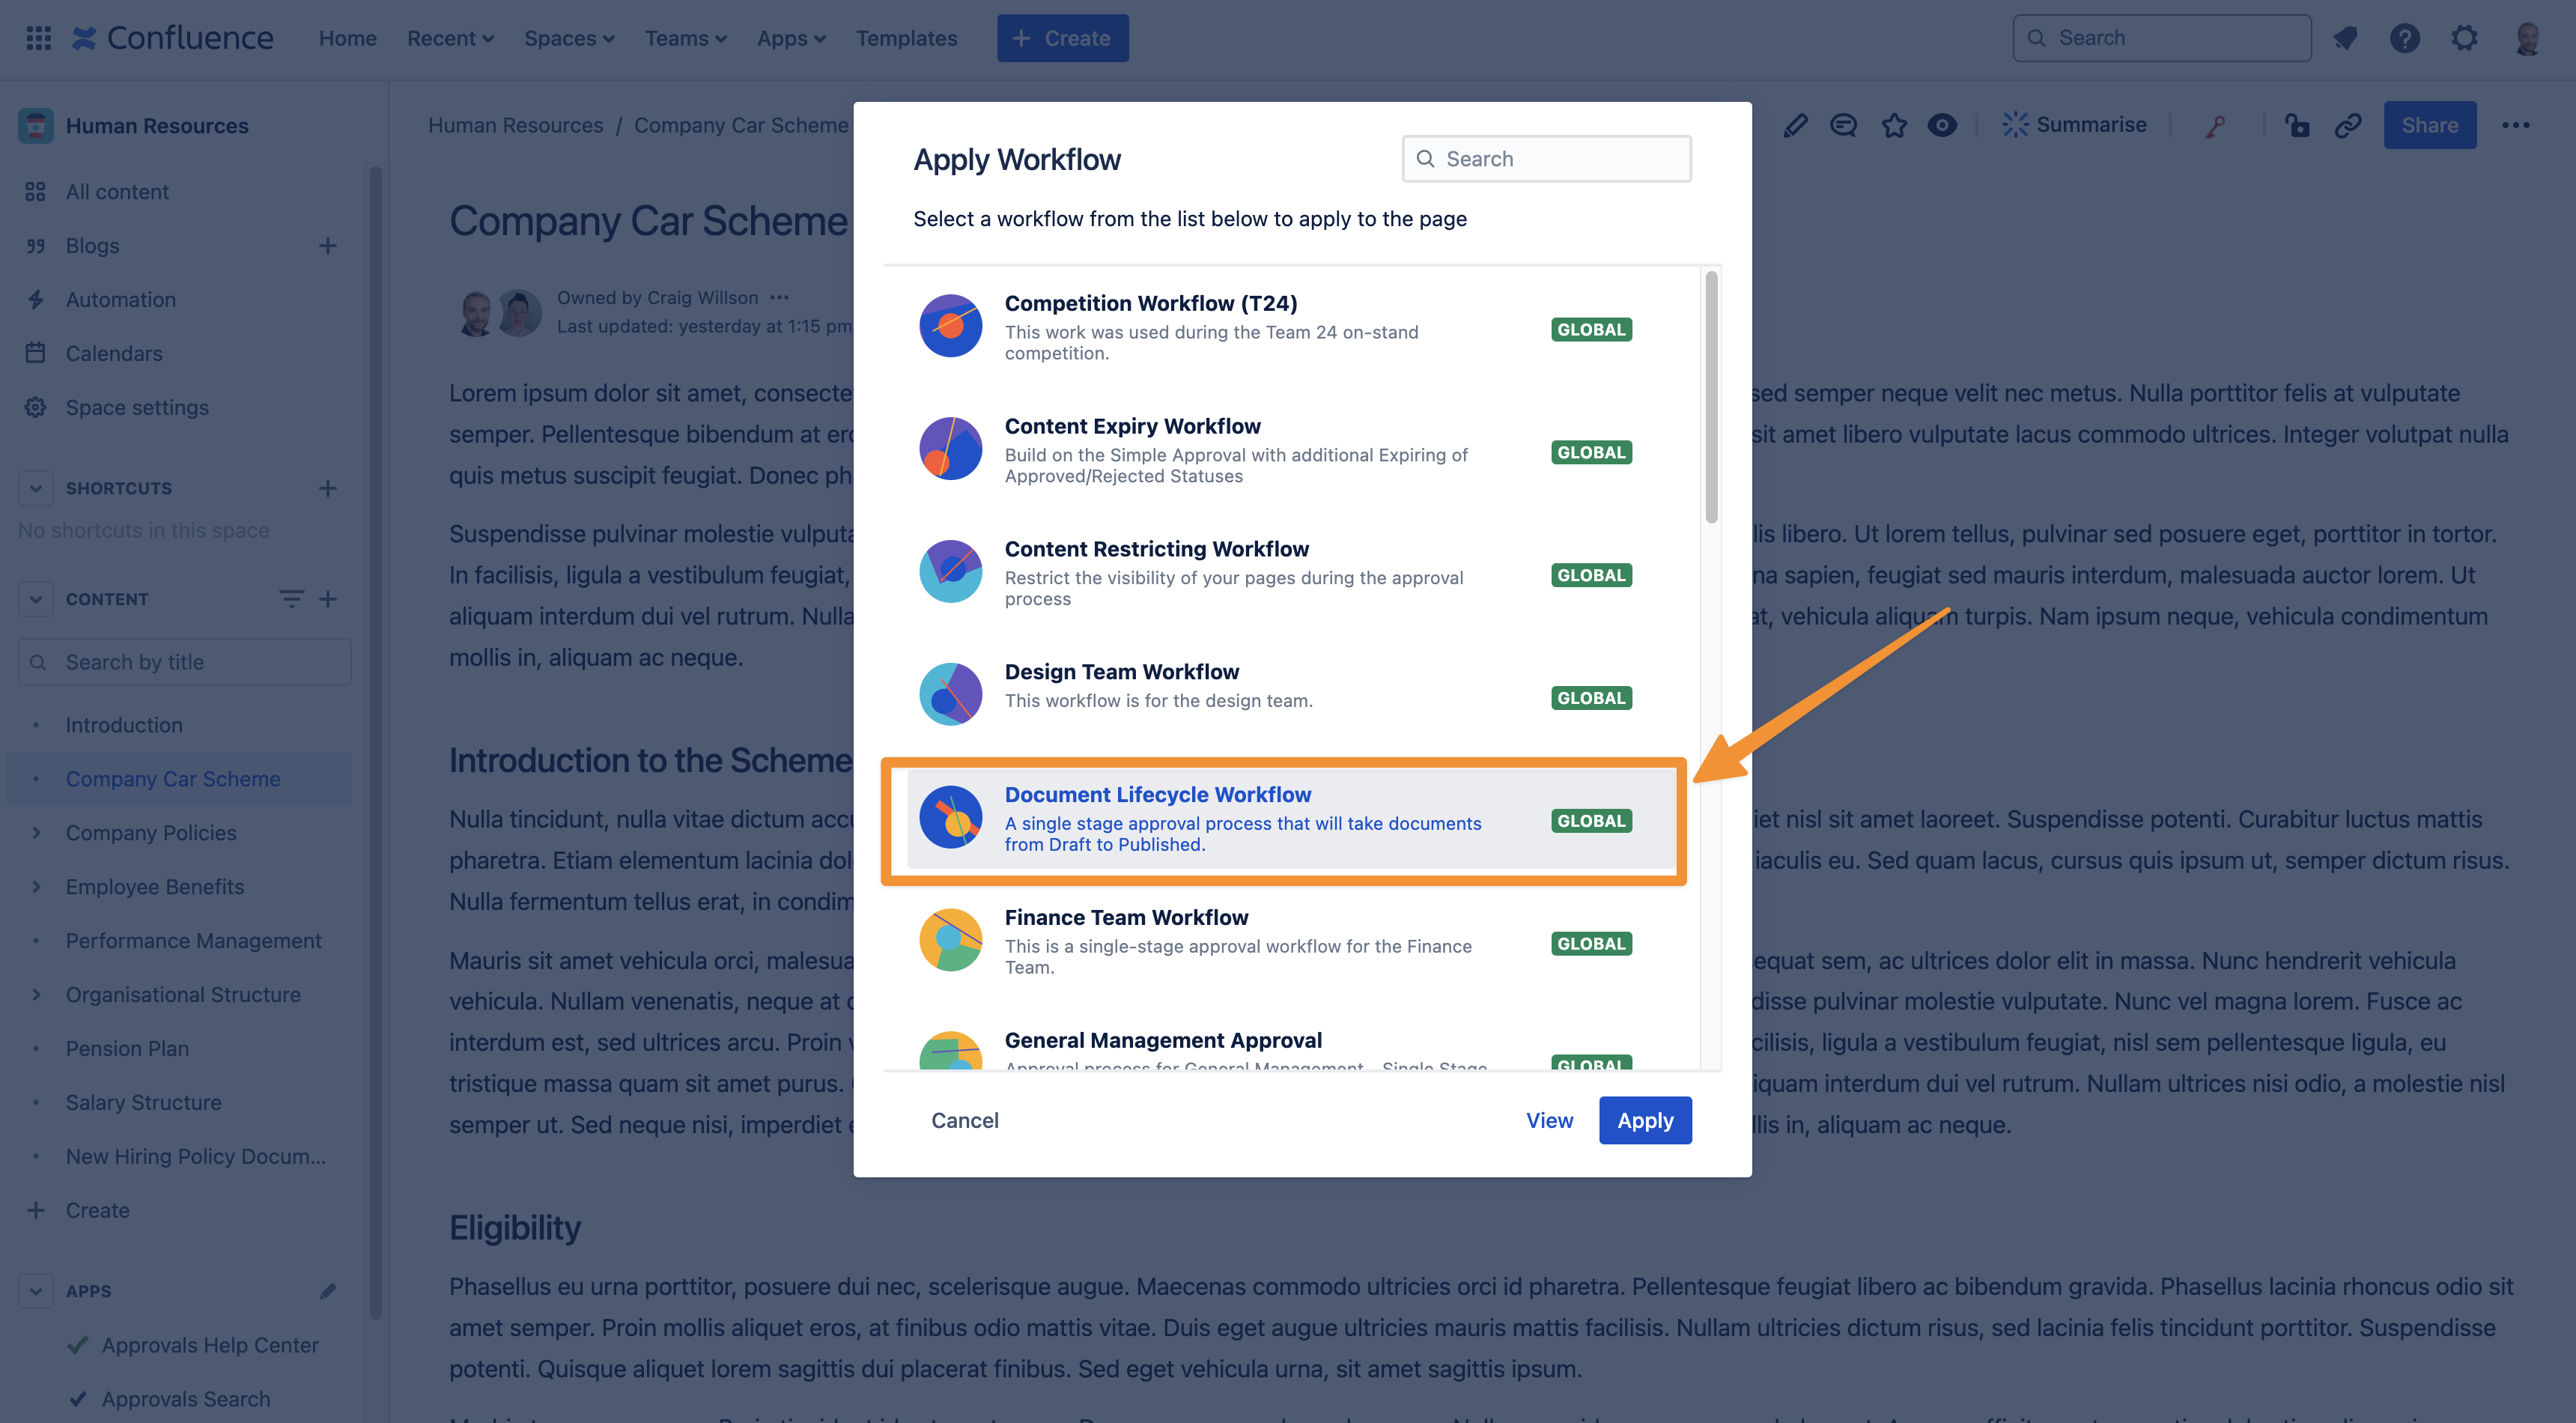
Select your workflow from the list
The workflow is then applied to your Confluence page and it should begin at the first step, which in this case is Draft. It’s as easy as that!
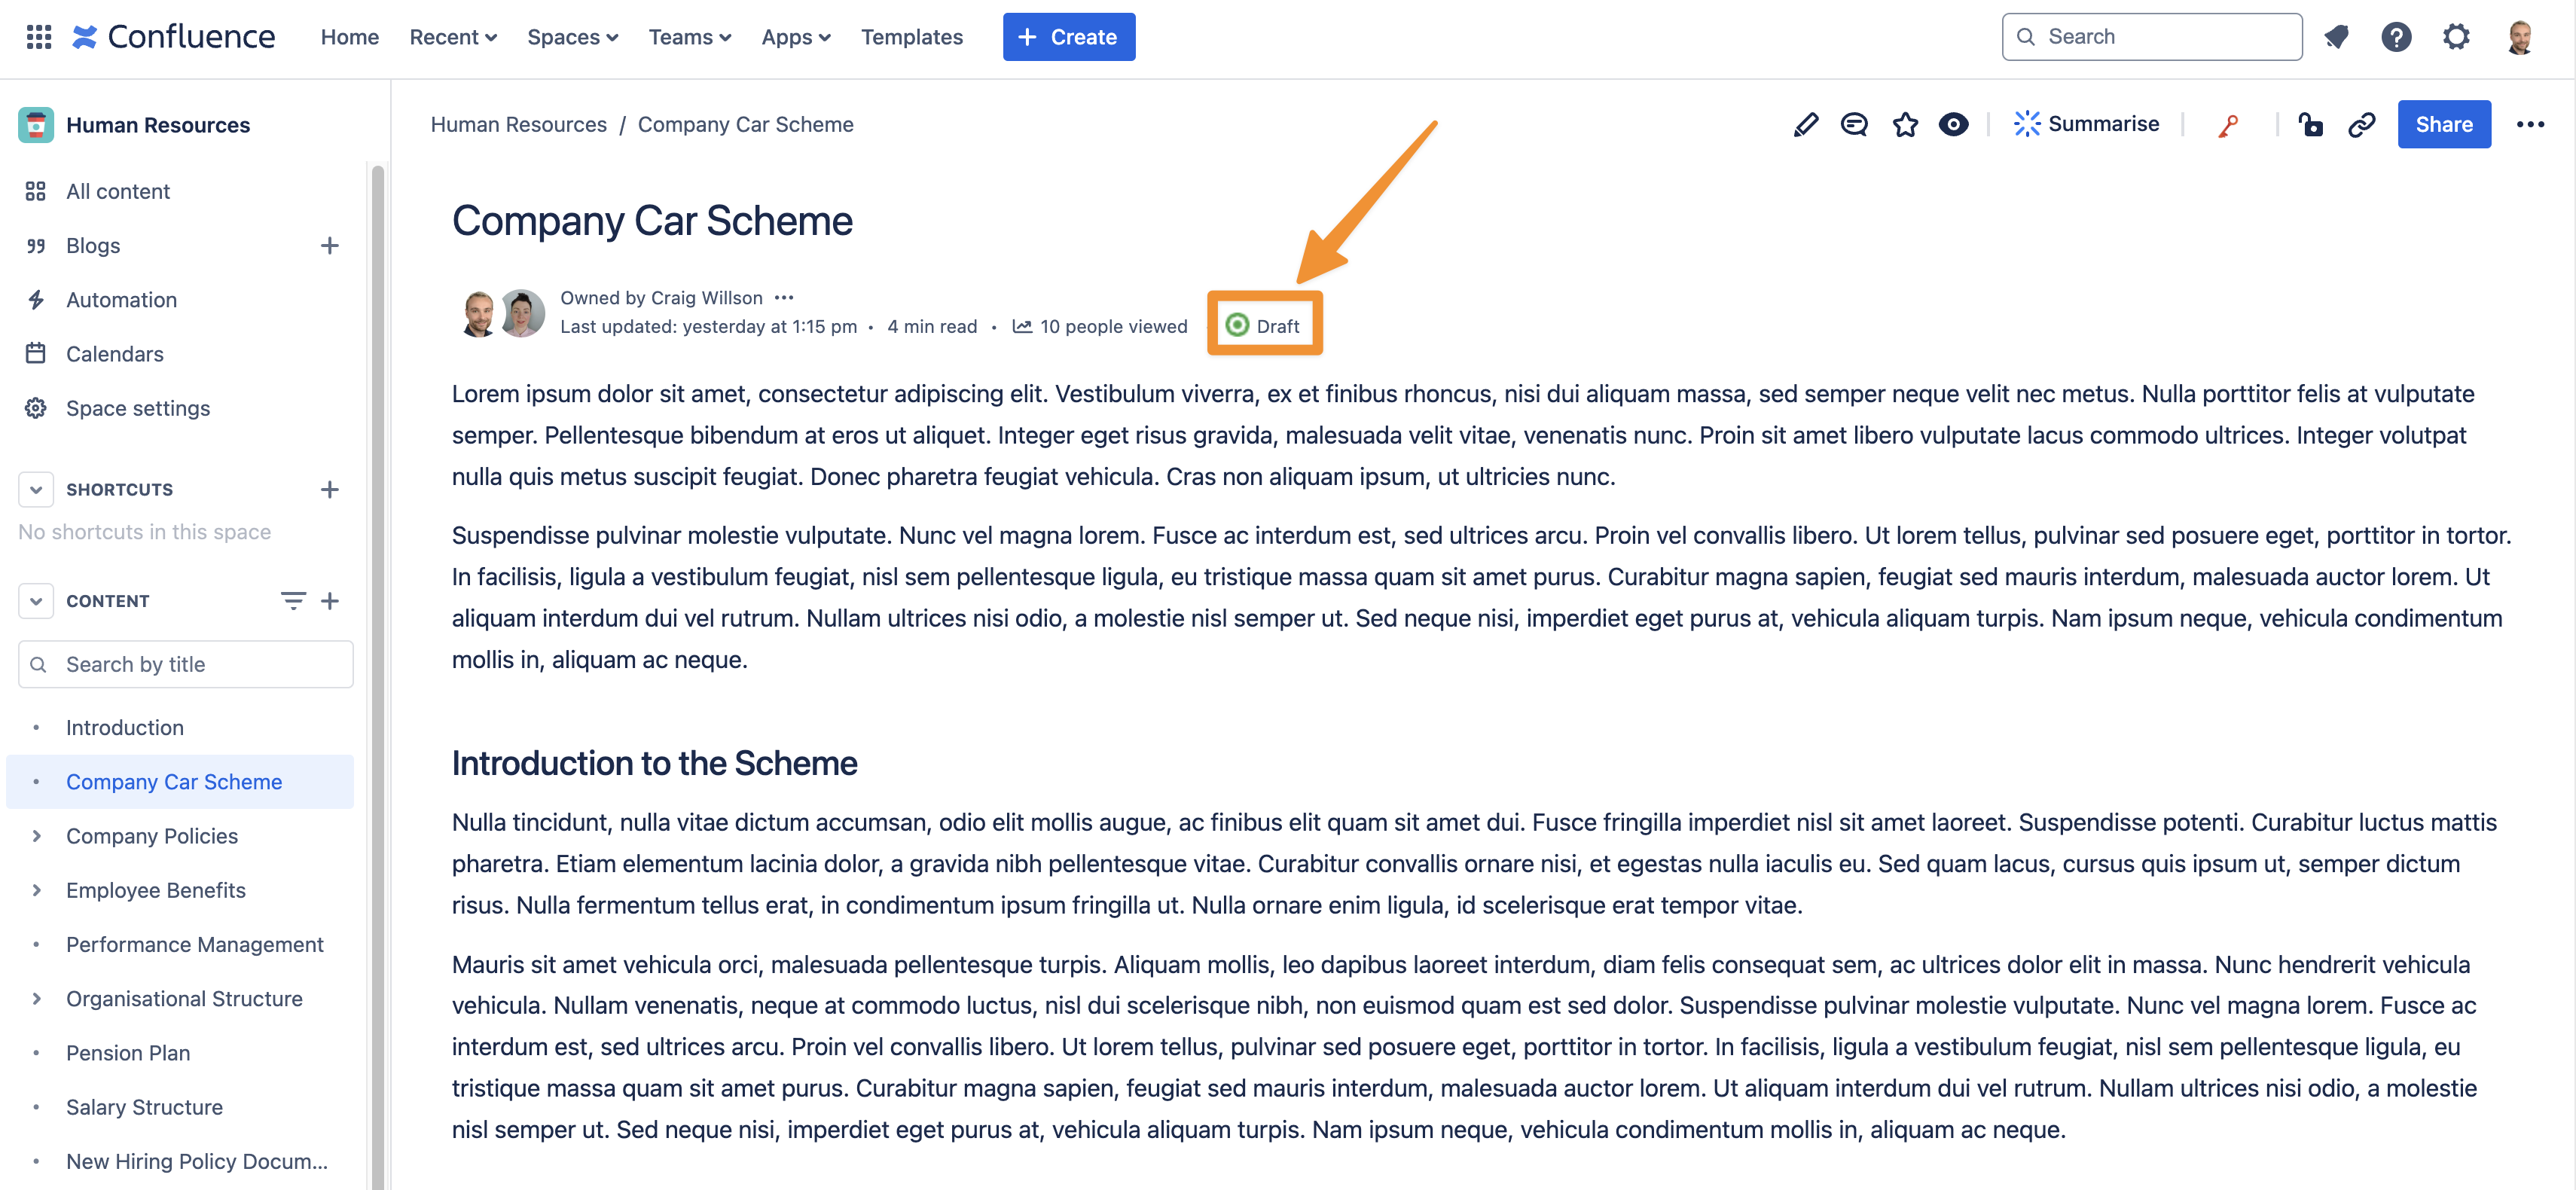
Once applied, your workflow will automatically start at the first step
How to move the document through the workflow
Now that the workflow has been added to the Confluence page, we just need to open the workflow status by clicking in the Confluence page byline, as illustrated below.
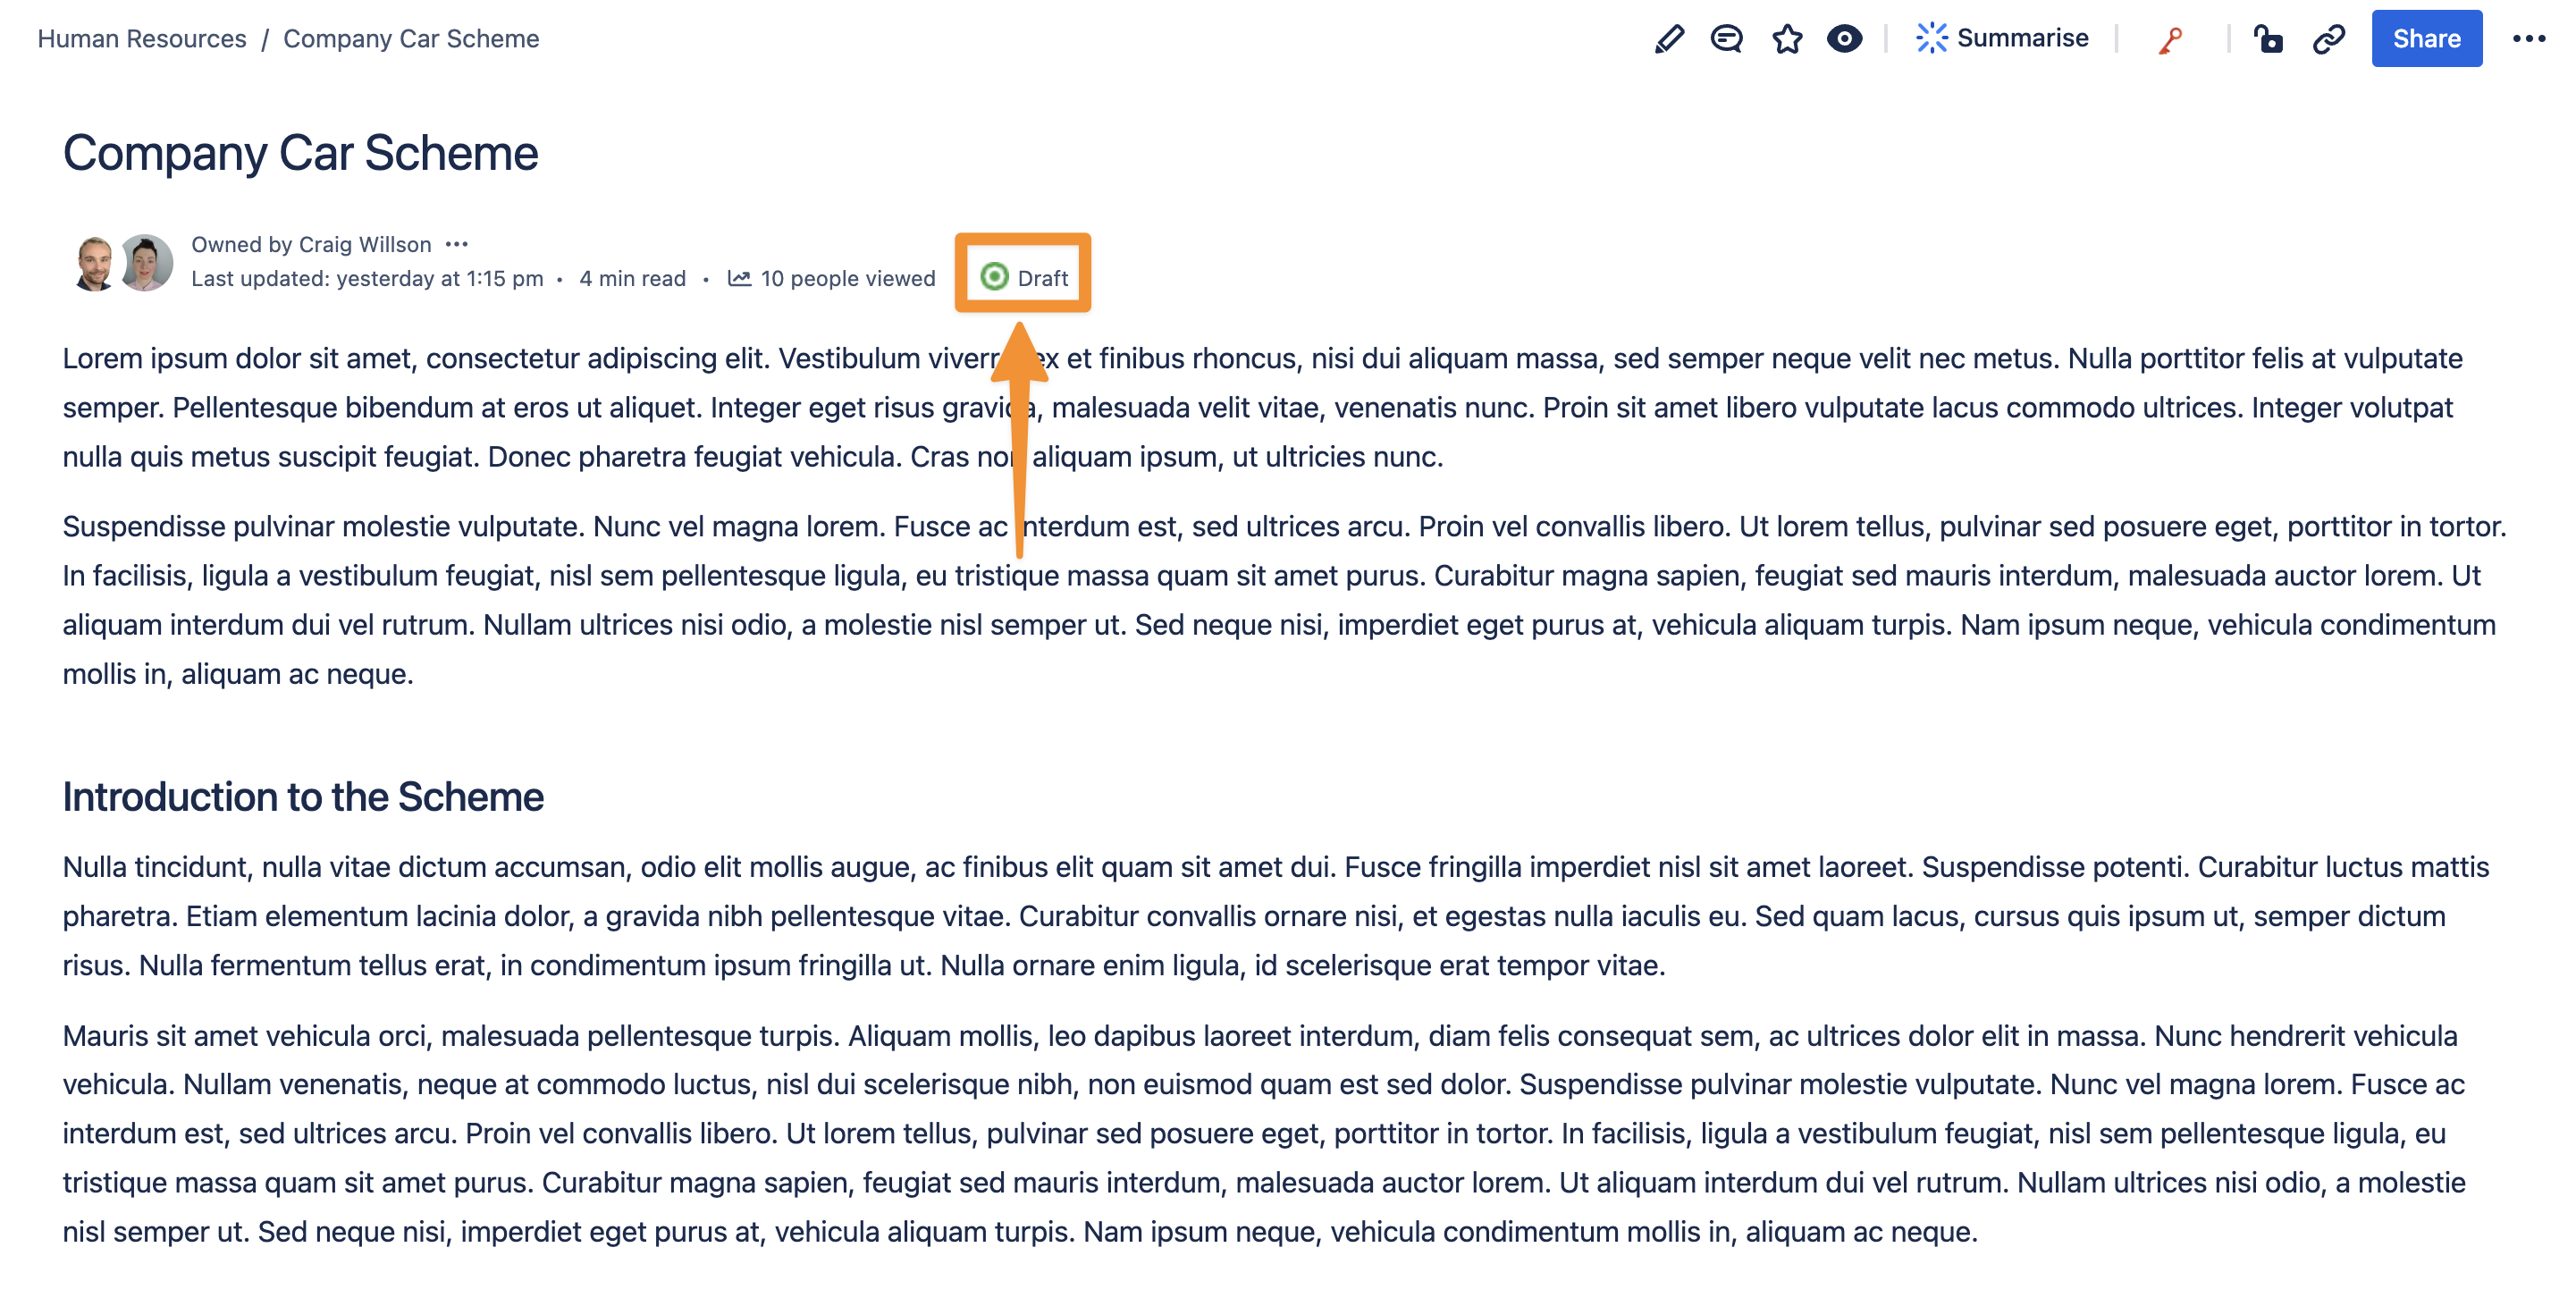
Open the workflow status to move the page forward in a workflow
You then need to select the next step with the workflow and the page will move forward once clicked.
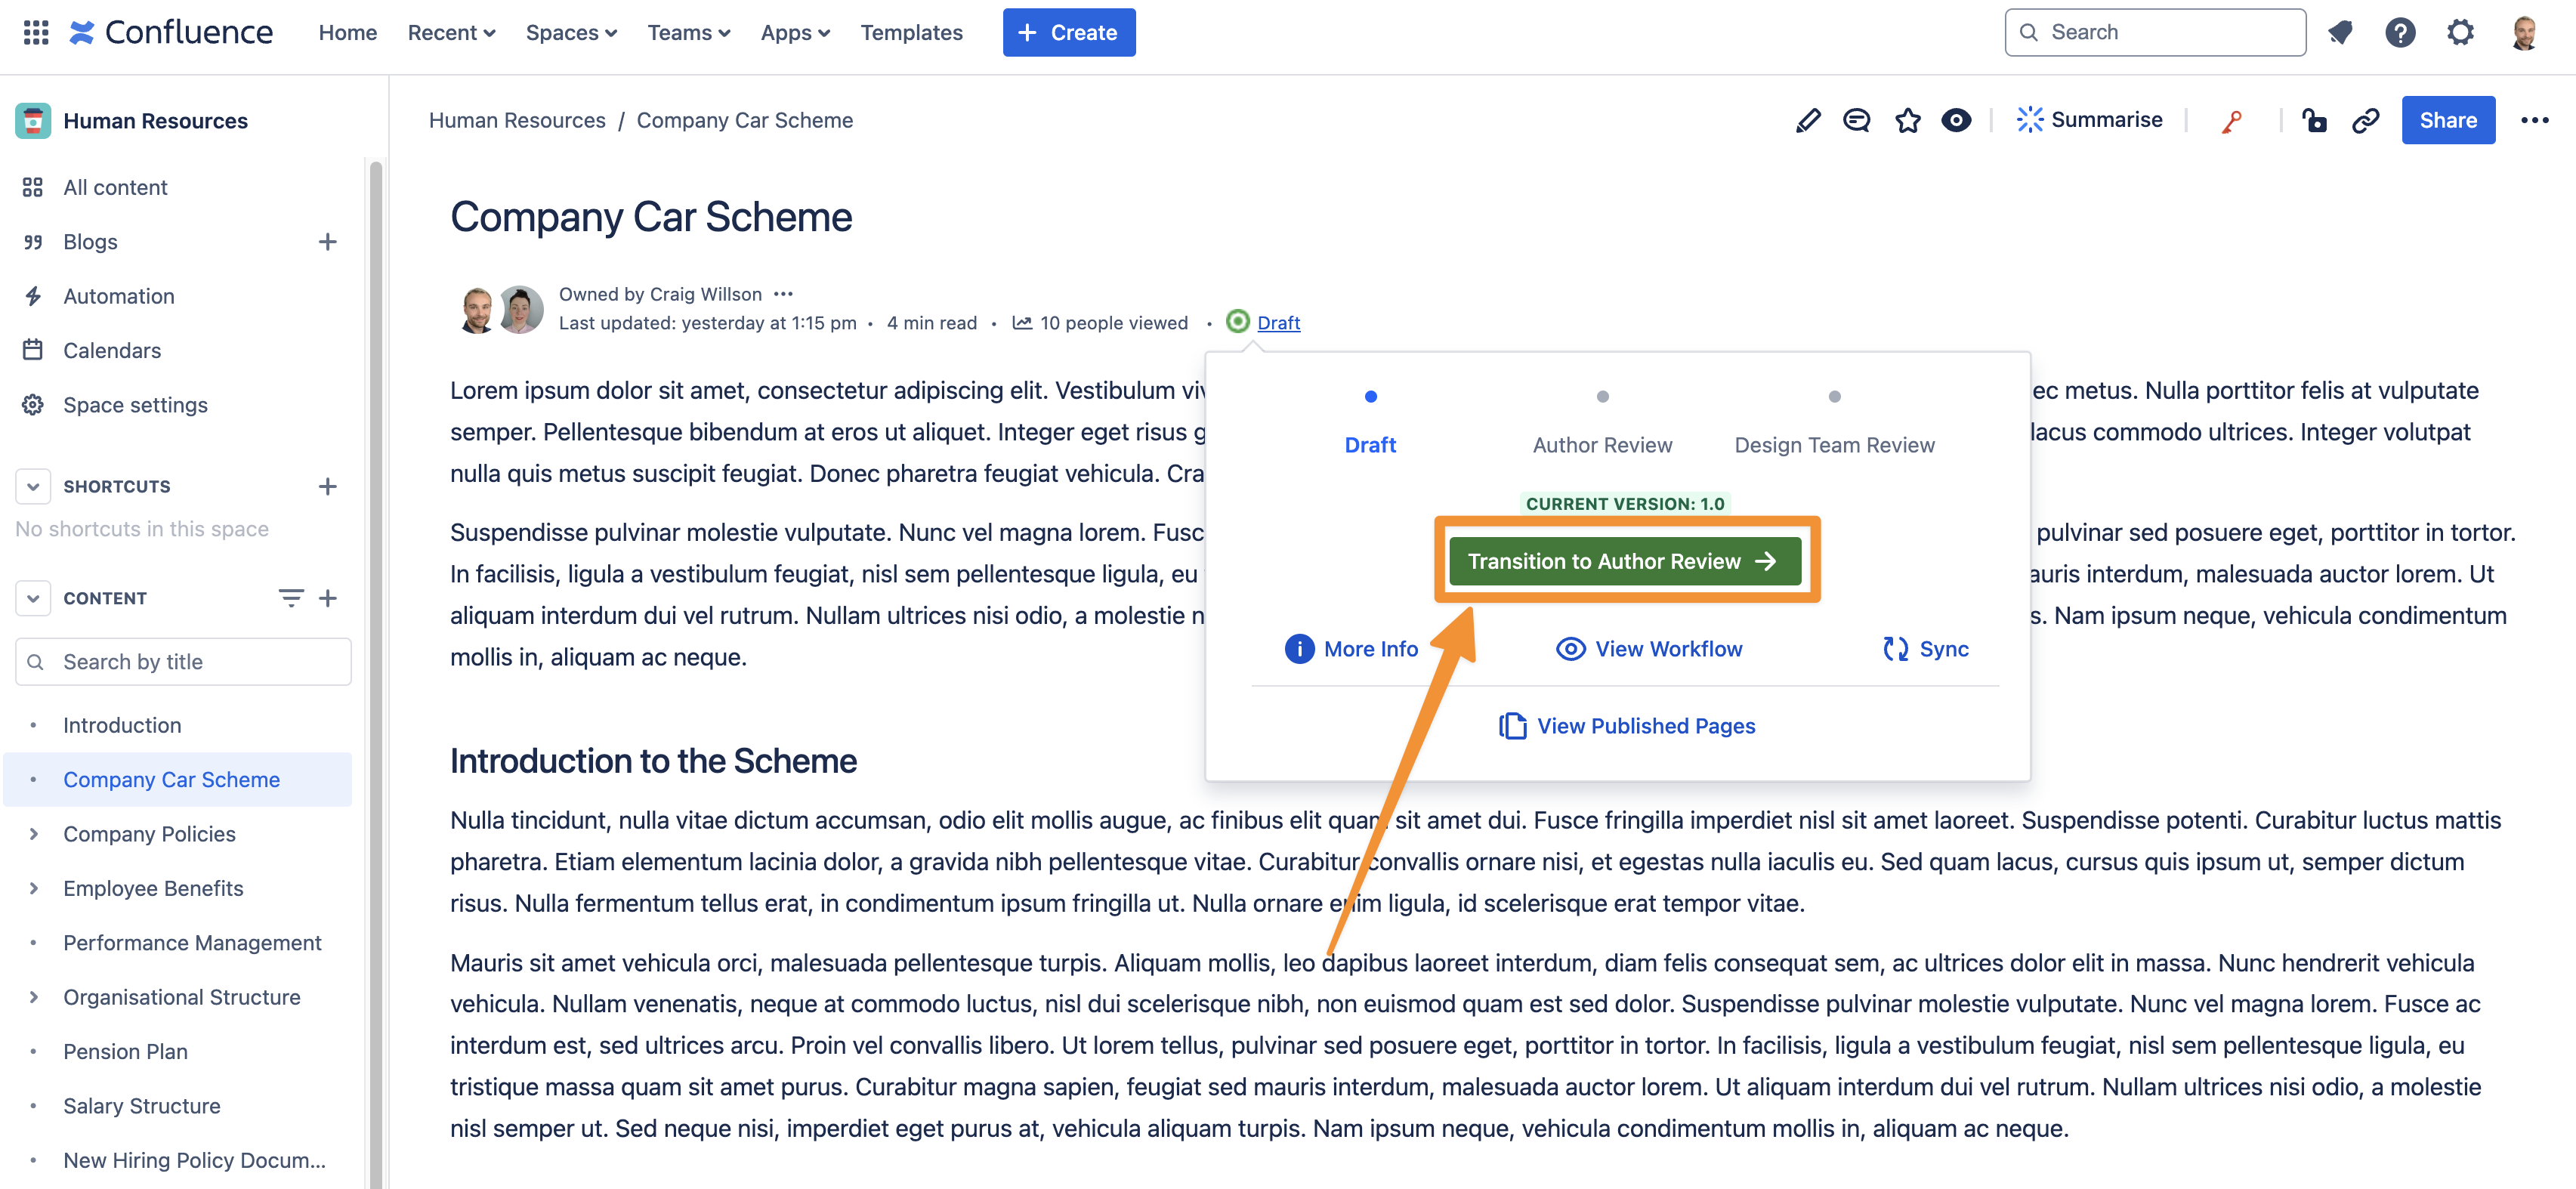
Move the page forward through the workflow by pressing the next step
View the workflow and approval history of Confluence pages
As an added bonus, you can easily view the workflow and approval history of any Confluence page using Workflows for Confluence. To access this, press the three dots (…) in the top right corner and navigate to Workflow Info.
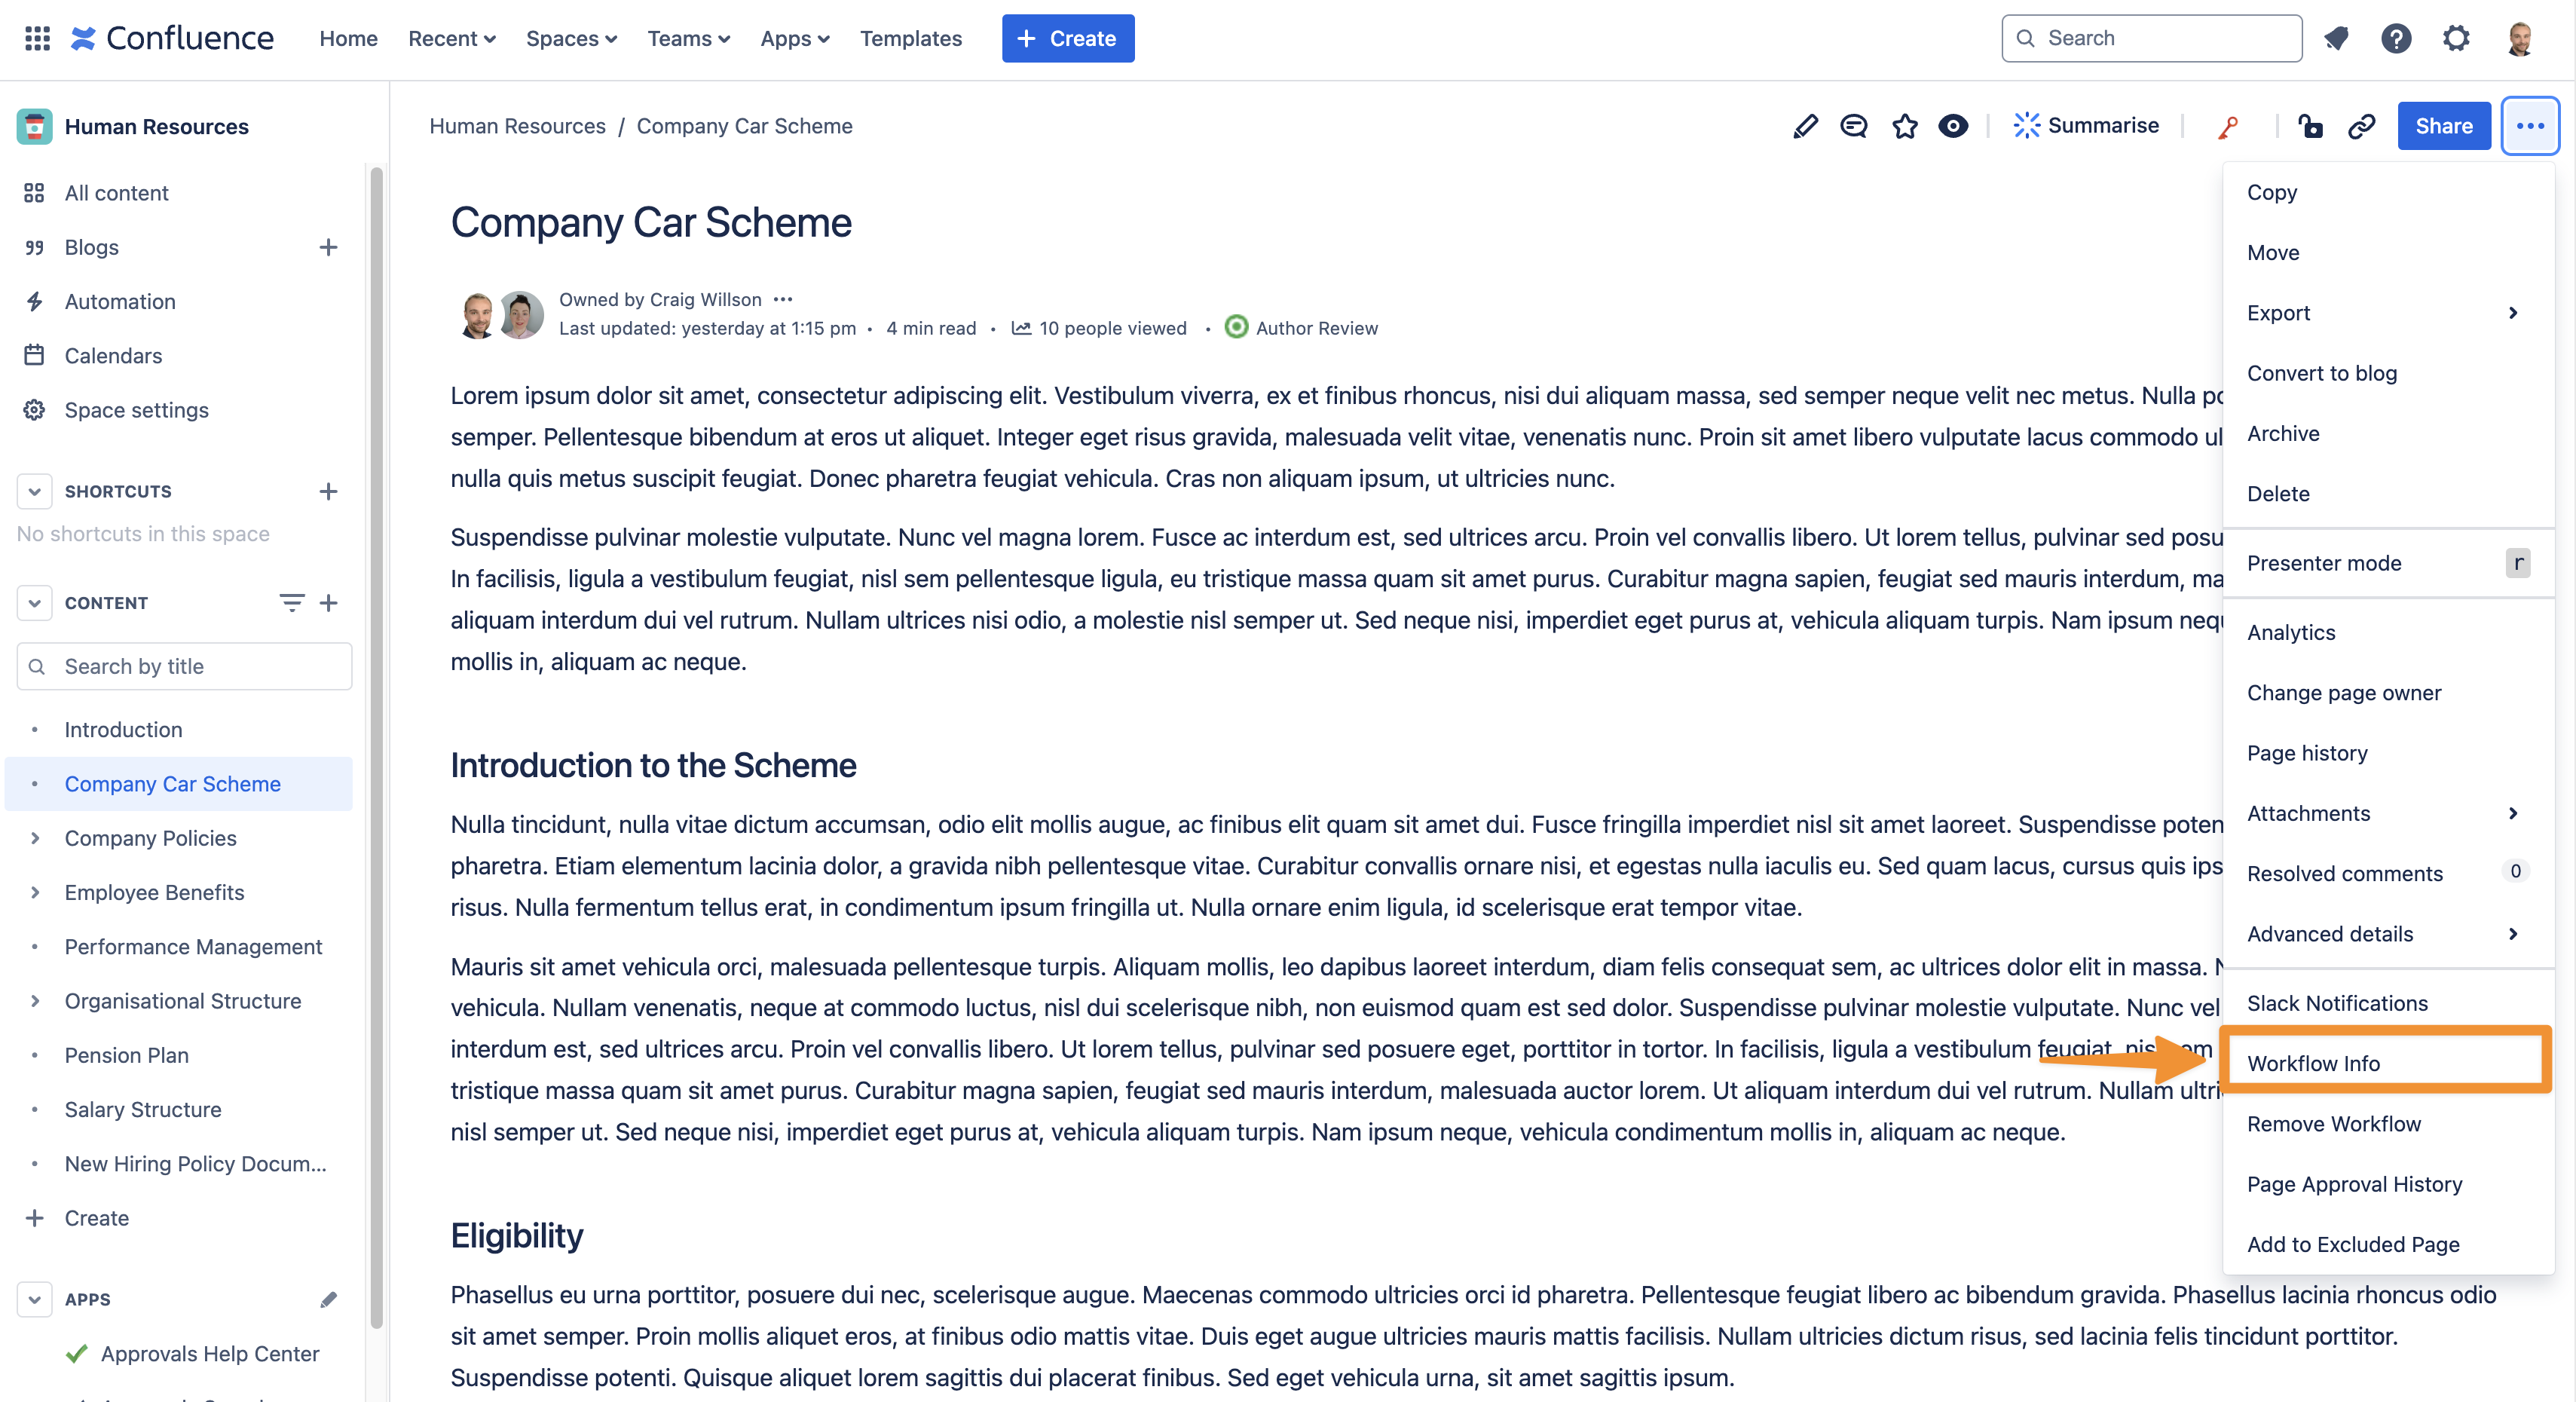
You will then see a full breakdown of the progress of a page throughout the entire document management lifecycle, as shown below.
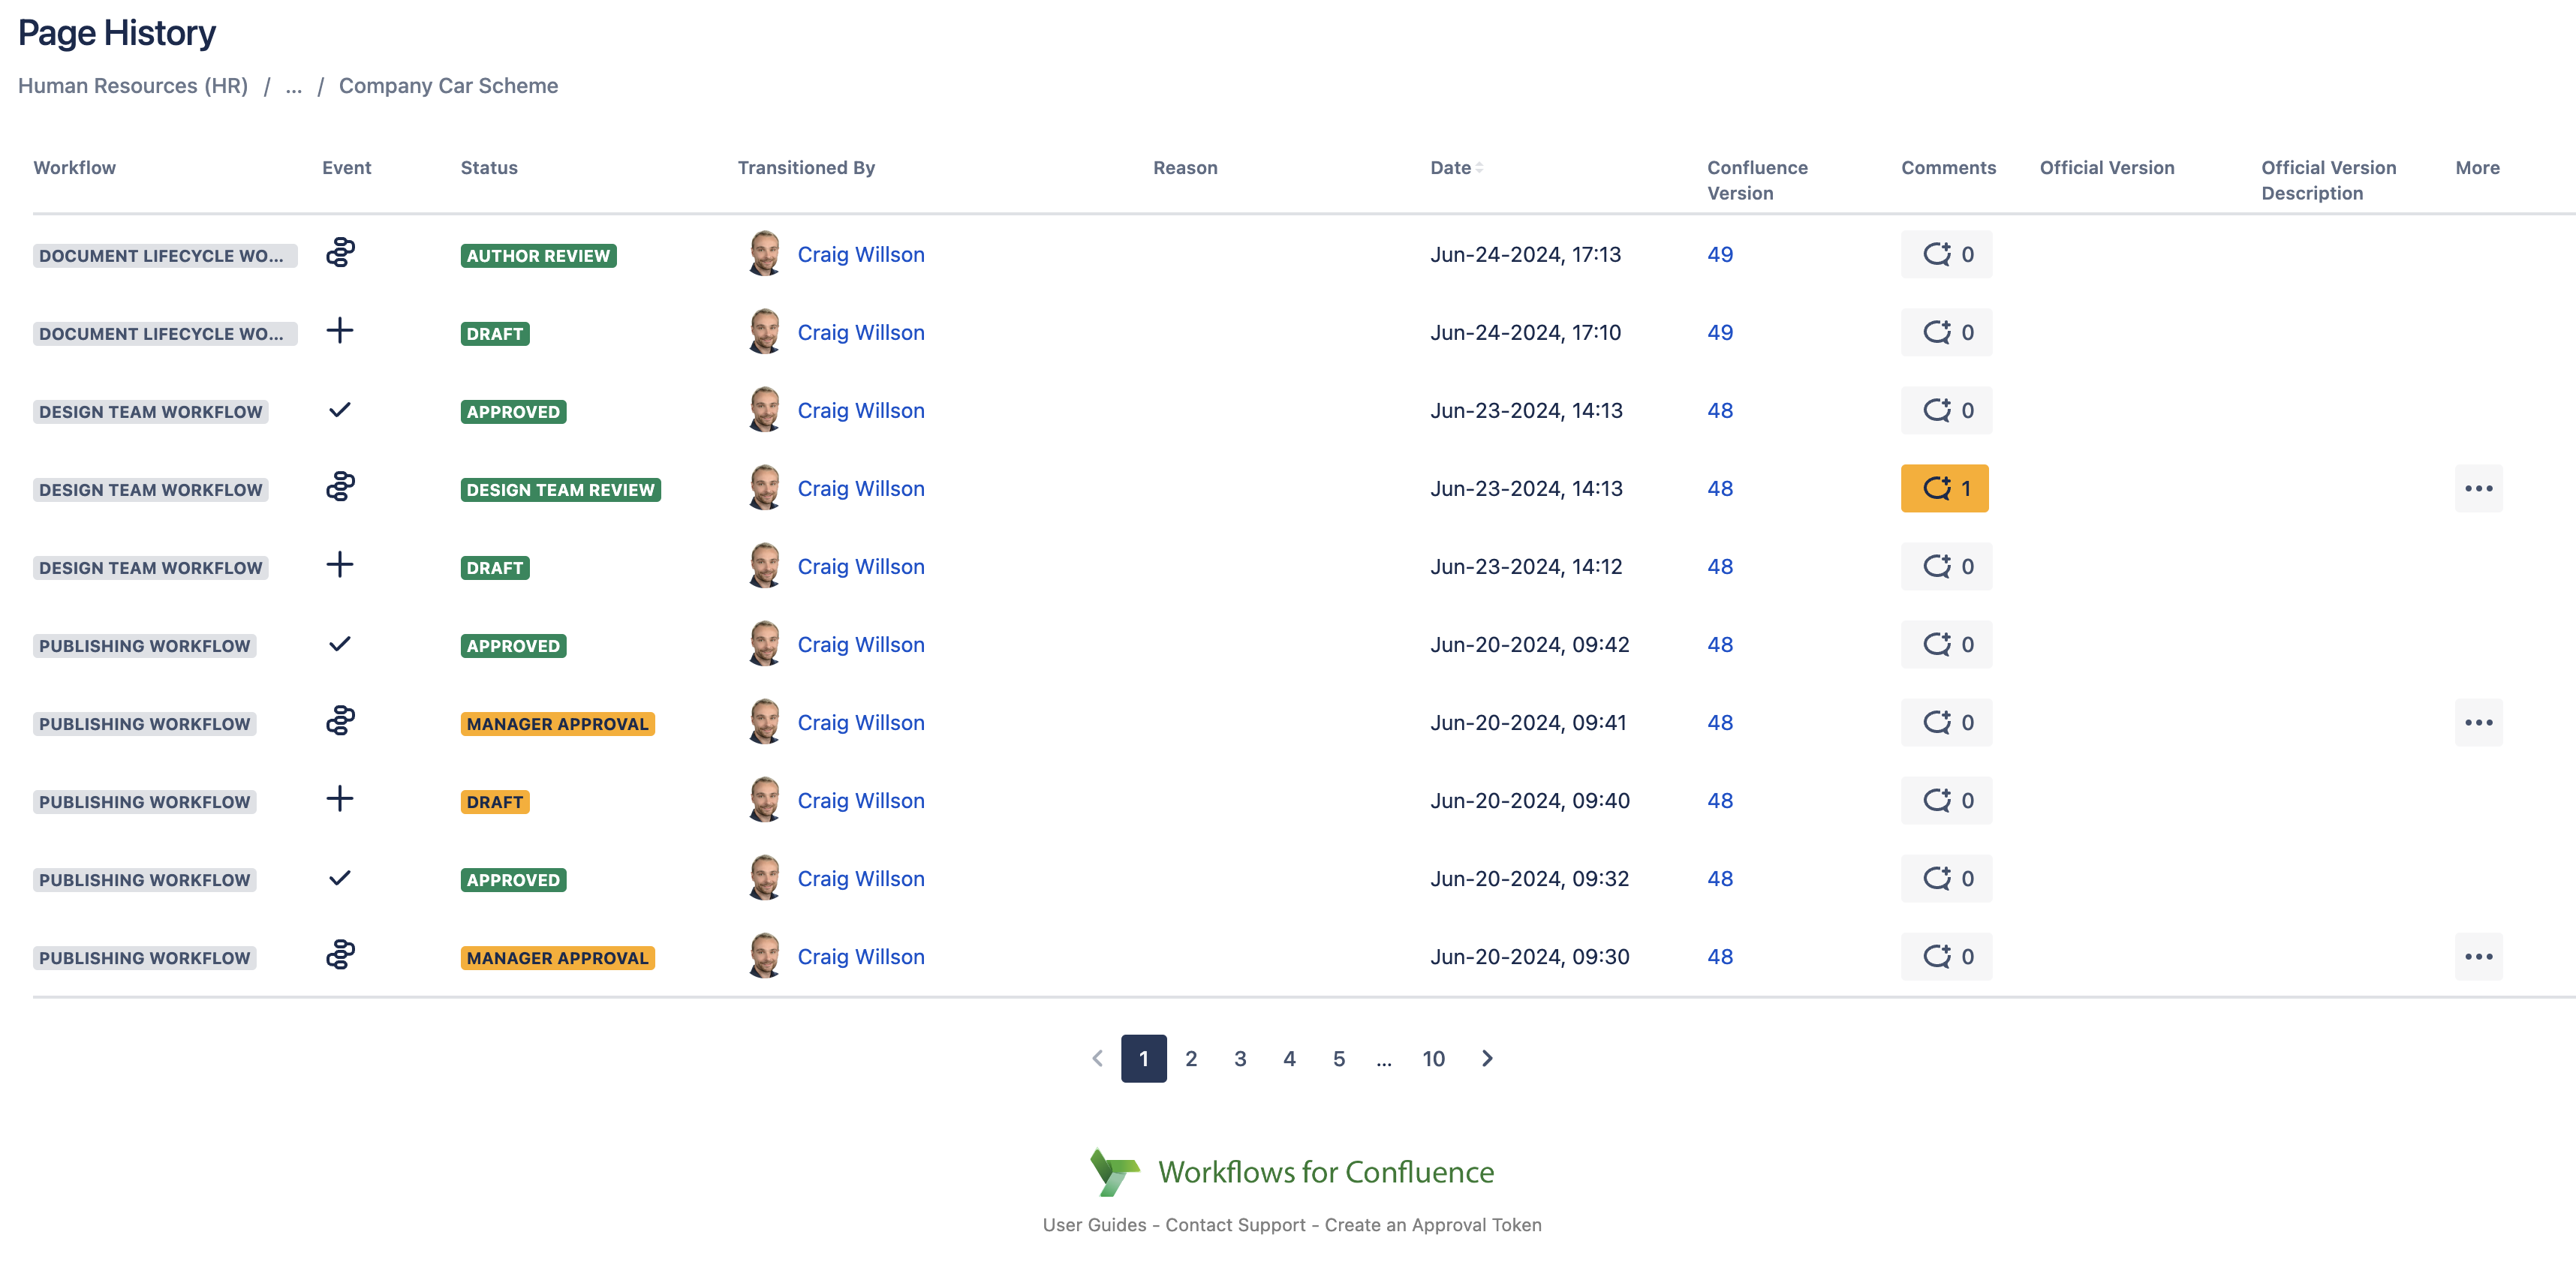
Get a clear picture of workflow and approval history of a Confluence page
Need support? We’re here to help 🧡
If you have any questions or would like to speak with us about Workflows, please don’t hesitate to reach out to our Customer Support team.
.svg)