-20250819-084018.svg)
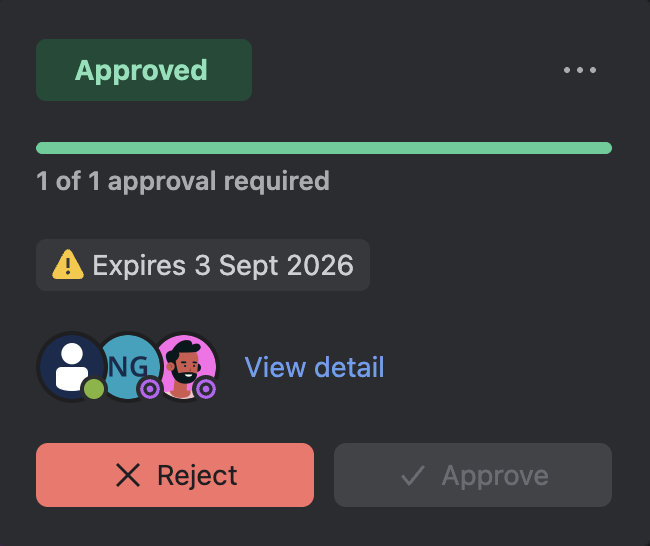
The page approval byline now has a refreshed look and feel. You still set up approvals, approve or reject pages, and track progress exactly as before, but the byline is now clearer, easier to scan, and looks great in both light and dark Confluence themes.
This guide walks through everything you'll see in the byline card and what it gives you.
Page approval byline
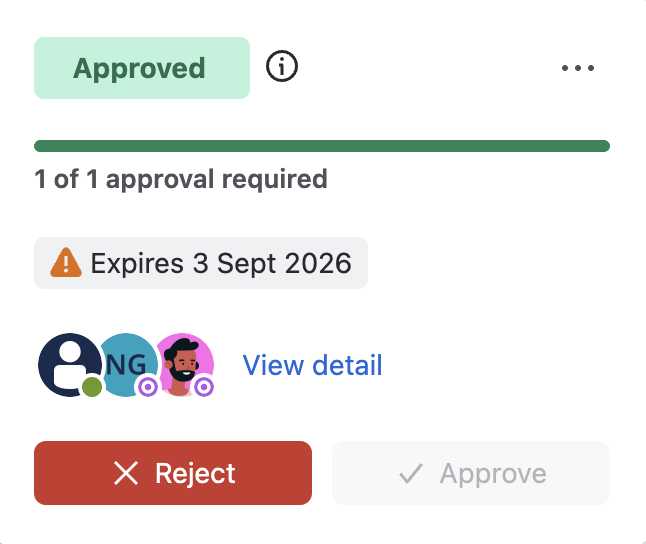
Whenever a page has an approval set up, you'll see an approval card when you click the Approvals app via the byline, as before. It's your single view of everything about that approval:
-
Status: A badge showing whether the approval is Pending, Approved, Rejected, or Expired, plus a ••• menu for viewing approval history or editing the approval's settings.

-
Progress: A segmented bar showing how many approvals have come in versus the minimum amount of required approvals, alongside a label like "2 of 3 approvals required".

-
Expiry (when set): A chip displaying the expiry date, with a warning icon if the expiry date is within a week.

-
Approvers: Avatars for everyone on the approval (click any avatar to jump to that person's profile), with a View detail link for the full picture. Each approver's avatar shows their current status at a glance: whether they've approved, rejected, are still pending, or expired.

-
Approve / Reject: Click to make your decision, if you're one of the approvers.

Putting it all together, you arrive at a byline card that looks something like this:
Setting up an approval
If a page doesn't have an approval yet, the byline invites you to start one:
"No approval in progress. Ask your teammates to approve this page."
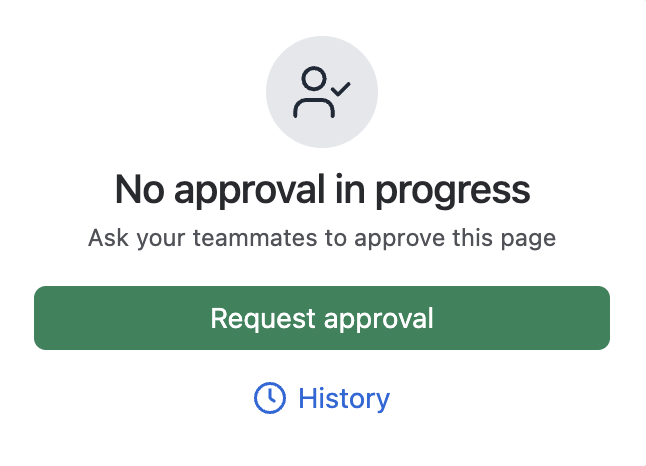
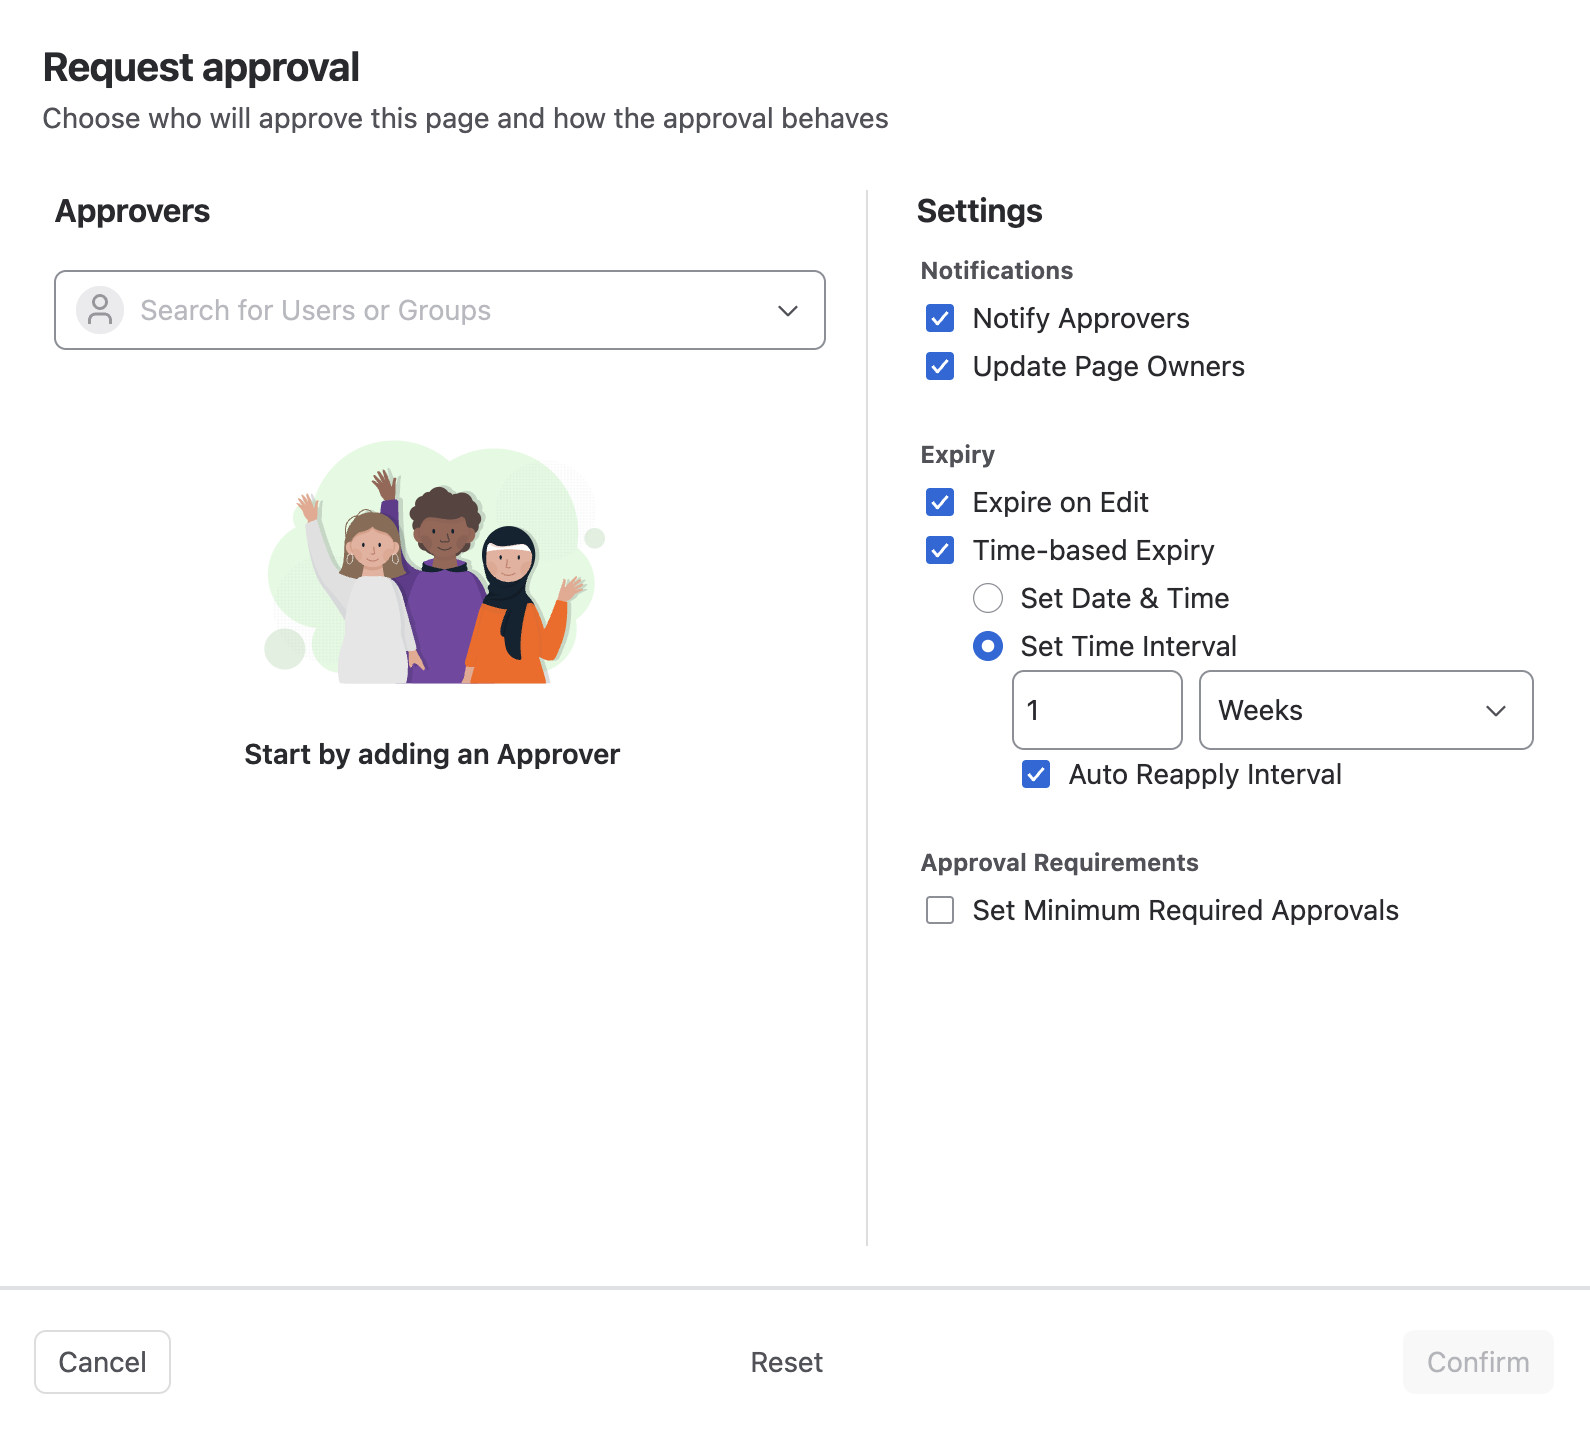
Click Request approval to open the setup screen, split into two simple parts:
-
Approvers: Search for and add the users or groups whose approval you require.
-
Settings: Choose who gets notified, if and when the approval should expire, and how many approvals are required before the page is considered approved.
Approving or rejecting a page
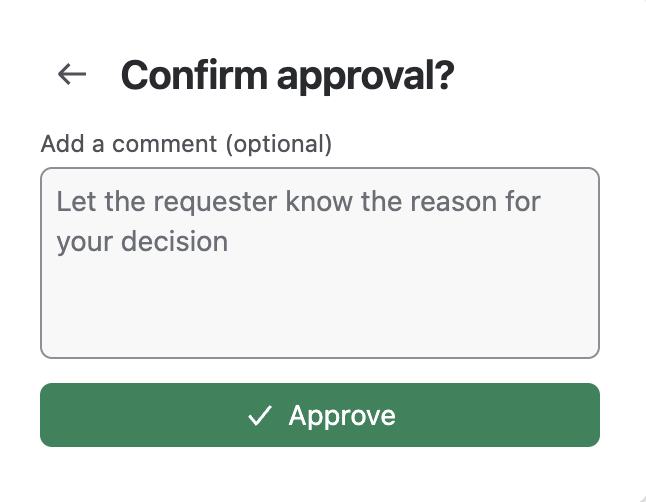
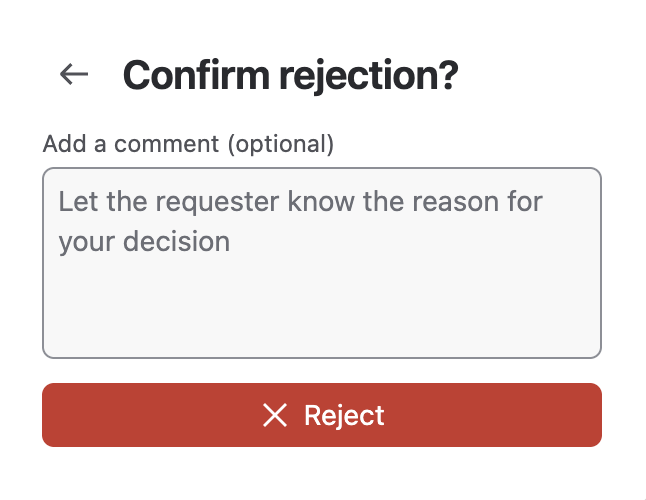
When you're an approver, clicking Approve or Reject opens a quick confirmation screen where you can optionally leave a comment explaining your decision before submitting it.
Viewing the full approval details
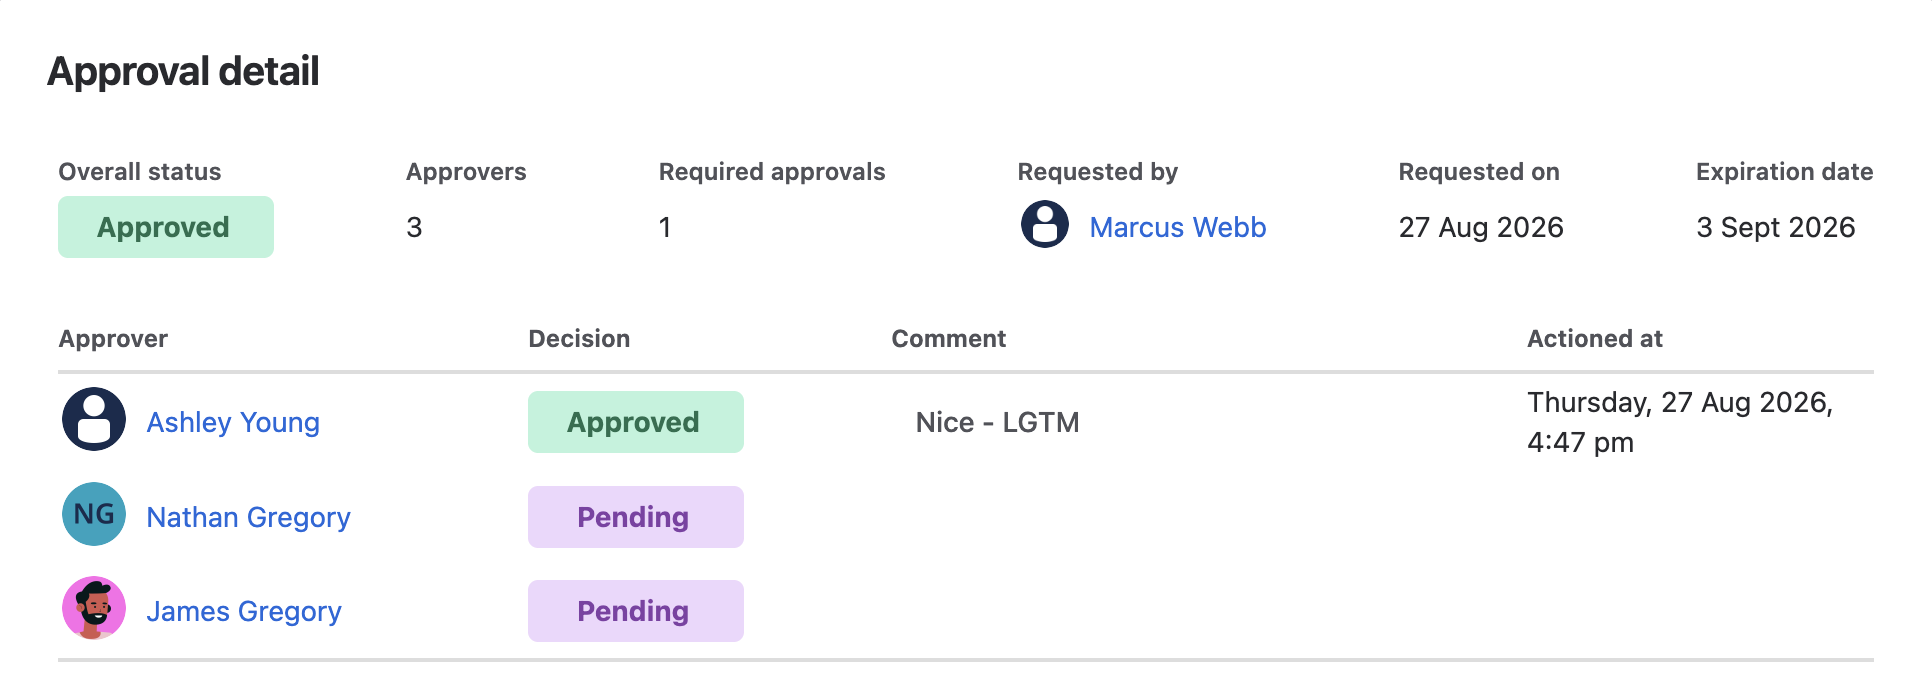
Click View detail to see everything about the approval in one place: overall status, number of approvers, how many approvals are required, who requested it and when, and the expiry date. Below that sits a full table of every approver, their decision, any comment they left, and when they made their decision.
Looks great in light and dark theme
The approval byline card, and everything you open from it, adapts automatically to your Confluence theme. Whether you work in light or dark mode, approvals will always feel like a natural part of the page.