-20250819-084018.svg)
Learn how to migrate your Approvals Data Center configuration and page approval statuses over to your Confluence Cloud site.
Who is this guide for?
This guide is for Confluence administrators who are migrating from Approvals for Confluence Data Center to Approvals for Confluence Cloud as part of a broader move from Confluence Data Center to Confluence Cloud.
By the end of this guide you will have:
-
Exported your existing page approval statuses from Data Center
-
Installed Approvals for Confluence Cloud
-
Migrated your Confluence content to Cloud (using the CCMA or another method)
-
Raised a service desk ticket to have your approval statuses restored in Cloud
Page approval statuses are not automatically carried over when you migrate Confluence content using the CCMA. This guide walks you through how to export your approval data from Data Center and have it restored in Cloud.
Note: This guide covers page approvals only. Section approvals are not in scope. If you rely on section approvals and need them migrated, please raise a ticket with our Service Desk team and we'll help.
This migration involves three phases. The table below summarises what each phase covers.
|
Phase |
Steps |
What you'll do |
|---|---|---|
|
Before migration |
1–2 |
Review your DC setup and export approval status data |
|
During migration |
3 |
Migrate Confluence content using Atlassian's CCMA tool |
|
After migration |
4–6 |
Install Approvals Cloud, request a status restore via Service Desk, and validate |
Phase 1: Before you migrate
Step 1: Review your current Approvals DC setup
Take stock of your current Approvals configuration in Data Center.
Work through the following checklist:
-
Approval statuses: Note the statuses in use across your instance.
If you have changed the names of each status in your DC instance, please note that this is not possible in Cloud, and so any of these status names will revert to the default Approved/Rejected/Pending.
-
Approvers and approval workflows: Note how approvers are assigned and any settings you have configured.
-
Space-level settings: Note any space-specific configuration.
-
Timeline: Plan for a test migration before your full migration.
Step 2: Export page approval data from Data Center
Because page approval data is not preserved during the migration to Cloud, you must export your approval data before you migrate. The resulting CSV will be used by our team to restore your page approval statuses after the migration.
2.1 Choose your export method: there are two ways to export your approval data
-
REST API (recommended for most migrations)
-
Handles large instances with thousands of pages
-
Can be run per space or across all spaces at once
-
Outputs a clean CSV file that you will attach to your service desk ticket later
-
-
Manual CSV export (for smaller instances or spot-checking)
-
Best suited to smaller instances or if you only need to check a handful of spaces
-
The rest of this step assumes you are using the Approvals REST API. You may wish to find out more about this here before starting: https://docs.appfox.io/confluence-approvals/rest-api
2.2 Run the export script
The script below retrieves the approval status for every page in your instance and writes the results to a CSV file.
While we hope this script is useful, please note that there isn’t a warranty and the code may not be actively maintained. If you need any further information or help, please raise a ticket with our friendly Service Desk.
Before running the script, update the configuration section with your own values:
-
BASE_URL: your Confluence Data Center URL
-
PAT: Authentication is done using a Personal Access Token: Using Personal Access Tokens | Enterprise Data Center Latest | Atlassian Documentation
-
SPACE_KEY: set this to a specific space key if you want to limit the export to one space, or leave it as None to export all spaces
The following script will save your page approval statuses
The output will be a CSV file with one row per page with an approval status (see below).
|
pageid |
spacekey |
title |
status |
|---|---|---|---|
|
12345 |
HR |
HR Policies and Procedures |
approved |
|
67890 |
FIN |
Q4 Financial Forecast |
pending |
Phase 2: During the migration
Step 3: Migrate Confluence DC content to Cloud
Migrate your Confluence spaces and pages from Data Center to Cloud using your chosen method. The Confluence Cloud Migration Assistant (CCMA) is the most common approach. Instructions on how to do this is out of scope of this document, but you need to install the app from the Atlassian Marketplace and the Atlassian documentation is here: Confluence Cloud Migration Assistant | Atlassian Support. It is recommended that you run a test before running the full migration, and that you schedule a migration window.
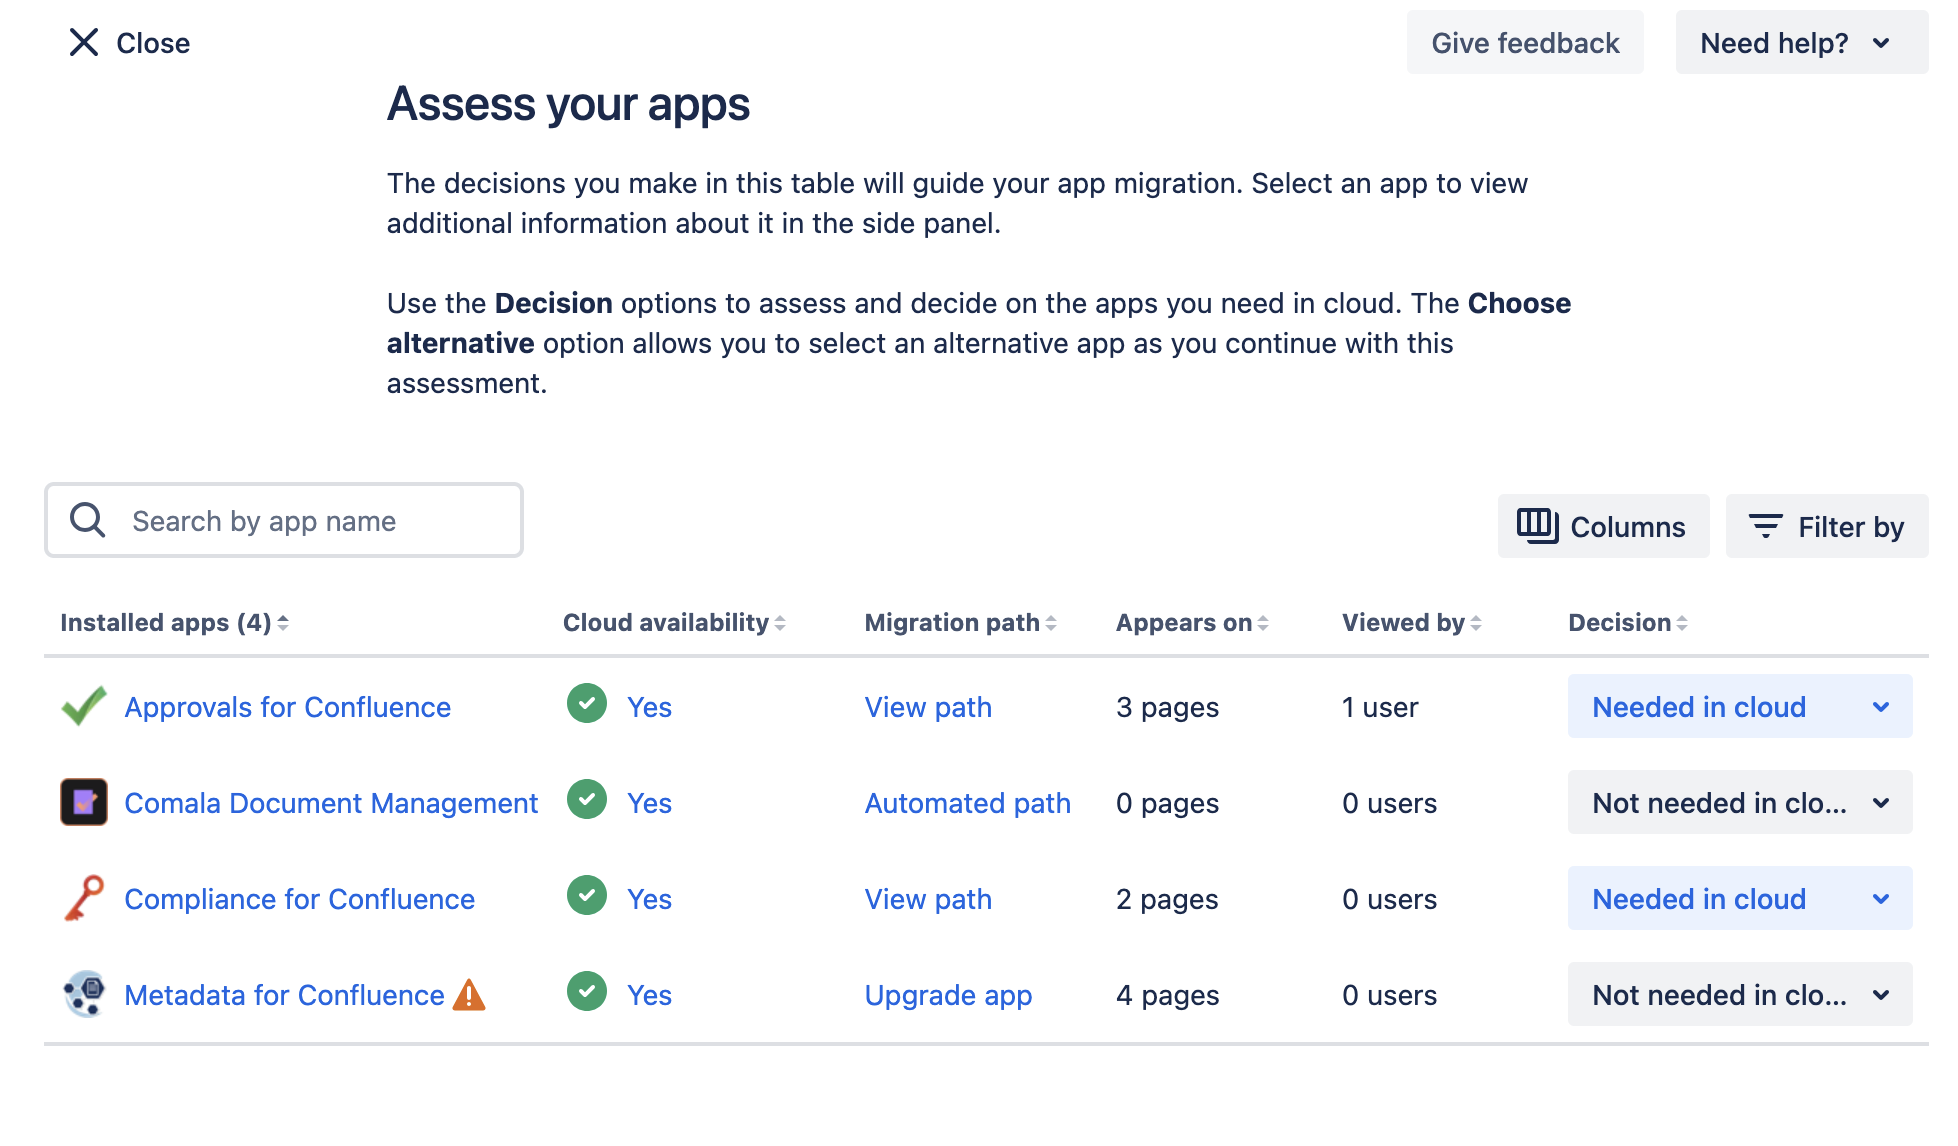
The CCMA app prompts you to install marketplace apps before migration. When you open the app, you will be asked to 'Assess your apps':
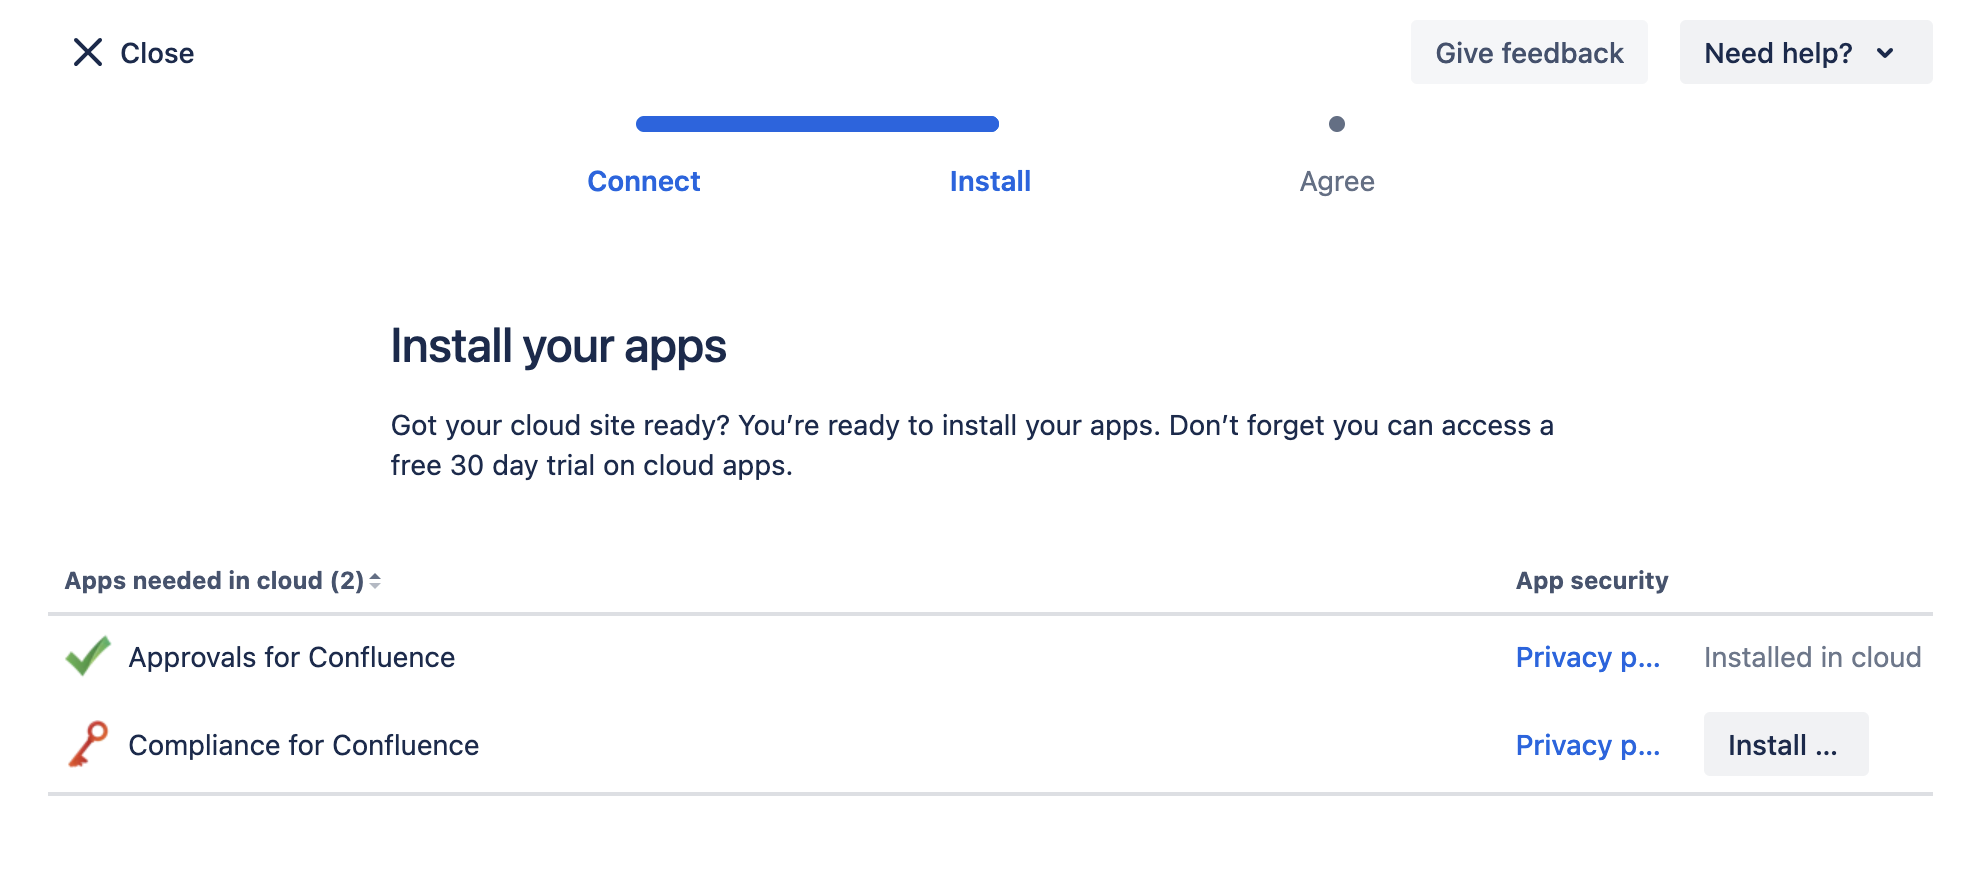
Once you have selected Approvals for Confluence from the list, you will then be asked to 'Prepare your apps'. You'll be able to click install from here:
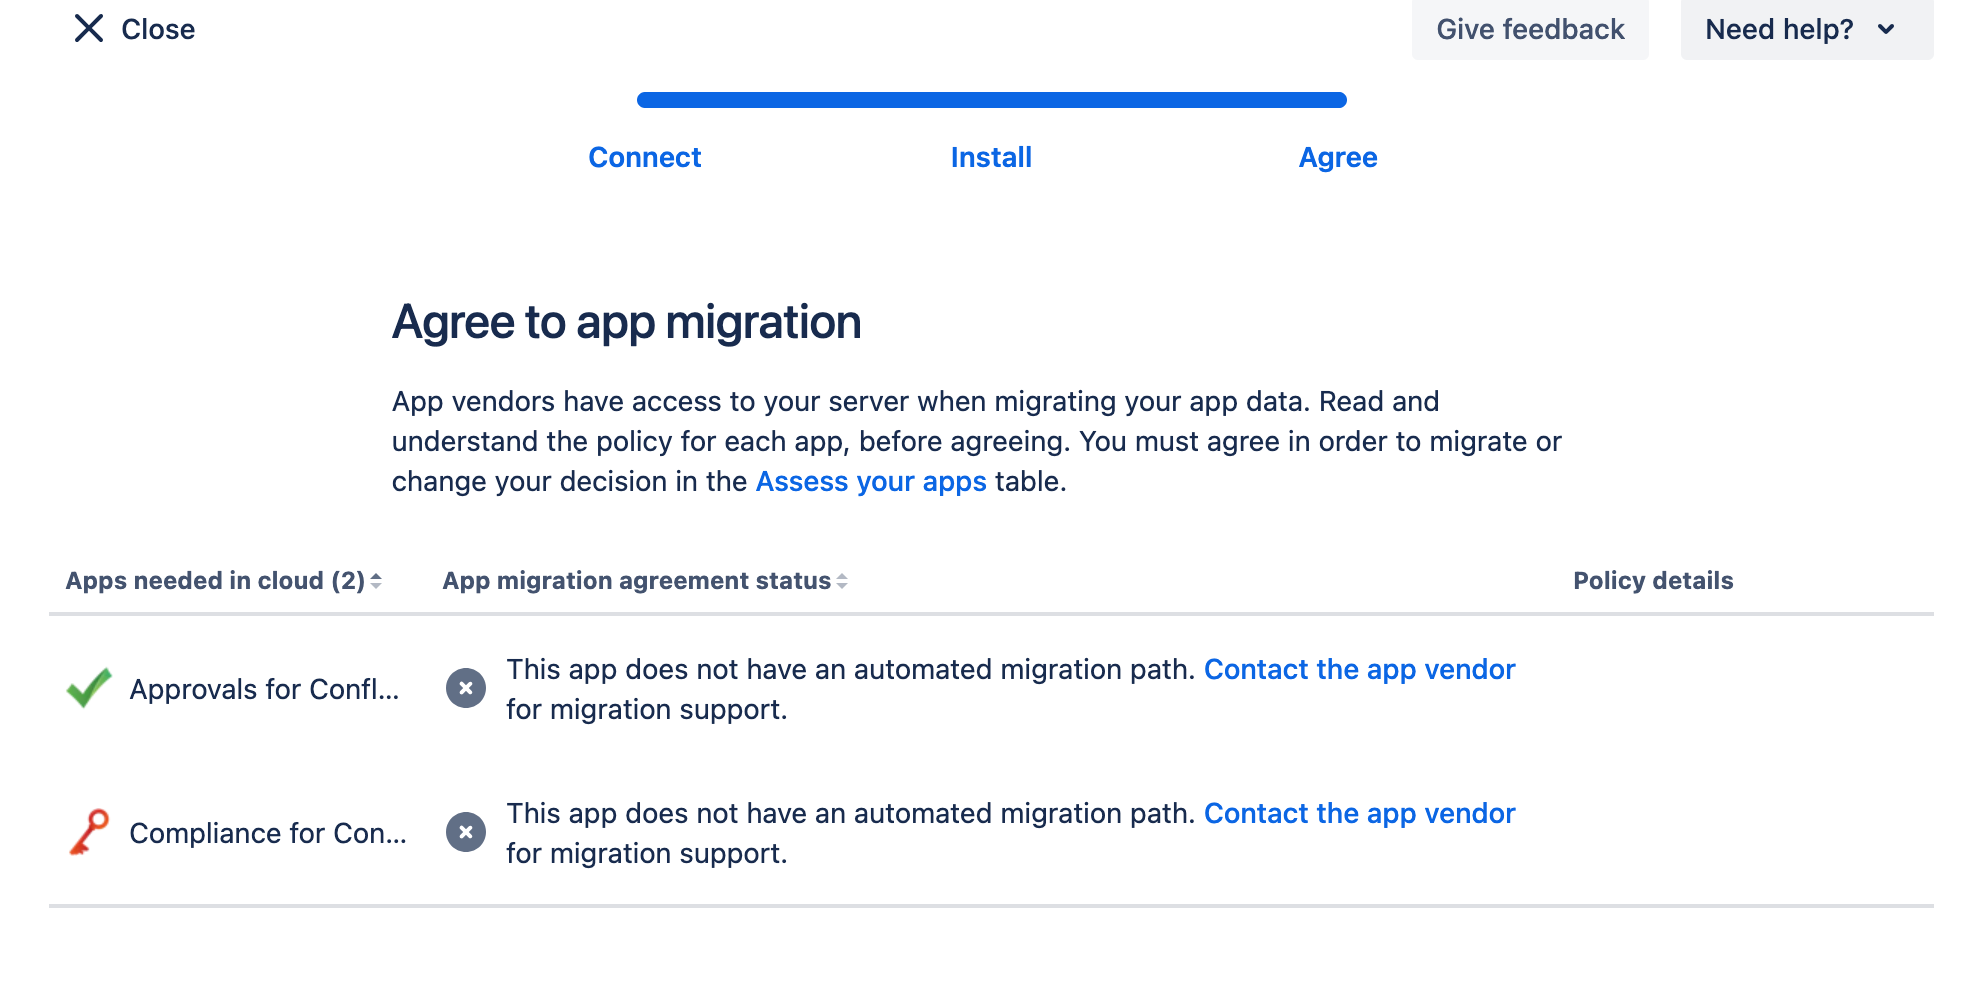
The final stage of this is to 'Agree to app migration'. There will be a message which comes up saying 'This app does not have an automated migration path', which just means that approval data will not automatically carry across and you need to complete Steps 4 and 5 below.
Important: Unlike some other apps, page content properties for Approvals are not preserved during the CCMA migration. This is why the CSV export in Step 2 is essential. It is the record that will be used to restore your approval statuses.
Phase 3: After your migration
Step 4: Configure Approvals for Confluence Cloud
You may wish to browse through our Getting Started documentation to get an introduction to navigating our Cloud version before starting this step.
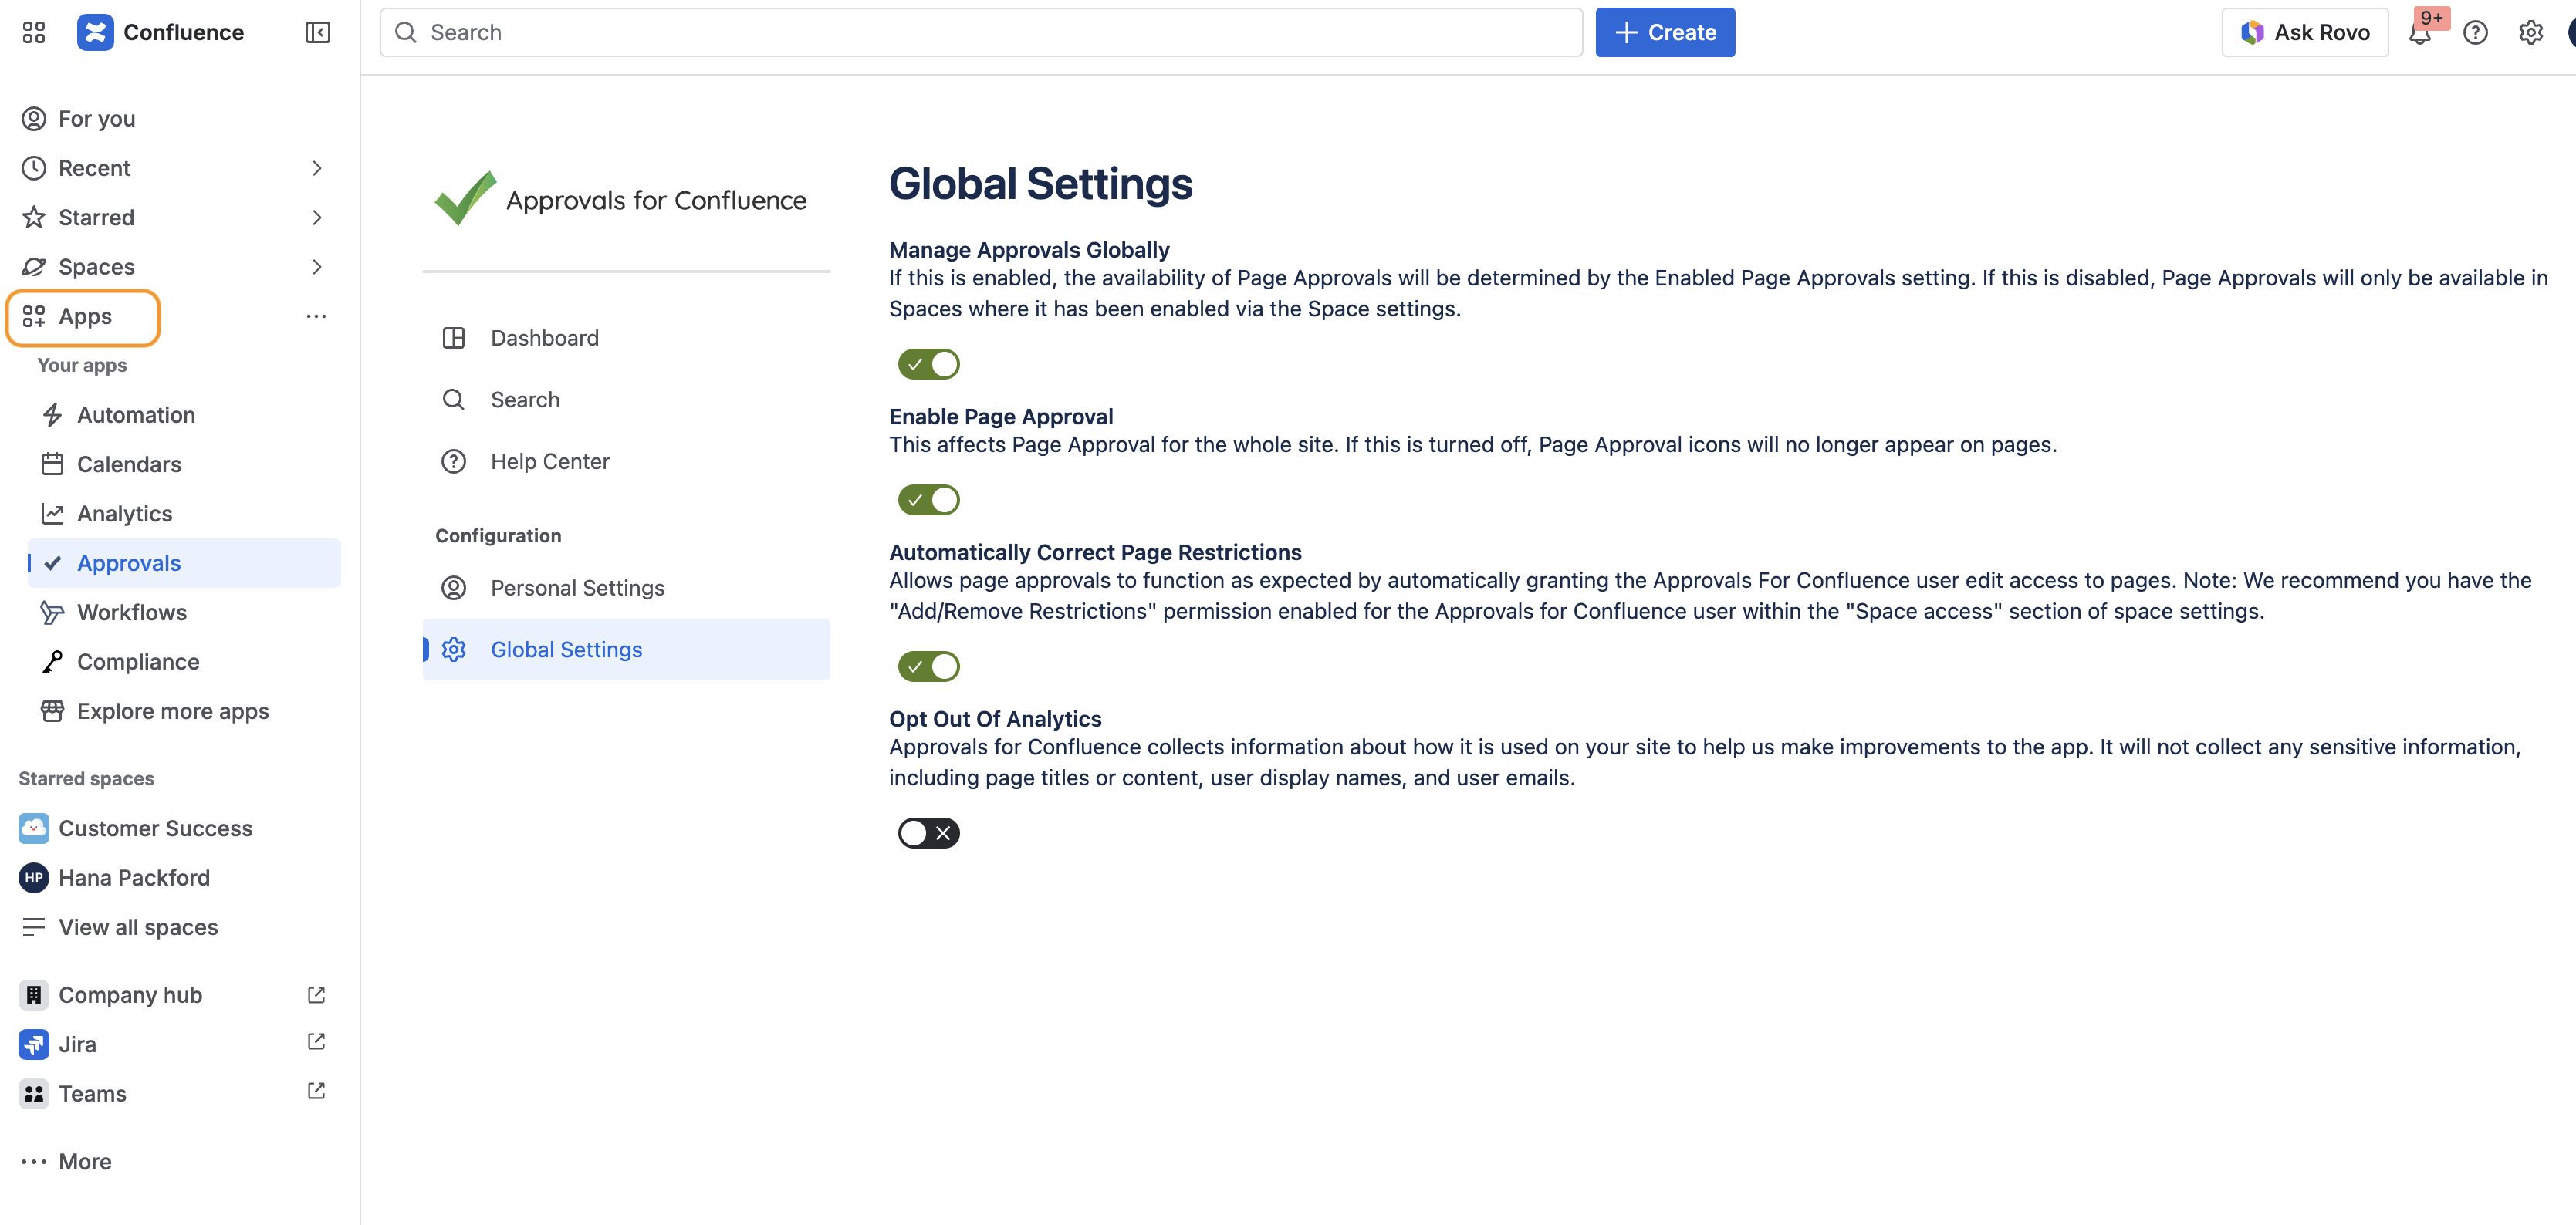
Recreate any global settings and space-specific configuration you noted in Step 1.
You can access global settings from the ‘Apps’ section in the left hand menu shown in orange here:
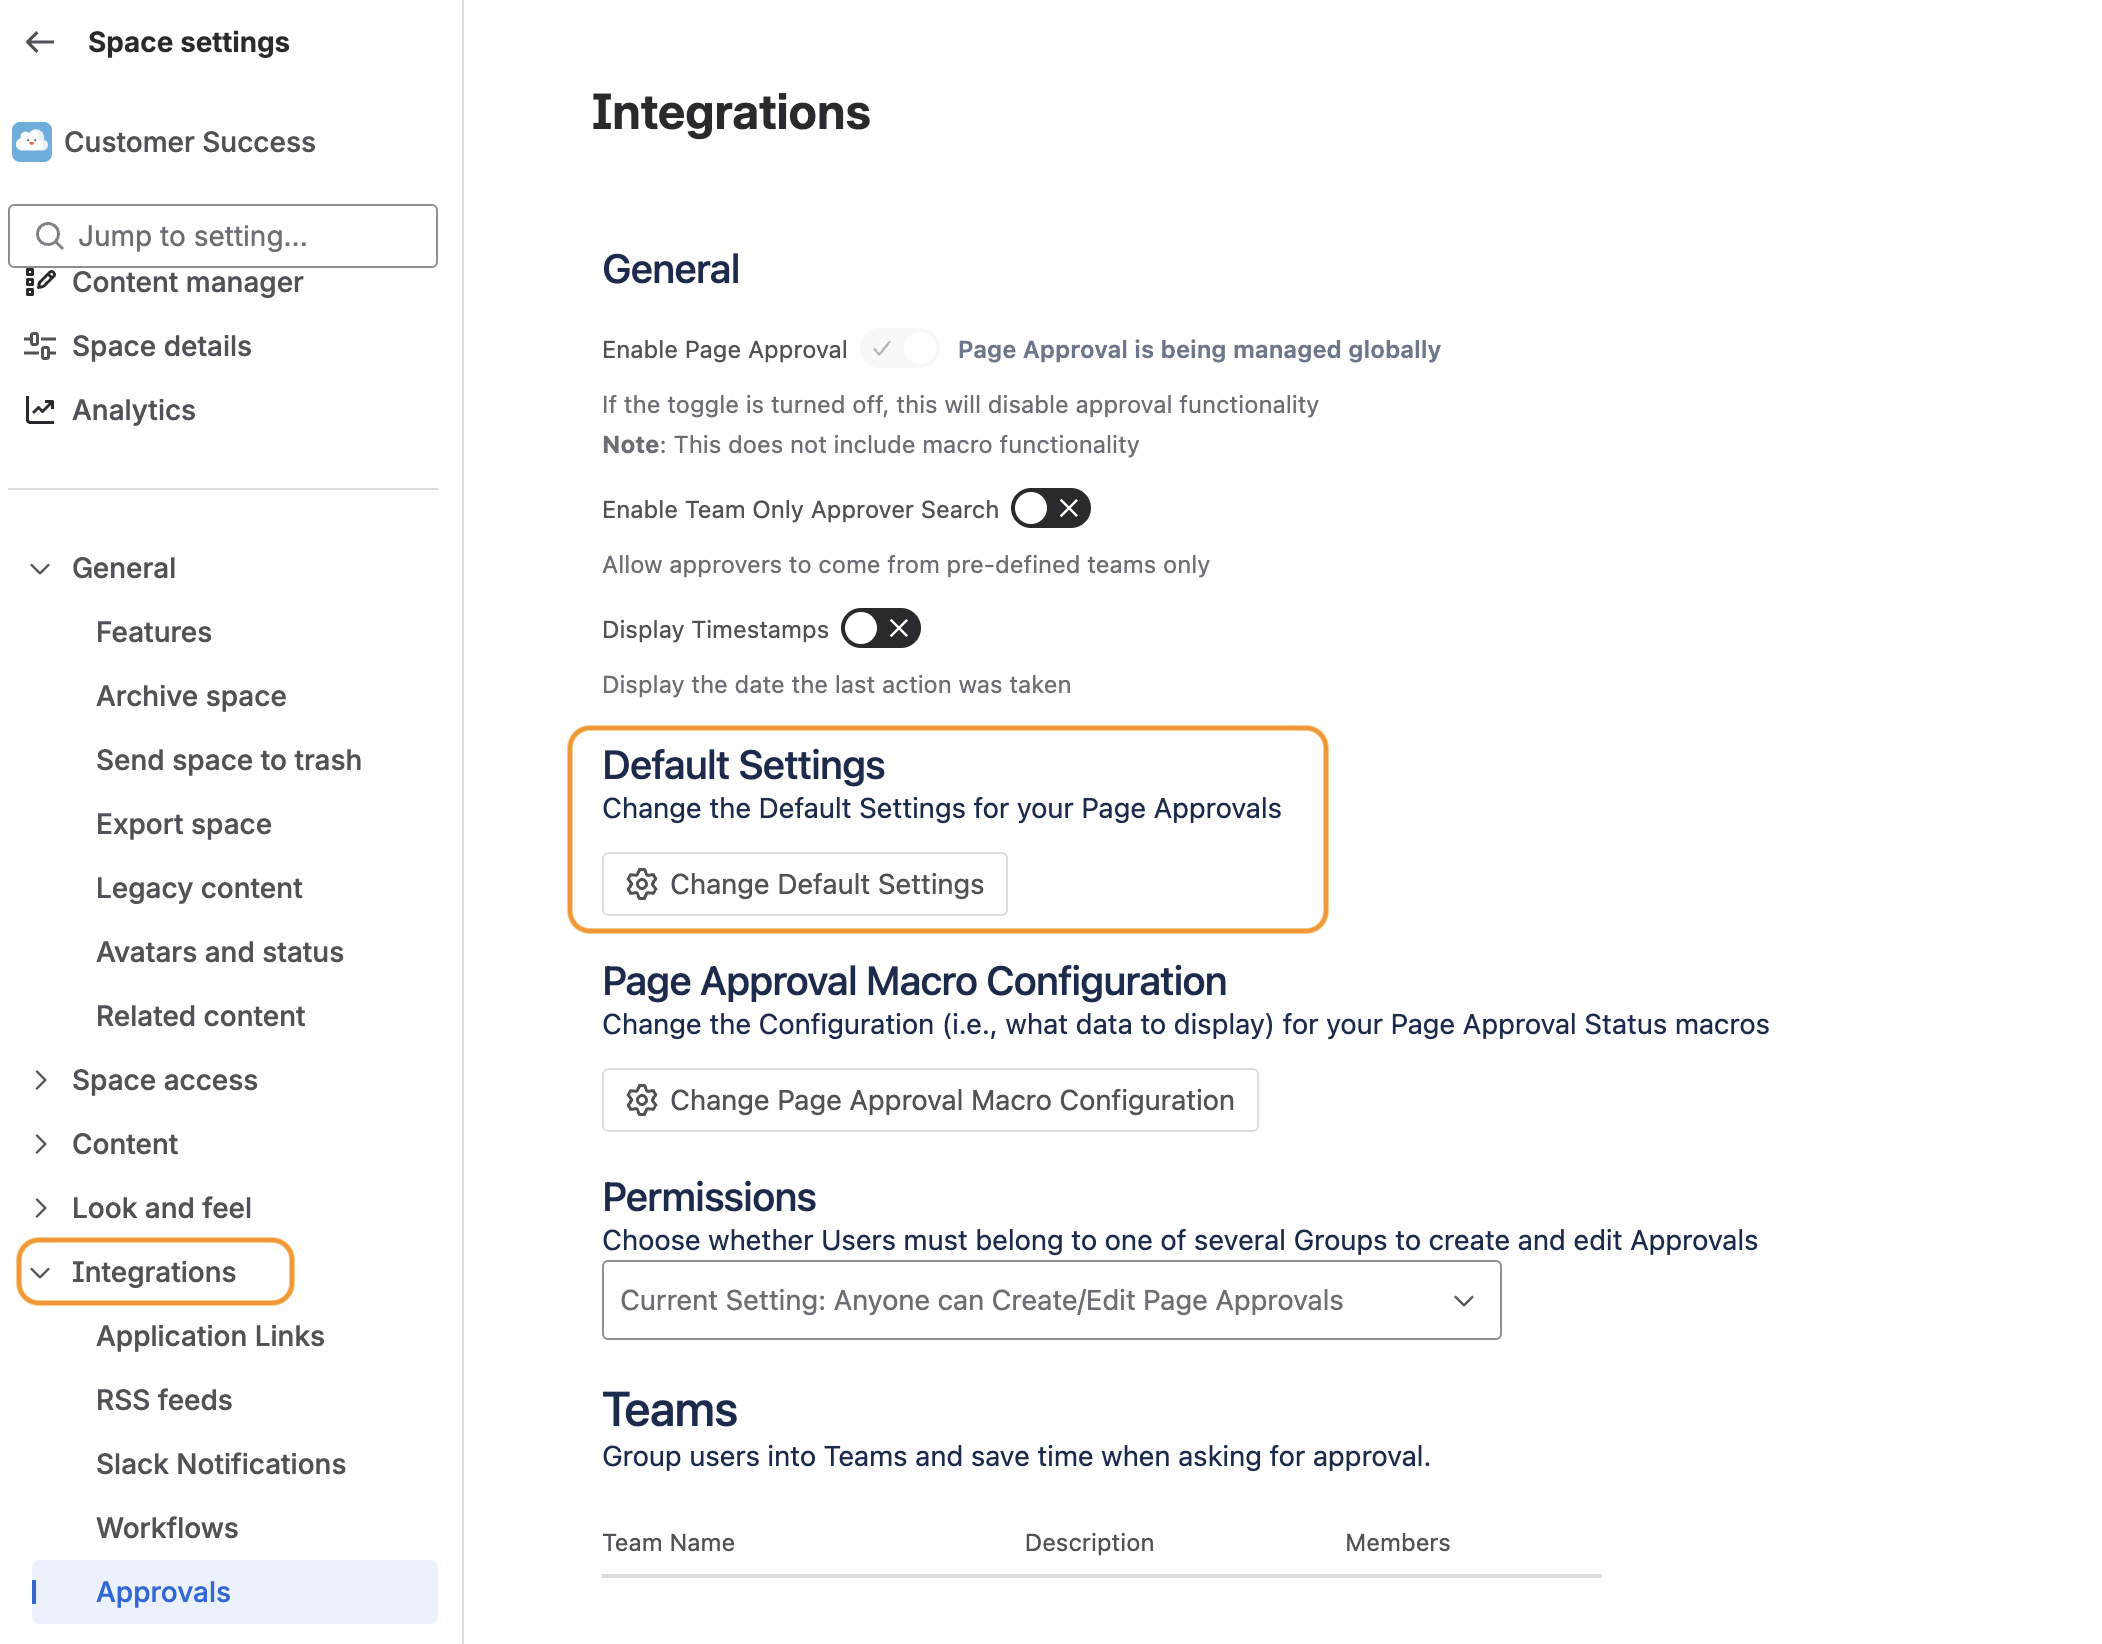
The Approvals space settings are accessed via the Integrations tab within the space settings of each space as shown in orange below:
Step 5: Restore page approval statuses in Cloud
With your Cloud instance configured, you can now have your approval statuses restored to your migrated pages!
To request a restore, raise a ticket with our Service Desk team and attach the CSV file you exported in Step 2. Our team will use this to restore the approval statuses to your pages in Cloud.
If you were unable to generate the CSV export, or if the export doesn't cover everything you need (for example, section approvals), please still raise a ticket. Our team will work with you to find the best path forward.
Step 6: Validate and communicate
Once our team has confirmed that the restore is complete, verify that approval statuses have been applied correctly and let your users know about the changes.
6.1 Functional checks
-
Statuses on pages: Open a sample of pages and confirm the expected approval status is visible.
-
Approval workflows: Try initiating an approval on a new page. Confirm the workflow behaves as expected.
Tip: Cross-reference a selection of pages against your exported CSV to confirm statuses match.
6.2 Communicate to users
You can now let your users know that Approvals for Confluence Cloud is now active!
-
Highlight anything that is different from Data Center.
-
Point users to the user documentation.
Need help?
If you run into issues at any point during this migration, please raise a ticket with our helpful Service Desk team, who are always happy to help.
You may also find it useful to explore our full documentation pages.