-20250819-084018.svg)
If you want to have a Workflow that separates your pages from your editors and your audience, you can set up a Publishing Workflow by following the guide below.
Prerequisites
-
Draft Space (this is the space where all your drafted pages are edited and are sent for approval)
-
Publishing Space (this is the space where all your pages will be published to upon approval)
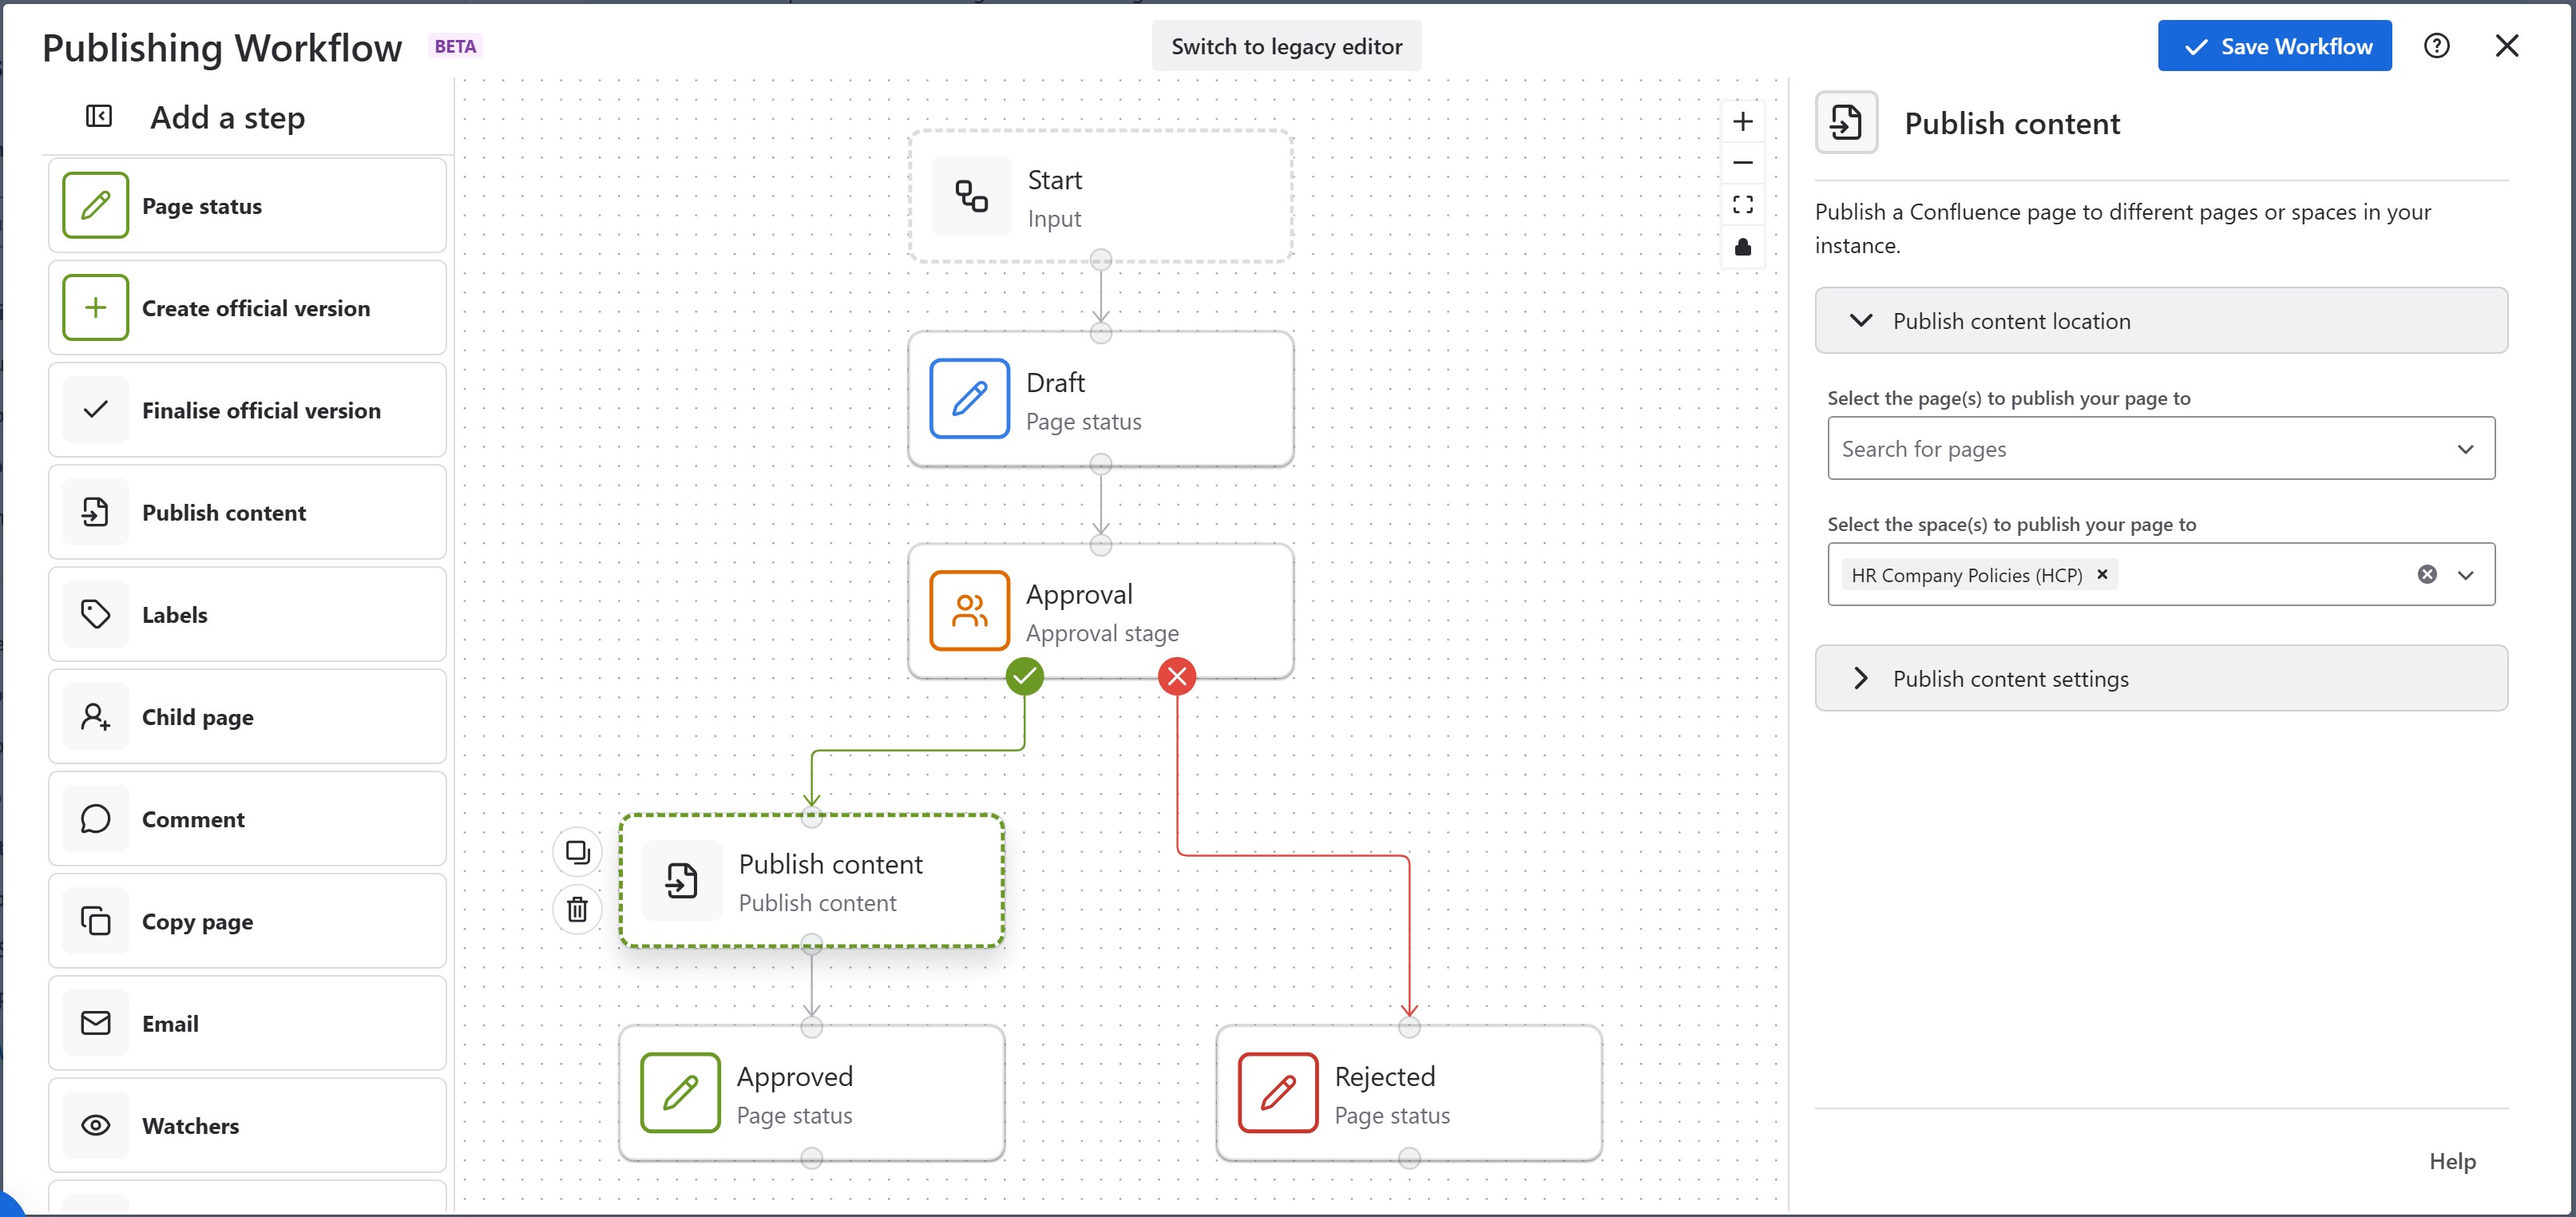
Workflow
Here is an example Workflow that can be used for Publishing Workflow:
You can replicate this workflow and customize it to meet your companies requirements. For more information on Creating a Workflow or Configuring Statuses and Approvals, please visit the respective links.
To learn more about how to use the Publish Content Action please see the documentation.
Space/Global Configuration
There are a few ways you can configure your instance/spaces to use the Publishing Action correctly. In this guide we will focus on the easiest.
This will be done using the CQL Mapping functionality which can be found in the Global Admin Workflow Configuration, as shown in the screenshot below:
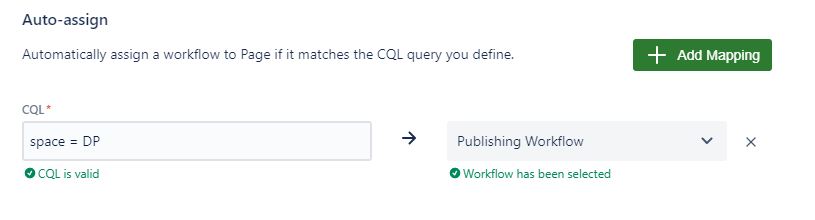
Here we are mapping the Publishing Workflow to all Pages that are in the Draft Space.
Now your pages will have this Workflow and whenever a Page is approved the page will be published to the Space that is configured in the Publish Content Action (The Publishing Space).
How to Configure your Spaces for Publishing
For the best set-up:
-
In the Space Permissions of the Draft Space, specify the users who have permission to Edit, Delete pages etc.
-
Remove all ability of Edits in the Published Space through the Space Permissions
Need support? We’re here to help 🧡
If you have any questions or would like to speak with us about Workflows, please don’t hesitate to reach out to our Customer Support team.