-20250819-084018.svg)
To get started creating your custom Workflow, navigate to either your Space Settings (if you’re a Space Admin) or to the Global Settings.
-
Admins: Navigate to Apps > Workflows > Global Settings > Workflows
-
Space Admins: Navigate to your Space, then follow Space Settings > Integrations > Workflows > Workflows (tab)
Below you will find a short video that guides you through how to setup a basic approval workflow.
Once you have accessed Workflows you will see the Workflows Table displayed in front of you. Now let’s create a Simple Approval Workflow!
-
Click the Create button to open the Workflow editor.
-
You will be presented with several templates to choose from, or simply Start from scratch. Click one and the Workflow Editor will show.
-
The name of the Workflow will initially be Untitled workflow, but you can change this at any time by clicking and editing the name at the top of the Workflow editor.
4. The workflow will open with a Start step already on it. You can move this step around, but you can’t add another, or delete it.
5. You can now start dragging and dropping your Status steps on to the canvas.
6. Rename these Statuses by clicking on them and editing the name directly at the top right. Alternatively, you can edit the name directly from the step on the canvas by clicking on the name.
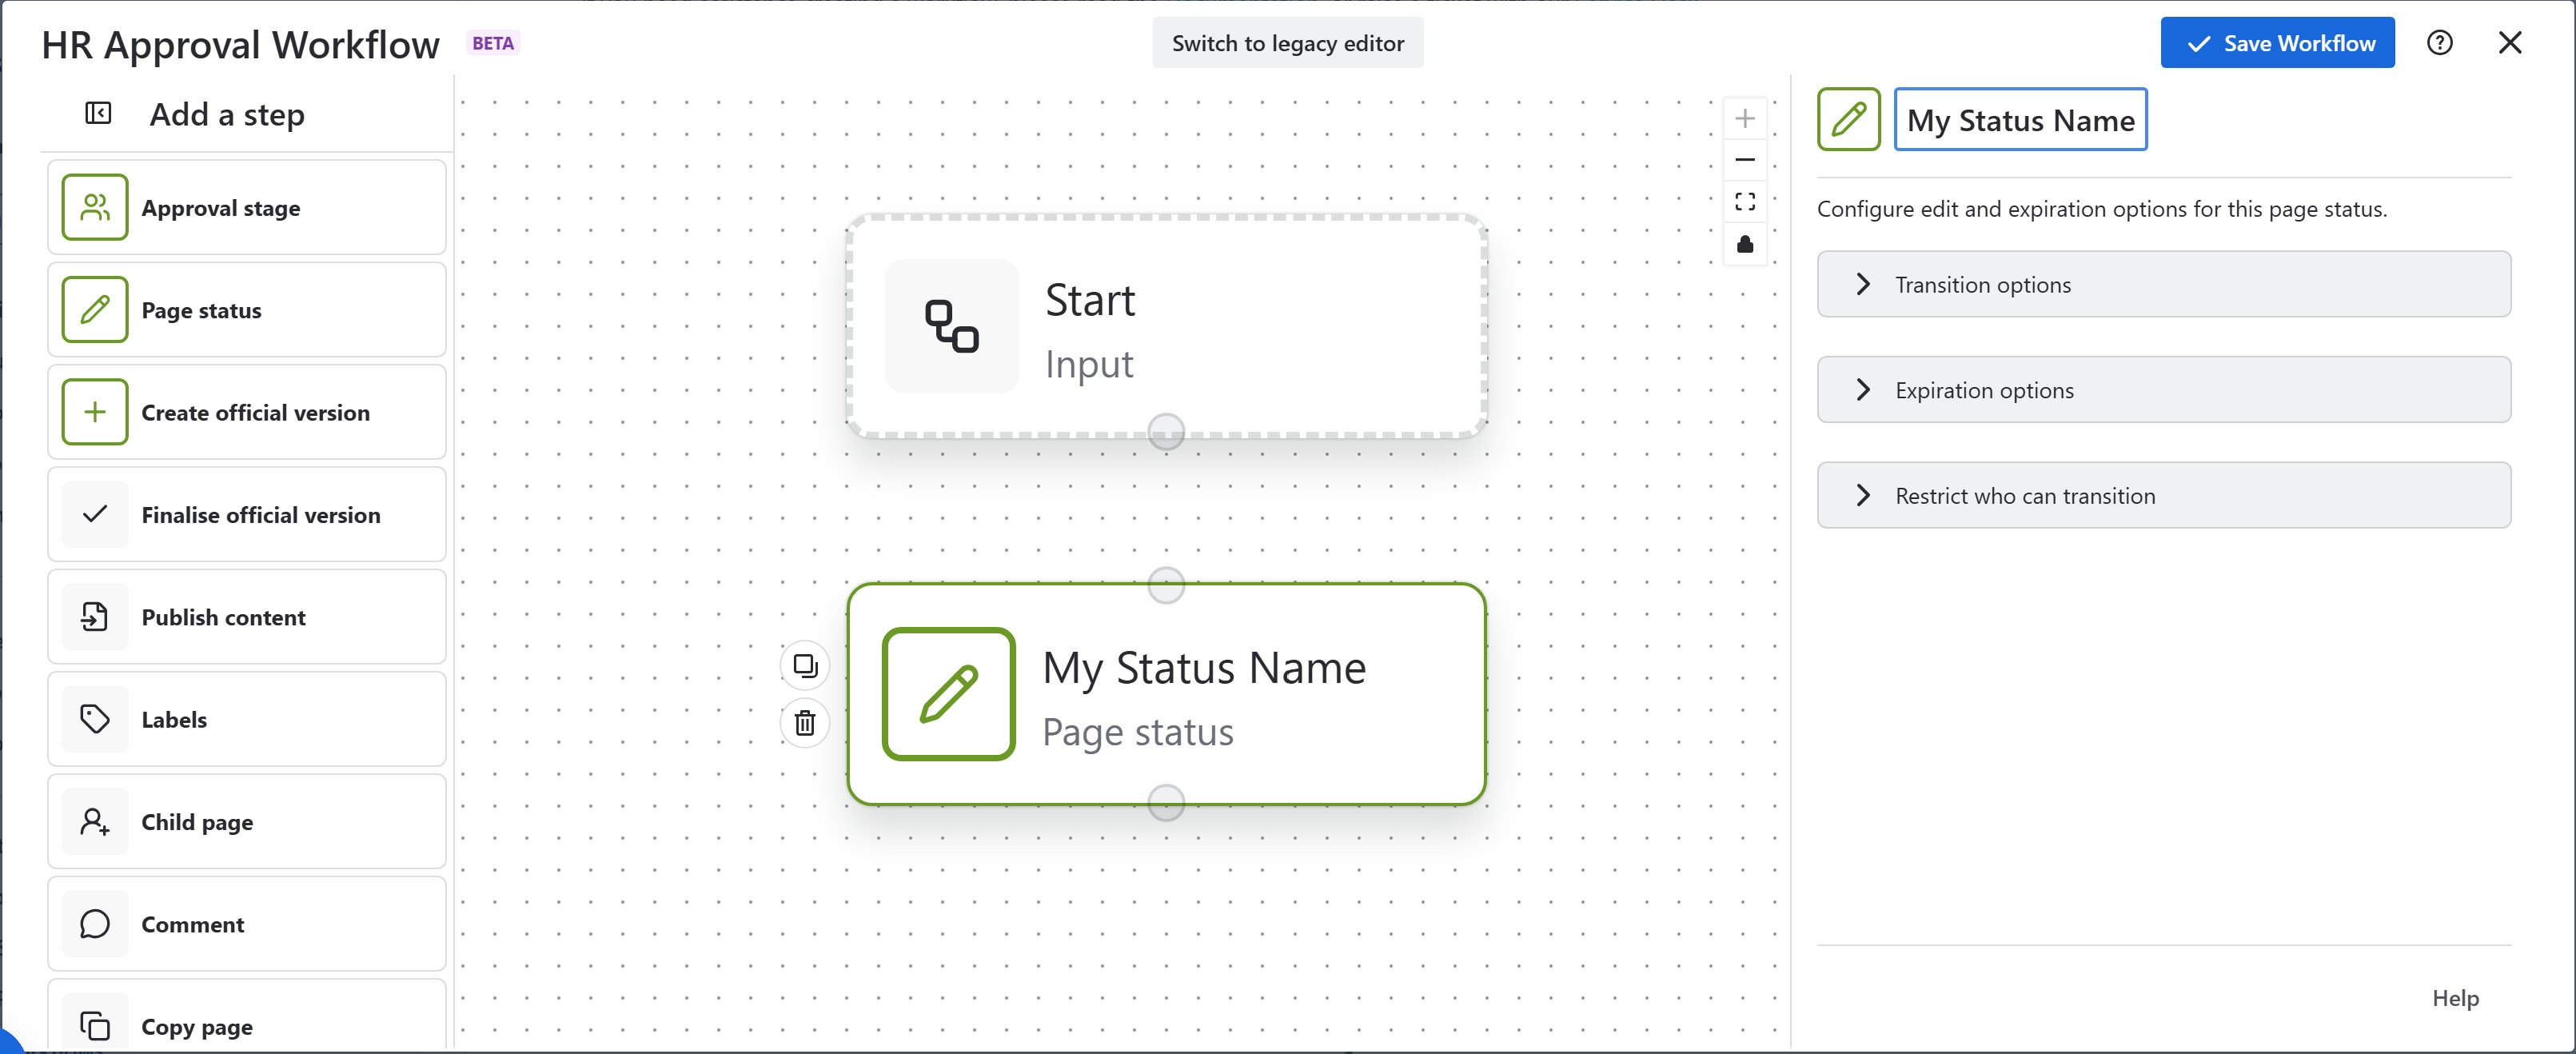
7. Once renamed, you can begin configuring the Status settings. For more information on these configuration options, check out our Status section on the Workflow Logic page.
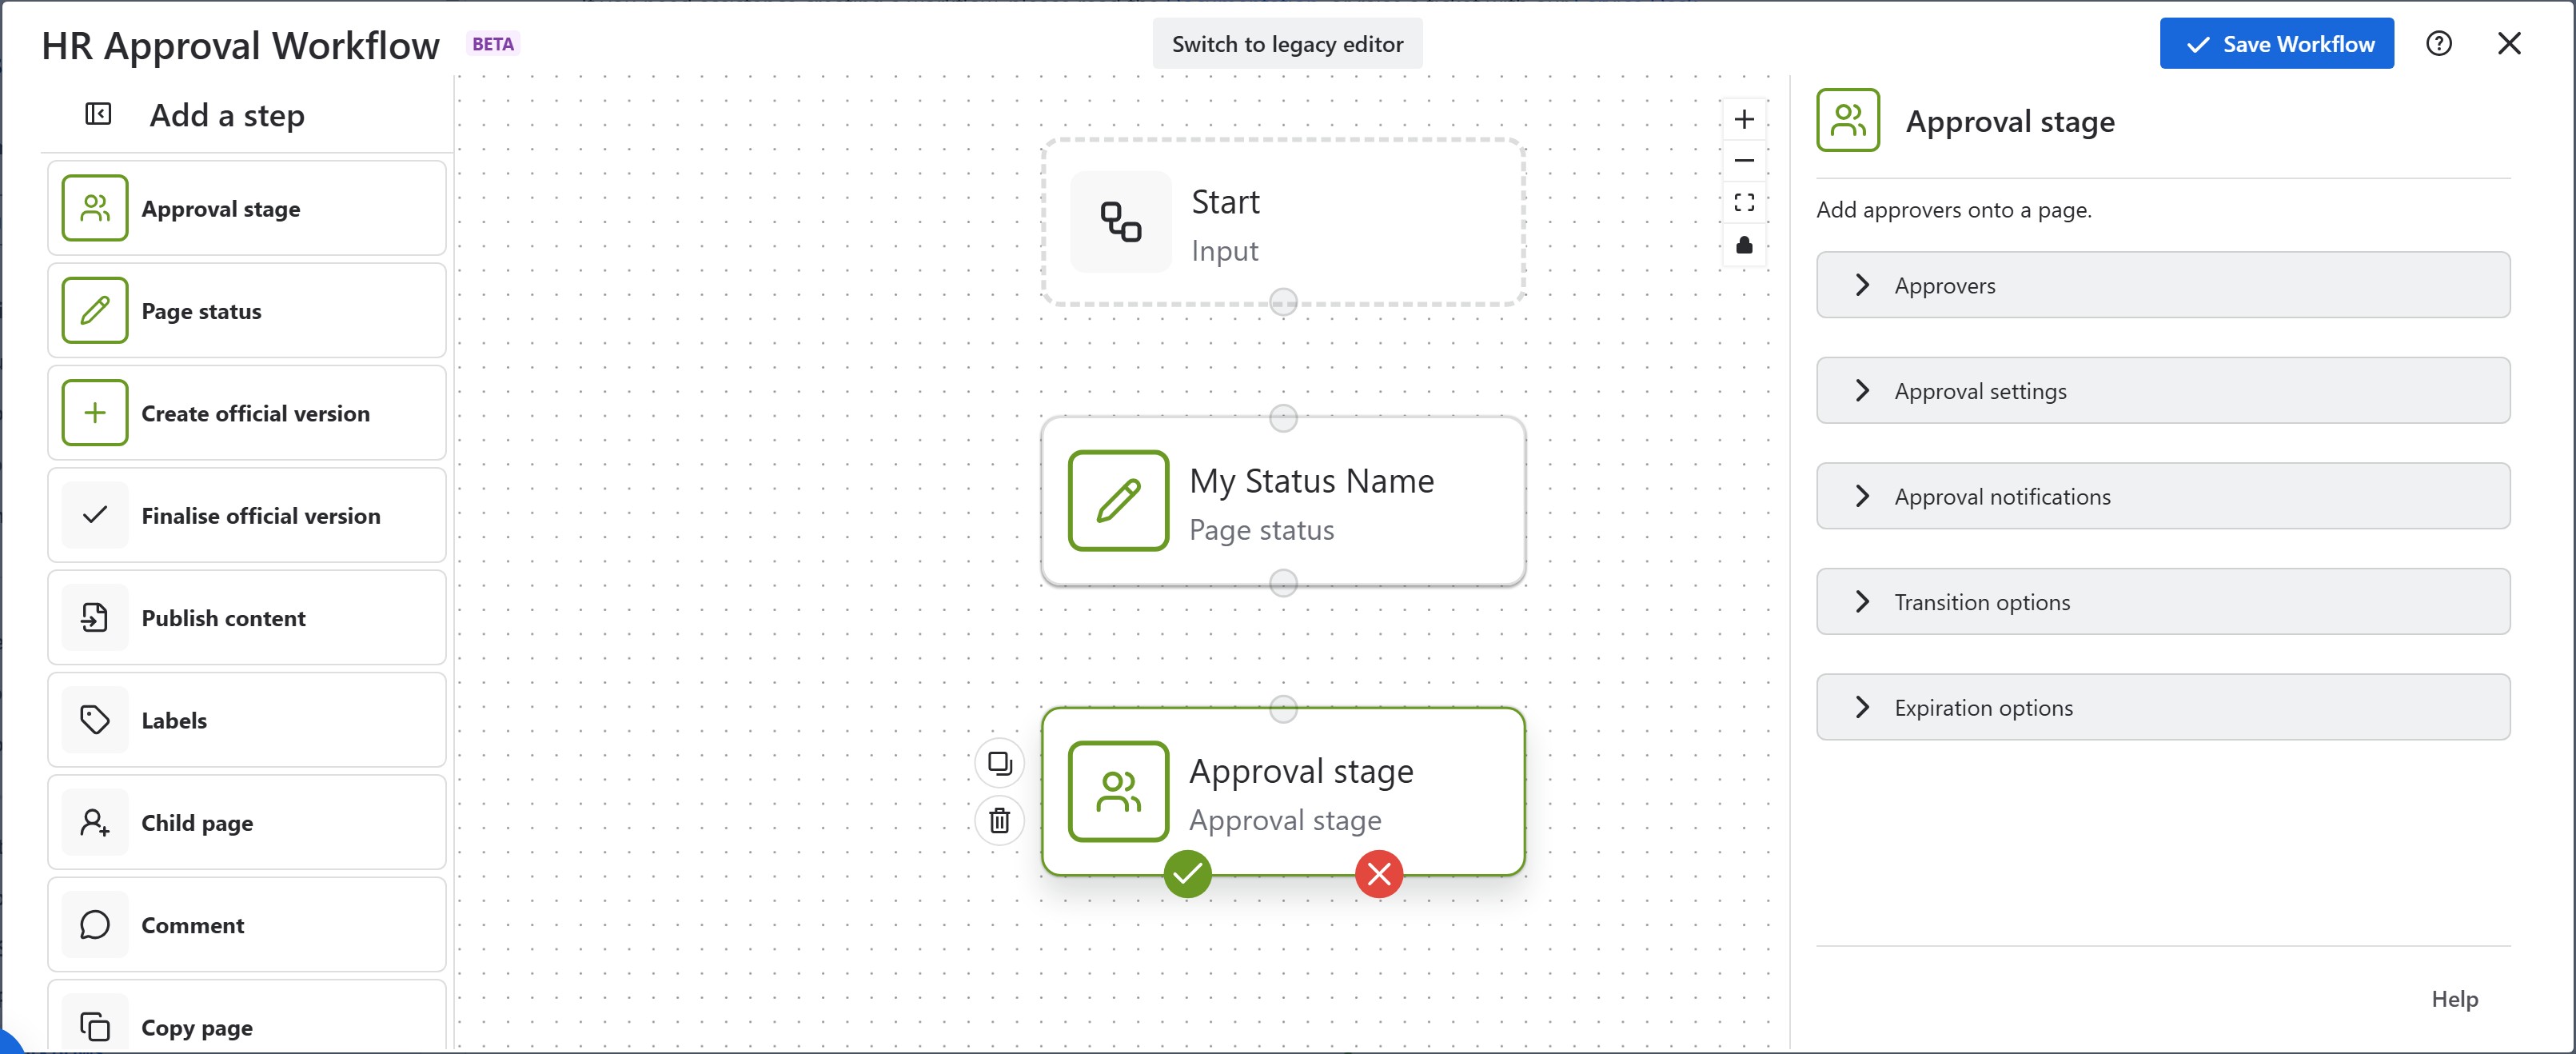
8. When your Statuses have been configured, you can now move on to setting up the Review and Approval. For more information on the configuration options available here, check out the Approvals section on the Workflow Logic page.
9. Link your workflow steps together by clicking the port on the bottom of the step and dragging it to the port at the top of the next step.
-
Note: you can delete connectors by pressing Backspace or Delete on your keyboard, or by clicking the delete (bin) button which appears on the connector when it’s selected.
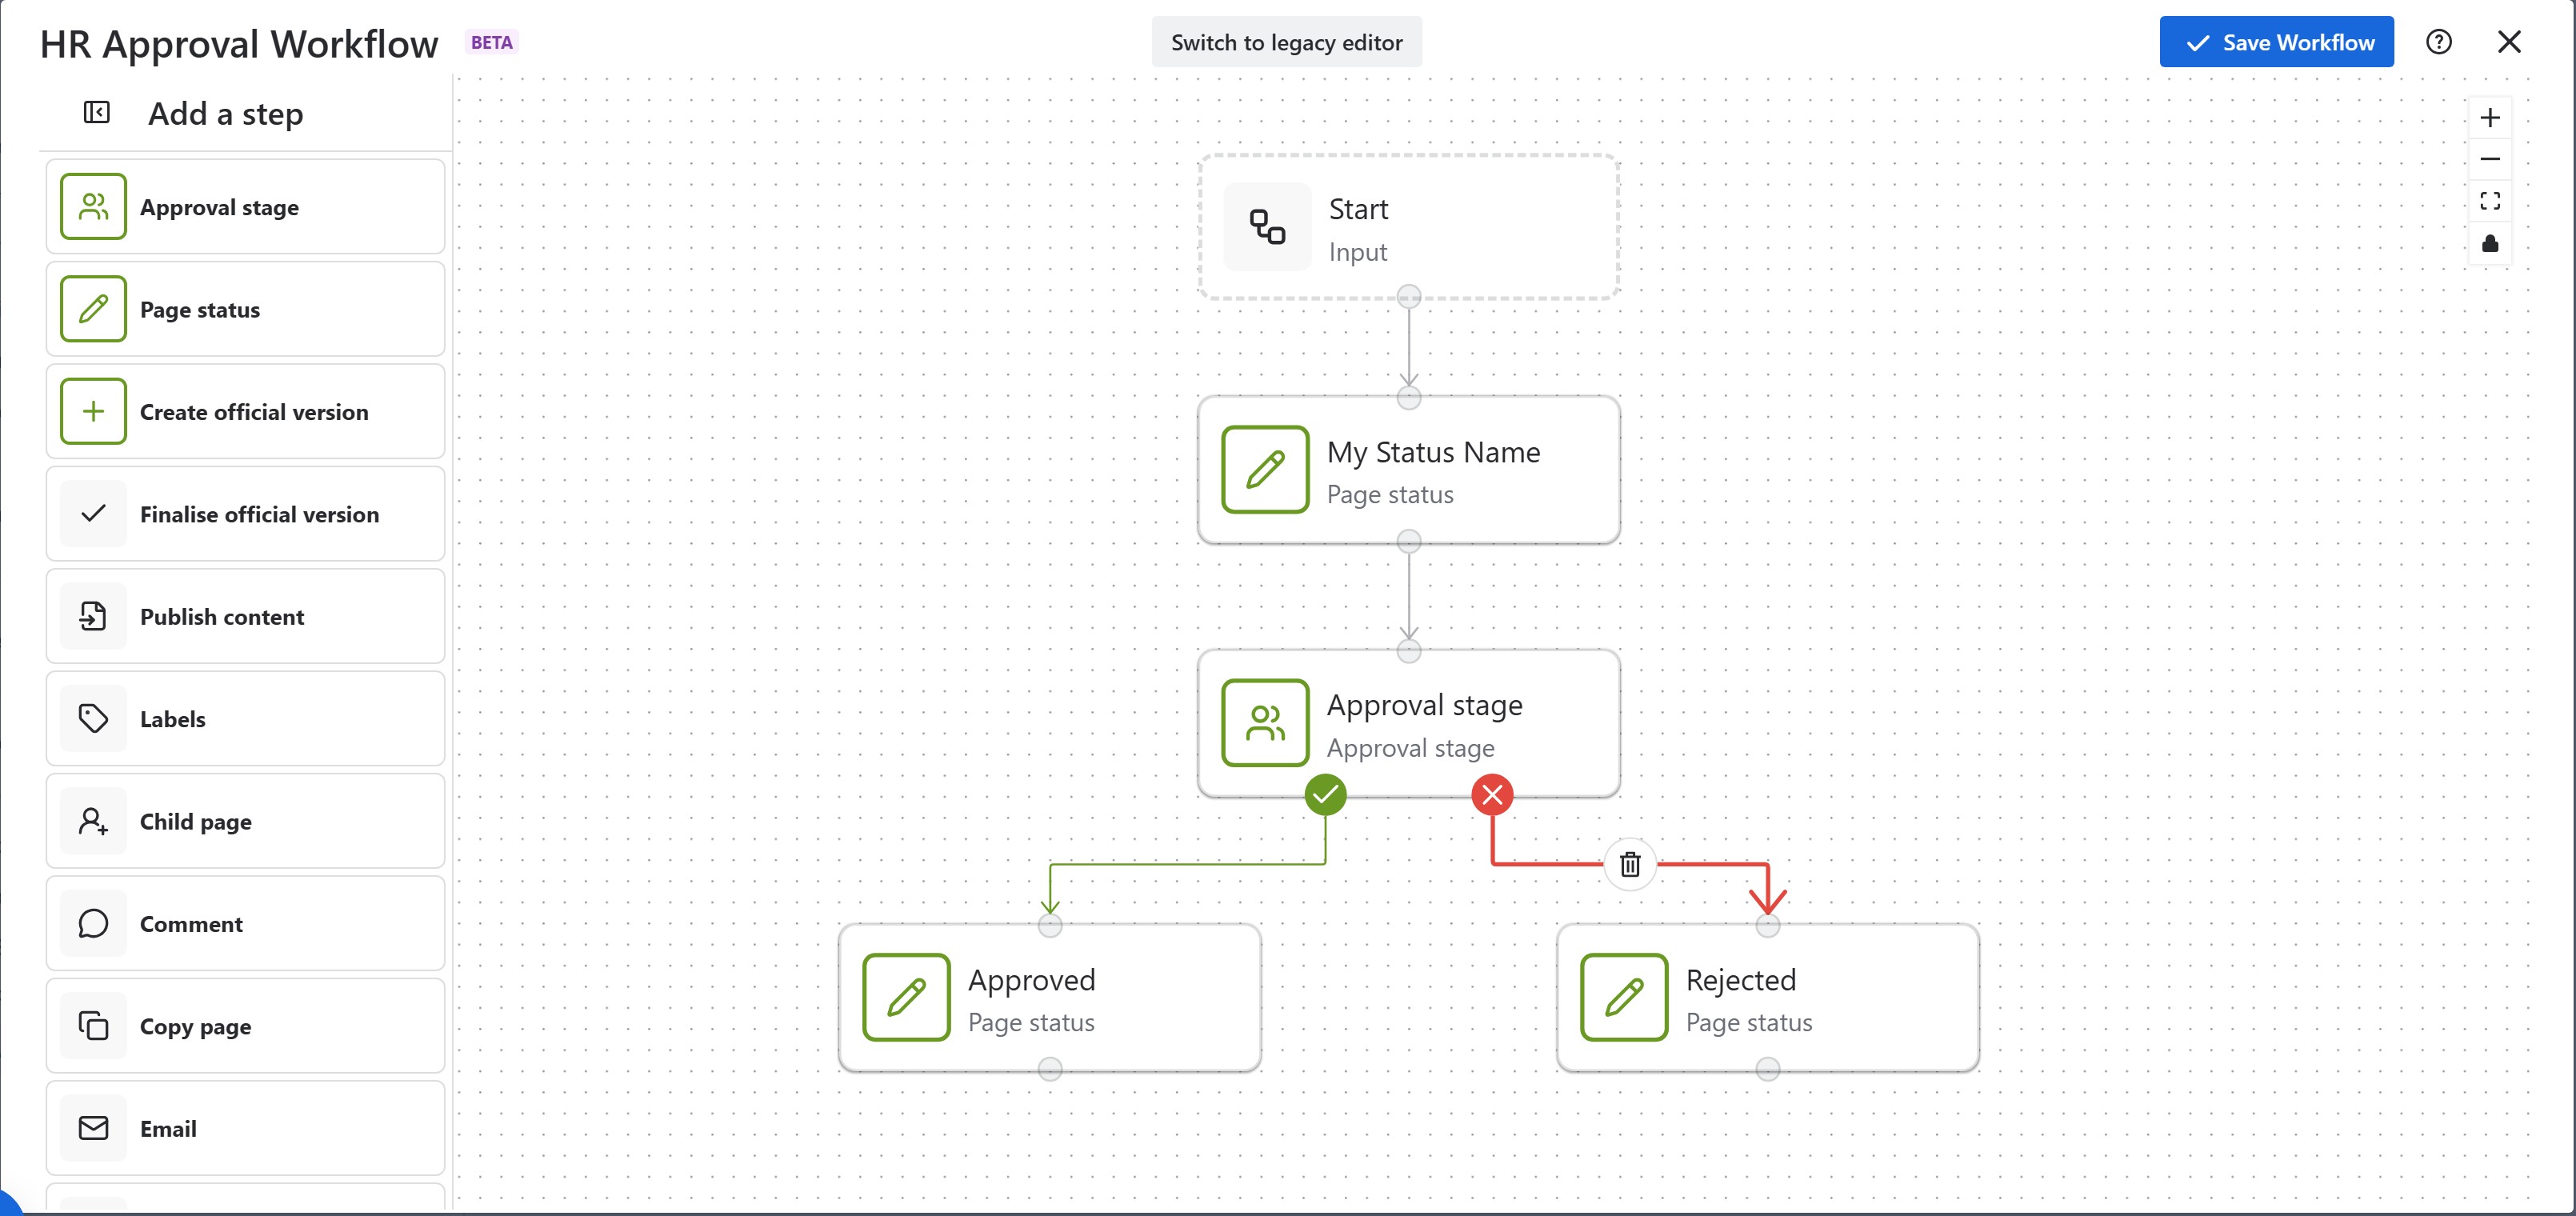
Top Tip: If you begin drawing your connector but want to cancel the drawing: release your mouse while the connector hasn’t snapped to an input port.
Top Tip: If you want to delete a transition, select it and use Fn + Delete (for Mac) or Del (for Windows).
10. Your workflow is now complete and ready to go! Click Save Workflow to begin using it on your pages.
Workflow Connector Keyboard Shortcuts
There are a number of keyboard shortcuts available when using the workflow connectors and these include:
-
Selecting multiple steps - hold Shift and draw a selection box, or hold Cmd or Ctrl while clicking multiple steps.
-
Copy steps - press CTRL / CMD + C.
-
Paste connectors - press CTRL / CMD + V (note that only your latest copy will be stored in the clipboard).
-
Enable Snap to Grid while dragging a node - hold Option or Alt.
-
Delete a step or connector - press Backspace or Del.
Additional Features of the Editor
Zoom
To zoom in and out of the editor you can either use the buttons or scroll Up/Down with your mouse.
Copy/Delete
If you have a step which you have configured and want to replicate this status multiple times you can press the button which is on the left of the Status step on the canvas. This will make a direct clone of the step, including its configuration, but with no connections. Alternatively, you can use the keyboard shortcut above to copy and paste.
If you want to delete a step you can press the button which is on the left of the Status step on the canvas. This will delete the step, and any connectors which were associated with it. Alternatively, you can use the keyboard shortcut above to delete. Note that you can undo step deletions, but the connectors will be lost. A full history of step deletions for your session will be retained.

Need support? We’re here to help 🧡
If you have any questions or would like to speak with us about Workflows, please don’t hesitate to reach out to our Customer Support team.