-20250819-084018.svg)
Who is this guide for?
This guide is for Confluence administrators who are migrating from Compliance for Confluence Data Center to Compliance for Confluence Cloud as part of a broader move from Confluence Data Center to Confluence Cloud.
By the end of this guide you will have:
-
Exported your existing page classifications from Data Center
-
Installed Compliance for Confluence Cloud
-
Migrated your Confluence content to Cloud (using the CCMA or another method)
-
Restored page classifications in Cloud using bulk-classification
Important
Compliance classifications are not automatically carried over when you migrate Confluence content. You will need to export classification data from Data Center and re-apply it in Cloud. This guide walks you through how to do that.
This migration involves three phases. The table below summarises what each phase covers.
|
Phase |
Steps |
What you’ll do |
|---|---|---|
|
Before migration |
1–2 |
Review your DC setup and export classification data |
|
During migration |
3 |
Migrate Confluence content using Atlassian’s CCMA tool |
|
After migration |
4–7 |
Install Compliance Cloud, verify data, restore classifications and validate. |
Phase 1: Before you migrate
Step 1: Review your current Compliance DC setup
Take stock of your current Compliance configuration in Data Center. You can find your classification levels under Settings cog → Compliance → Classification. The Statistics section gives you a count of classified pages per space.
Work through the following checklist:
-
Classification levels: Note the levels, their names and order.
-
Defaults and Sensitive Data Settings: Note any default classifications, sensitive data detectors and enforced classification settings
-
Automation rules: List all rules you have configured in DC so you can rebuild them in Cloud.
-
Timeline: Plan for a test migration before your full migration.
Tip: Run a Sensitive Data Detection scan before migrating to identify your most critical spaces and highly sensitive pages. This helps you prioritise validation after the migration. Find out more here.
Step 2: Export page classification data from Data Center (optional)
Compliance classifications are stored as page content properties in Confluence. Before you migrate, you may wish to export this data so you have a reliable snapshot of the data, as it was in the Data Center instance.
2.1 Choose your export method: there are two ways to export your classification data
-
REST API (recommended for most migrations)
-
Handles large instances with thousands of pages
-
Can be run per space or across all spaces at once
-
Outputs a clean CSV file you can use to check classifications later
-
Manual CSV export (for smaller instances or spot-checking)
-
Use the Export to CSV option from Compliance Search
-
Best suited to smaller instances or if you only need to check a handful of spaces
The rest of this step assumes you are using the Compliance REST API. You may wish to find out more about this here before starting: https://docs.appfox.io/confluence-compliance/rest-api-dc
2.2 Run the export script
The script below retrieves the classification for every page in your instance and writes the results to a CSV file.
While we hope this script is useful, we cannot provide our usual level of support. Whilst you can raise a ticket with our friendly Service Desk, there isn’t a warranty and we aren’t maintaining the code.
Before running the script, update the configuration section with your own values:
-
BASE_URL: your Confluence Data Center URL
-
PAT: Authentication is done using a Personal Access Token: Using Personal Access Tokens | Enterprise Data Center Latest | Atlassian Documentation
-
SPACE_KEY: set this to a specific space key if you want to limit the export to one space, or leave it as None to export all spaces
The following script will save your page classifications
The output will be a CSV file with one row per classified page (see below).
|
pageid |
spacekey |
title |
classification |
|---|---|---|---|
|
12345 |
HR |
HR Policies and Procedures |
Confidential |
|
67890 |
FIN |
Q4 Financial Forecast |
Restricted |
Phase 2: During the migration
Step 3: Migrate Compliance for Confluence DC content to Compliance Cloud
Migrate your Confluence spaces and pages from Data Center to Cloud using your chosen method. The Confluence Cloud Migration Assistant (CCMA) is the most common approach. Instructions on how to do this is out of scope of this document, but you need to install the app from the Atlassian Marketplace and the Atlassian documentation is here: Confluence Cloud Migration Assistant | Atlassian Support. It is recommended that you run a test before running the full migration, and that you schedule a migration window.
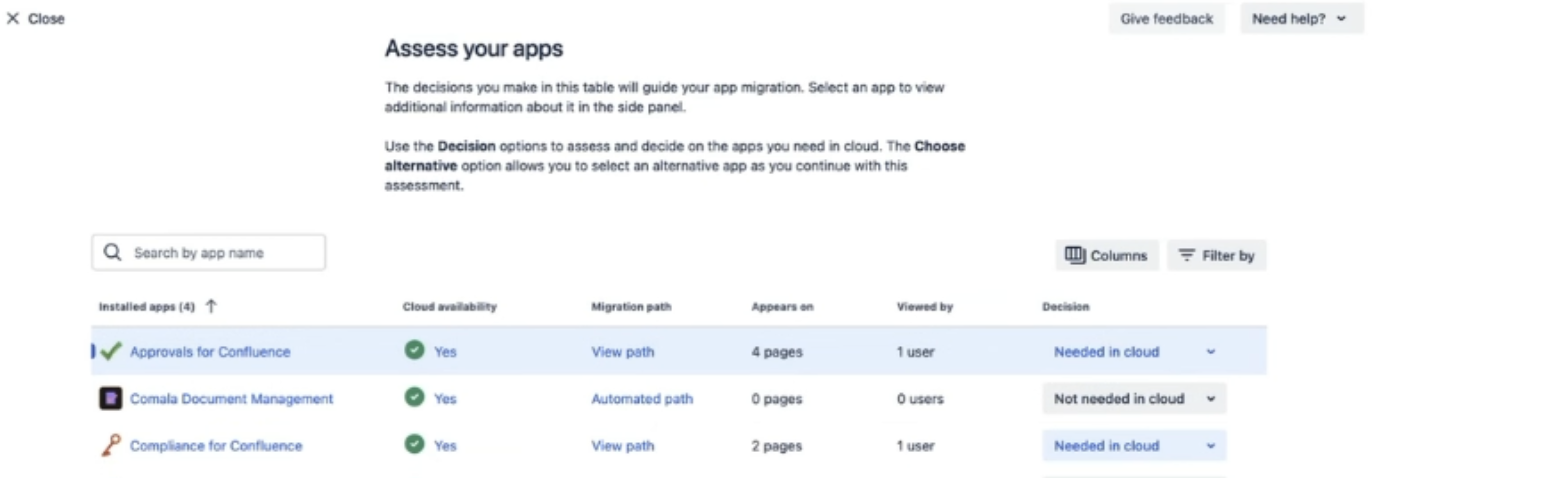
The CCMA app prompts you to install marketplace apps before migration. When you open the app, you will be asked to ‘Assess your apps’:
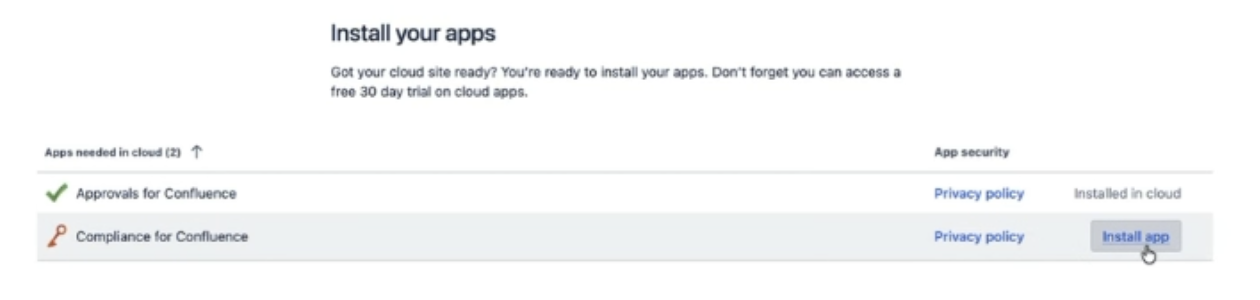
Once you have selected Compliance for Confluence from the list, you will then be asked to ‘Prepare your apps’. You’ll be able to click install from here:
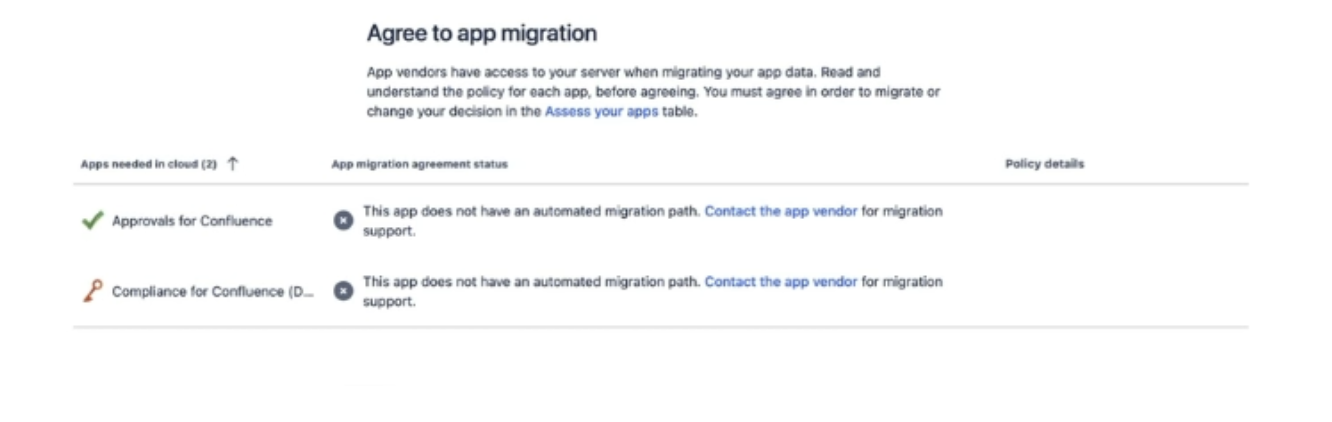
The final stage of this is to ‘Agree to app migration’. There will be a message which comes up saying ‘This app does not have an automated migration path’, which just means that Compliance data will not automatically carry across and you need to complete Step 4 below.
Once your Confluence content is in Cloud, you may wish to check your page properties to ensure that the classification data was preserved during the migration. The quickest way is to open the following URL in your browser, substituting your domain and the page ID:
https://{your-domain}.atlassian.net/wiki/rest/api/content/{page_id}/property/classification
You can find a page’s ID by opening the page in Confluence and copying the number from the URL.
Phase 3: After your migration
Step 4: Configure Compliance for Confluence Cloud
You may wish to browse through our Getting Started documentation to get an introduction to navigating our Cloud version before starting this step.
4.1 Recreate classification levels (Cloud configuration)
Recreate your classification levels in Cloud to match your Data Center setup as closely as possible. This makes it much easier to bulk-reapply classifications in the next step.
For each level, configure its name, description, colour and display order.
Once you have created your levels, you will need to configure your level schemes, which is a new addition to Compliance Cloud. Edit the default level schemes to ensure all levels are present and ordered from least to most sensitive.
4.2 Configure the global settings and any space level settings.
Recreate any global settings and space-specific configuration you noted in Step 1. You may find this page helpful: Configuring Global Options.
4.3 Recreate your Sensitive Data Detectors and automation rules
Recreate your Sensitive Data Detectors and configure your detector schemes to apply them. This is a Cloud feature which allows you to group different detectors together, and replaces the on/off toggles that there were in Data Center. Once you have done this, you can start rebuild your automation rules.
Tip: There are some additional default detectors in Cloud that you might find useful, but there are some which were on Data Center which are not provided by default on Cloud. You will need to recreate any detectors you need by copying the RegEx from your DC detector to a new Cloud detector.
Step 5: Restore page classifications in Cloud
With your classification levels and rules in place, you can now restore classifications to your migrated pages. There are two approaches: using the bulk classification tools in the Compliance admin UI, or running a script against the Cloud REST API.
Option A: Bulk classification via the admin UI
The Compliance admin interface includes bulk classification tools that let you apply classifications to many pages at once without writing any code. You can approach this:
-
By space: Open the Compliance admin view, select a space, and apply a default classification to all pages..
-
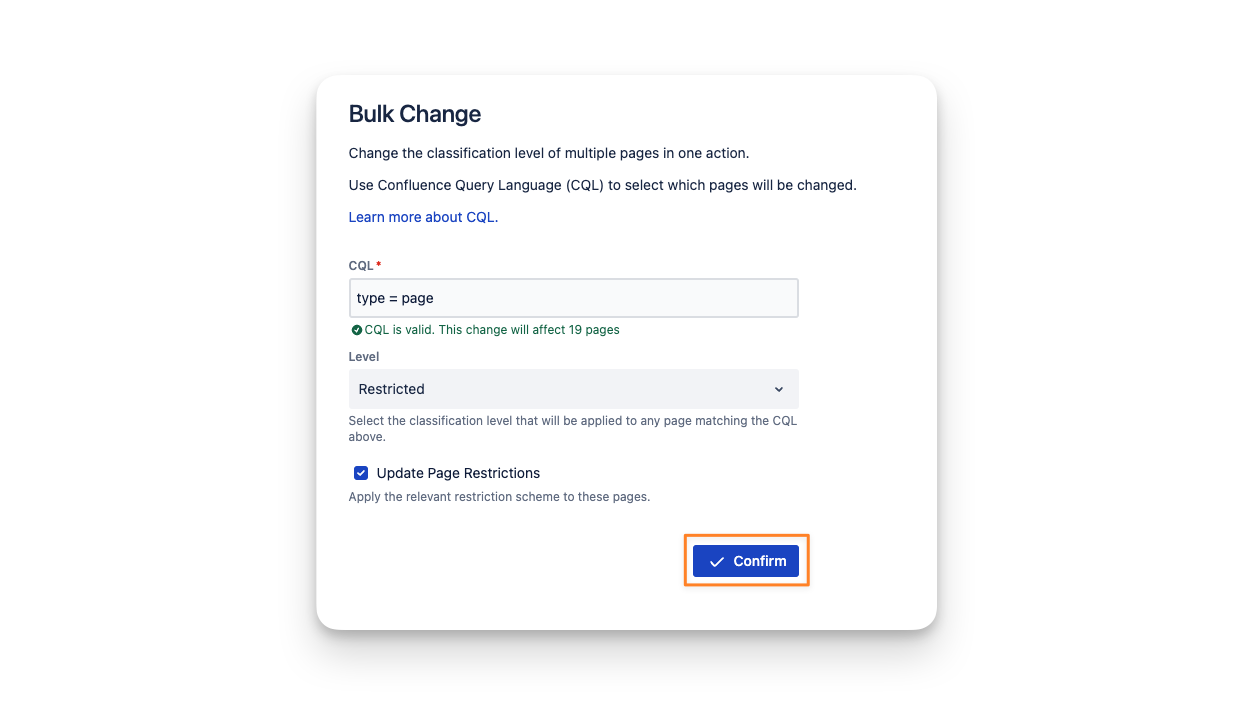
By filter: Filter pages by space, label, existing classification, or other metadata, then apply a classification to all filtered results at once.
Tip: A useful pattern for large spaces is to apply a default classification to the entire space first (for example, all HR pages → Confidential), then use filters to adjust any pages that need a different level
Option B: Scripted bulk classification via REST API
For larger instances a scripted approach is preferable.
You may use the following script for this approach. This script will overwrite any existing page levels on your Cloud instance. It will use the information in the content properties of each page and reapply it to the Compliance Cloud app. Running this script immediately after the CCMA migrates the page information is therefore recommended.
While we hope this script is useful, we cannot provide our usual level of support. Whilst you can raise a ticket with our friendly Service Desk there isn’t a warranty and we aren’t maintaining the code.
Before running the script, update the configuration section with your own values:
-
CONFLUENCE_BASE_URL: your Confluence Cloud URL
-
CONFLUENCE_EMAIL: your email address
-
CONFLUENCE_API_TOKEN: An Atlassian API key. The documentation is available here: https://support.atlassian.com/atlassian-account/docs/manage-api-tokens-for-your-atlassian-account/
-
COMPLIANCE_API_KEY: A Compliance API key. The documentation is available here: https://docs.appfox.io/confluence-compliance/rest-api
-
SPACE_KEY_FILTER: set this to a specific space key if you want to limit the export to one space, or leave it as None to export all spaces
Step 6: Validate and communicate
Before you wrap up, verify that classifications have been applied correctly and let your users know about the changes.
6.1 Functional checks
-
Labels on pages: Open a sample of pages and confirm the expected classification label is visible.
-
Enforcement rules: Try creating a new page in a space where classification is required. Confirm the user is prompted to classify it.
You can get a handy overview of this information through your the Compliance Search and Audit Logs are useful here.
Tip: Compliance for Confluence Cloud now includes AI classification, which can help you identify and suggest classifications for pages that were missed or difficult to categorise manually. Find out more here: Classifying Pages with AI.
6.2 Communicate to users
You can now let your users know that Compliance for Confluence Cloud is now active!
-
Highlight anything that is different from Data Center (such as renamed classification levels).
-
Point users to the user documentation and our getting started video.
-
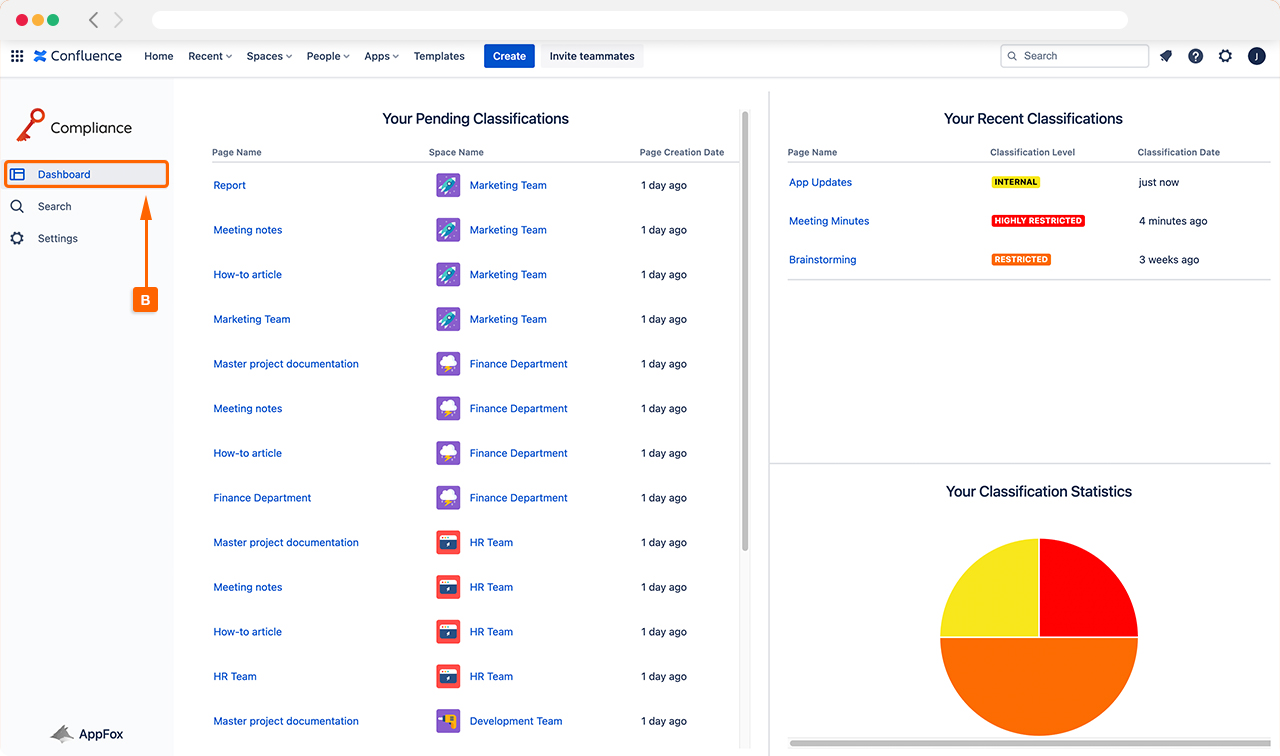
Users track their own pages’ compliance status via the Compliance Dashboard
Need help?
If you run into issues at any point during this migration, please raise a ticket with our helpful Service Desk team, who are always to help.
You may also find it useful to explore our full documentation pages.