Migrating from Comala Document Management DC/Server
Migrating from Comala Document Management Data Center/Server is a mostly automated process, with a few manual steps.
Getting started
To start, we recommend taking a look at all that Workflows for Confluence offers and confirming it has what you need. See here for an overview of how our app compares to Comala Document Management.
If you prefer to be hands-on and try the app for yourself, you can get a free 30-day trial through the Atlassian Marketplace or book a demo with our product team.
Alternatively, we have user guides available that will walk you through every piece of functionality in Workflows for Confluence.
Things to keep in mind
When migrating across to Workflows for Confluence you should treat this as a blank slate. Any existing workflow history, metadata, or approval audit logs will not be migrated across to Workflows.
Once you are up and running with Workflows for Confluence, you will get access to page-level workflow history, metadata macros, and approval audit logs going forward.
Overview
It is important to note that there are two distinct “migration” phases when moving from Comala Document Management DC/Server to Workflows for Confluence Cloud. The first phase is the migration of your core on-premise Confluence data to Confluence Cloud, which is handled by the Confluence Cloud Migration Assistant. The second phase is the migration of Comala Document Management data to Workflows for Confluence data. This is handled by our in-app tool.
Our in-app tool migrates one space at a time. In other words, a space admin has to run a separate migration for each space in which they’d like to migrate Comala Document Management data to Workflows for Confluence data.
Before migrating, you will need to recreate your Comala Document Management workflows as Workflows for Confluence workflows and choose how statuses from the former correspond to statuses in the latter.
During a migration, each page which had a Comala Document Management workflow in your on-premise instance will have the chosen Workflows for Confluence Cloud workflow applied at the corresponding status, allowing your document management process to pick up where it left off before migrating to Cloud.
Other Comala Document Management data, including workflow history, metadata, and approval audit logs, are not migrated. However, Workflows for Confluence provides many equivalent features which are available to use once the migration is complete.
With these high-level points in mind, let’s take a look at the detailed steps of a migration.
Step 1: Review your Comala Document Management workflows
To begin, review the Comala Document Management workflows in a space in which you’d like to use Workflows for Confluence. A Cloud migration is a great time to assess your document workflows and make sure that they actually do what you and your team need – there might be workflows that you no longer need or that could be improved.
Step 2: Create your chosen workflows in Workflows for Confluence
Once you’ve decided which workflows to use in the Cloud, install Workflows for Confluence (a free 30 day trial is available) on the target site of your migration and recreate your Comala Document Management workflows. We have a workflow migration guide which shows you exactly how to do this using our no-code, drag-and-drop workflow builder. Our Customer Support team are also happy to help with any questions you might have.
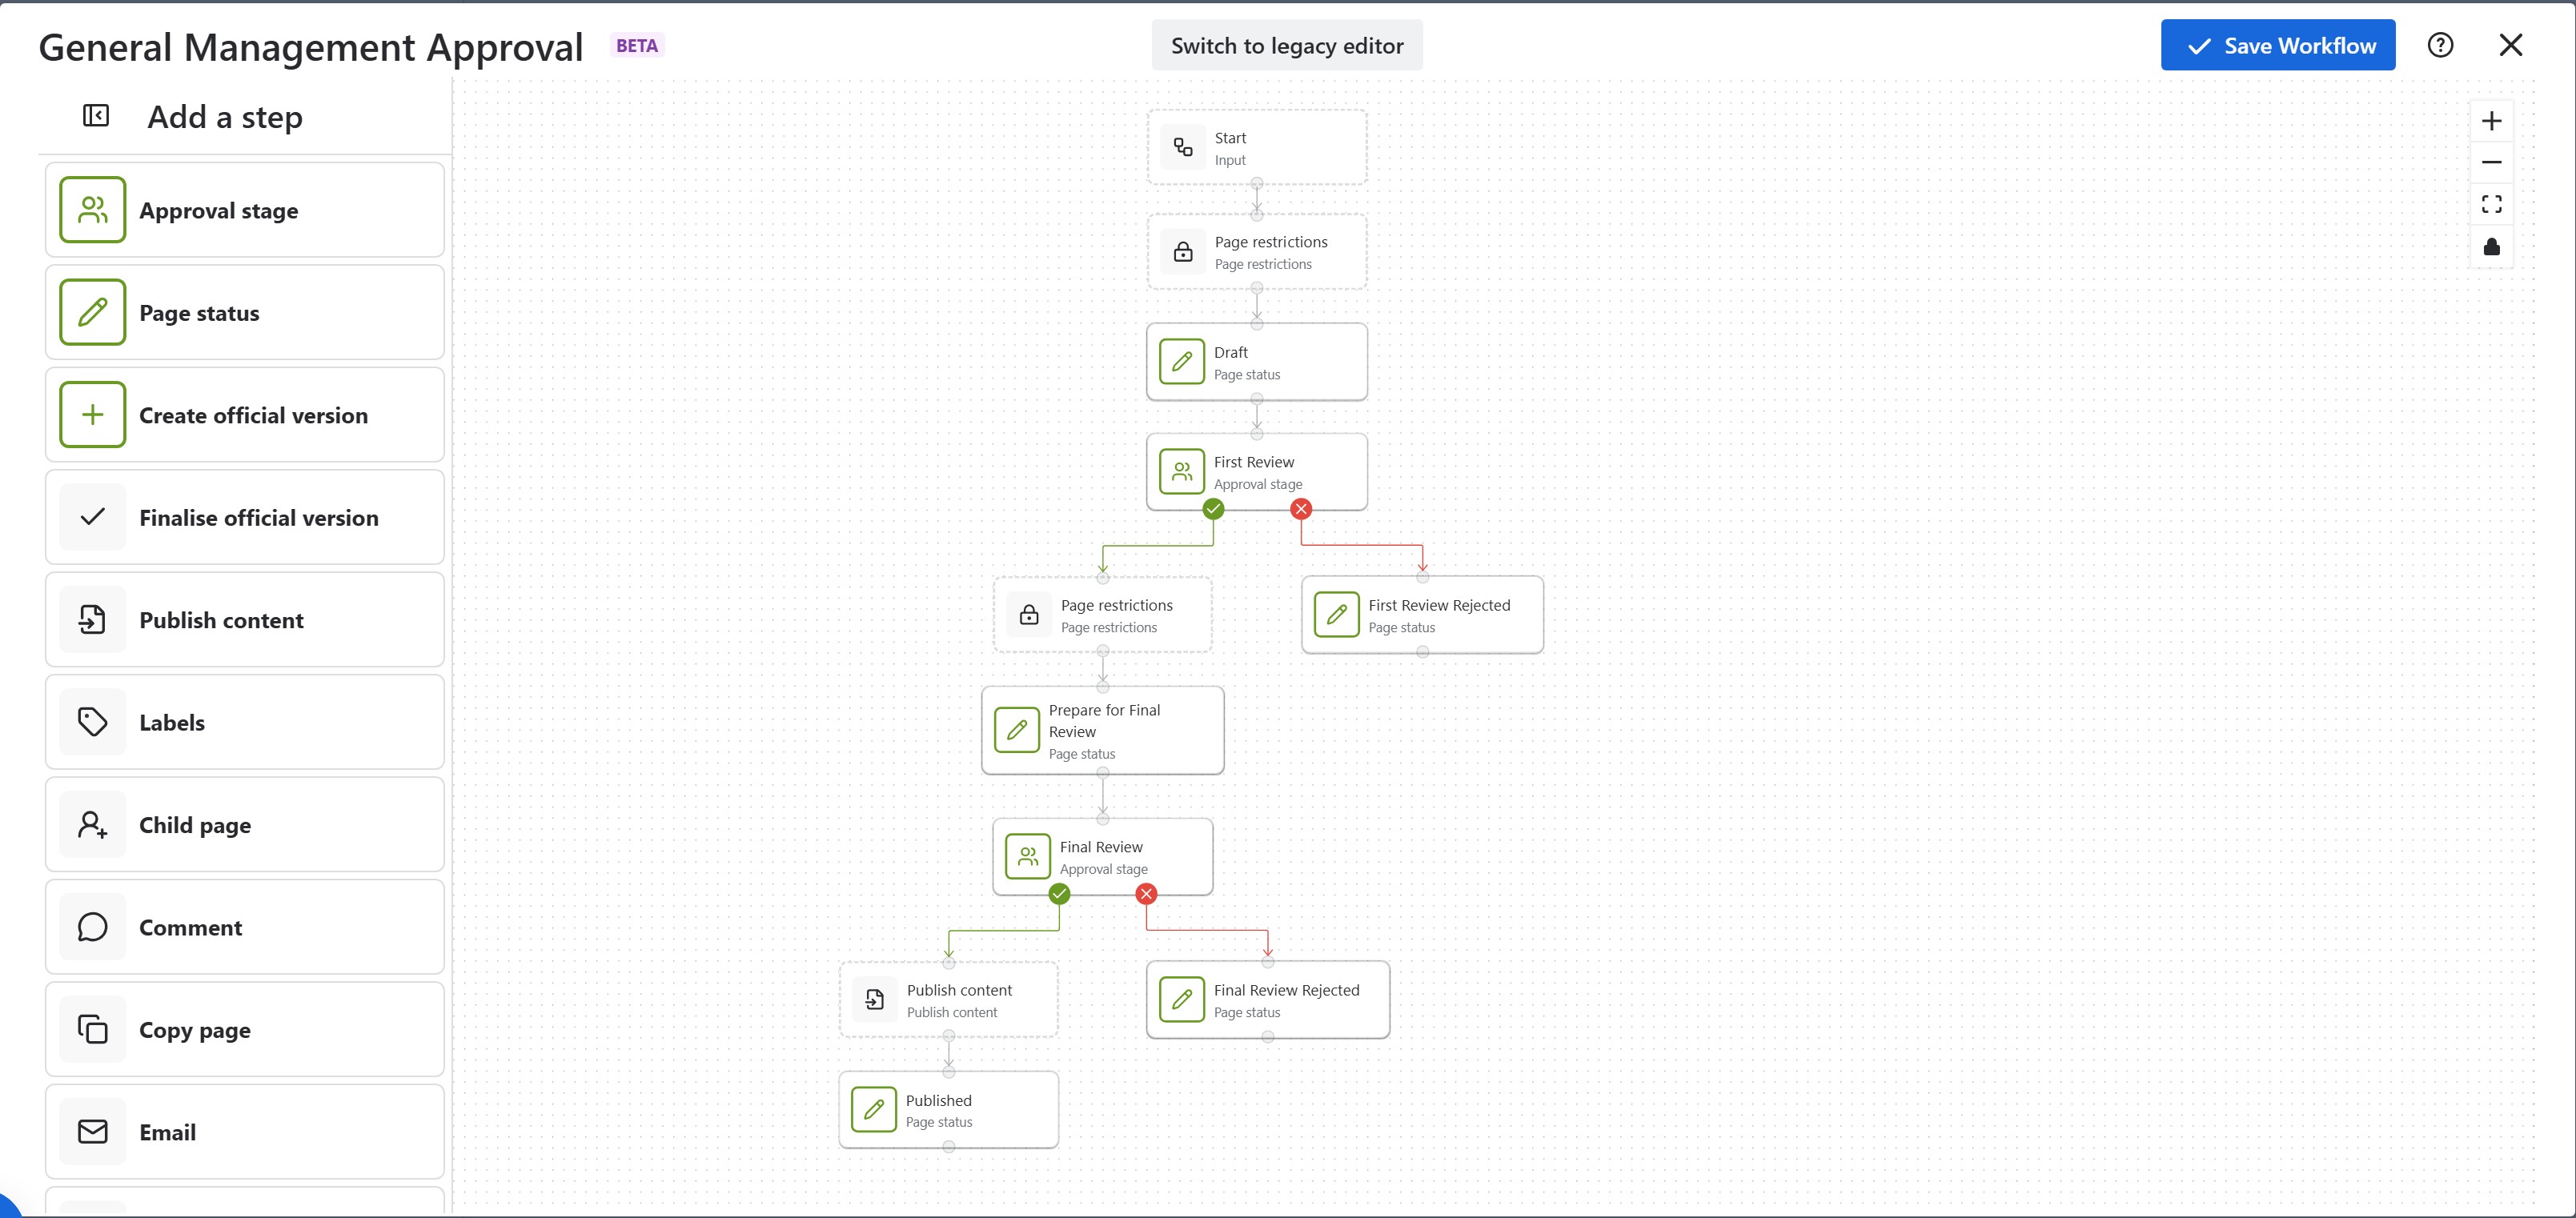
Step 3: Migrate with the Confluence Cloud Migration Assistant
If you haven’t already done so, the next step is to migrate your core Confluence data to the Cloud using the Confluence Cloud Migration Assistant (CCMA). If you’ve already migrated, you can skip to the next step.
No special action is needed with regard to apps: it is not necessary to install Comala Document Management Cloud on the target site, so it can be marked as ‘Not needed in cloud’ in the App Assessment section.
The CCMA will automatically ensure that all the data necessary for migrating to Workflows for Confluence Cloud is made available on your target site.
When you are ready, run the CCMA to migrate to your target Cloud site, including any spaces with Comala Document Management workflows that you’d like to migrate.
Step 4: Automatically apply workflows to your Confluence pages
Please note that for the scan and migration to be successful, your page restrictions must be configured correctly. If you are using page restrictions, you can choose from one of two configurations:
The user triggering the scan/migration has edit access to all pages you would like to migrate.
The user triggering the scan/migration has view only access, whilst the Workflows for Confluence user has edit access to all pages.
We recommend using our Accessfeature to assist with managing page restrictions.
On your Cloud site, navigate to the Space Settings for a space in which you’d like to migrate Comala Document Management data to Workflows for Confluence data. From there, click Workflows in the App links section and then navigate to the App Migration tab, where you will see a page like the following:
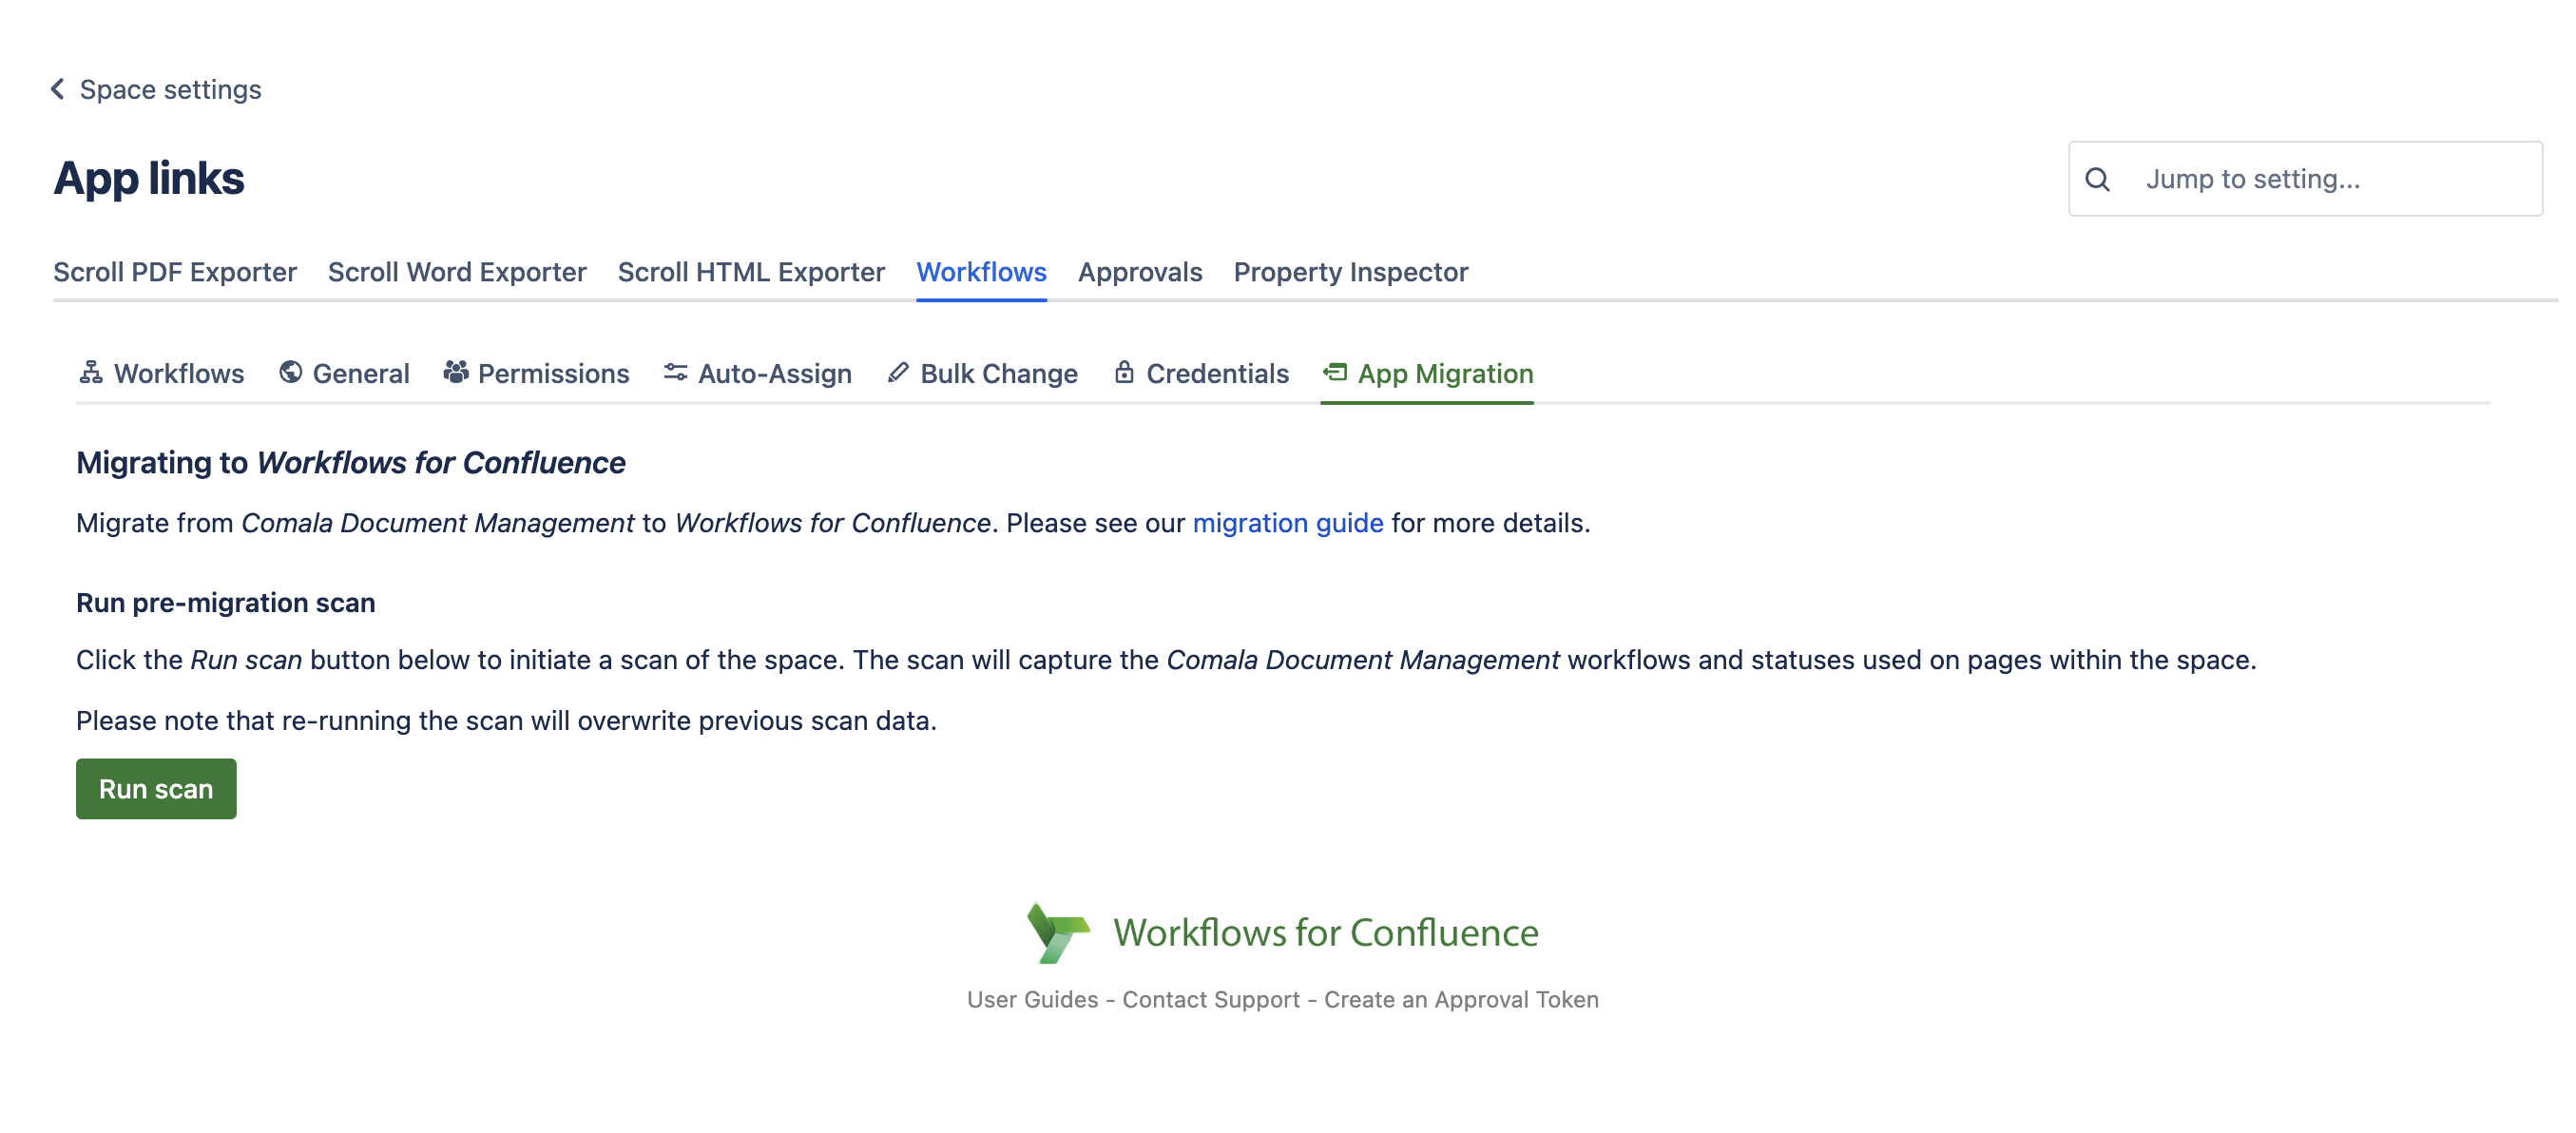
To start, click the Run scan button. This will begin a search for any pages in the space which had a Comala Document Management workflow in DC/Server. When the search is done, you’ll see a table summarising the results:
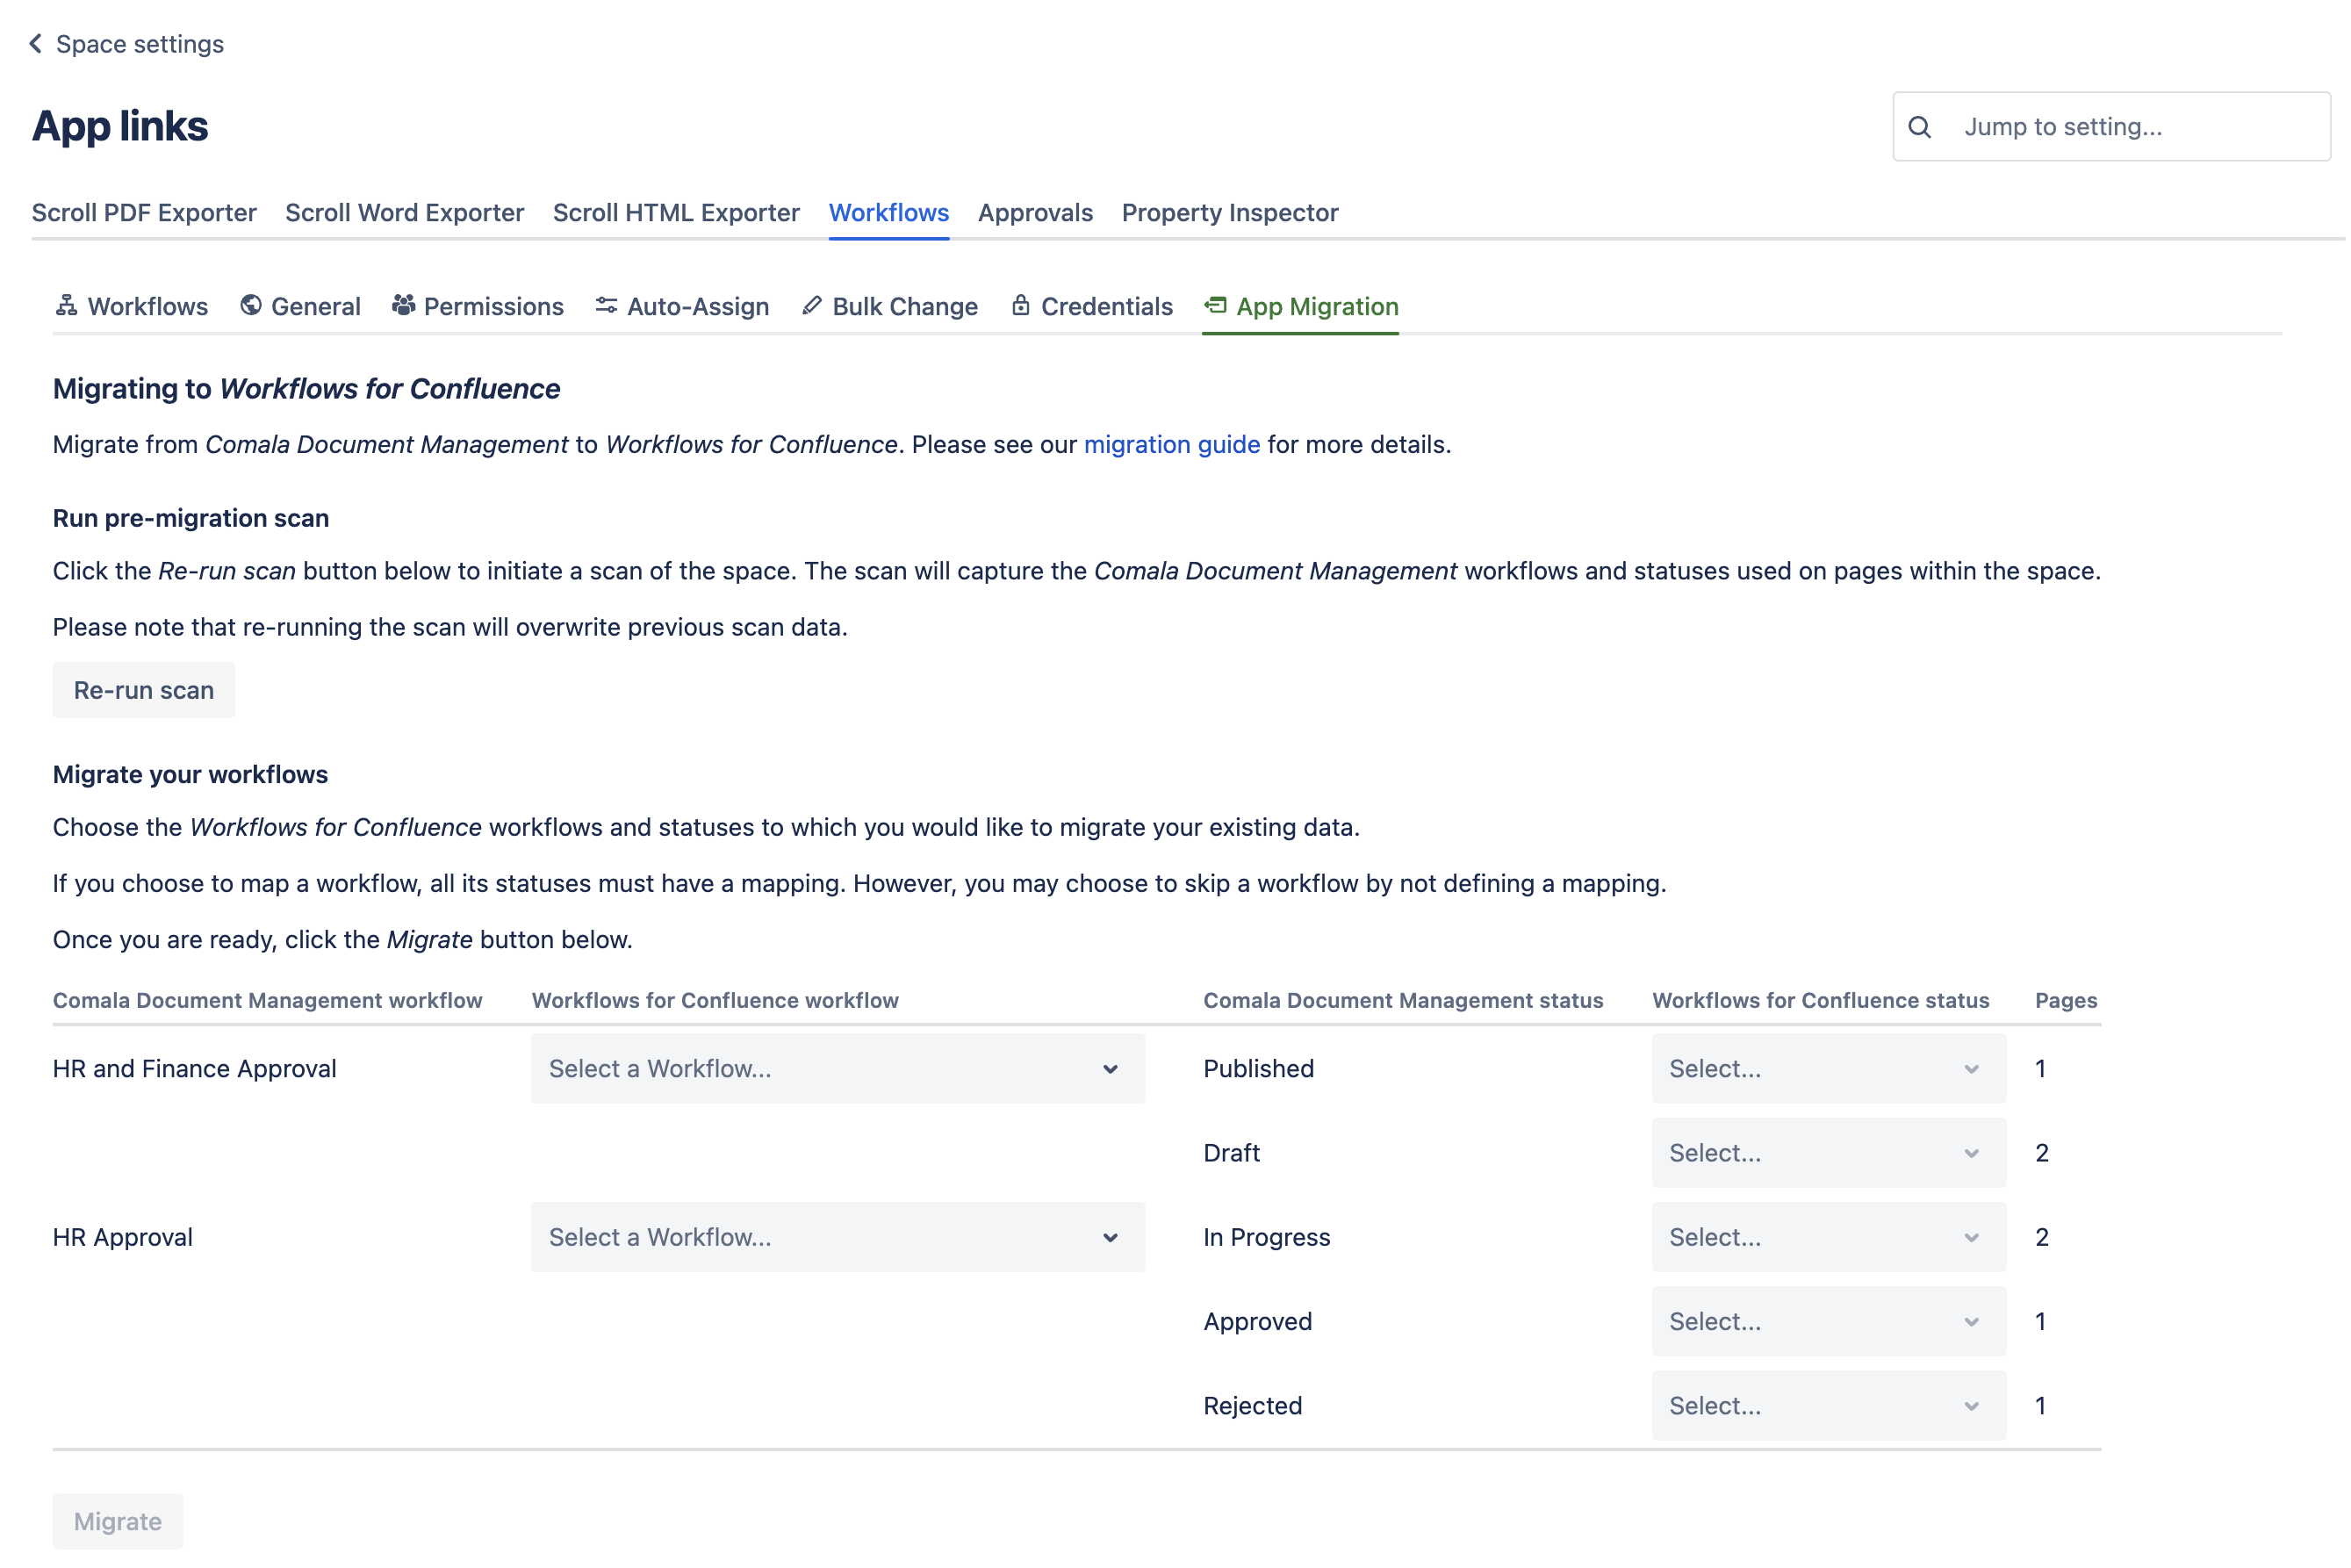
This example shows that two Comala Document Management workflows have been found: HR and Finance Approval and HR Approval. The former has been found at a status of Published on 1 page and Draft on 2 pages. The latter has been found at a status of In Progress on 2 pages in the space, Approved on 1 page and Rejected on 1 page.
For each Comala Document Management workflow in the space, you can select a corresponding Workflows for Confluence workflow. Similarly each Comala Document Management status can be mapped to a corresponding Workflows for Confluence status. The example below shows that the workflows have been mapped to the corresponding Workflows for Confluence workflows, with the statuses set appropriately.
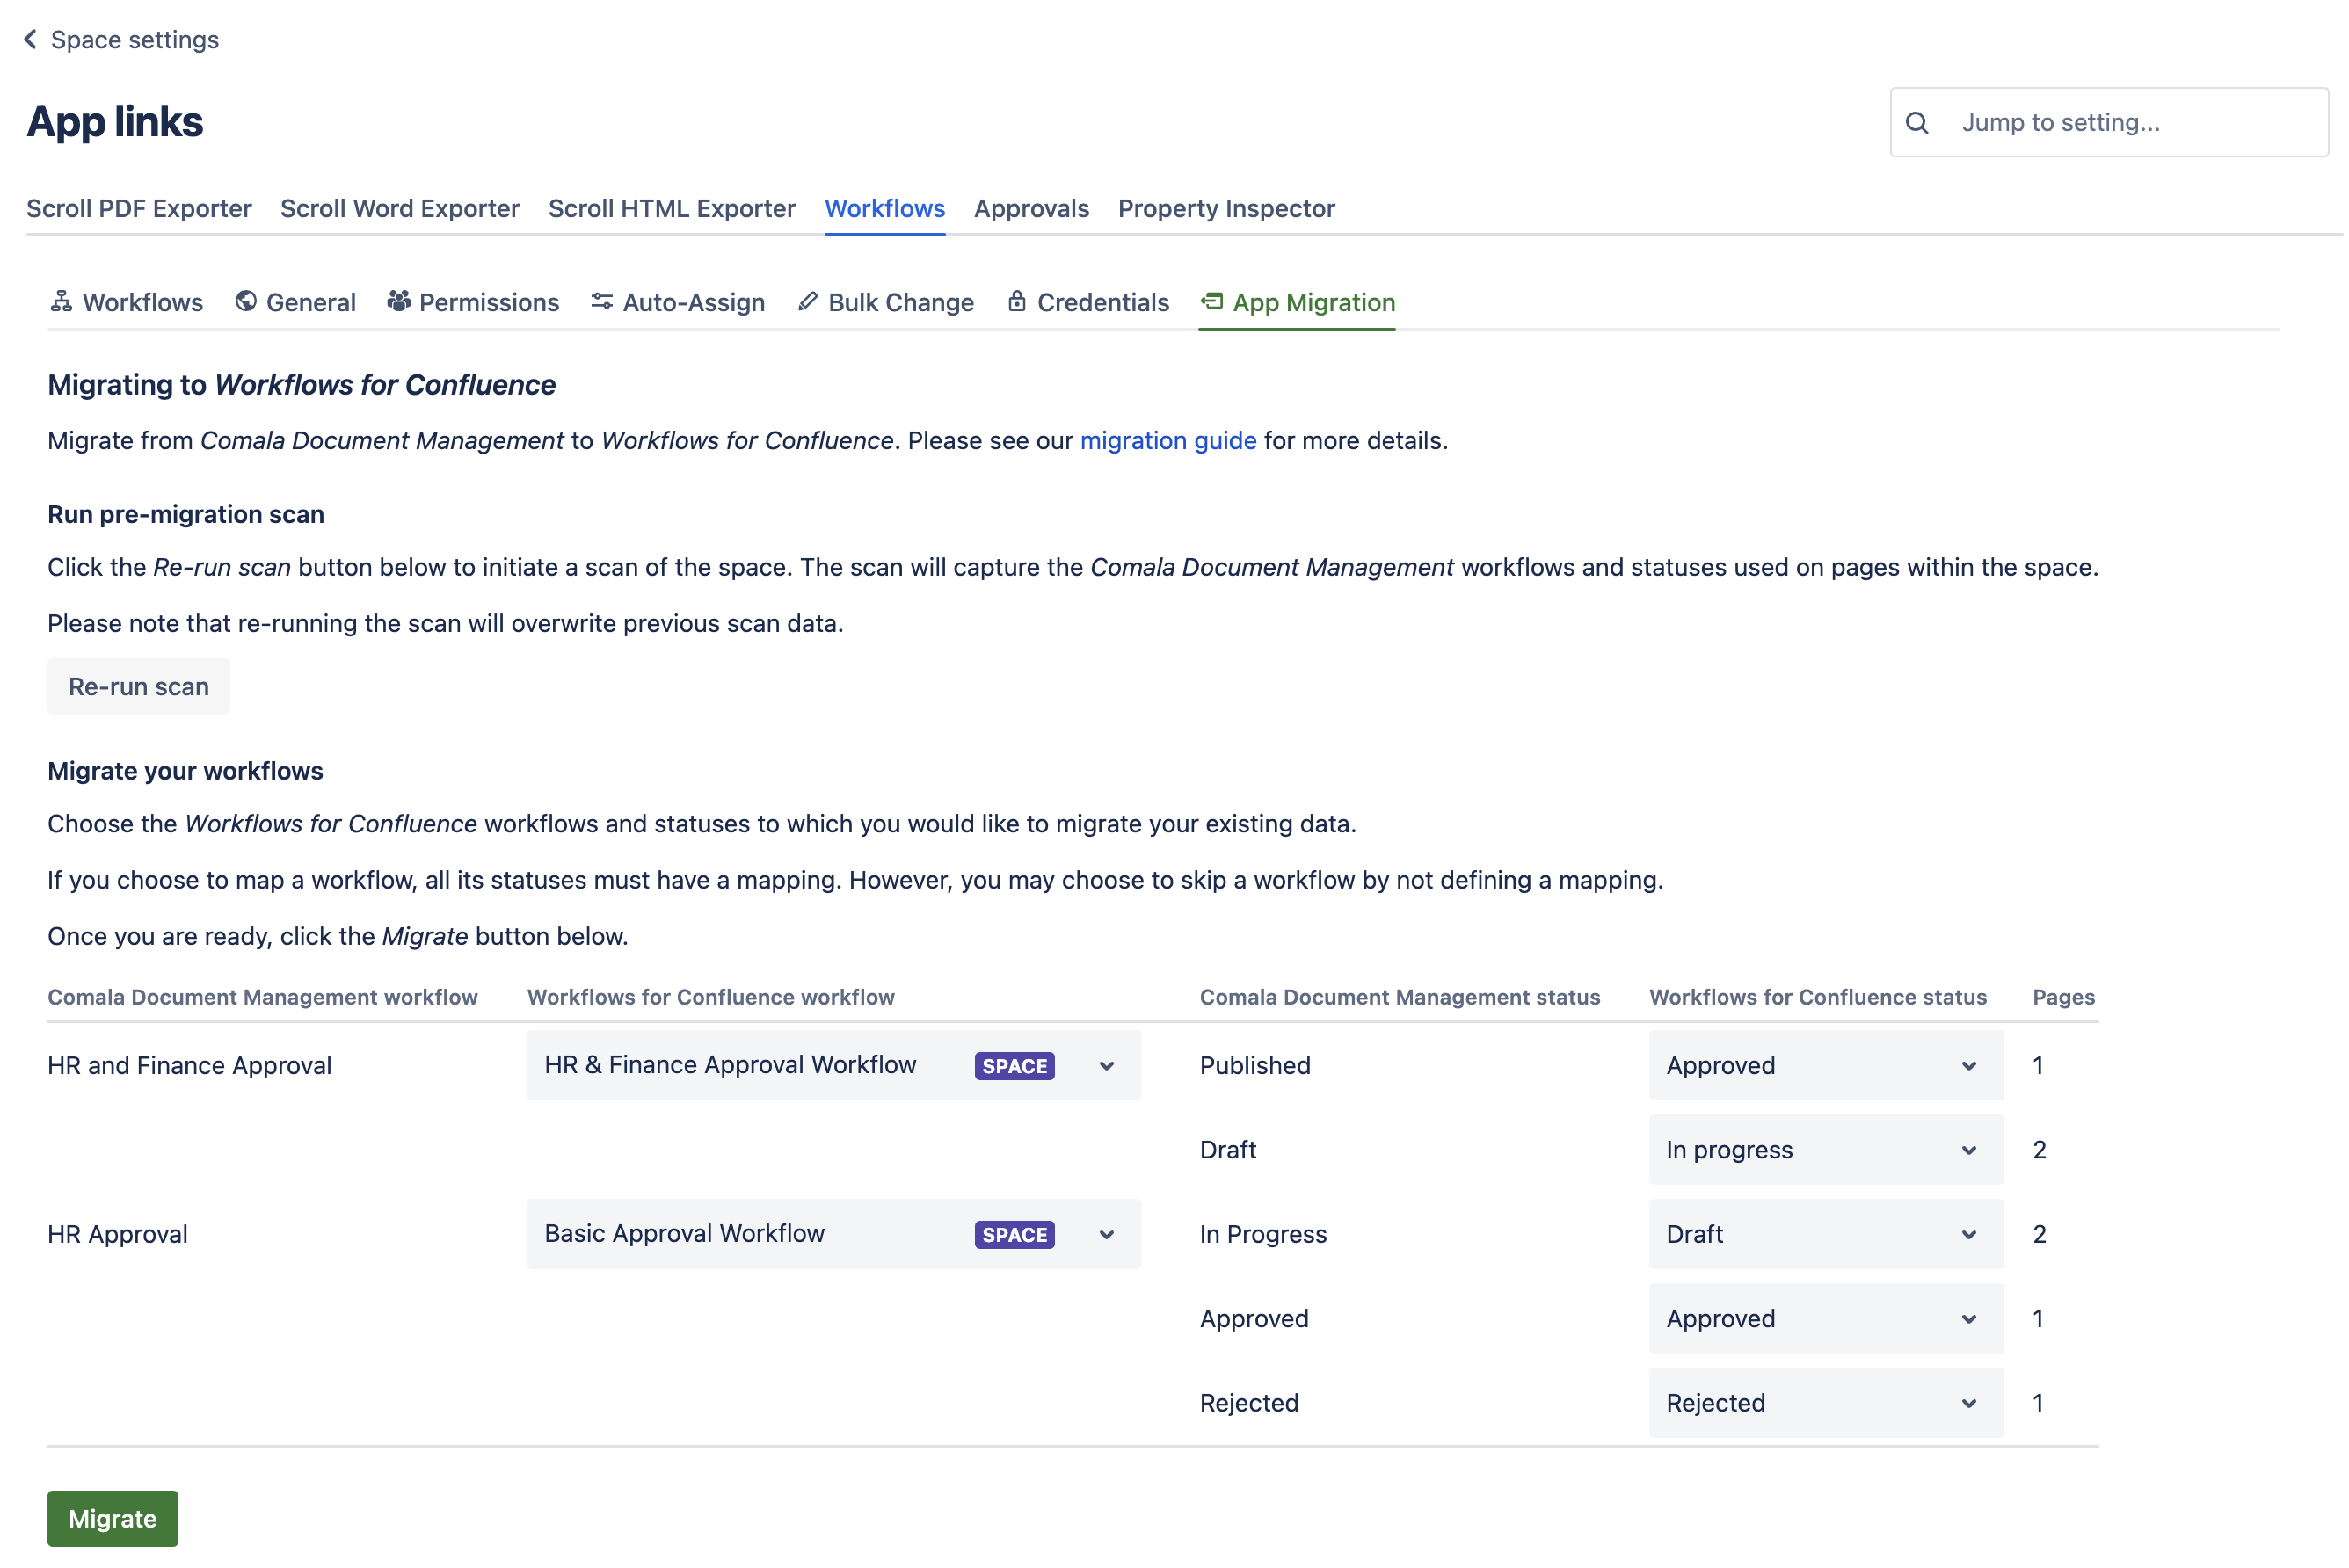
If there are Comala Document Management workflows detected which you do not want to migrate then you can simply leave the ‘Workflows for Confluence workflow’ column blank.
Once you’ve specified how your Comala Document Management workflows correspond to Workflows for Confluence workflows, you can click the Migrate button to start applying workflows to pages. Note that, in large spaces (e.g., with 1000+ pages), this will take some time – the progress bar will indicate how far along the migration is. You don’t need to keep the page open while a migration is running, you can close the page and come back to it later.
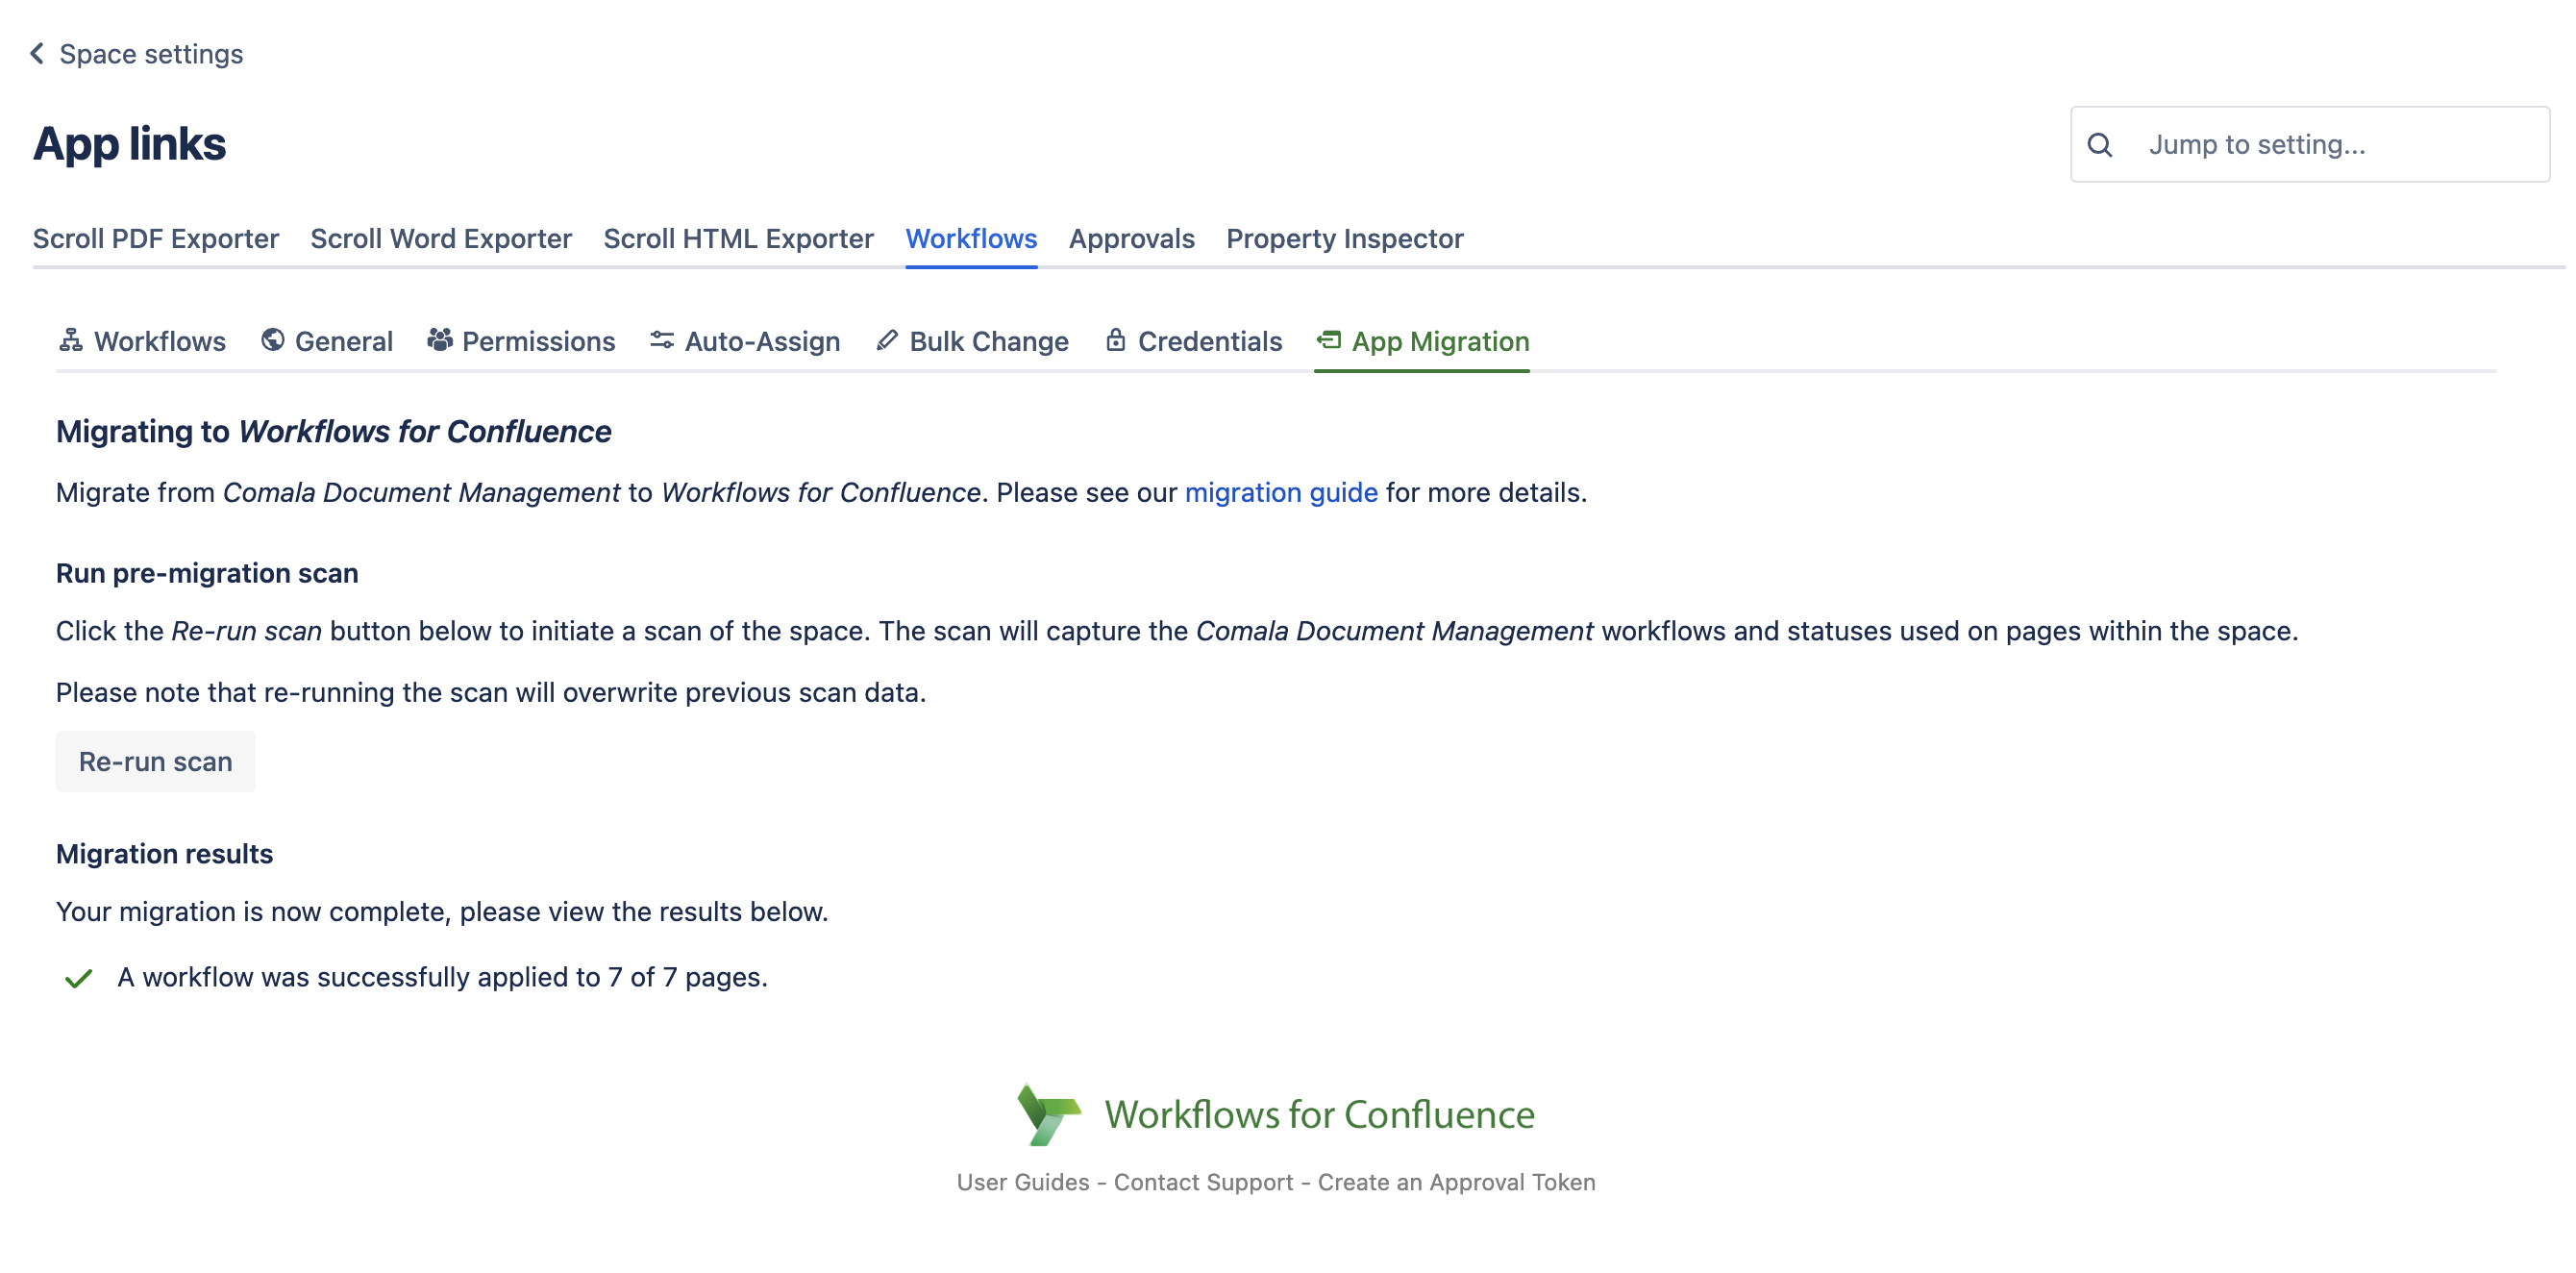
Once the migration has completed, the migration tool will display on overview of the outcome of the migration.
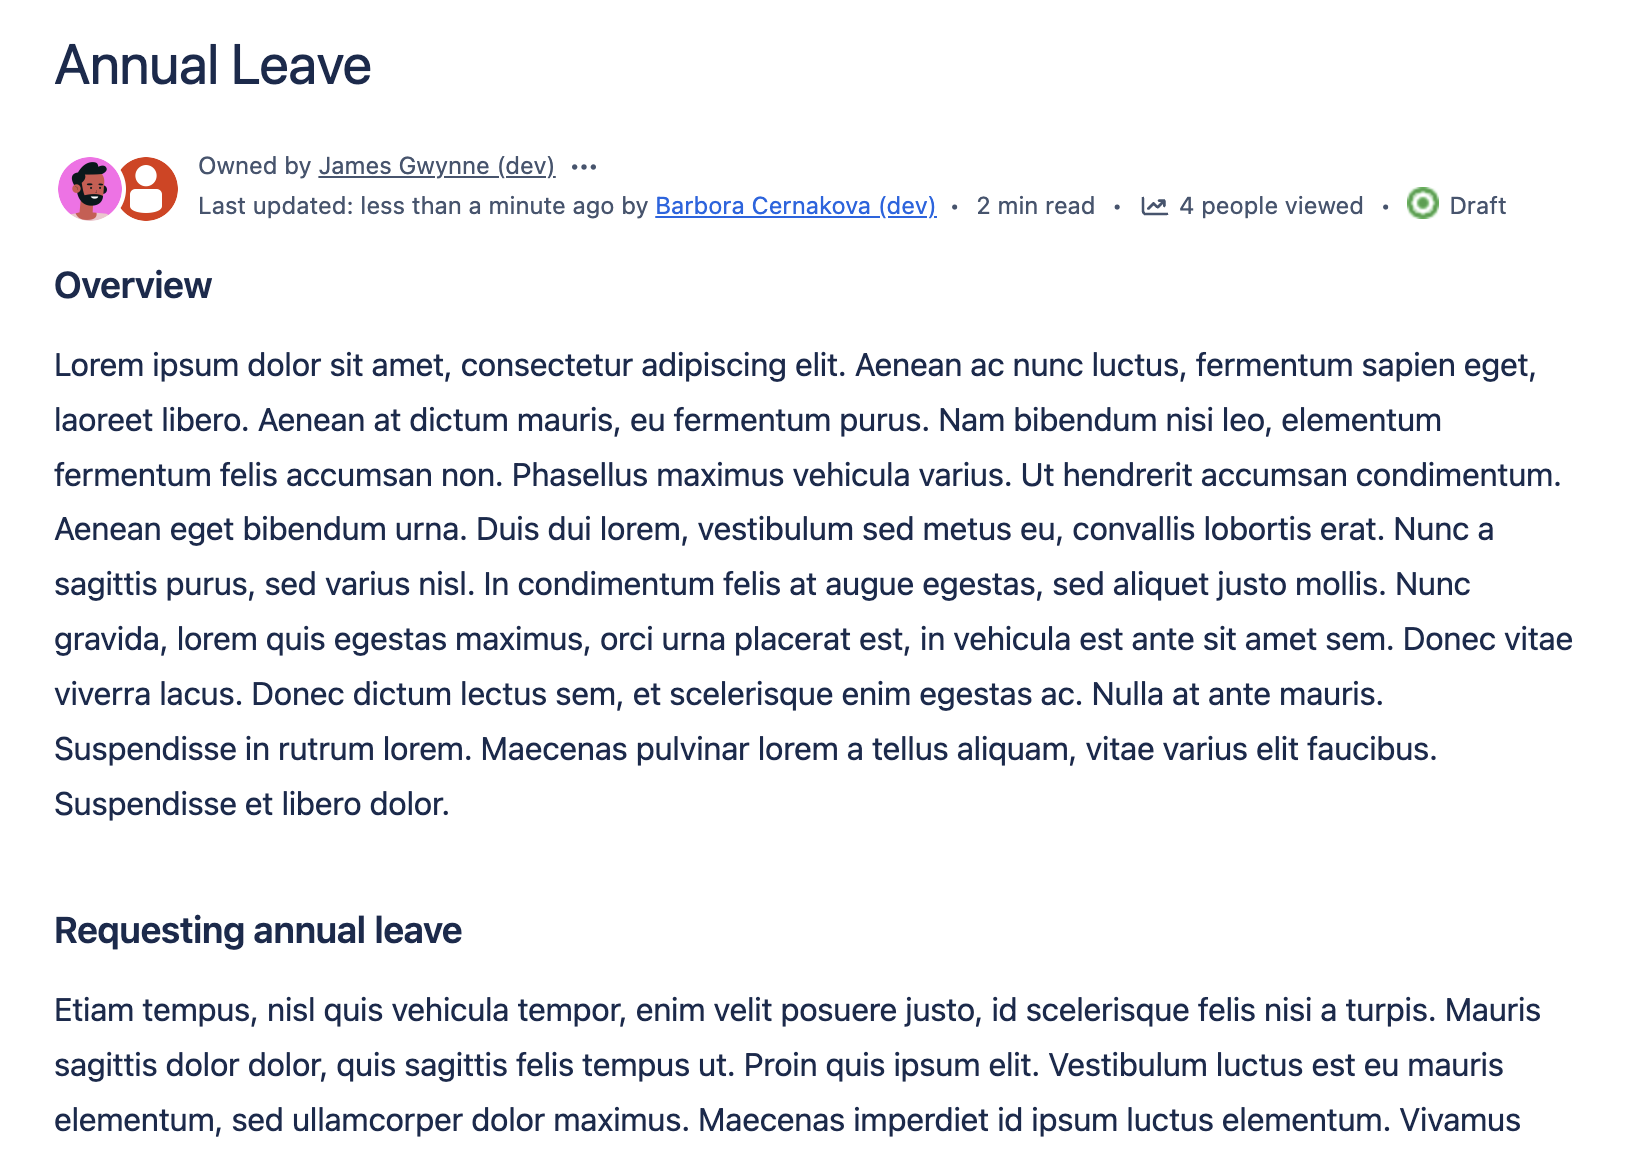
You can then inspect some pages in the space to verify that Workflows for Confluence has added workflows in the correct statuses. In the screenshot below, you can see that this page is now in Draft status, which is visible in the byline.
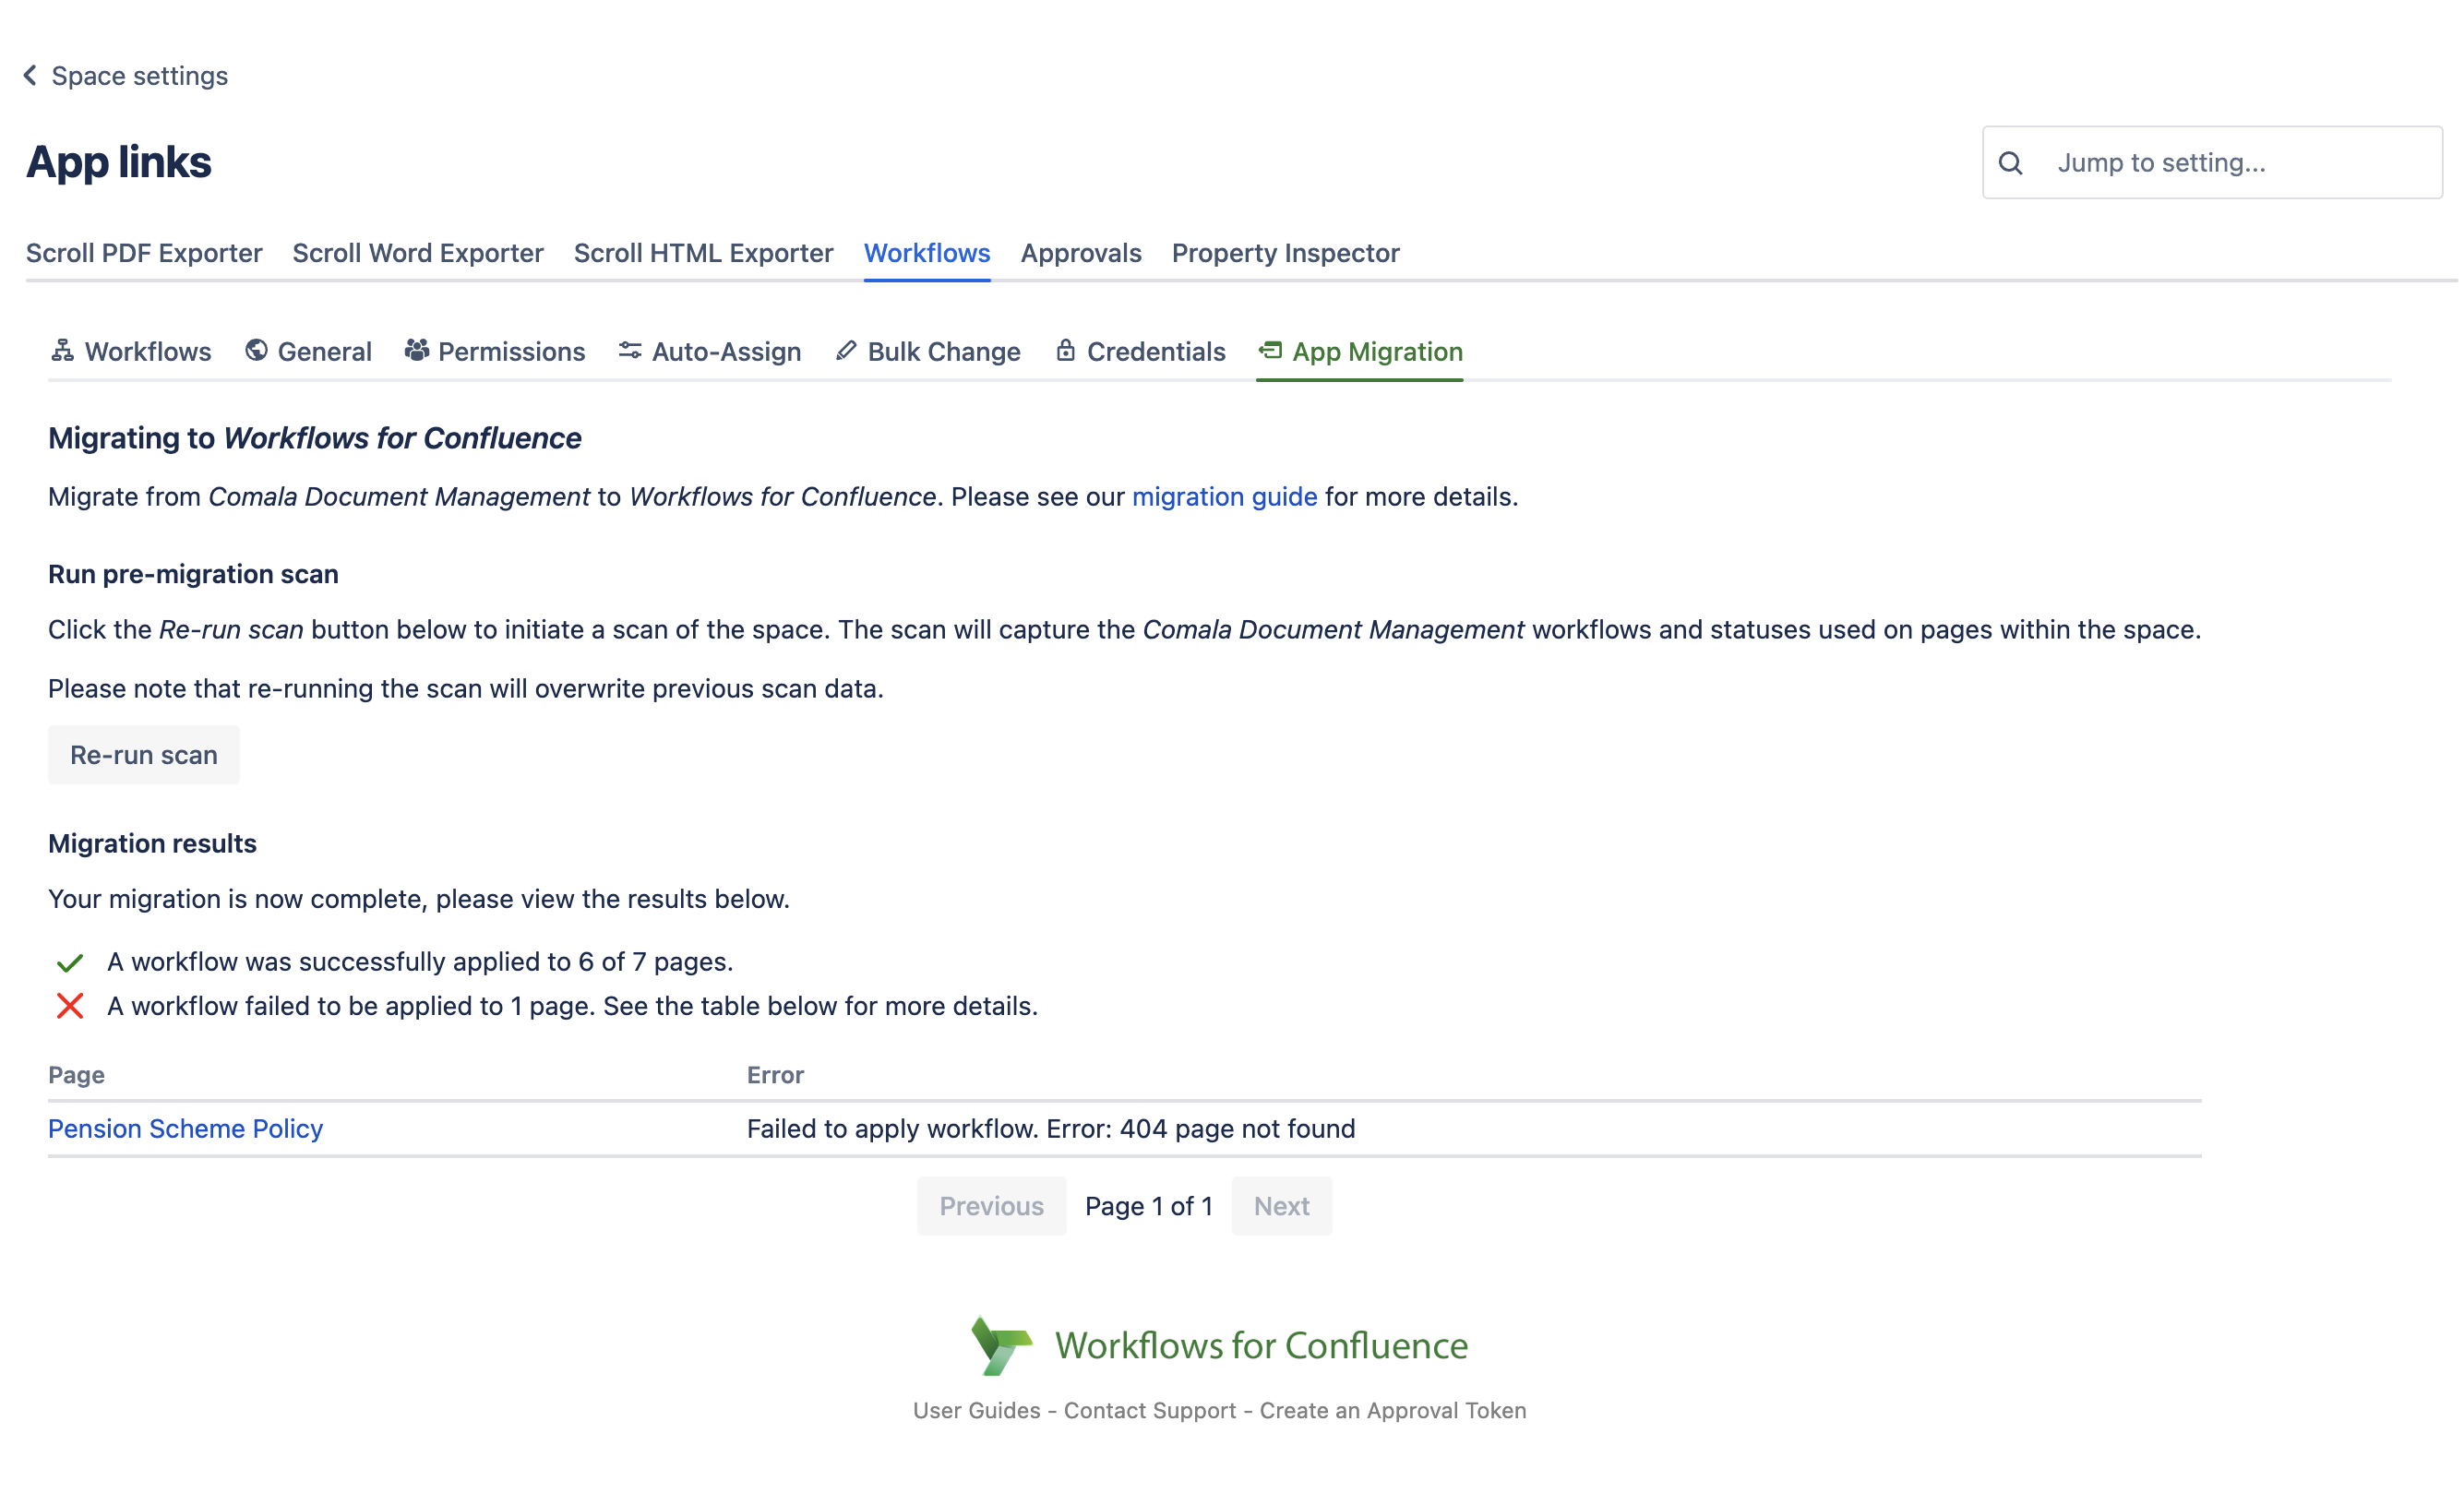
If any errors occurred, they’ll be shown in a table indicating which pages had problems and why, as can be seen in the screenshot below. Similarly, you will be able to see whether any pages were skipped, e.g. due to a workflow mapping not being defined.
FAQ
How long will it take to migrate?
This depends on the number of pages and Comala Document Management workflows in use in the space you’re migrating. As a rough guide, it could take around 50 minutes to migrate in a space with 1000 pages that all have active Comala Document Management workflows.
Do I need to install Comala Document Management Cloud?
No, but you can install it if you’d like to compare the apps – having Comala Document Management Cloud installed won’t impact your migration to Workflows for Confluence in any way.
Can I run a migration again if I realise I want to change something?
Yes, migrations can be run as many times as needed. However, note that any changes made to pages with migrated Workflows for Confluence workflows will be lost if a migration is repeated. Therefore we encourage you to complete the migration process before your teammates start using Workflows for Confluence.
Can I use the in-app migration tool to migrate from Comala Document Management Cloud?
Currently the in-app tool only supports migrating from Comala Document Management DC/Server, if you’d like to migrate from Cloud the please get in touch.
Will my migration run the actions I have configured in my Workflows for Confluence workflow?
No, a migration will apply the correct status to each page, but it will not run any actions preceding the status.
I have run into permission errors which have resulted in failures during the migration, what do I need to change?
It is essential to ensure that your page restrictions (if you are using them) are configured appropriately so that the scan and migration can run successfully. We accept two types of configuration:
The user triggering the scan/migration has edit access to each page.
The user triggering the scan/migration has view only access, whilst the Workflows for Confluence user has edit access to each page.
Regardless of your configuration, we recommend using our Accessfeature to assist with this task.
Support
If you have any questions or require assistance during the migration process, or if you’re planning to migrate to Workflows for Confluence from another app not on this page, please don’t hesitate to get in touch via our Customer Support.
.svg)