%20v2.png)
Create Classification Levels
You can create as many classification levels as your organization requires in Compliance for Confluence, and the names of these can be customized to align with your policies and procedures.
After first installing Compliance for Confluence, you will find 4 default classification levels:
Highly Restricted
Restricted
Internal
Public
These levels are just a starting point; you can easily edit or archive them.
https://youtu.be/8WAKIA5MFu8
Create a classification level
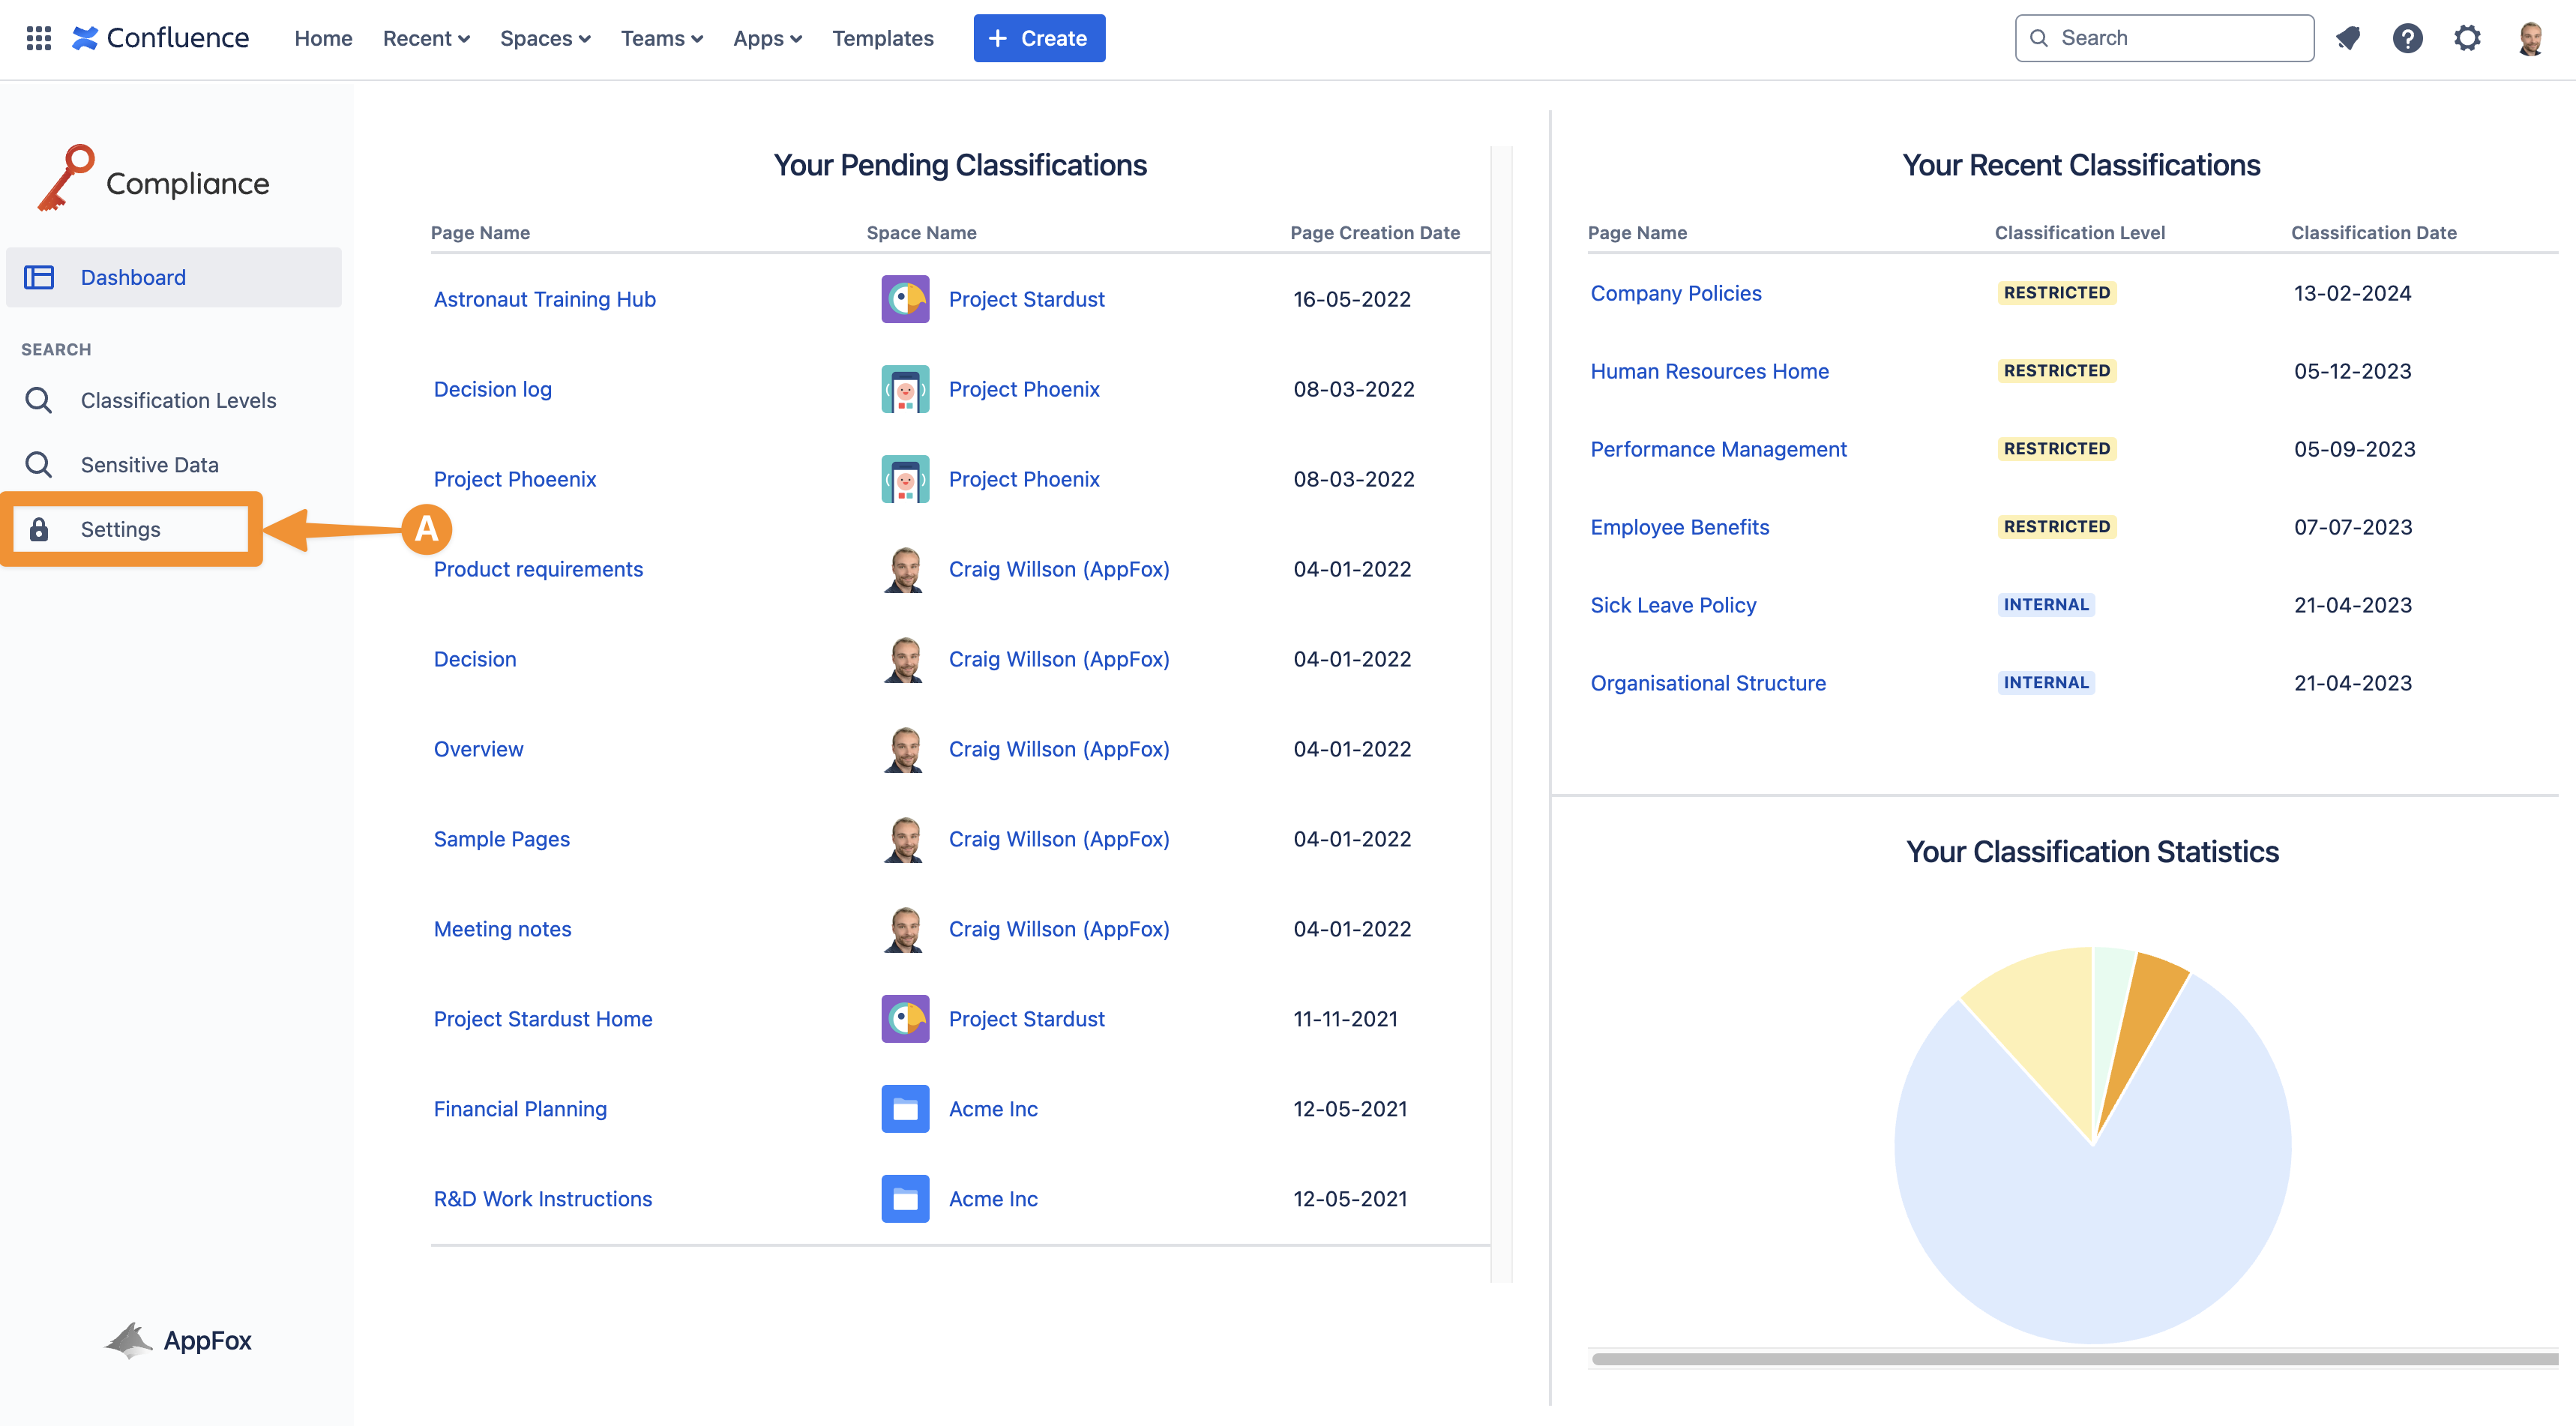
To create a new classification level, access Settings (A) in the left-hand navigation bar.
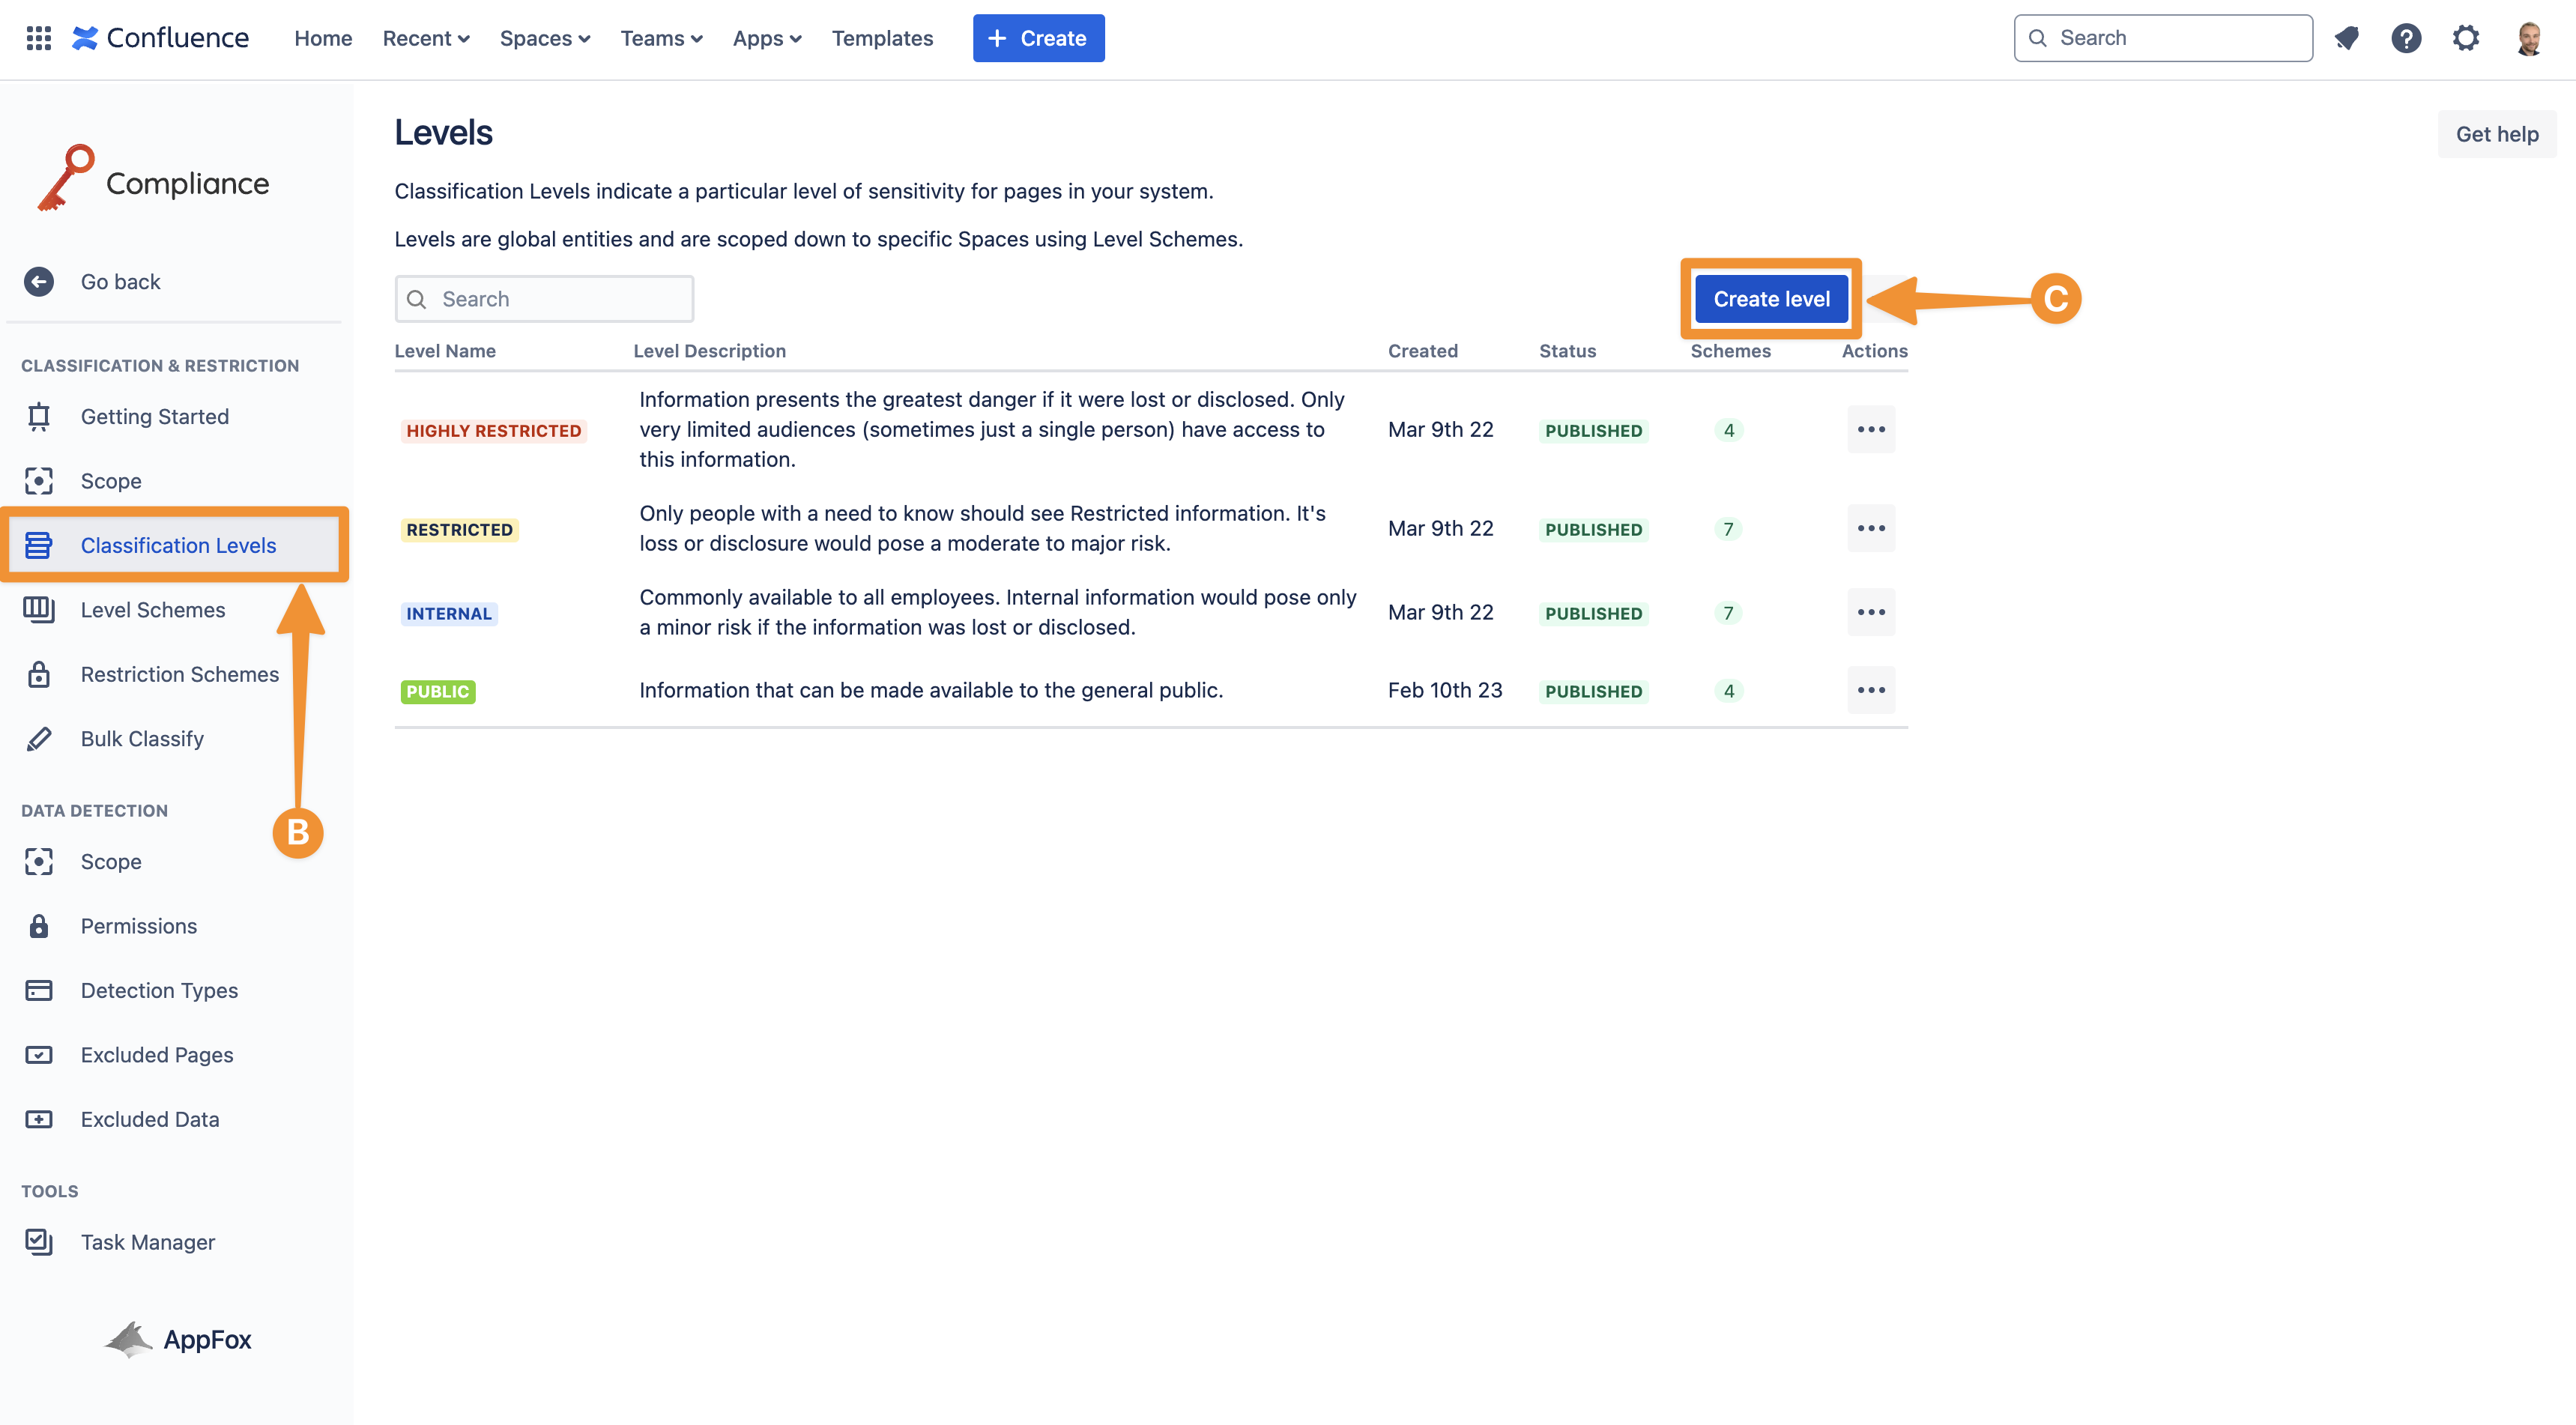
Once you’re in the settings, navigate to Classification Levels (B) to open the configuration settings and create custom Classification levels (C).
Now you can start customizing your Classification Level (D) by choosing a name and description and selecting a color for the background and text.
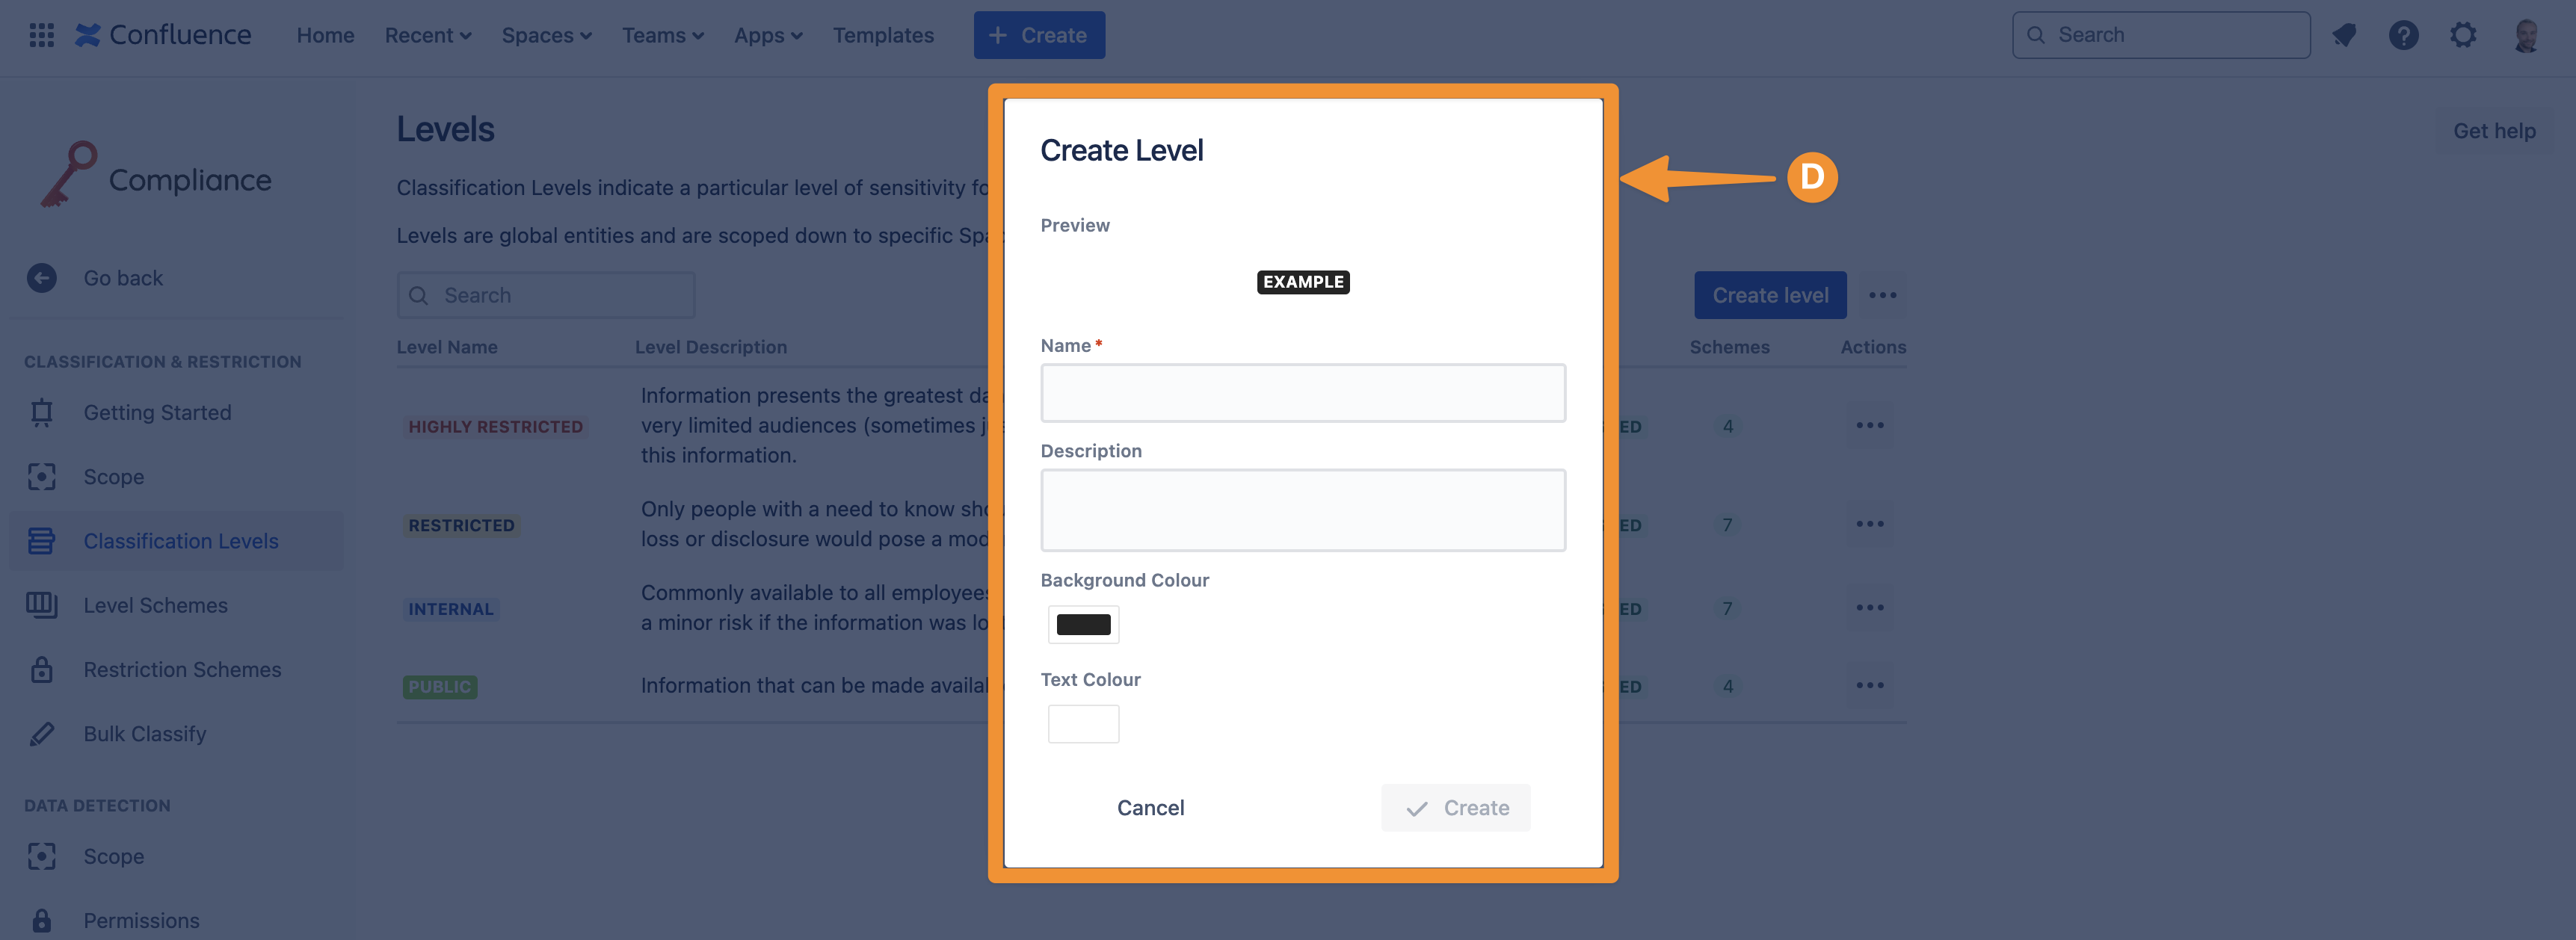
Once you are happy with the classification level, click Create, and this will be added to the levels page as a draft (E) level.

Confluence users will be able to see the name, description, and colors of the classification levels so be sure to choose something your colleagues will understand.
A classification level can only be used, for example, applied to pages and set as a default classification level, after it has been published, but not while it is in a draft status. Please refer to Publish Classification Levels .
Need support? We’re here to help 🧡
If you have any questions or would like to speak with us, please don’t hesitate to reach out to our Customer Support team.