-20250819-084018.svg)
Section approvals are a great way to get specific parts of your content reviewed. This feature may be useful for certain documents where you require different people or teams to provide approval on different parts of a document.
Add a Section Approval to a Page
To add a section approval to your document using Approvals for Confluence, you simply add it as you would a regular macro in Confluence. Type ‘/' followed by ‘section approval’ (A) and the Section Approval macro will appear, as shown below.

Once you select the macro, it will be added to your Confluence page, and the approval configuration settings will open. This is where you can select the section approval settings.
Configure your Section Approval
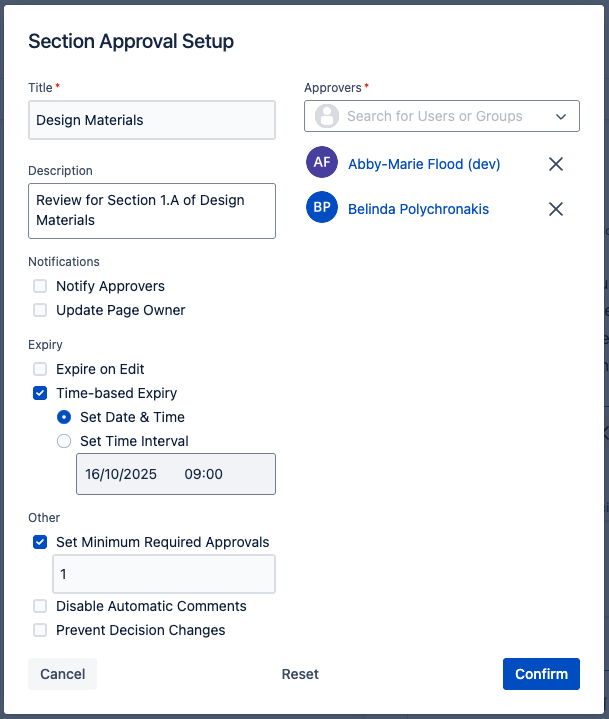
Within the Section Approval configuration settings, there are a number of options (illustrated in the image below). We’ll go through each of these options one-by-one:
-
Approvers: Add users as approvers by typing and selecting their names via the search field. If you have set up an Approval Team, you can type and select the name of the Team in the search field and this will add all members of that team to your approval.
-
Notify Approvers: When enabled, emails are sent to approvers when they are requested to review a section of a Confluence page.
-
Update Page Owner: When enabled, updates on the approval’s status are sent to the page owner (e.g., when an approver approves/rejects the section approval).
-
Expire on Edit: When enabled, the approval will automatically expire if the content of the page has been edited. Note: For live docs, the approval may take up to 15 minutes to expire after an edit session ends.
-
Time-based Expiry: When enabled, the approval can be set to expire on a date and time. There are two ways to specify the expiry date:
-
Set Date & Time: Set an absolute date and time that the approval will expire on, regardless of the approval status.
-
Set Time Interval: Set an interval, e.g. ‘2 Weeks’. An expiry date will only be applied once the approval enters an approved state, and the time interval will be applied from the date that the section is approved.
-
Auto Reapply Interval: Set whether the interval is reapplied whenever the approval re-enters an approved state, or is only applied once the first time the approval is approved.
-
-
-
Set Minimum Required Approvals: This sets the minimum number of approvals required for the section to be approved.
-
Disable Automatic Comments: This prevents automatic comments being made on the page when an approver approves/rejects the section approval.
-
Prevent Decision Changes: When enabled, an approver cannot change their approval or rejection decision after it has been made.
After you have the set up the section approval, click Confirm and your approval will be live. The section approval will look similar to the one shown below (B).
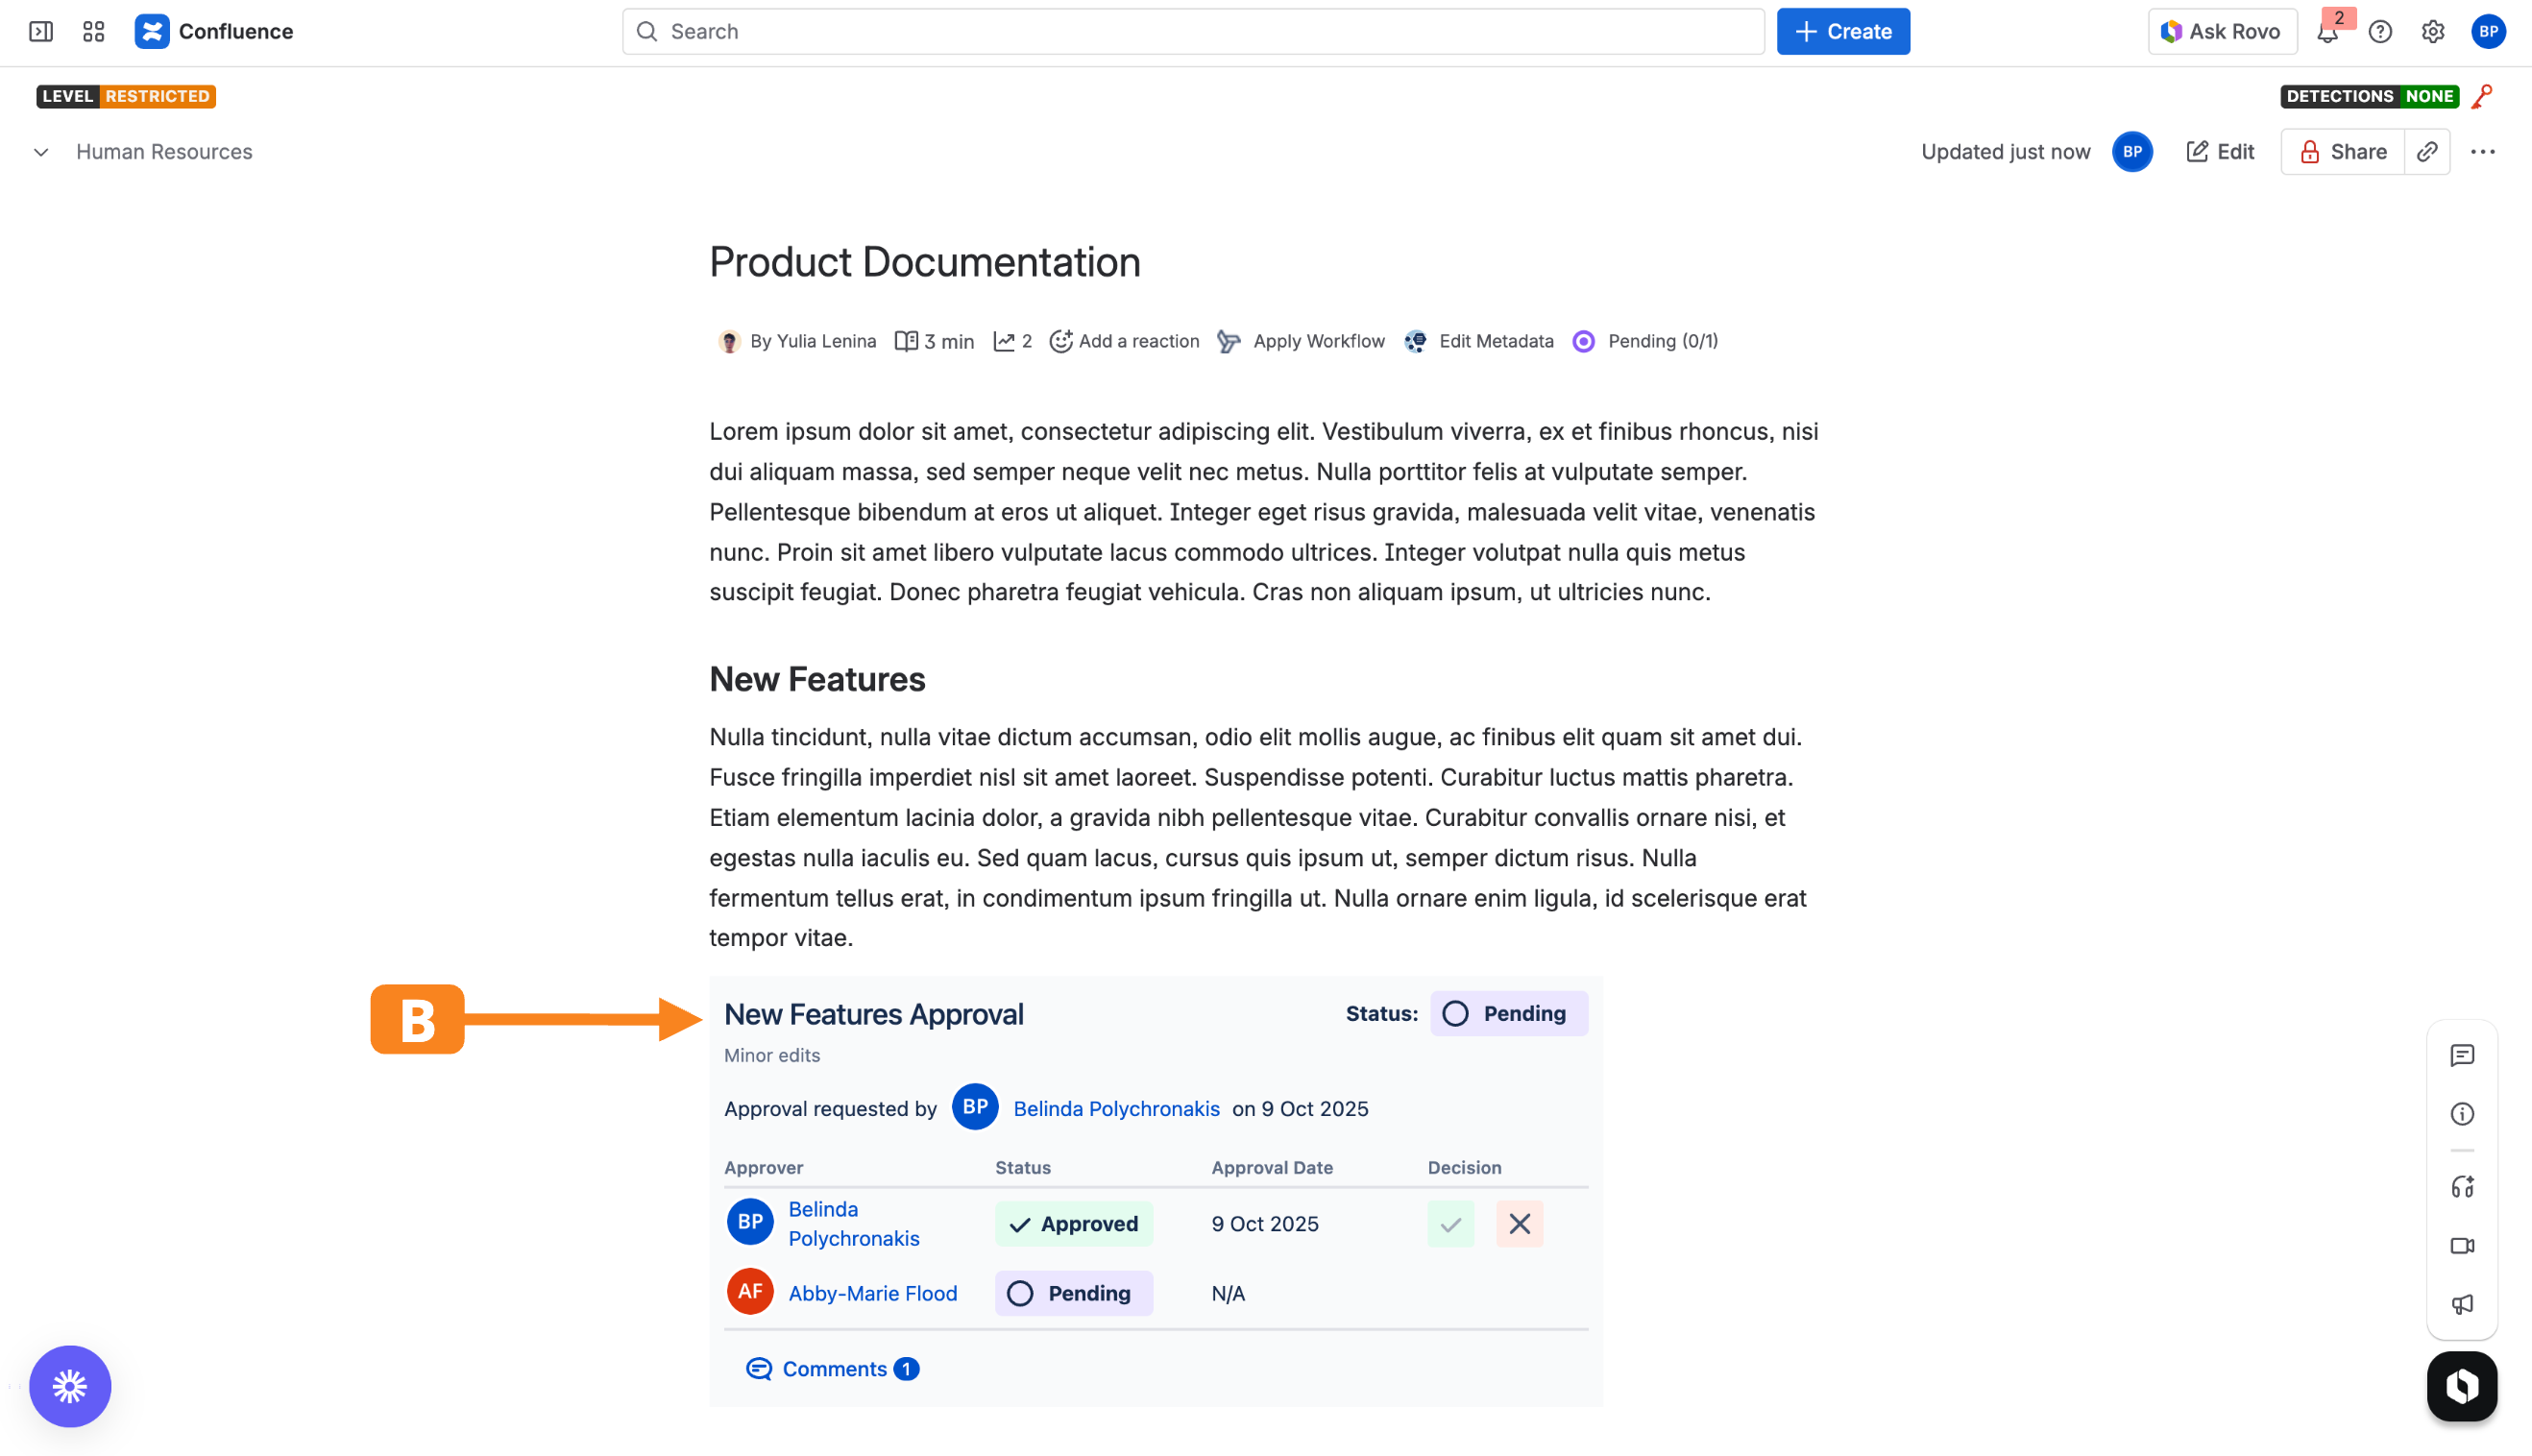
Any of the specified approvers can approve or reject the section. When doing so, approvers may optionally leave a comment regarding their decision. Any comments left by approvers can be accessed via the ‘Comments’ button within the Section Approval macro.

Need support? We’re here to help 🧡
If you have any questions or would like to speak with us about Approvals for Confluence, please reach out to our Customer Support team.
Looking to get started quickly with approvals?
You can begin your 30-day free trial of Approvals for Confluence on the Atlassian Marketplace here.