Configure the minimum required approvals or rejections
Many teams have procedures for getting tasks approved. These procedures ensure that specific individuals are involved in the approval process. However, sometimes, using these procedures for smaller tasks can be time-consuming, as each individual must be gathered to provide approval feedback.
To streamline the process, teams can use online tools to manage the quorum size of an approval. This can be achieved by setting the minimum approvals and rejections required for a task sent for review. For example, a proposal budget must be signed off before implementation. The proposal can be sent to all necessary people within the finance department for review while setting the minimum approval threshold. This helps to make the approval process more efficient and less time-consuming.
With Approvals for monday.com, you can easily manage minimum approvals and rejections, keeping workflows efficient and all stakeholders involved.
This guide will show you how to set and manage minimum approvals and rejections, ensuring a smoother approval workflow.
Approvals quorum size
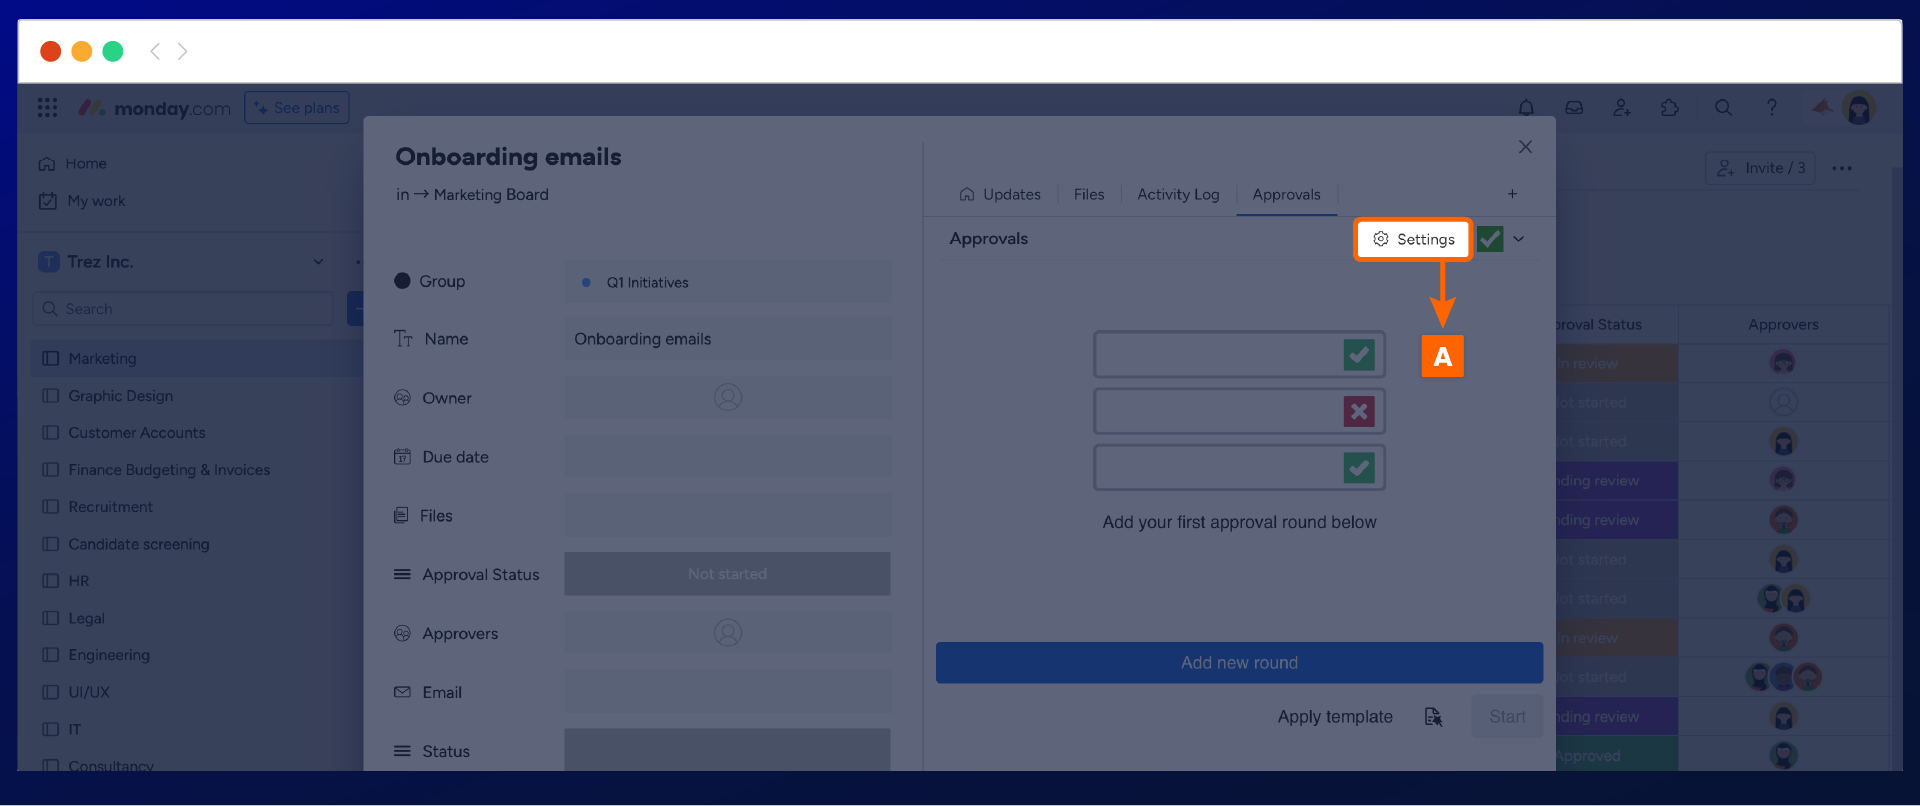
To set the minimum number of approvals or rejections required for any item sent for approval on your Monday board, navigate to our app within an item and select the settings icon (A).
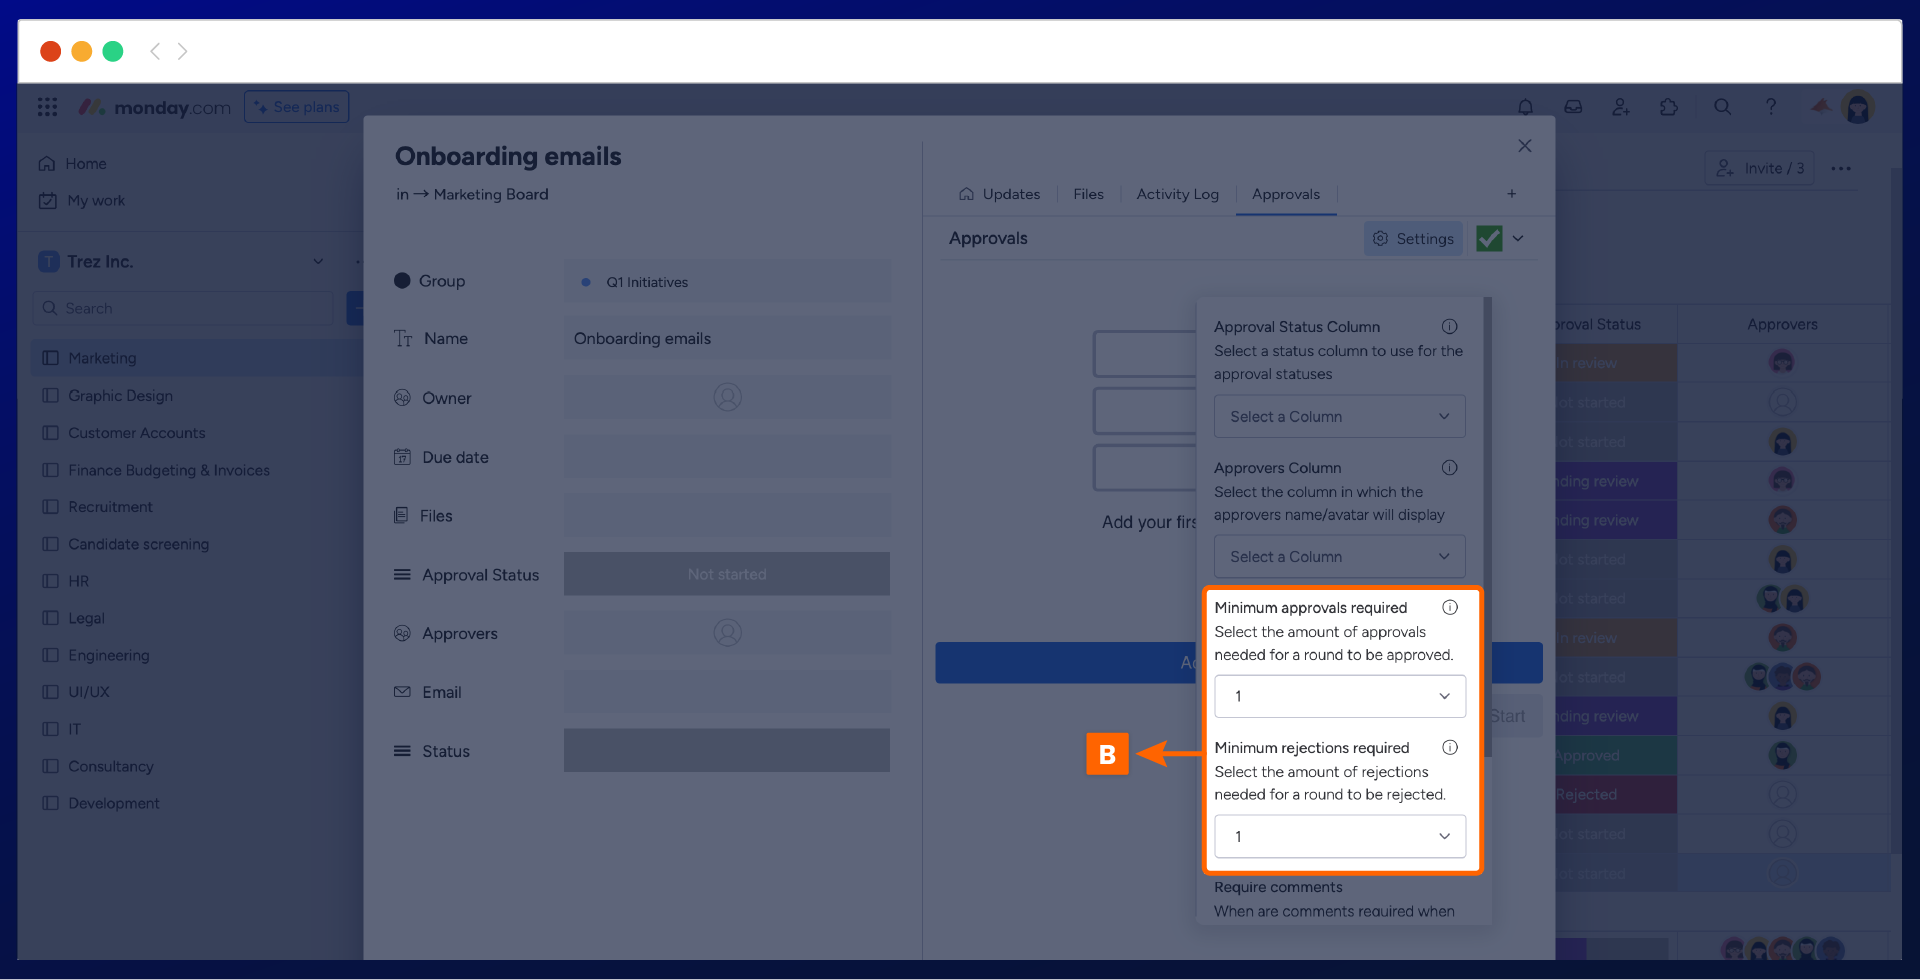
A dropdown list will appear, highlighting two separate sections to set the minimum number of approvals and rejections (B) required for an approval round to be considered approved or rejected.
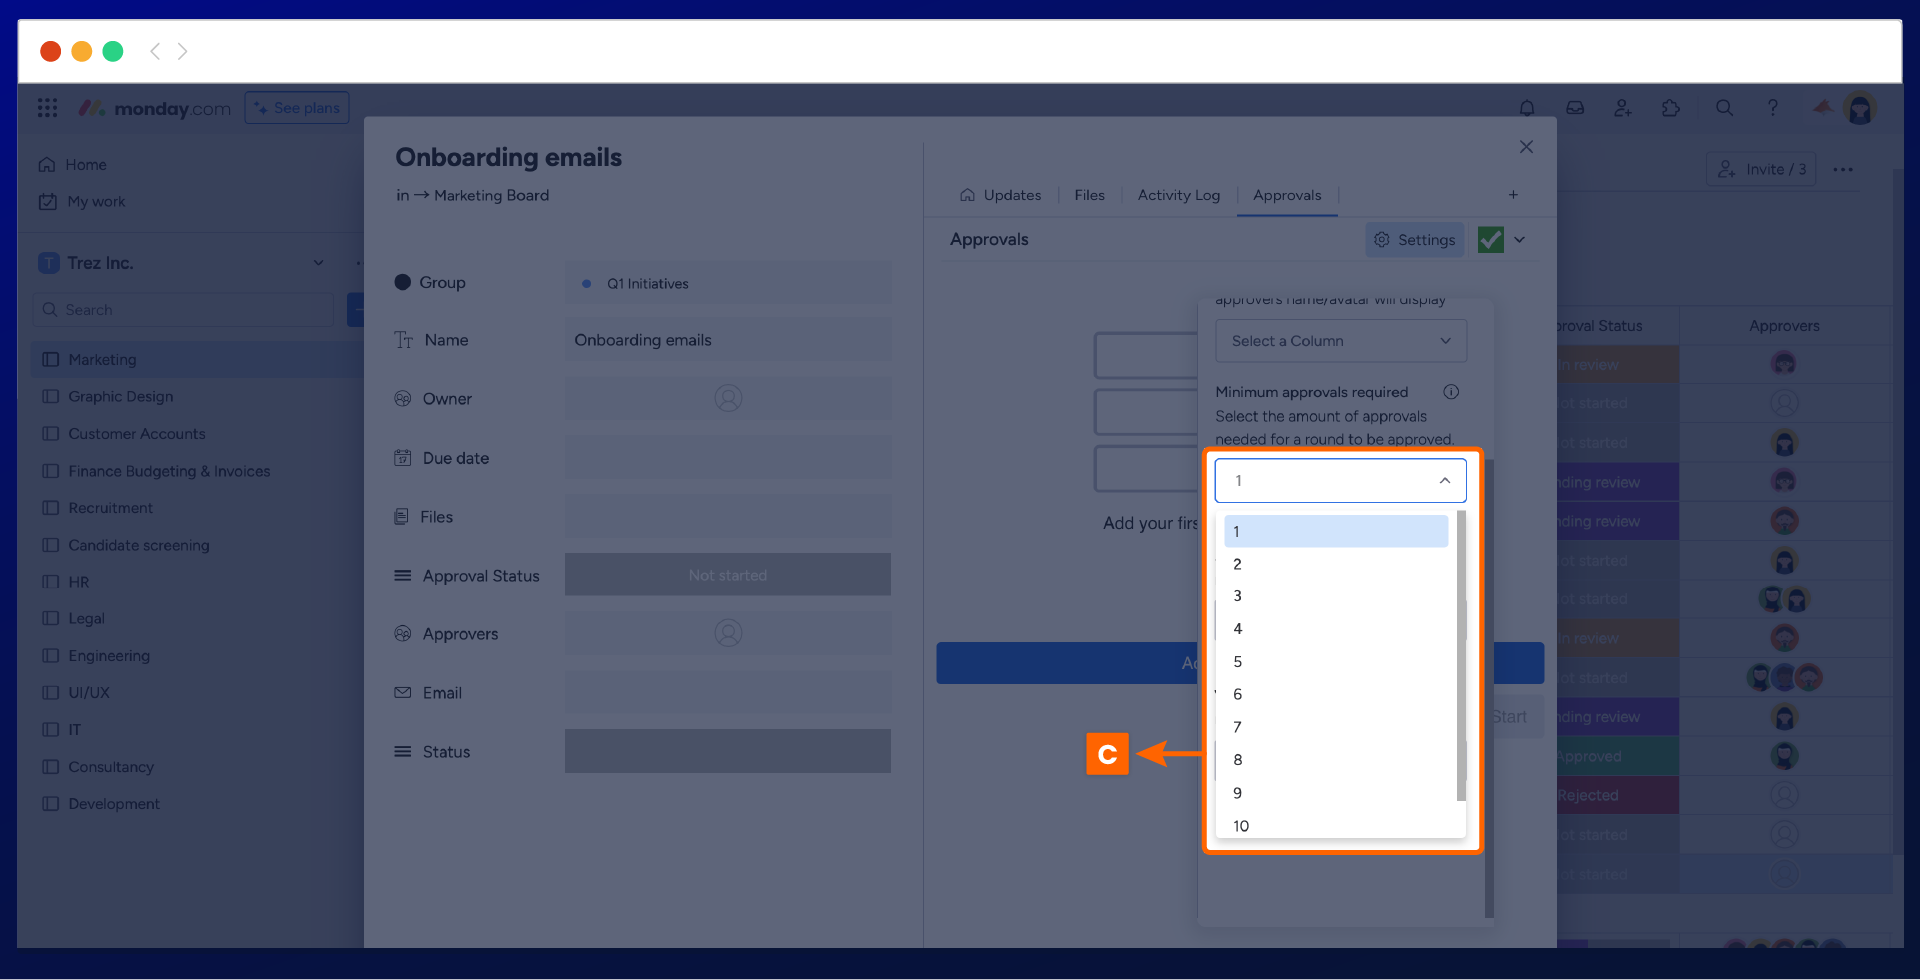
To change the required approvals or rejections, click on the number field under each section (C). This will display a list of numbers from which you can select the approvals or rejections required for an item to be considered approved or rejected.
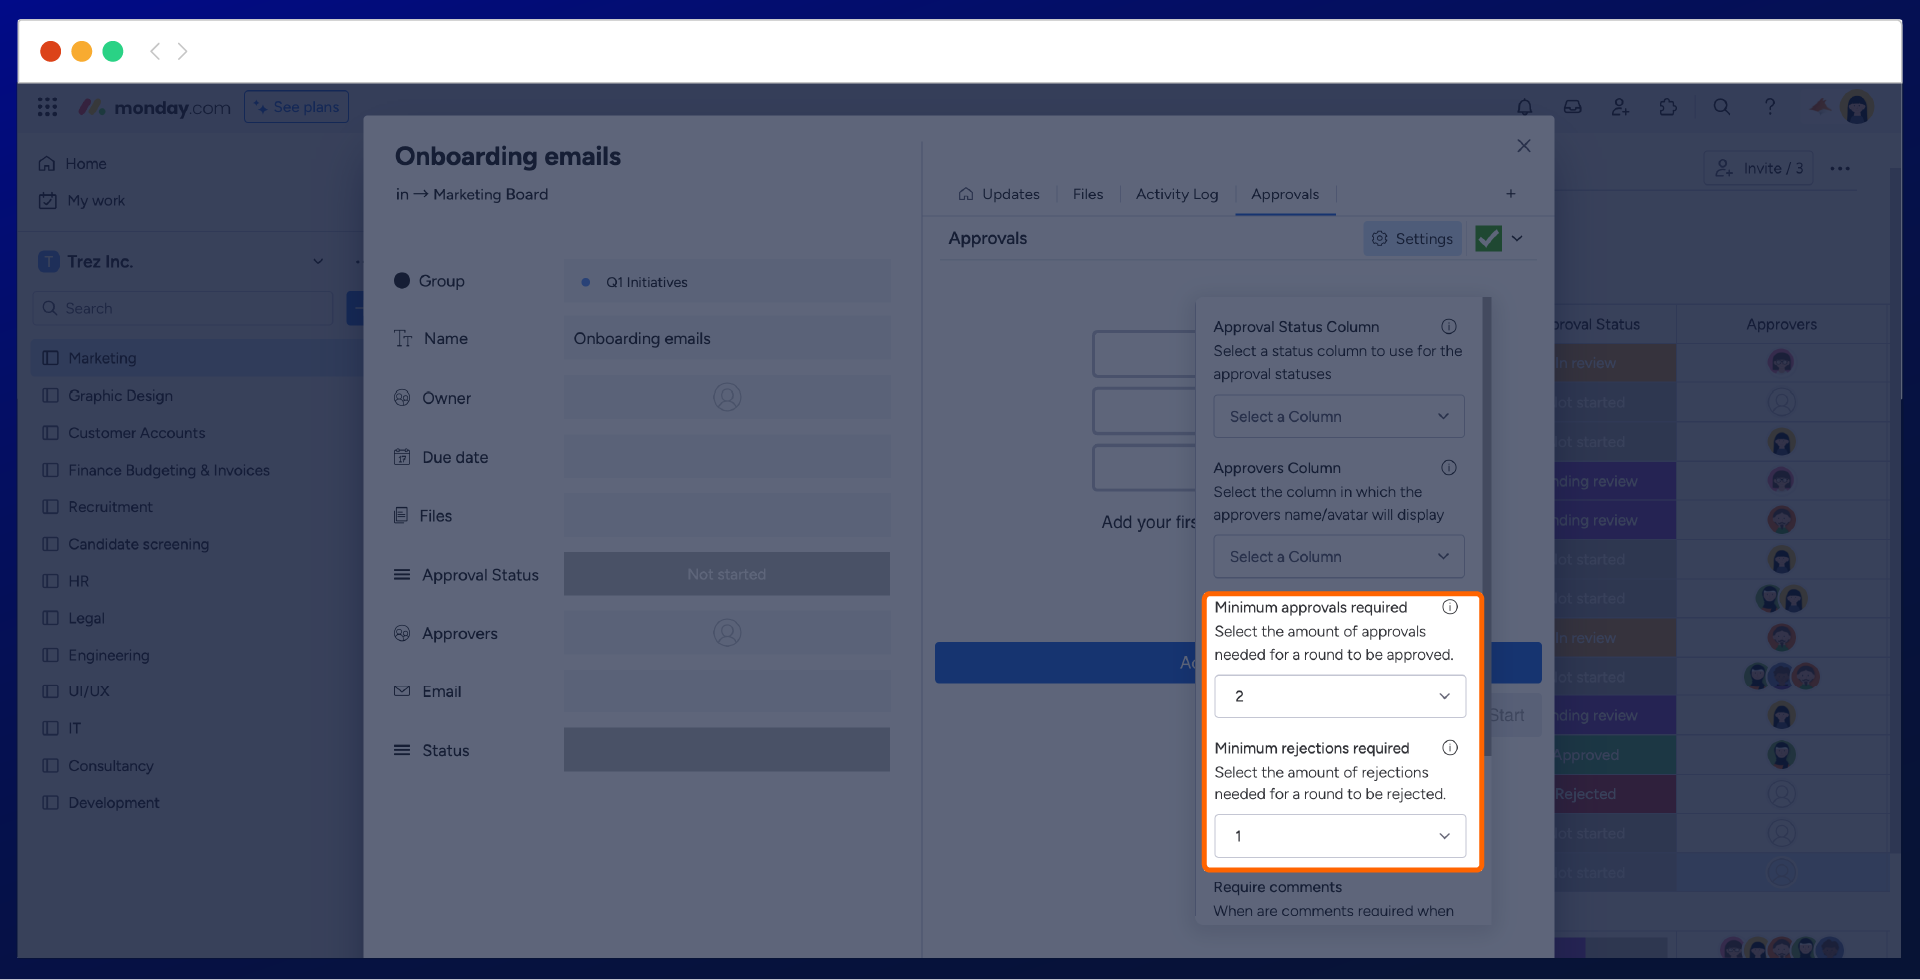
Once you have selected your number, it will appear in the settings, and you can change it anytime. In our screenshot example below, we have set the minimum approvals needed to two and rejections to one.
Important: The minimum approvals and rejections will apply globally
In the following sections, we overview how your approval will display when an item has two minimum approval sets and now minimum rejection sets.
Minimum approvals required in action
The screenshot below highlights what an approval will display when the minimum approvals have been set to two and one approver has approved the item.
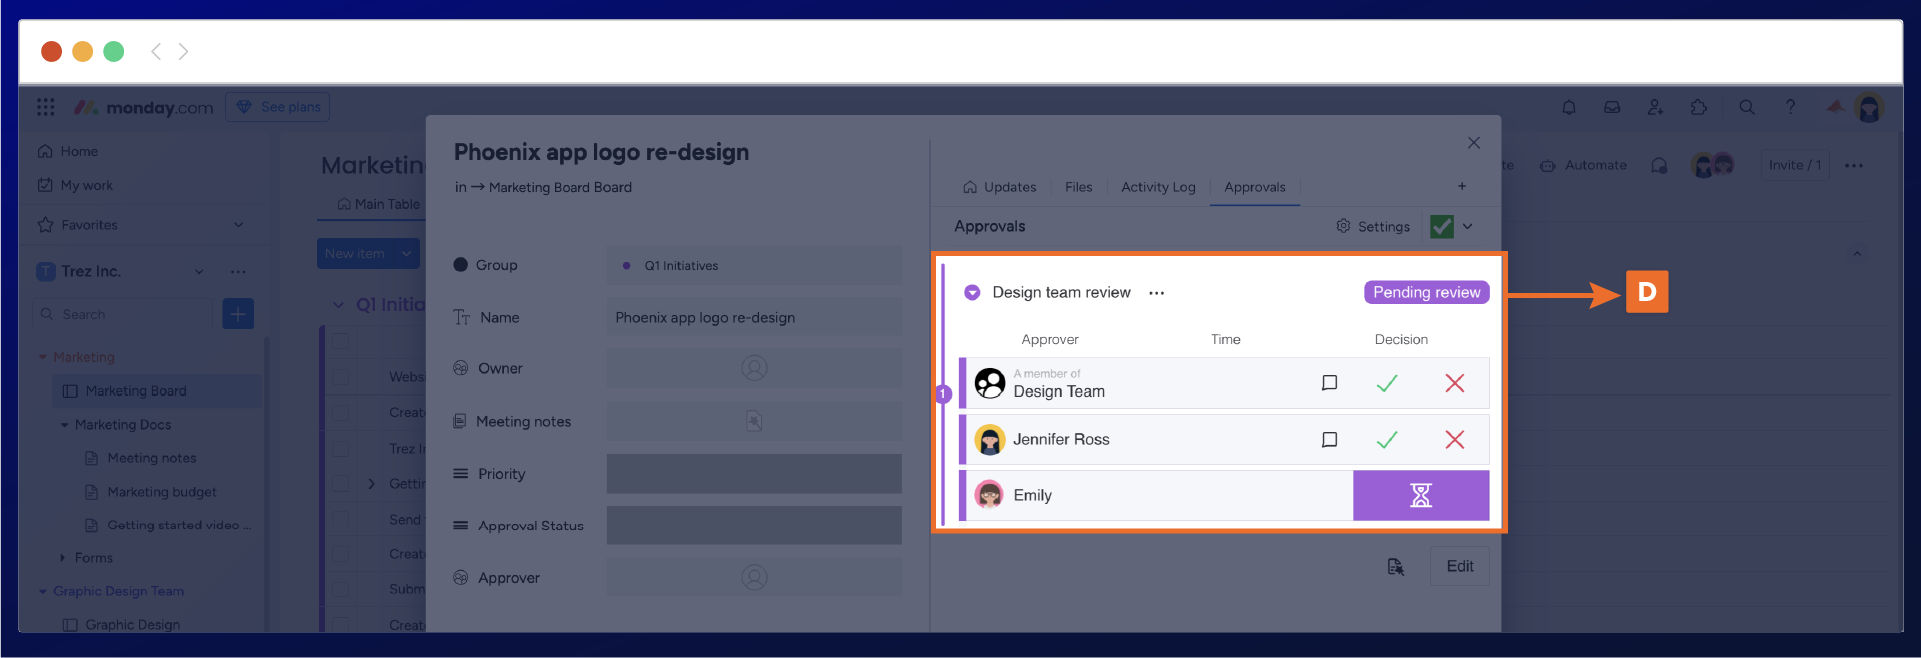
When you have set up your approval and started the process, the approval status will show as 'pending review' (D), as no approvers have decided.
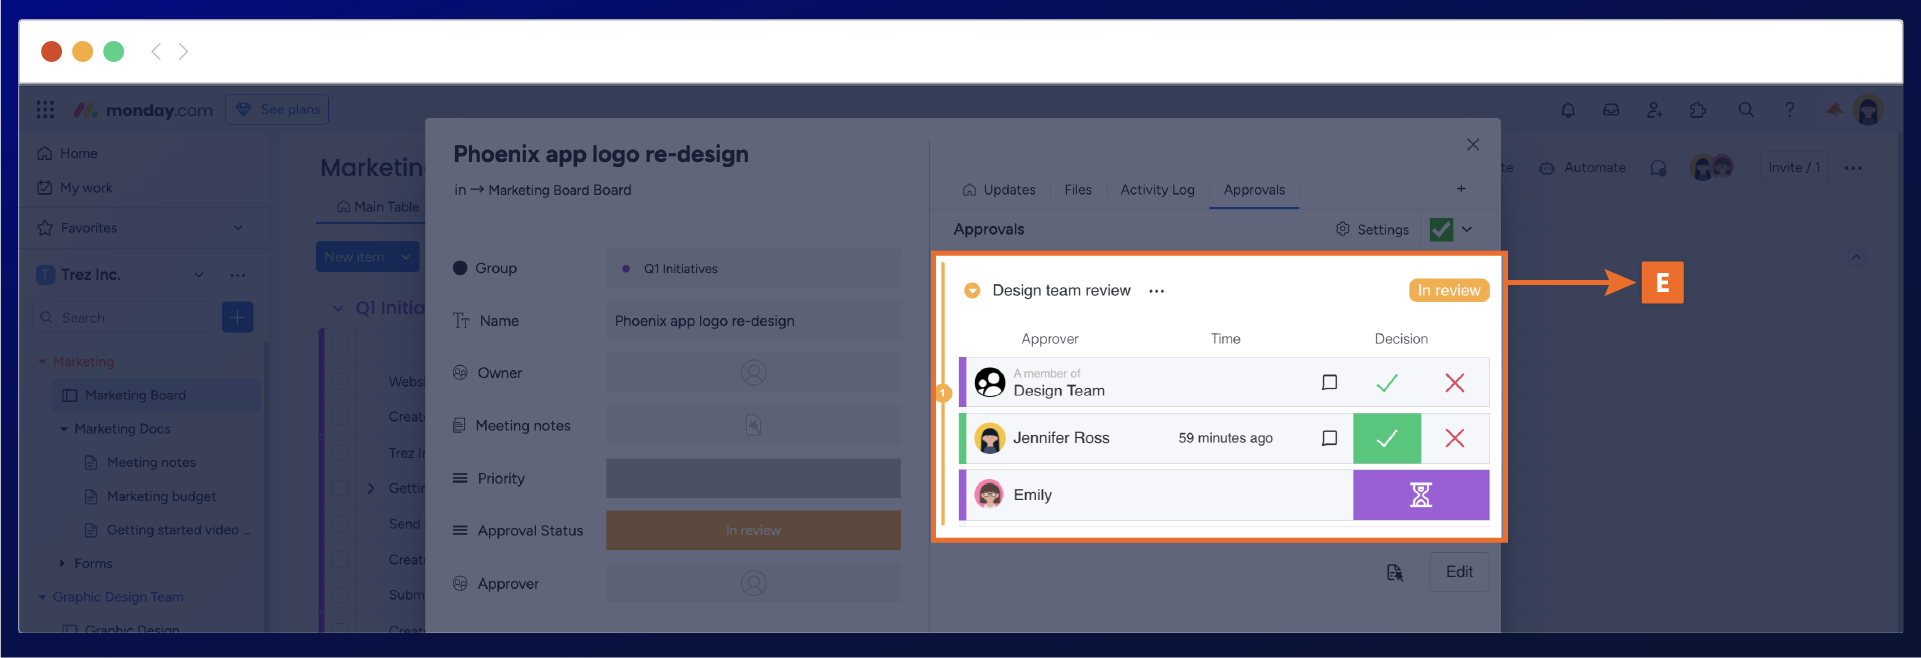
Once one reviewer approves an item, the approval status shows as 'in review' (E). The approval will not show as approved until it has met the threshold of two.
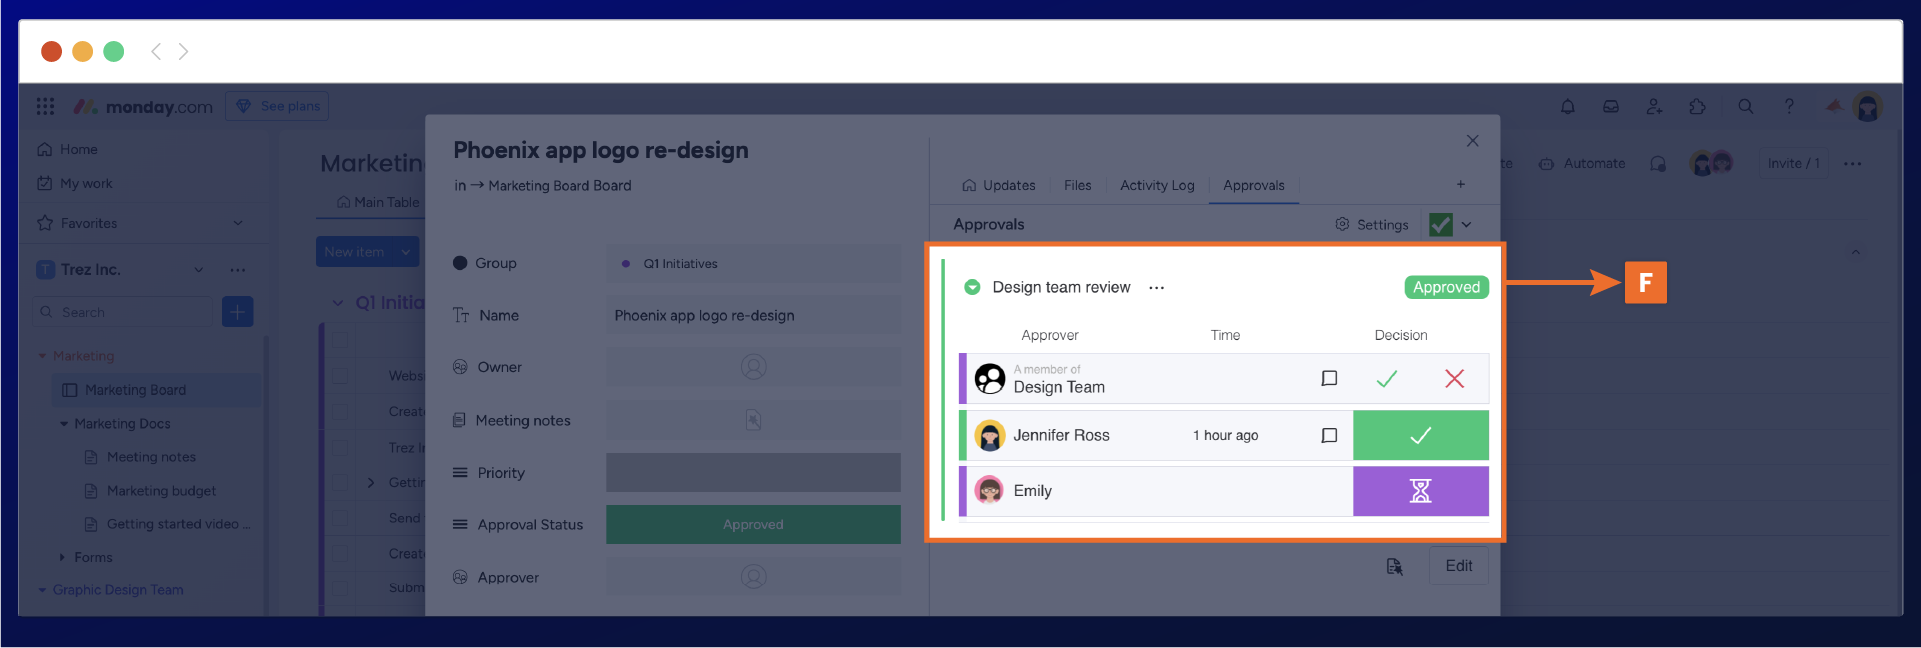
Alternatively, suppose you have selected the minimum approvals threshold to be one. In that case, the approval status will show as approved (F), as only one reviewer is needed to approve the item before it is considered approved.
Approval rejection in action
The screenshots below highlight what an approval will display when an approval round has two approvers who have approved and one rejection.
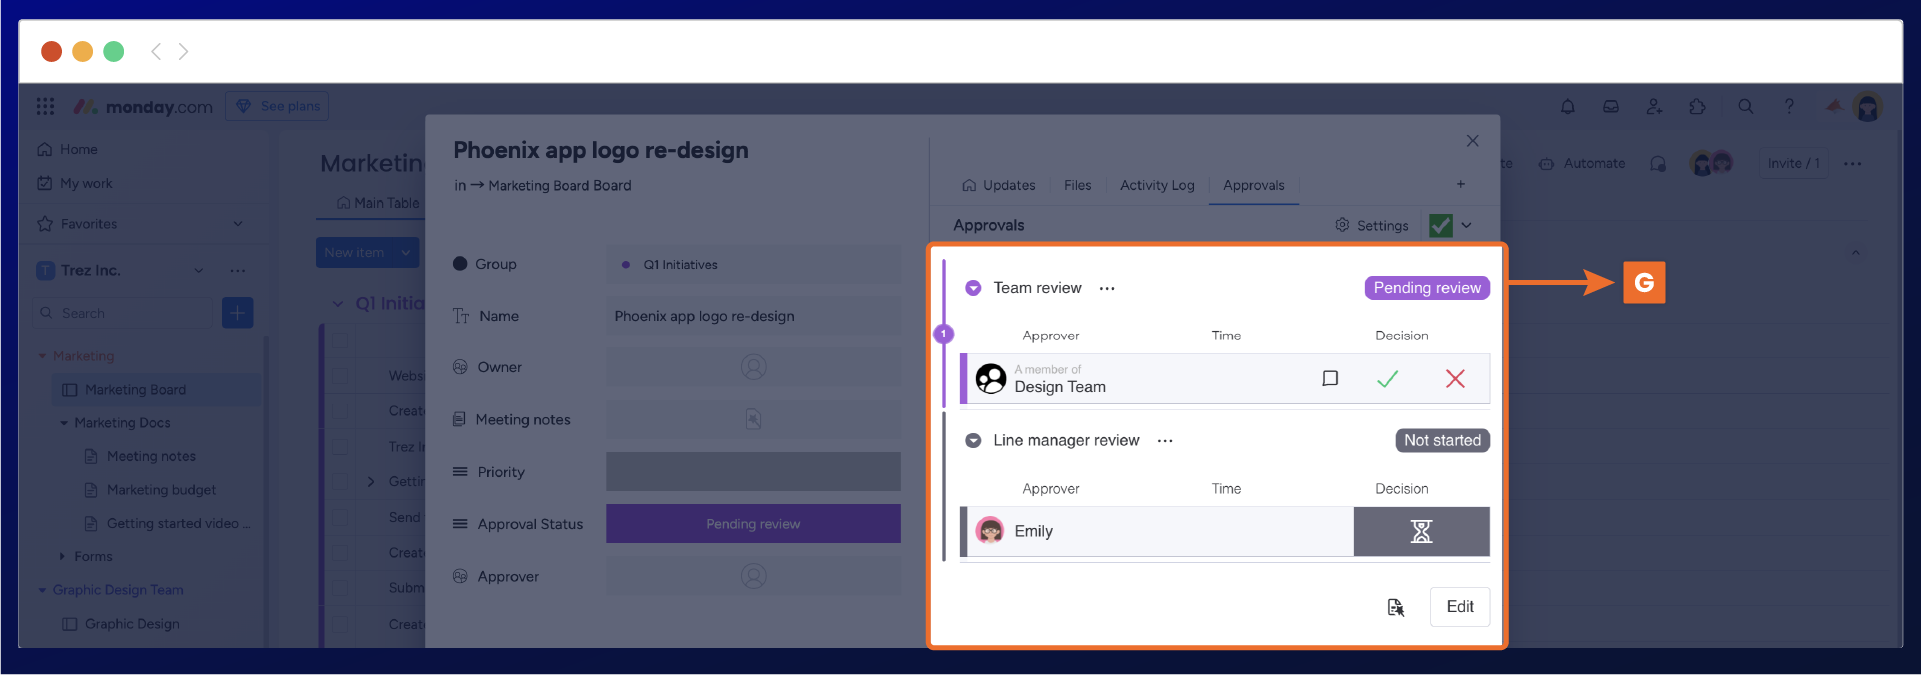
When you have set up your approval and started the process, the approval status will show as 'pending review' (G), as no approvers have approved the item.
The approval round has received two approvals, but one approver has rejected it. As a result, the overall approval status is now marked as rejected (H). By default, any rejection in an approval round will change the status to rejected. Additionally, if the approval process consists of multiple stages, the round will not advance to the next stage.
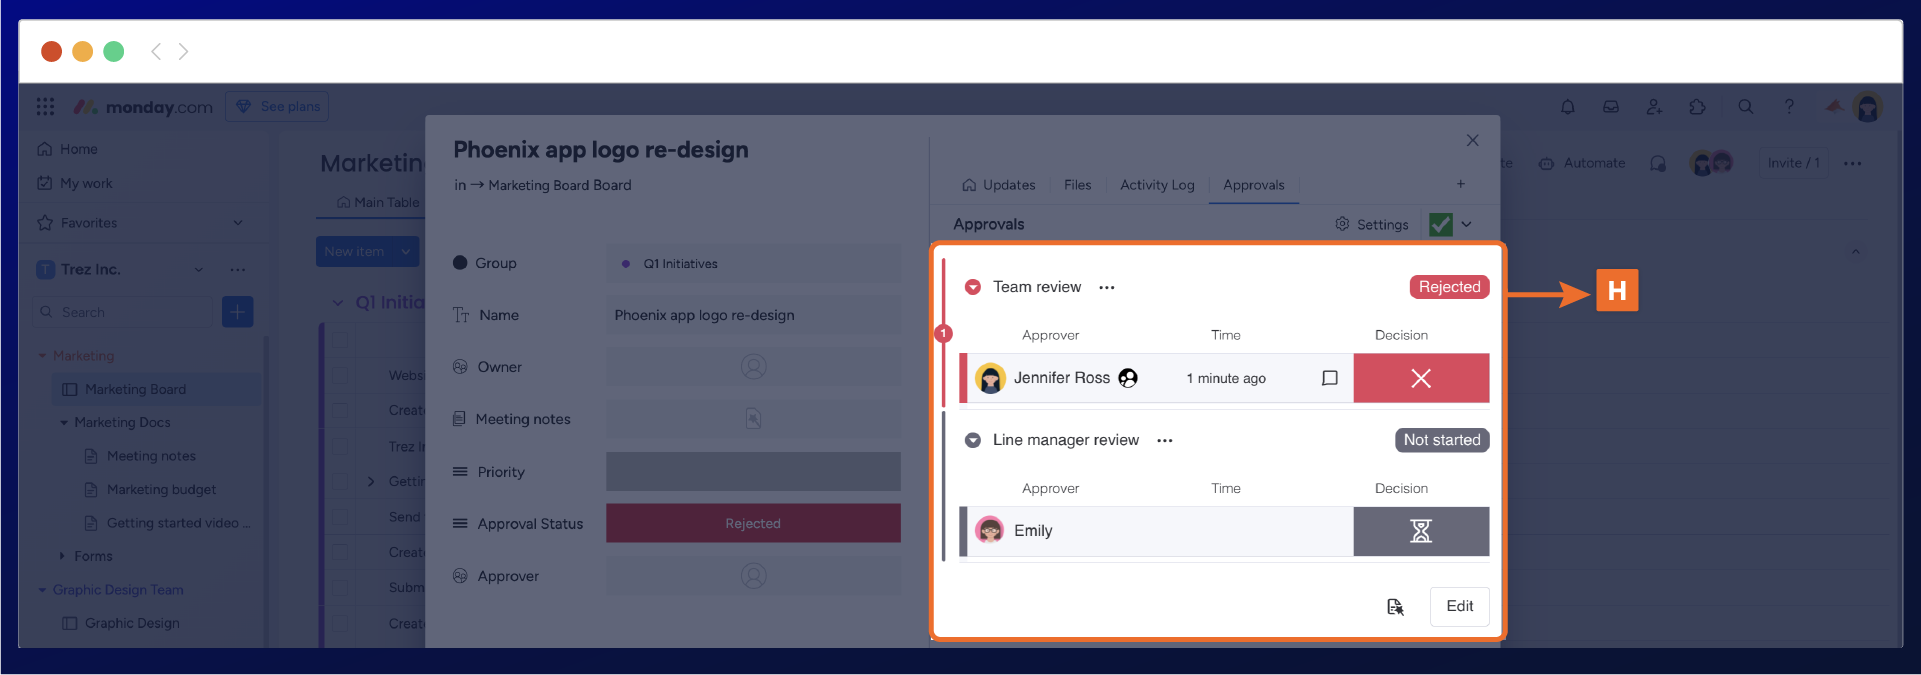
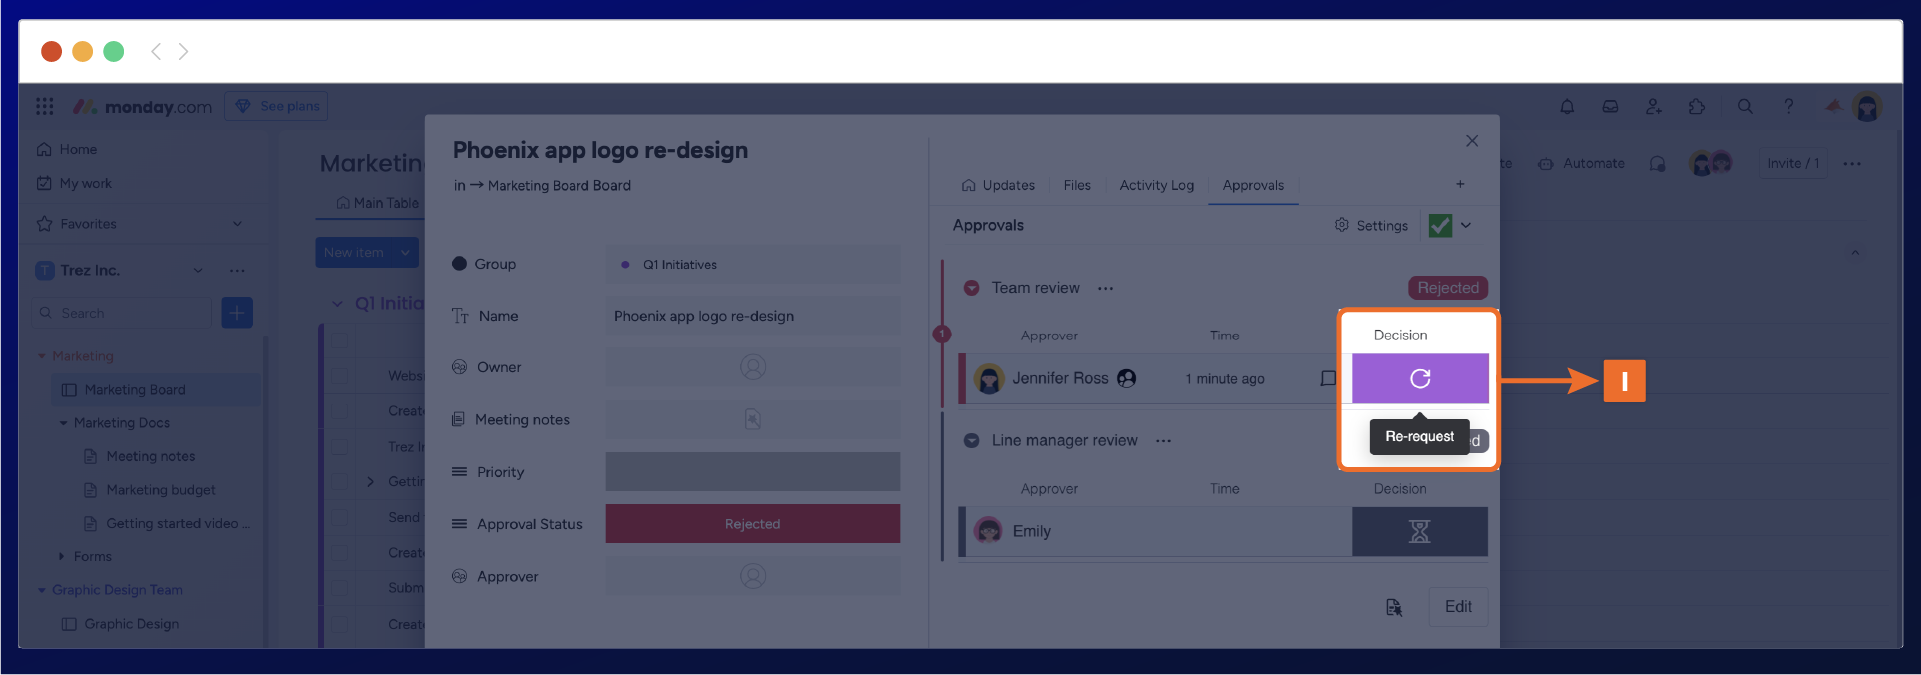
The status of the approval indicates that action is required for any item sent for review in this scenario. As a result, the approval owner can re-request approval (I) from the approver who rejected the item.
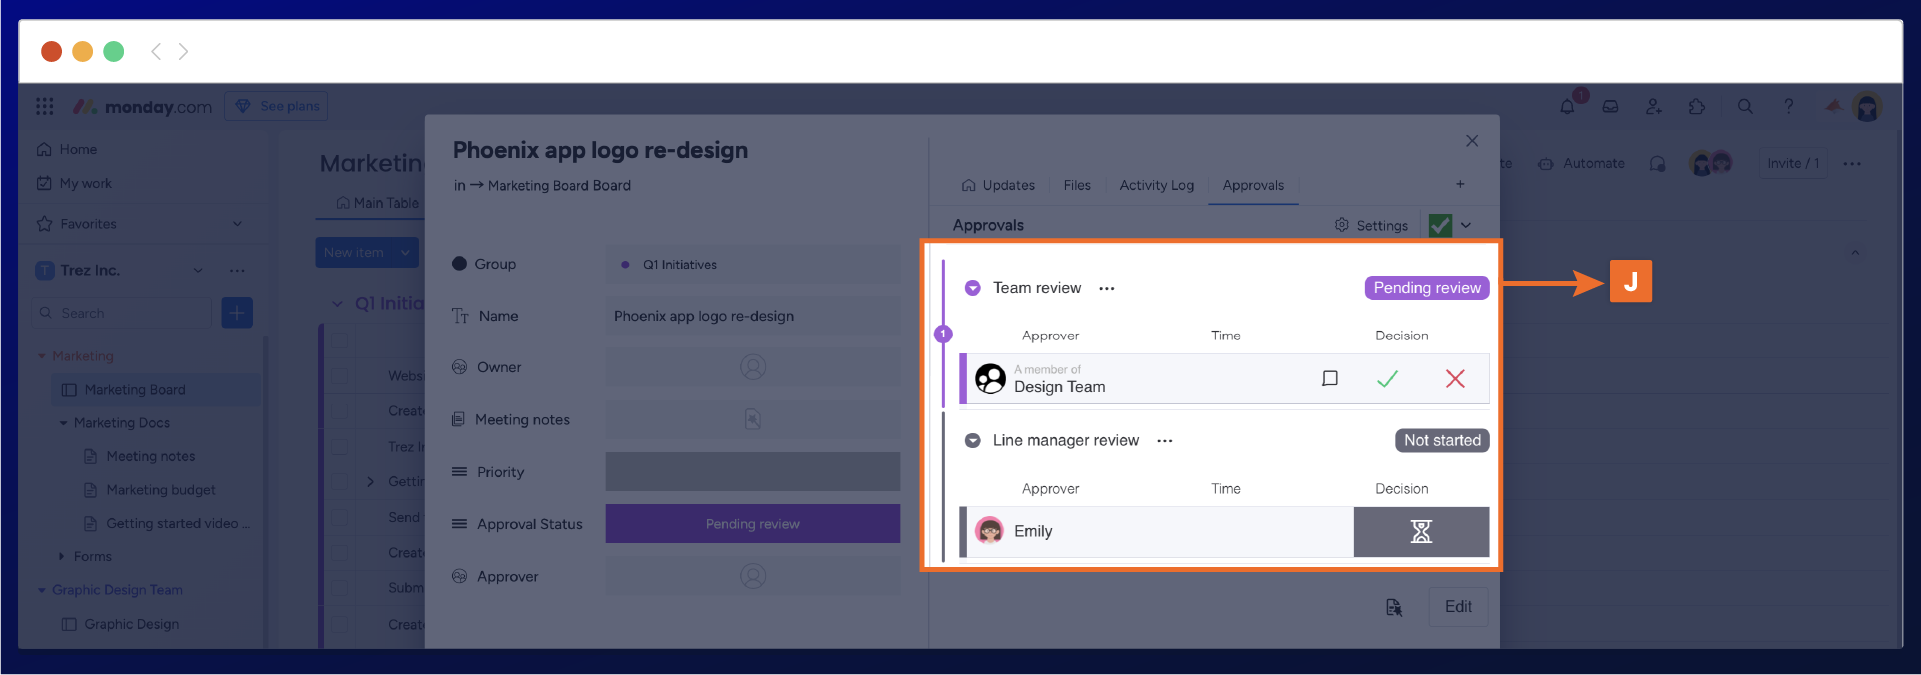
The item approval will now show as pending review (J), and the approver will receive an automated notification, both in-app and via email, regarding the re-request.
Need support? We're here to help 🧡
If you have any questions or would like to speak with us about Approvals for monday.com, please contact our Customer Support team.
.svg)