.svg)
Custom Field Merging
Custom field merging in Optimizer allows you to copy the contents of one custom field into another across all associated work items, in order to consolidate and clean up duplicate fields.
The merge wizard can be accessed from the ‘Merge Fields’ button in the navigation tab.
Initiating a Merge
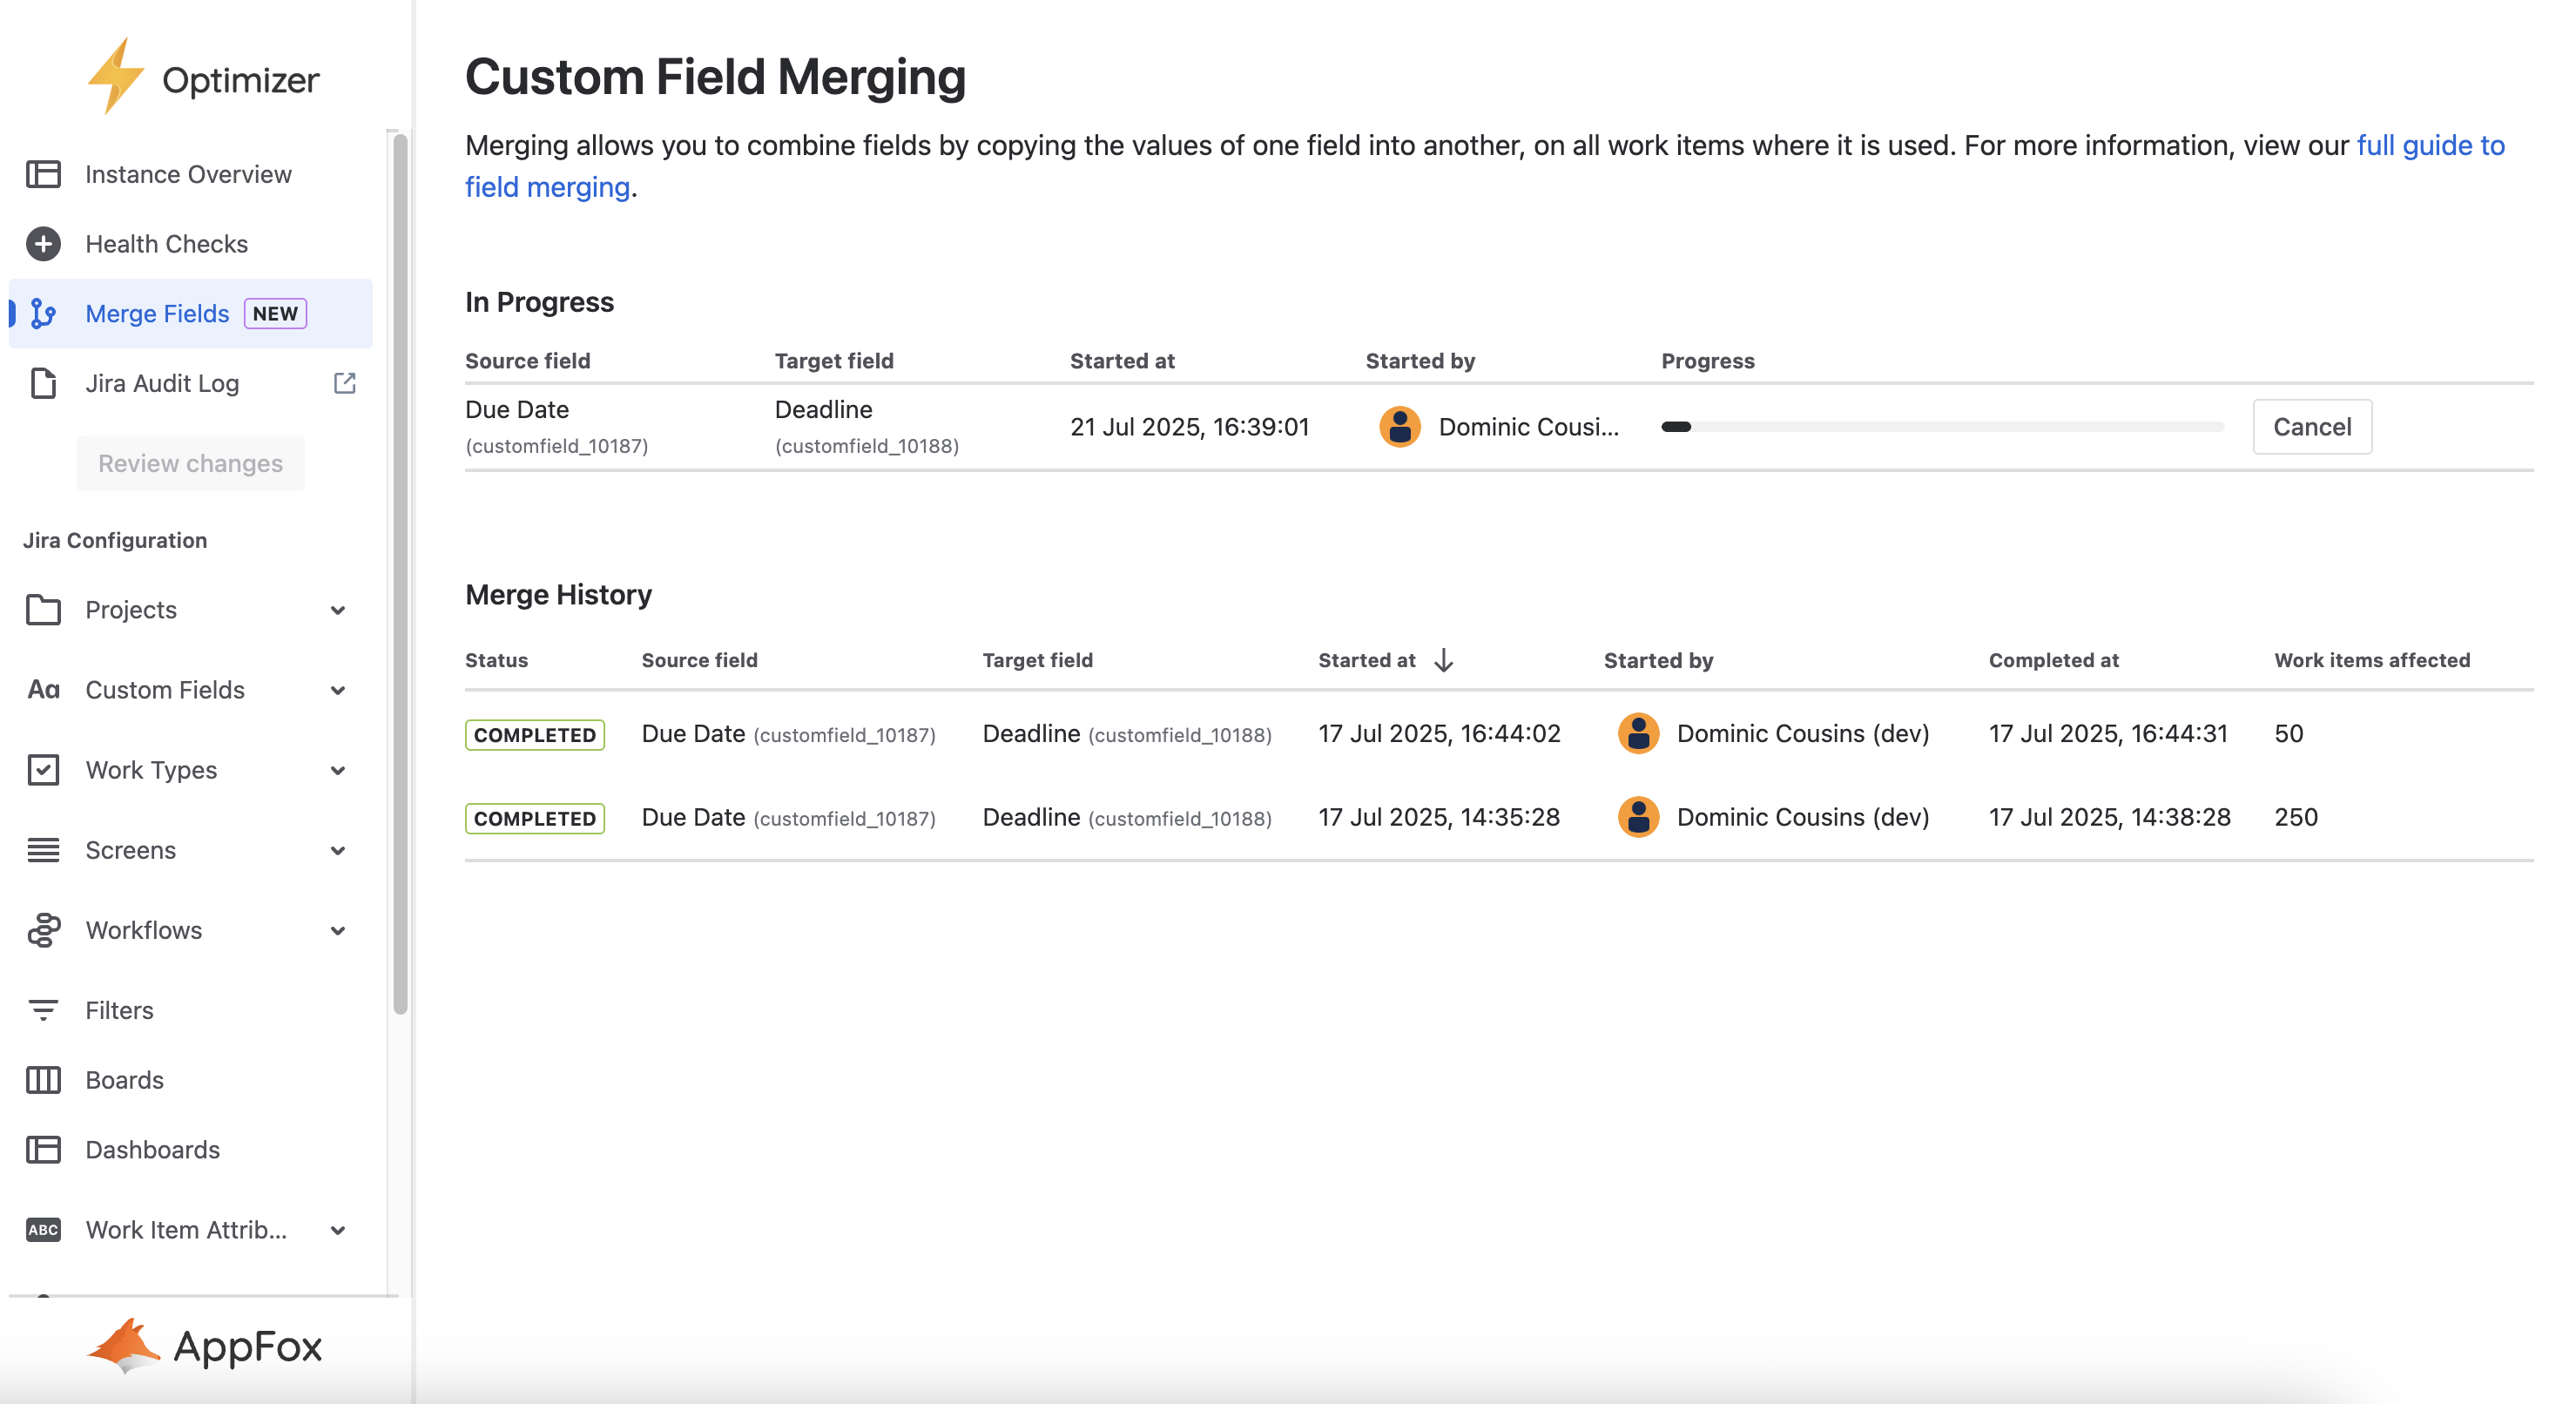
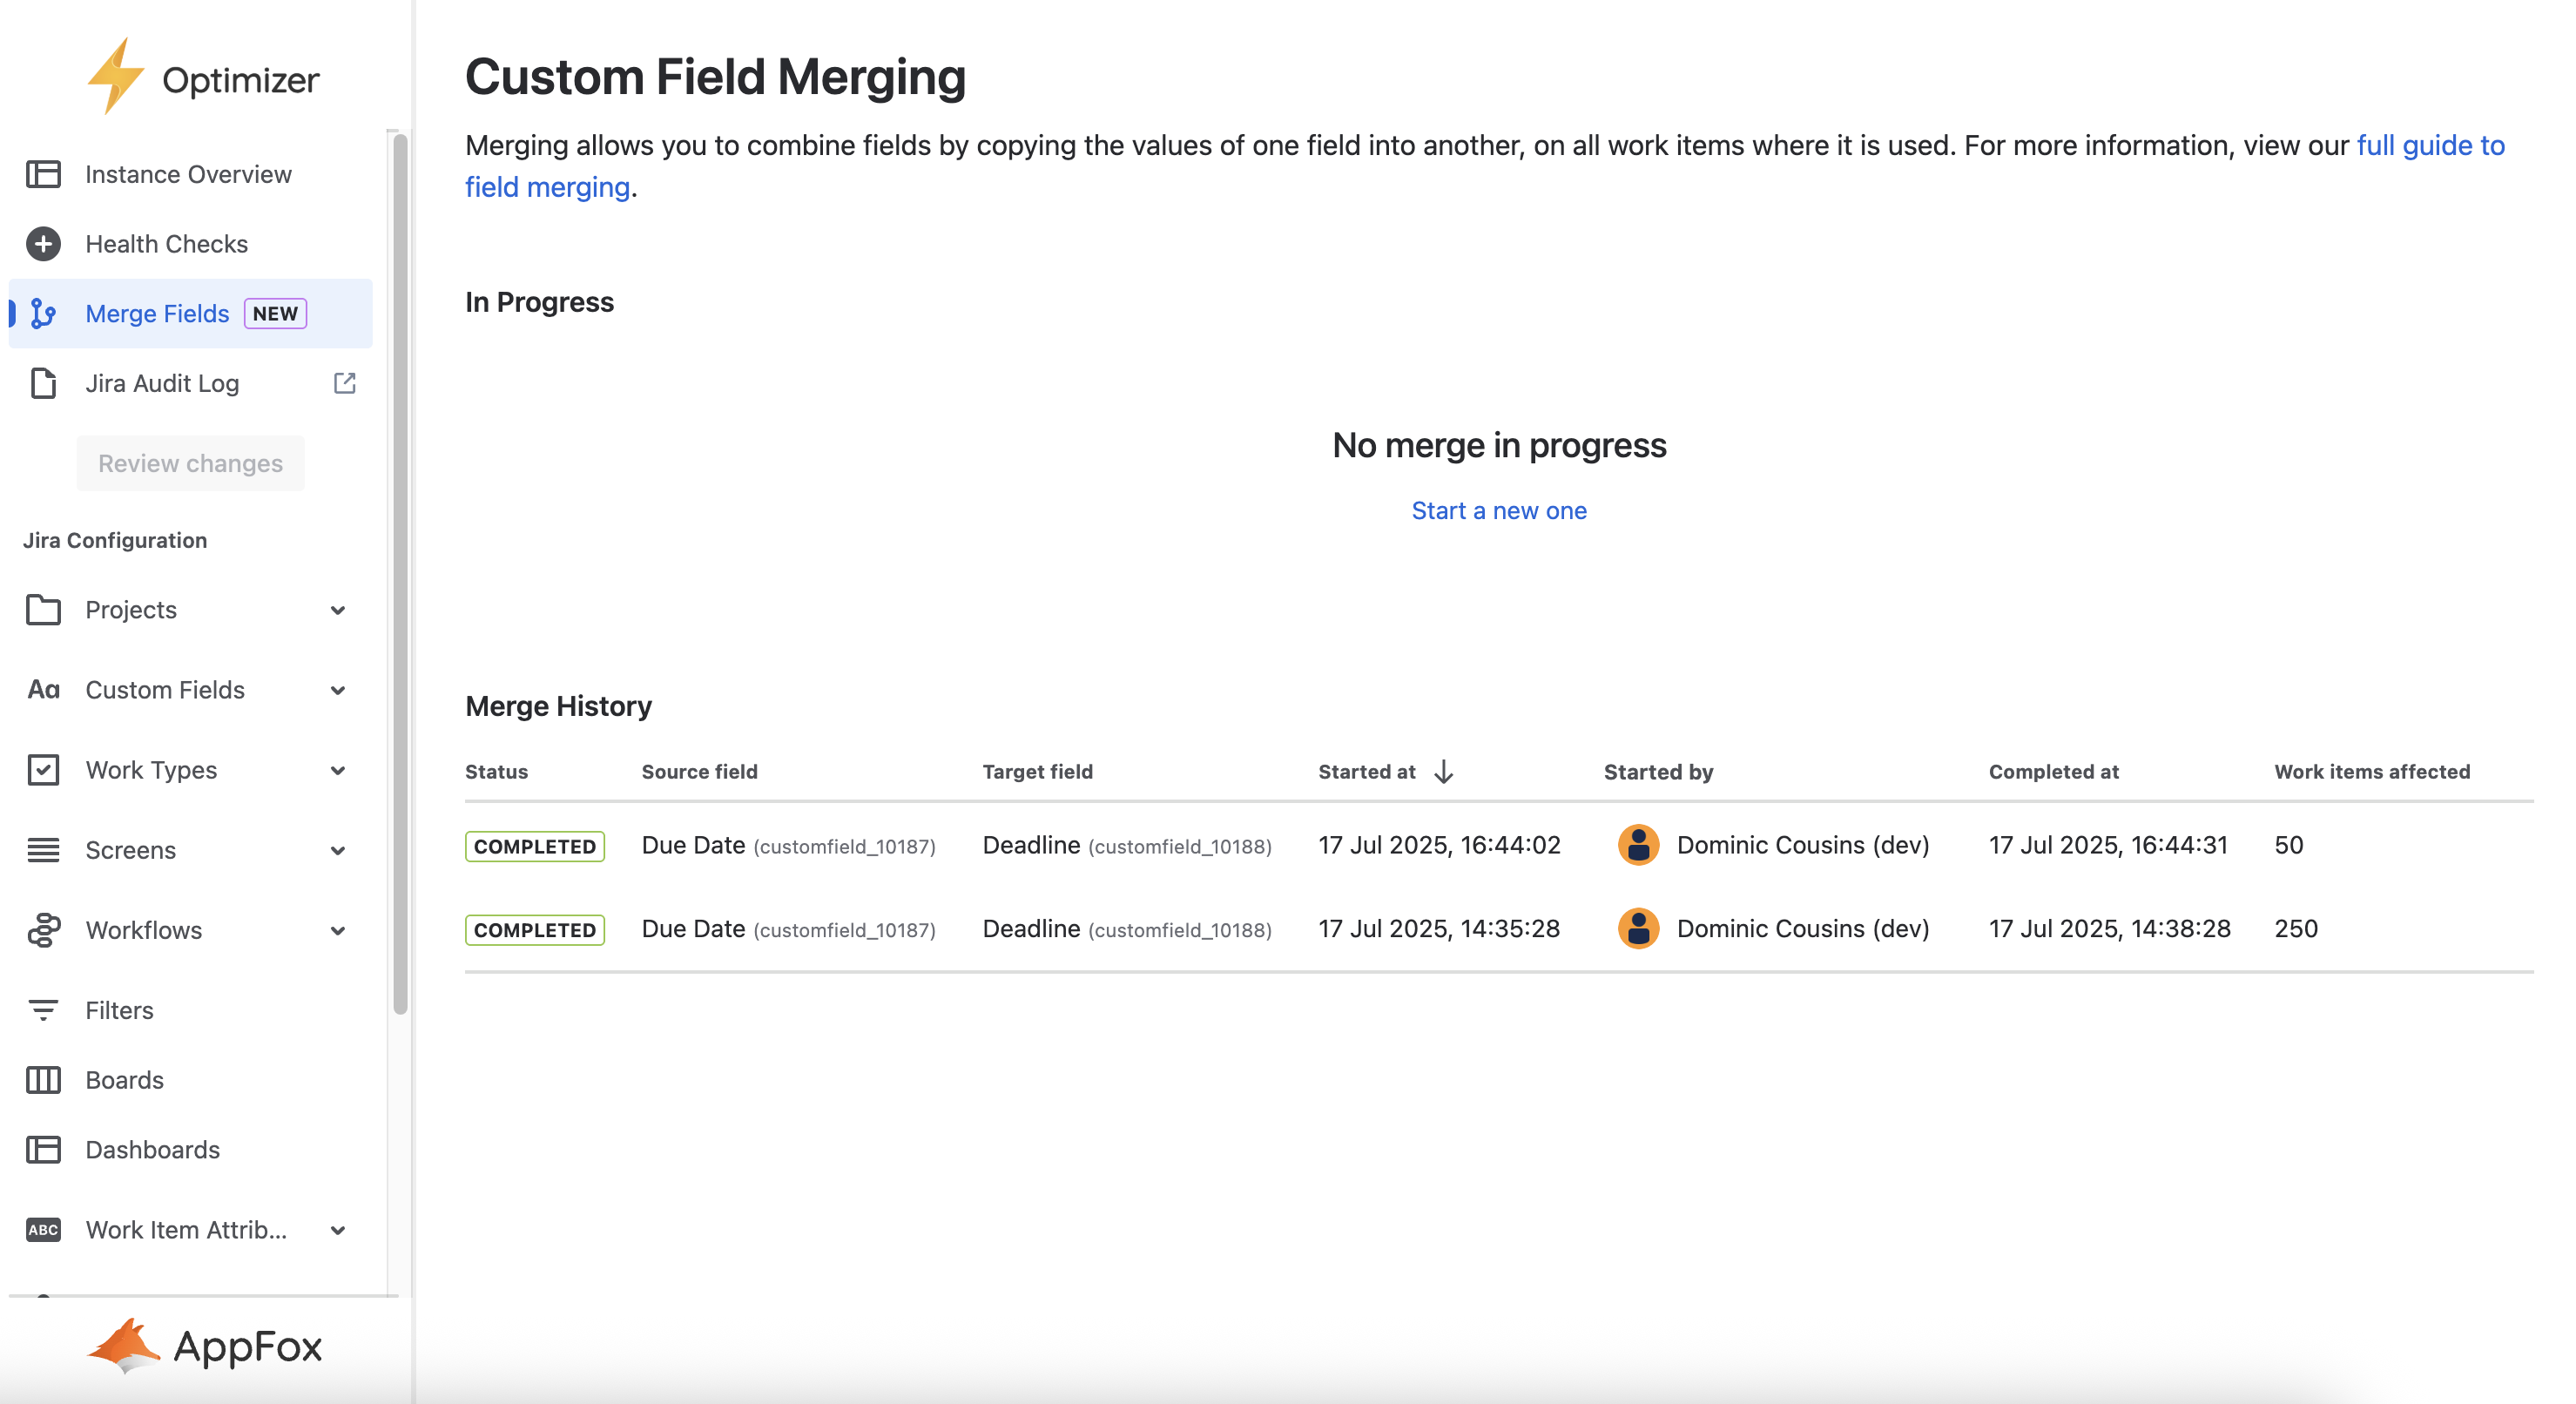
To begin a field merge, navigate to the Merge Fields tab using the Optimizer sidebar. From this page you can see any in-progress merge task, as well as a list of all completed ones.
If there is no merge in progress, one can be started by clicking the “Start a new one” button in the middle of the page. This will take you to the merge wizard which guides you through the process in four steps, including a compatibility check for the screens and context of the selected fields.
You may only have one merge task in progress at a time.
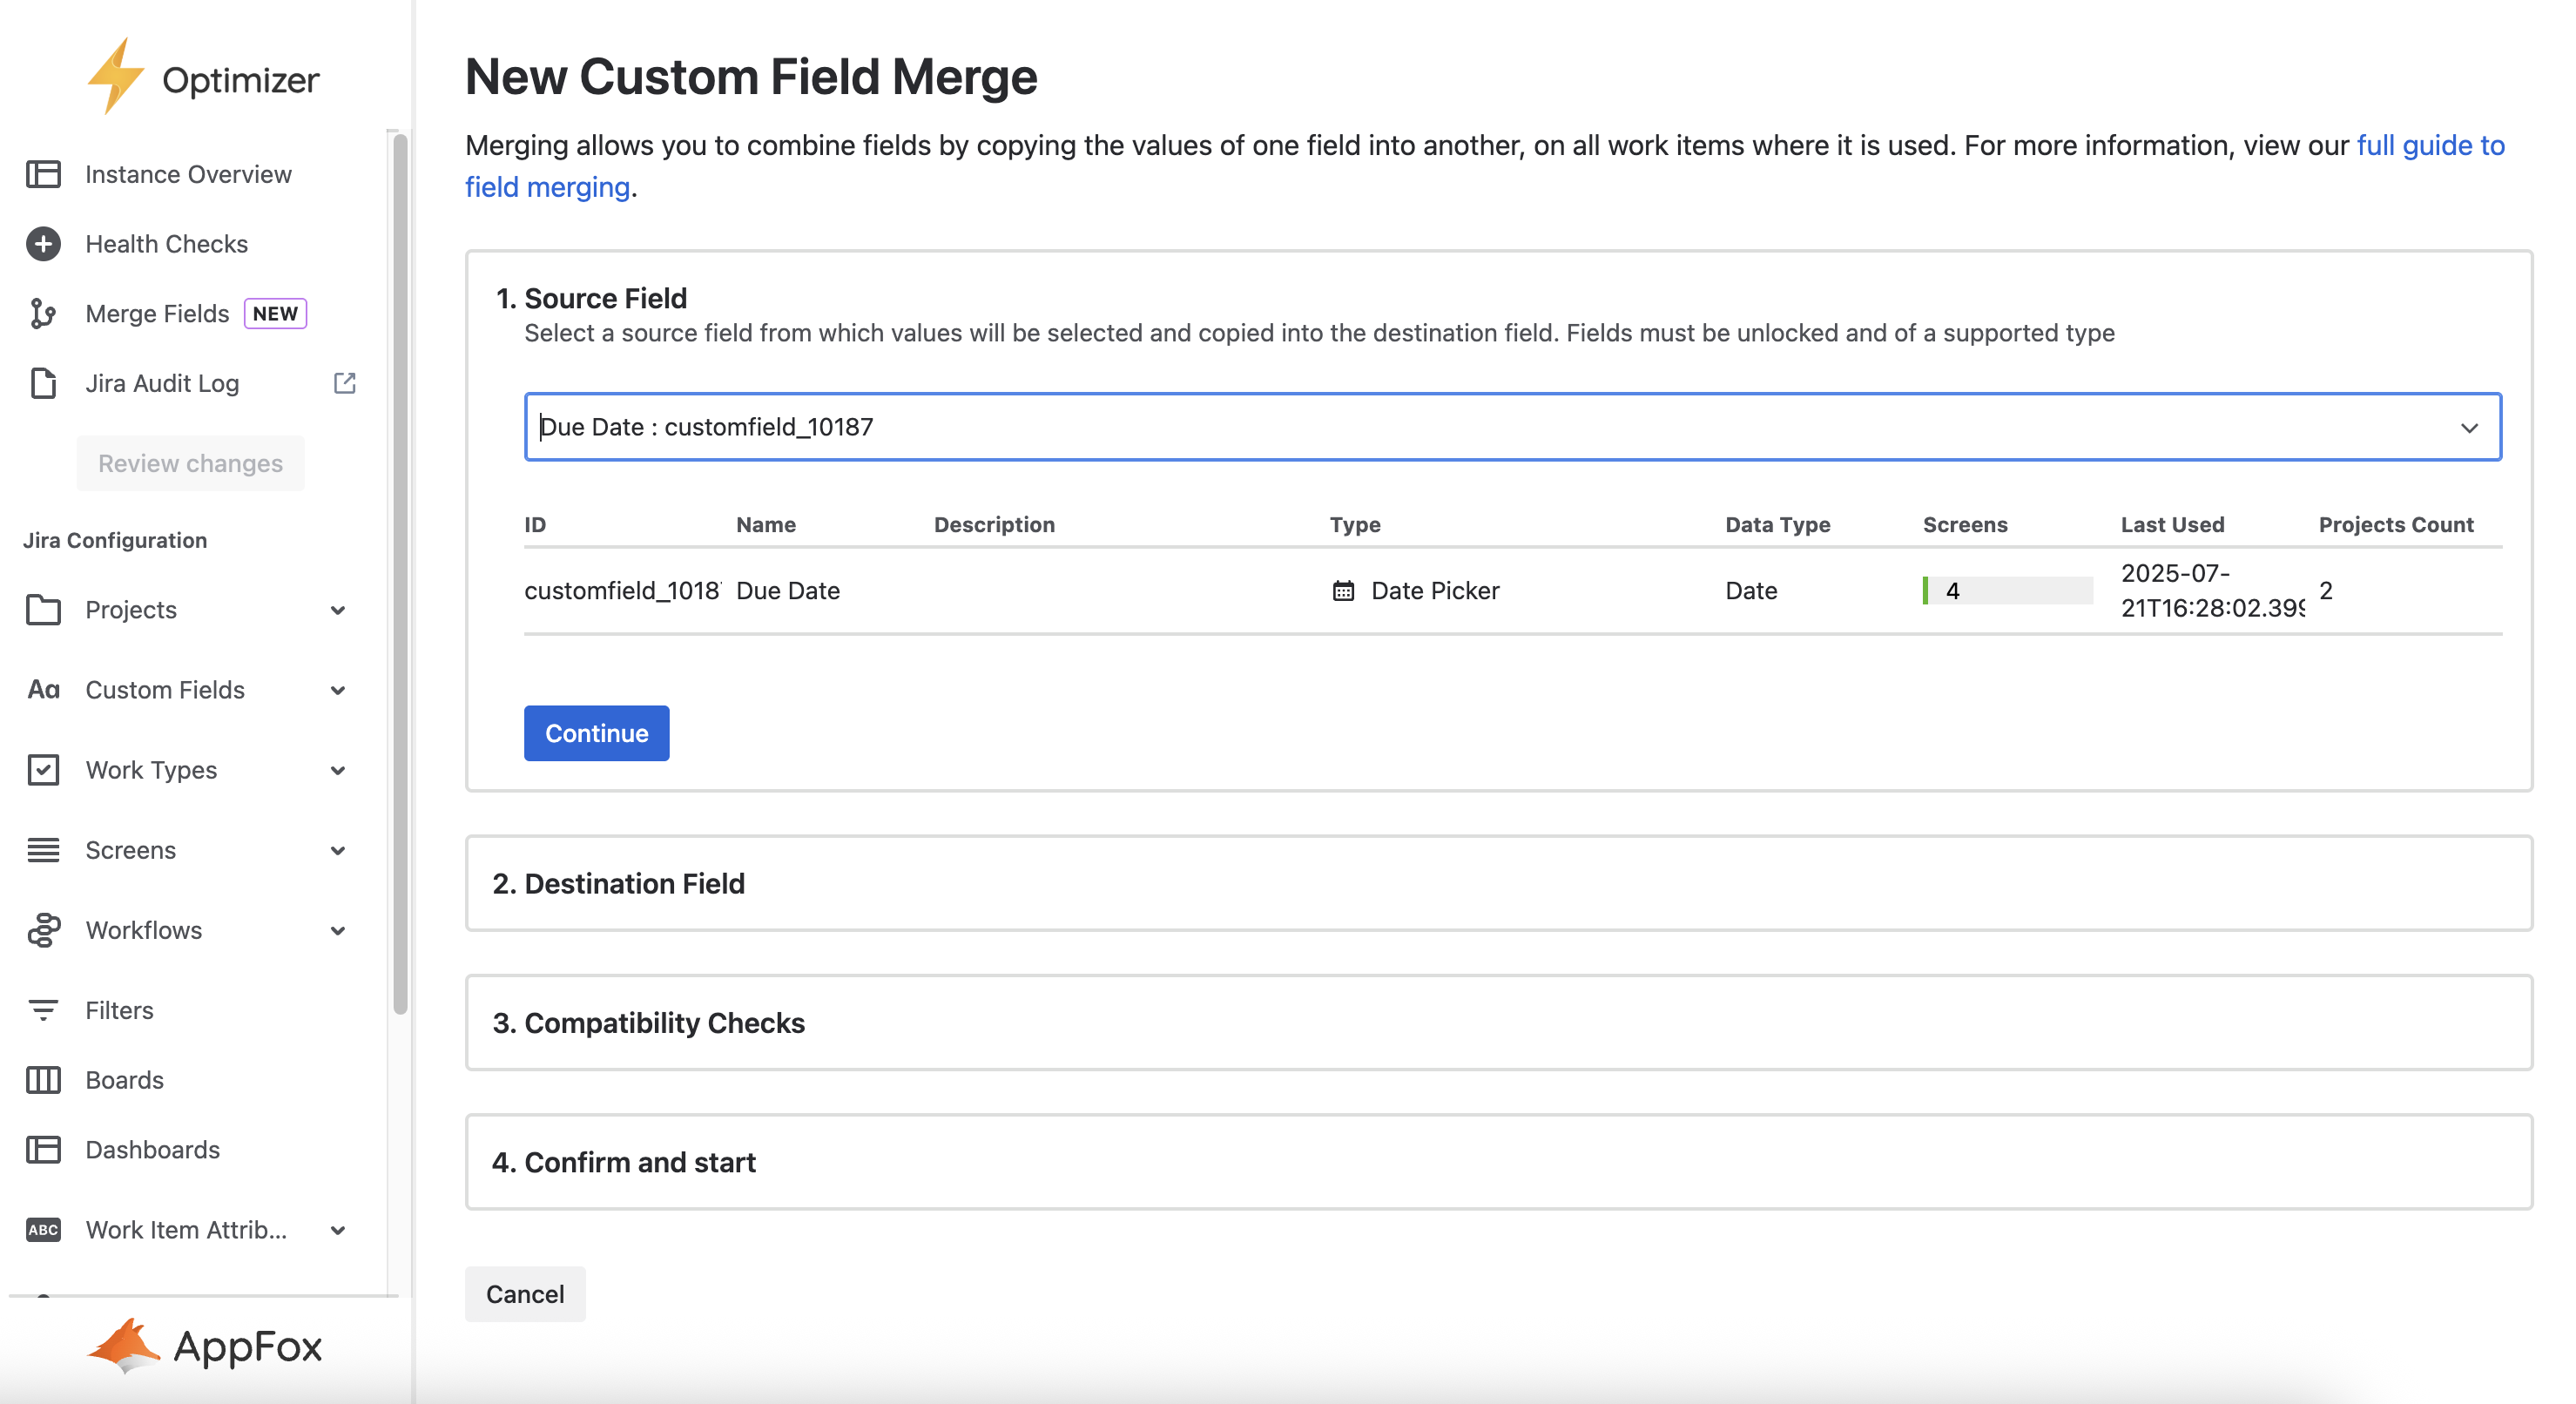
1. Select Source Field
The first step is to select a source field. This is the field you want to copy data from. If you are intending to use this feature to help you in removing duplicate fields, then the source field should be the one that want to remove. The wizard will show some information about the chosen field so you can make sure you’re choosing the correct field.
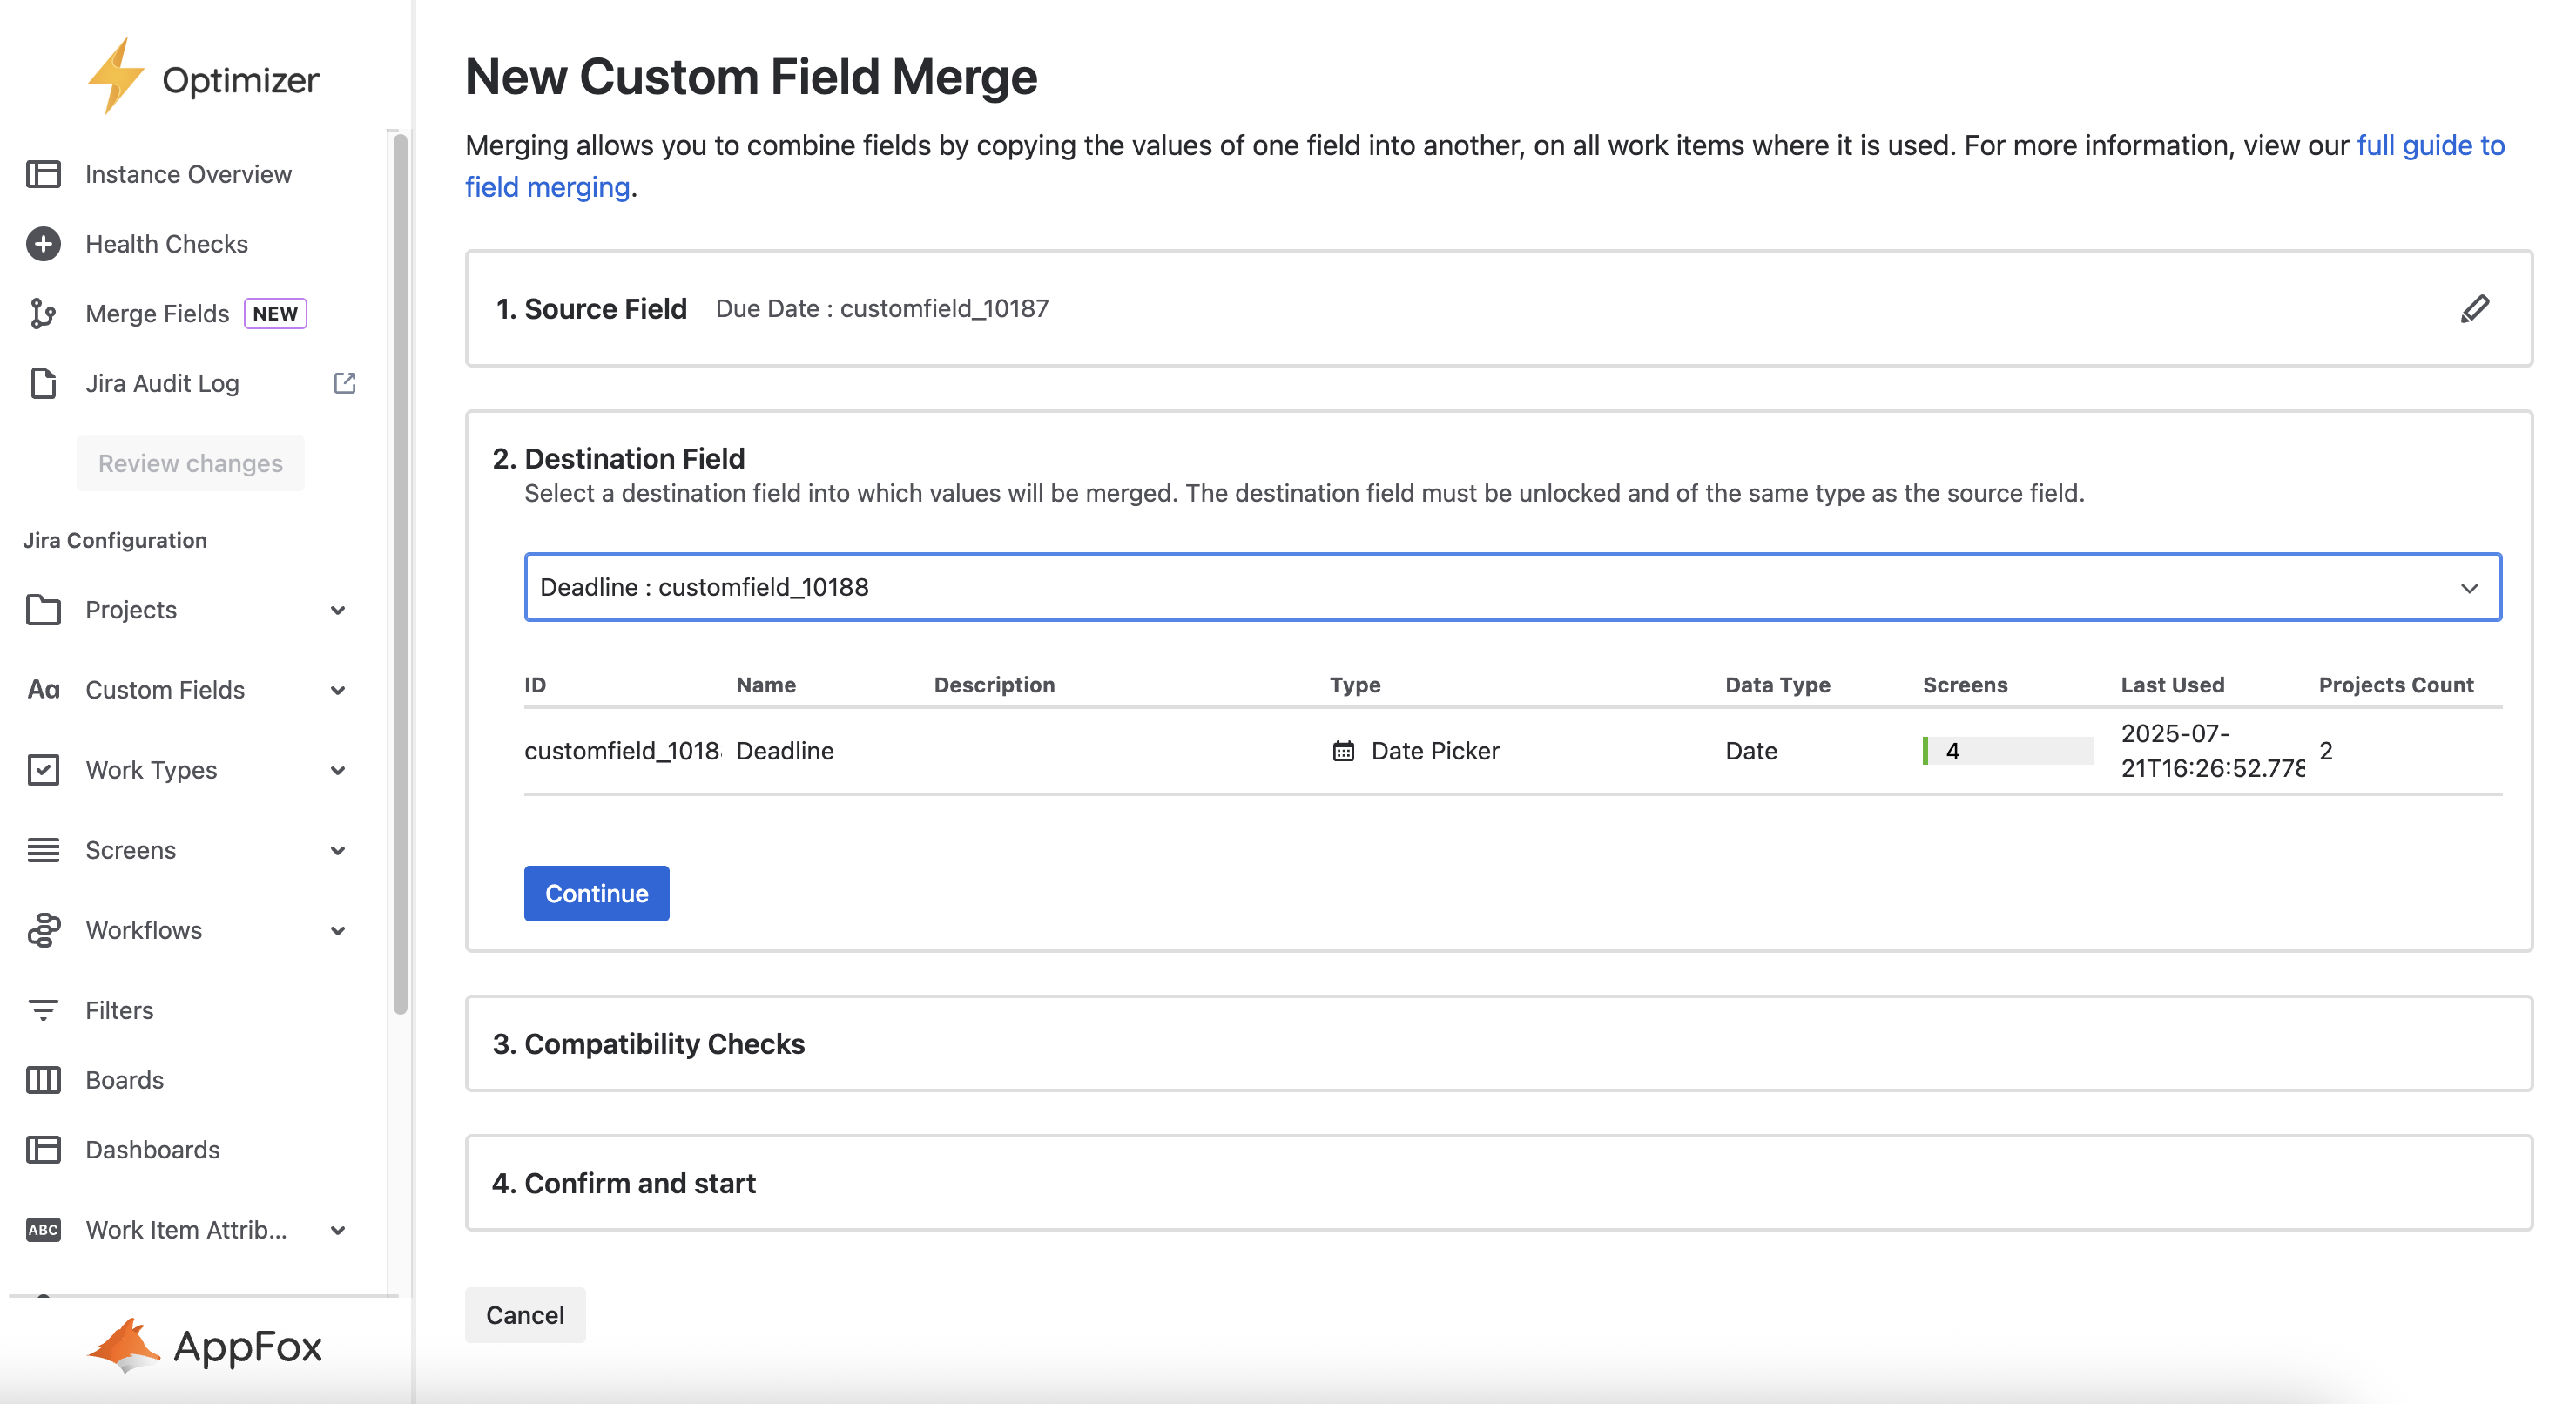
2. Select Destination Field
Destination field in much the same way as the source field. This is the field you want to copy data to. The destination field must have the same field type as the source field. If fields with different types are chosen you will not be able to continue and an error will be displayed until you choose a matching field.
Where a work item has a value for both the source and destination fields, the existing value in the destination field will be maintained.
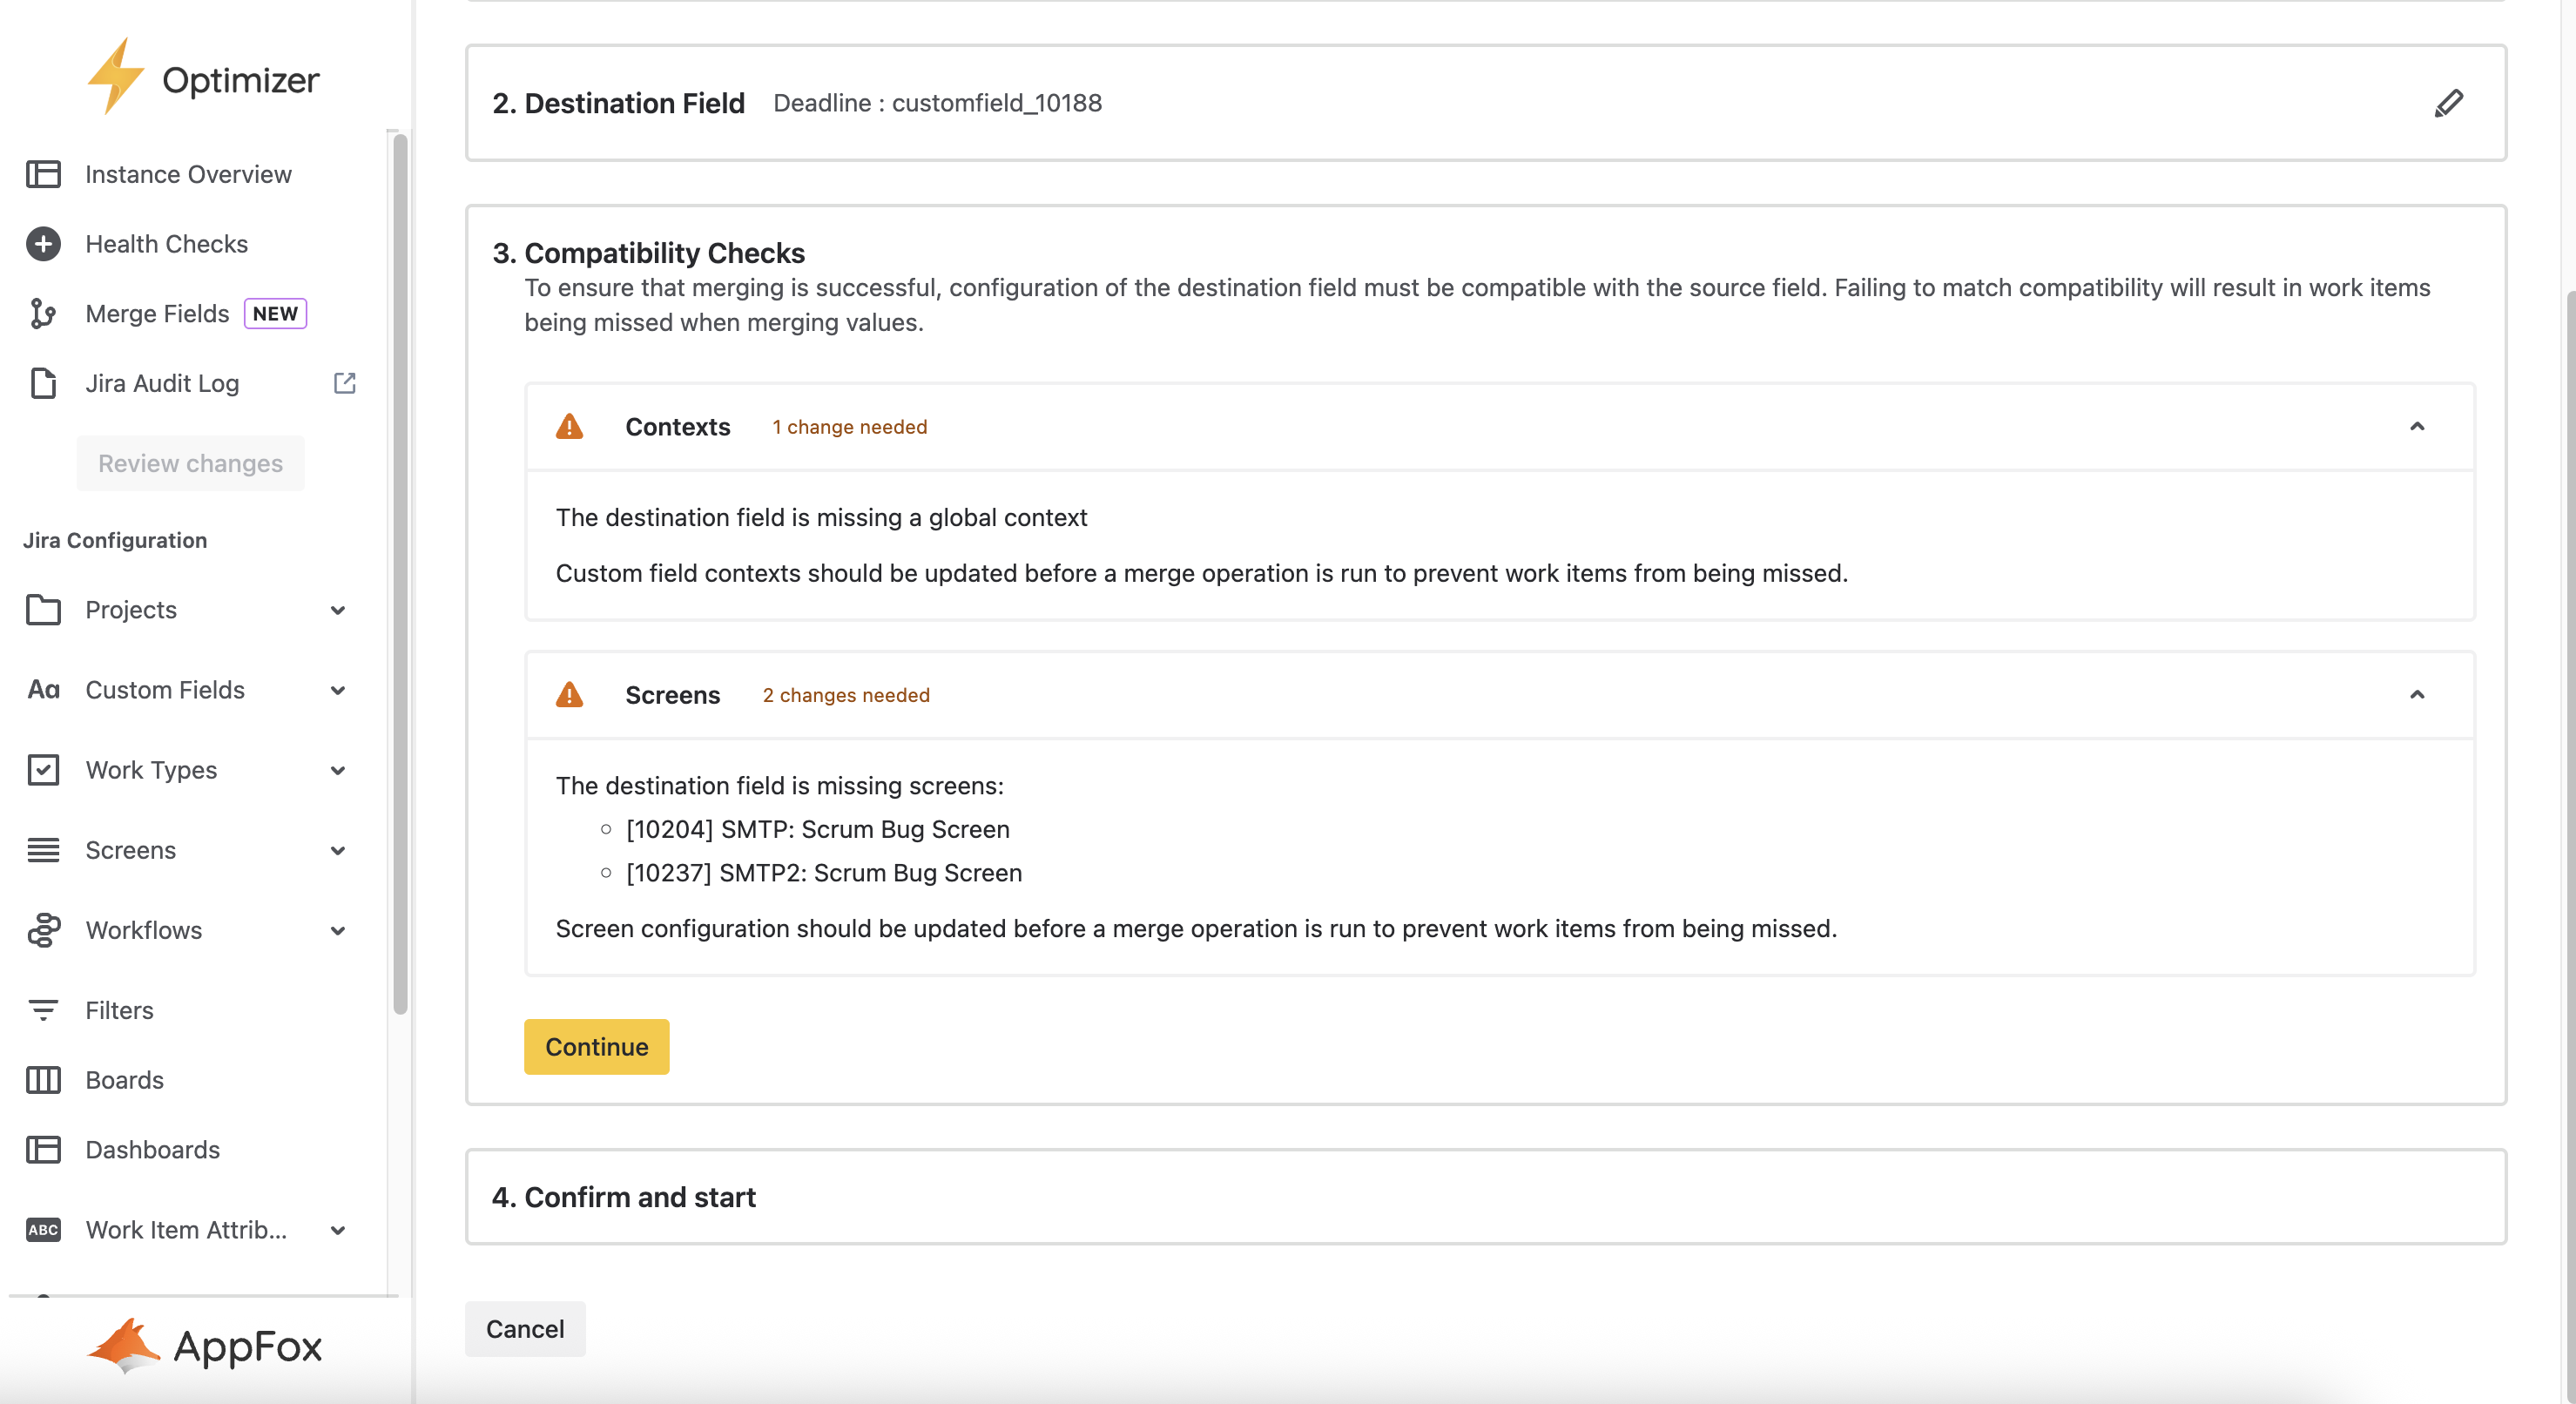
3. Compatibility Checks
To ensure that all source values are properly copied to the destination field, it is important that the destination field is on all the screens where the source field appears, and that the field contexts cover at least the same project/work type combinations. This also helps you configure the destination field to appropriately replace the source field where it is currently being used.
The field merging wizard will check for field context and screen compatibility and display any inconsistencies. These checks will update as you make changes to relevant field contexts and screens.
Although passing these compatibility checks is optional, it is highly advised to update the field config so that they are compatible, as Optimizer may not be able to copy the field values for issues with mismatched fields or screens.
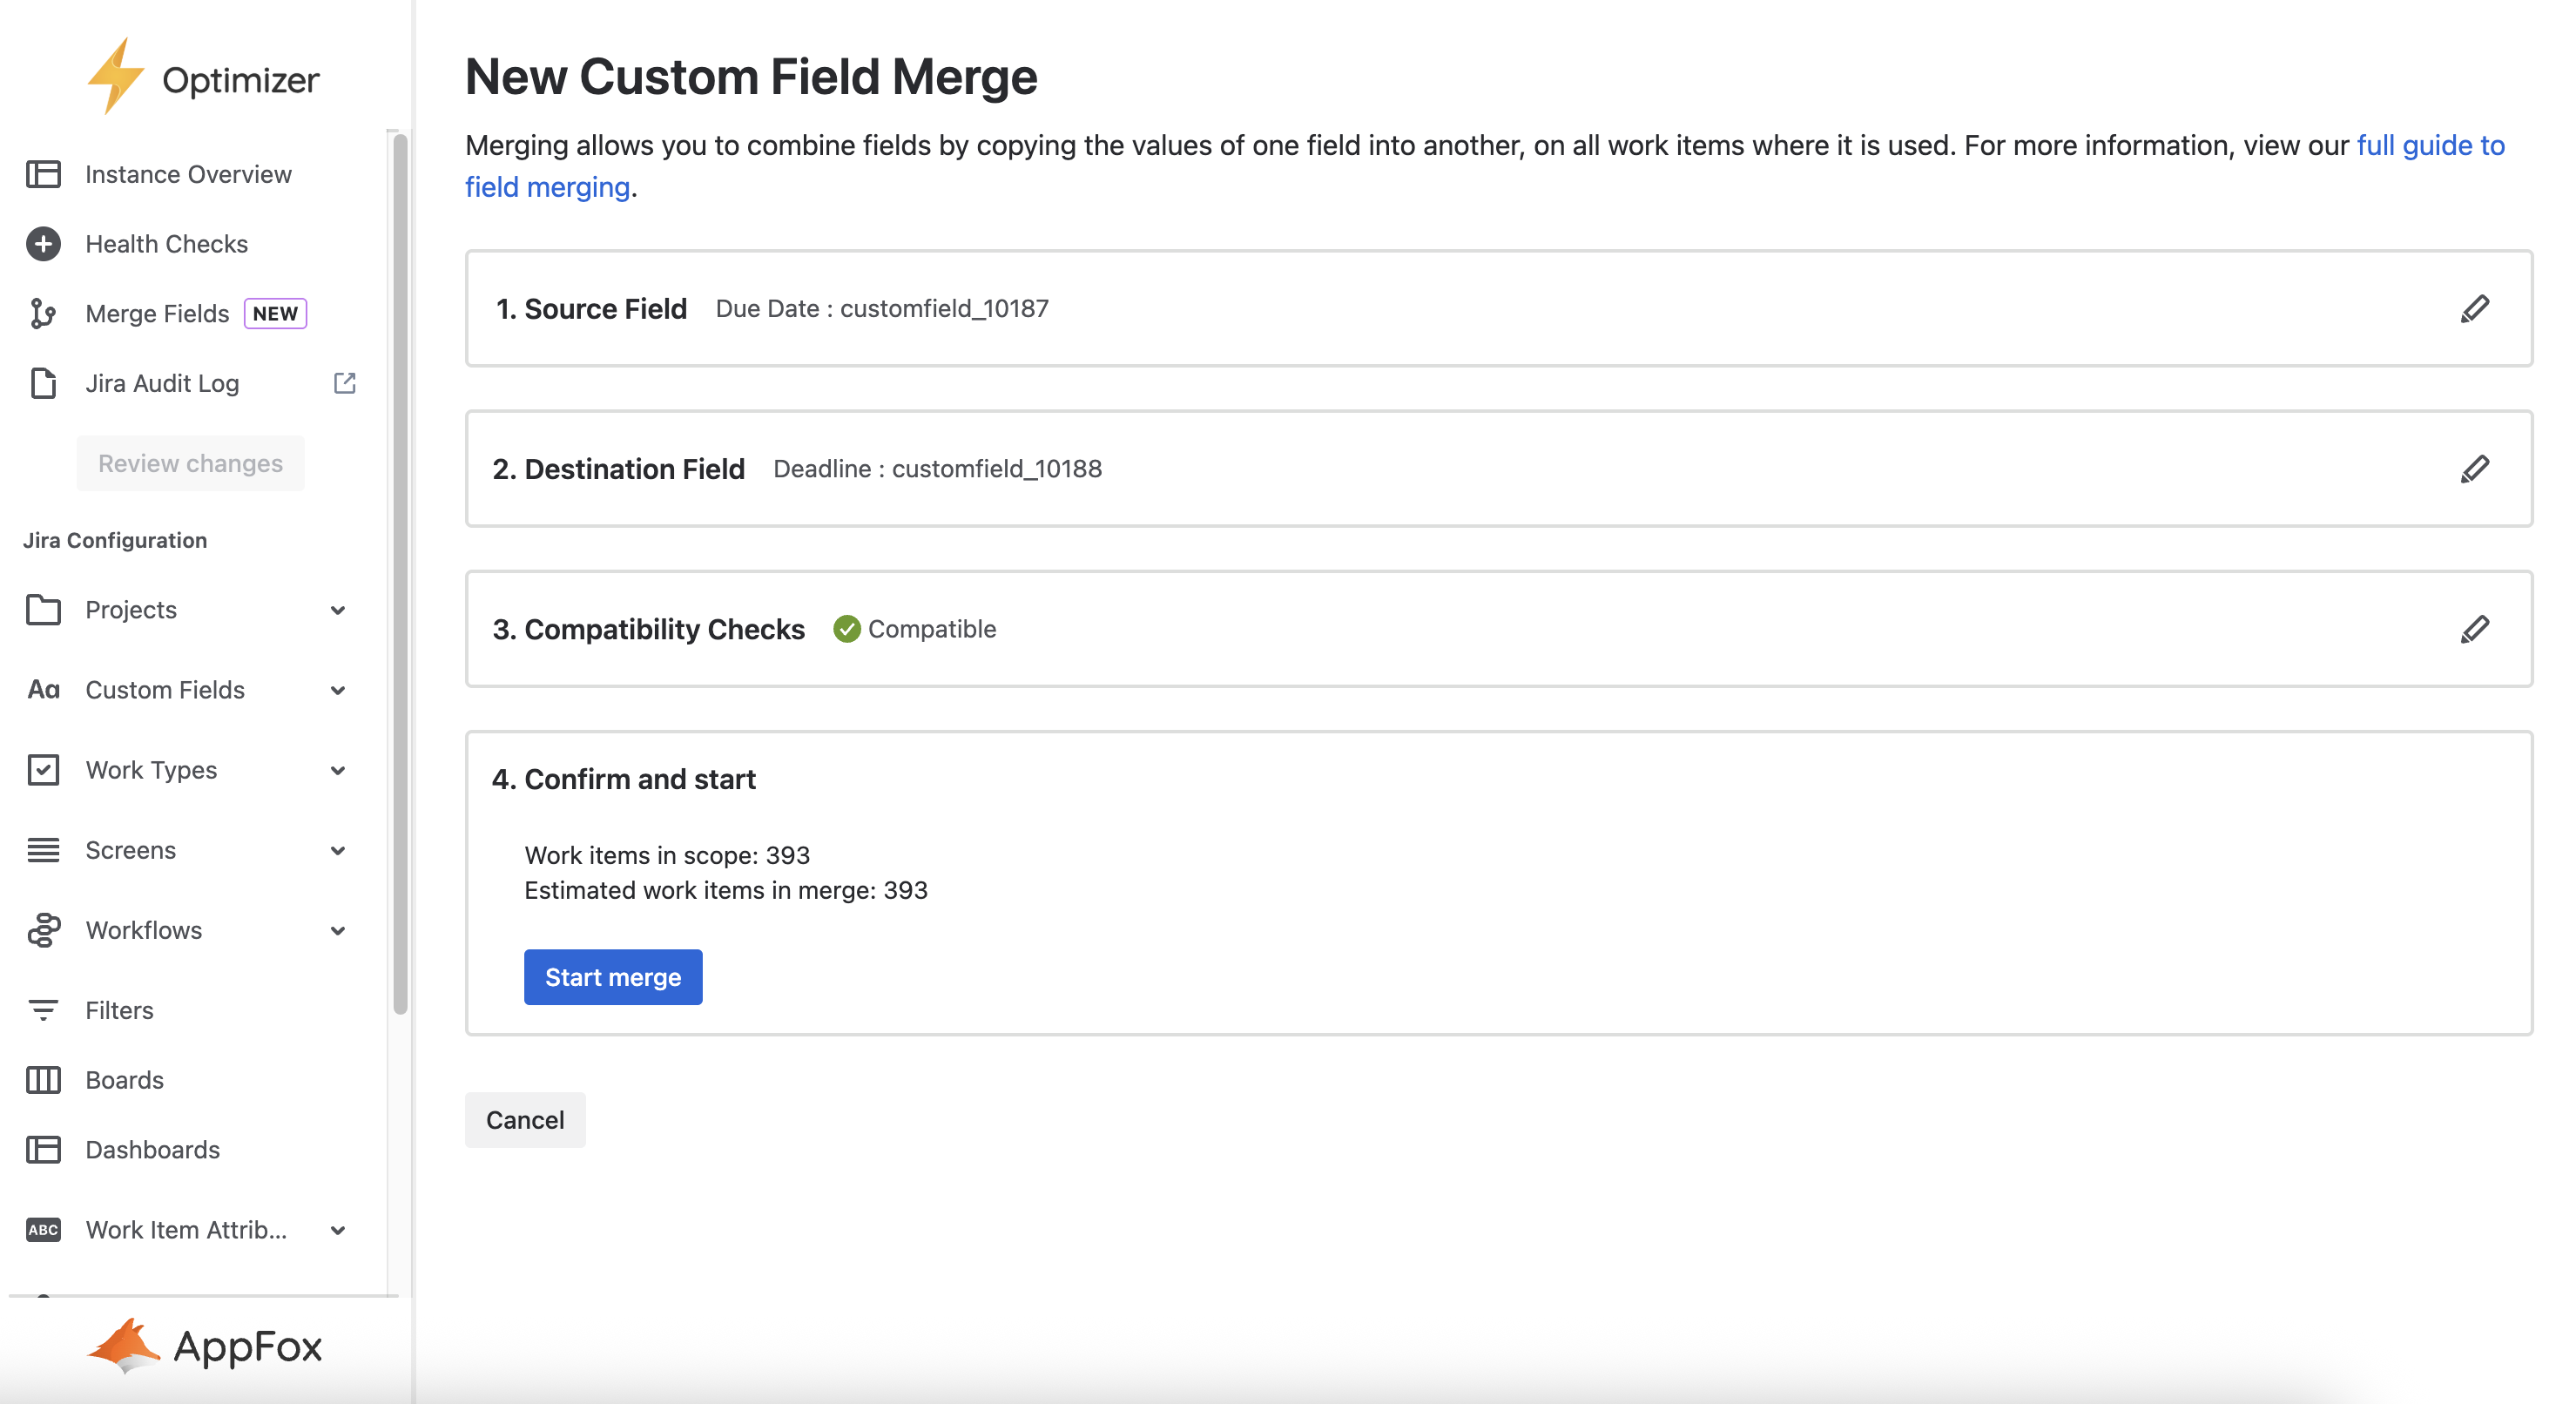
4. Confirm and Start
Before you confirm the merge, the wizard will show you how many work items will be updated by this merge. This is the number of work items with a value in the source field and no value in the destination field.
Merging is currently limited to changing a maximum of 60,000 work items. If you have more than 60,000 work items in scope, you will not be able to start a merge.
Monitoring Field Merge Tasks
Once you have run Custom Field Merge tasks you can monitor their progress and see historical tasks from the Merge Fields page.
The field merge process will take longer when more work items are affected, however once you start a merge task you can leave Optimizer and the task will continue to run in the background. You can cancel an in-progress merge by clicking the ‘Cancel’ button next to the merge. This will not revert field values which have already been copied, but it will prevent any further changes being made for the merge.