Custom Field Optimization
The Data Center and Server versions of Optimizer for Jira contain powerful features to help you optimize your custom fields. In this guide, we’ll explain more about the Custom Field Optimization feature and how you can use it to improve the overall state of your Jira site.
🎯 Purpose of Custom Field Optimization
Optimizer for Jira (DC/Server) contains a feature for optimizing custom fields.
Custom fields with a global context (i.e., custom fields that can be used in every project and issue type) may result in poorer performance when there are many of them within a Jira instance. In most cases, these global-context custom fields are only used by few projects and issue types. Thus, the optimize custom fields feature localizes the global context of these custom fields to just the projects and issue types where they are used.
Custom field optimization is context-preserving; existing custom field configurations other than the global configuration are considered when performing an optimization.
🚶♀️ Walkthrough
There are 4 phases in the custom field optimization process, as detailed below:
Step 1 – Scan for Fields
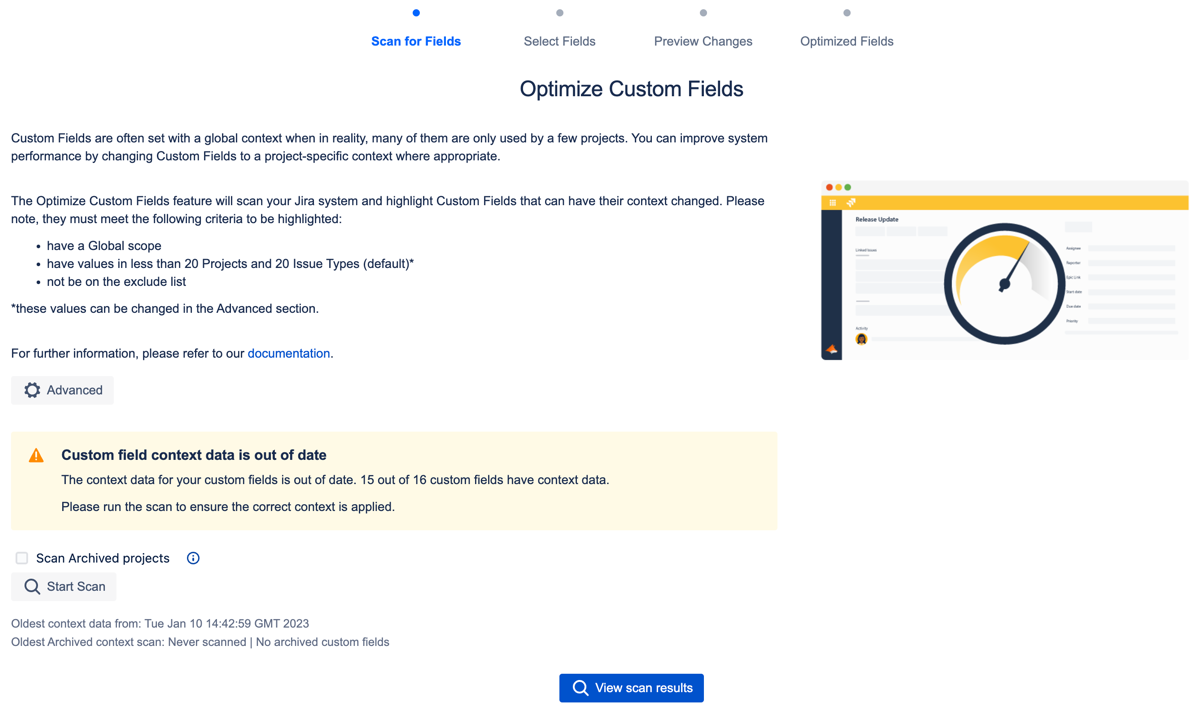
In this phase, you are provided with high-level information that outlines the process for optimizing custom fields.
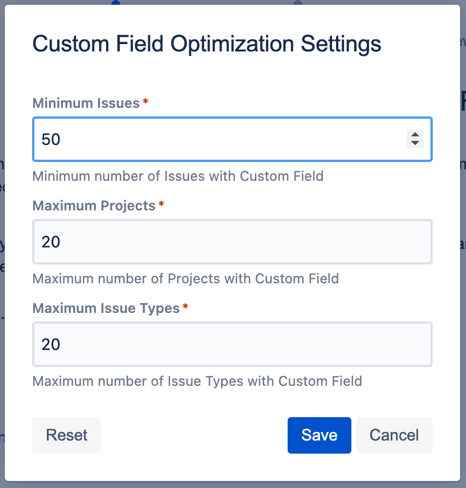
You are then instructed to scan the instance to identify optimizable custom fields. There are also advanced options available where you can adjust the criteria for identifying candidate custom fields. These criteria include:
Associated minimum number of issues.
Associated maximum number of projects.
Associated maximum number of issue types.

Figure 1: Advanced options when scanning for optimizable custom fields.
During this process, you are also presented with the option to expand the search to include archived projects, which we recommend occasionally to help maintain data integrity.

Figure 2: Scan for Fields screen with guide, advanced options, and archived projects toggle.
Step 2 – Select Fields
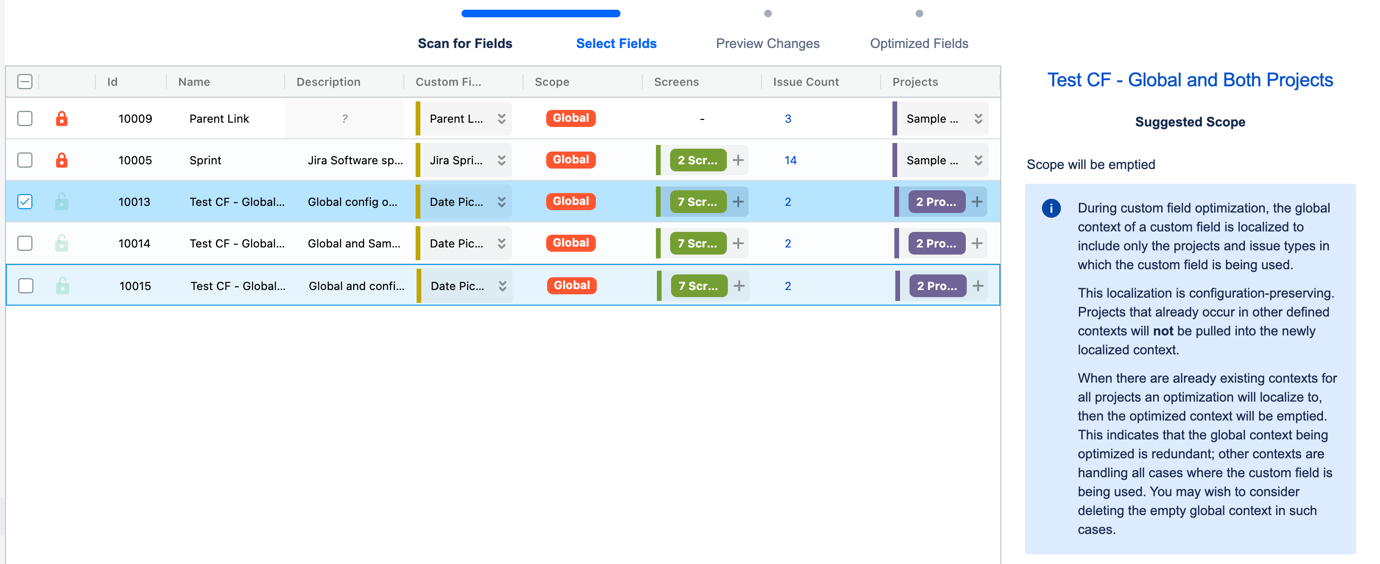
After scanning for custom fields, Optimizer will display all the custom fields with a global scope that match the specified criteria (in the advanced options). You can then select one or more custom fields you wish to optimize.
Optimizer will only progress with selected custom fields that are unlocked.
When a custom field row is selected, the suggested scope of the custom field is given. This suggested scope is the list of projects and issue types relevant to the custom field, minus any projects that already feature in configurations other than its global configuration. If there are already configurations covering all projects, then the resulting optimized context will be empty.

Figure 3: Optimizer shows all custom fields that can be optimized, along with the suggested scope of the selected custom field.

Figure 4: Custom fields where the global config will be optimized to an empty context are explained.
Step 3 – Preview Changes
After selecting which custom fields to optimize, you are then given the opportunity to review and confirm the changes before the optimization process begins.

Figure 5: Multiple custom fields pending optimization with their new scopes provided.
Step 4 – Optimized Fields
When you are satisfied with the changes that will be made during optimization, then the ‘Apply Changes’ button can be selected and the final confirmation screen displayed.
The confirmation screen displays the status of the optimization tasks performed (as they are performed). As well as a status indicator for each custom field, a ‘View’ link is provided which will open a new tab to the corresponding custom field’s configuration page. This allows you to review and confirm any configuration changes made by Optimizer.

Figure 7: Confirmation page resulting from optimization.
Additionally, when a custom field’s global configuration is emptied by the optimization process, Optimizer will leave a note within the description of this custom field explaining why this has happened. This feature improves accountability for unorthodox changes within the Jira instance, especially if this empty context is retained (its removal is recommended) and the custom field’s configuration is viewed by a user that did not carry out the optimization.

Figure 8: Optimizer alters the description of a configuration with an empty context explaining itself should this empty configuration be retained.
.svg)