Setting up a Section Approval
If you have sections within your Confluence page that need to be approved, you can make use of the Section Approval feature. This can even be used to send different sections of content to different colleagues - a feature that’s really important if you have designated reviewers across a project team.
Instructions
Open a Page in the Editor, either by creating a page (from navigation bar, or 'c' key) or editing a page (from Edit button, or 'e' key)
Create a new Approval Macro
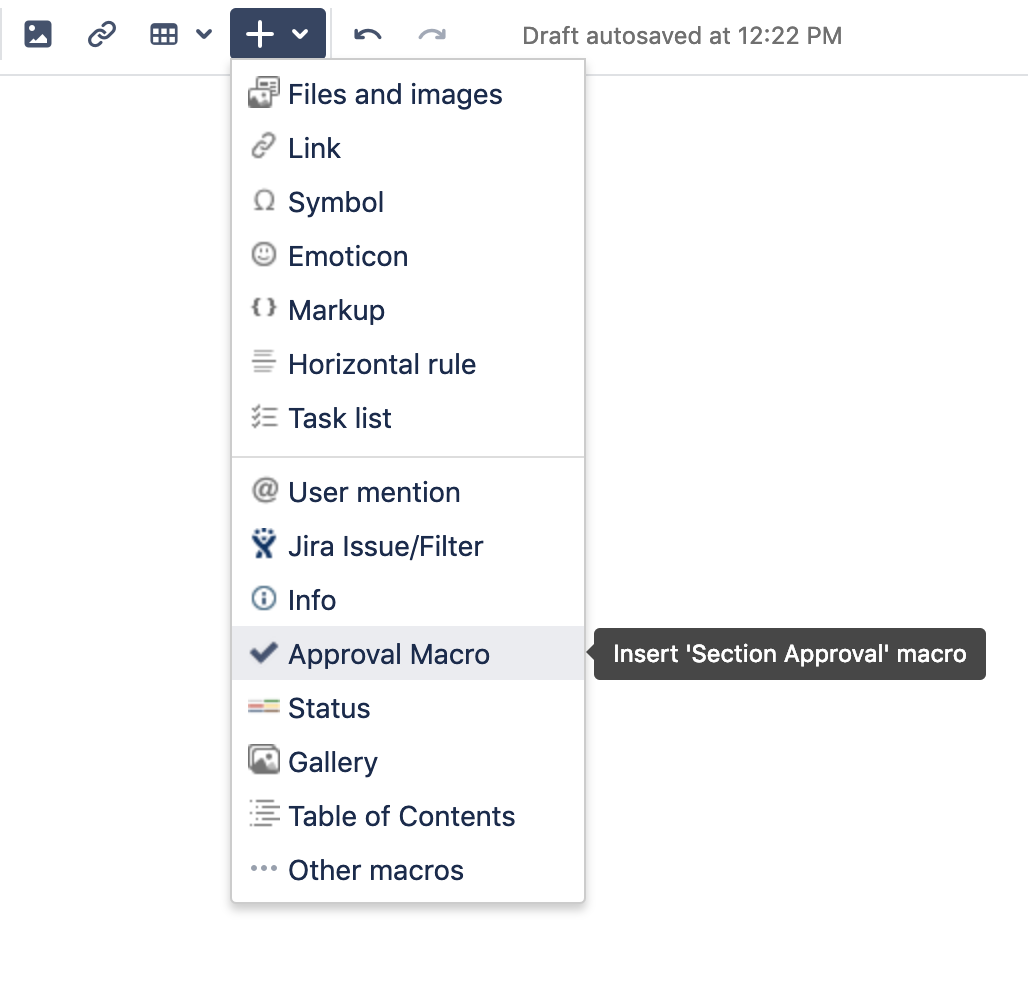
a. Either click on the 'Add' button on the Editor Toolbar and choose 'Approval Macro'
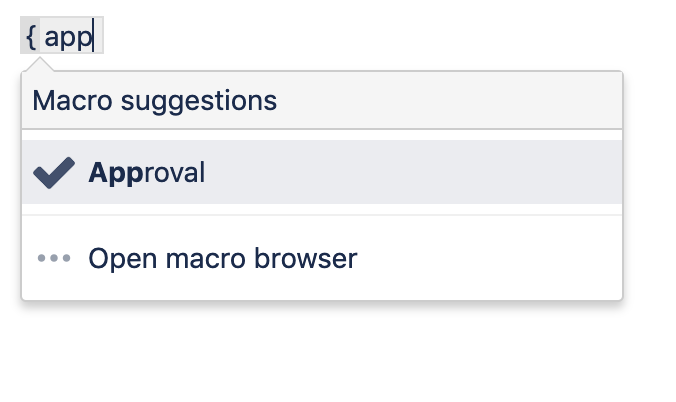
b. or press the '{' key and type 'approval' to add an Approval at the current location
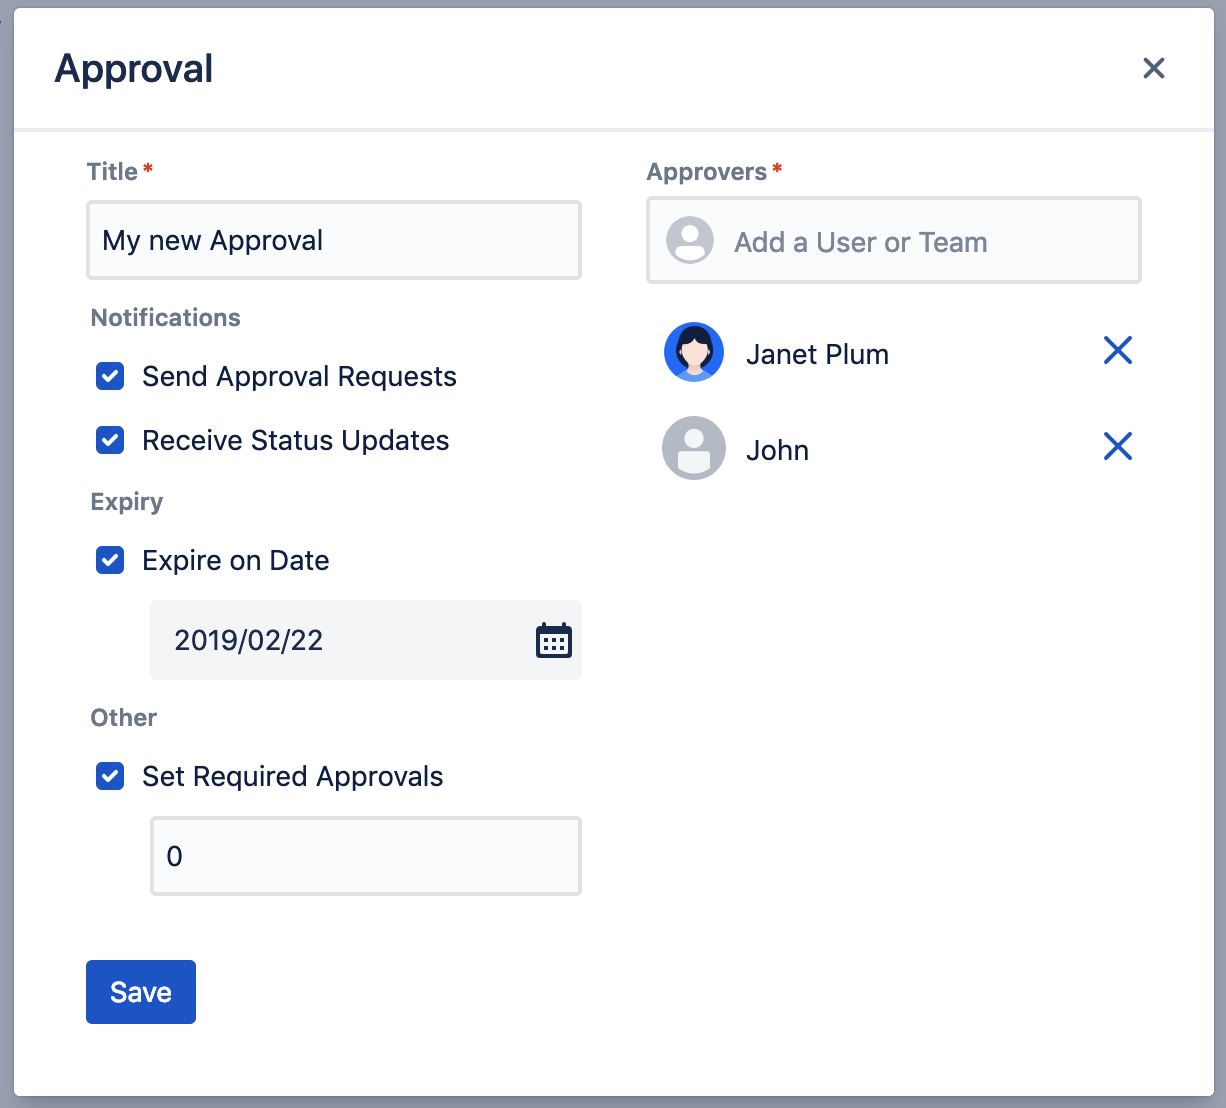
This will open up the Macro Editor, where you can set up the approval
When you save the Page, it will trigger in-app notifications (and emails if selected)
When viewing a Page, you'll see the 'Macro Viewer' mode, allowing the status to be changed
a. Pending
b. Approved
c. Rejected
d. Expired (page updated, or expired on date)
Detailed Instructions
1. Open a Page in the Editor, either by creating a page (from navigation bar, or 'c' key) or editing a page (from Edit button, or 'e' key)

2. Create a new Approval Macro
Either click on the 'Add' button on the Editor Toolbar and choose 'Approval Macro'

Or press the '{' key and type 'approval' to add an Approval at the current location.

3. This will open up the Macro Editor, where you can set up the approval. The Macro Approval functionality has the following functionality:
Choose Approvers from Individual Users or Teams (multiple users)
Send Approval Request emails
Send Status Update emails
Expire on a certain Date
Set Required Approval Members (Quorum)

4. When you save the Page, it will trigger in-app notifications (and emails if selected)
5. When viewing a Page, you'll see the 'Macro Viewer' mode, allowing the status to be changed to one of the following:
Pending

Approved

Rejected

Expired (page updated or expired on date)

.svg)