-20250819-084018.svg)
You can send a Confluence page for approval in a few simple steps with Approvals for Confluence.
Note: Page Approvals can only be set up for the 'page' content type.
Instructions
1. Open a page up and click on the 'Add Approval' byline to open the Page Approval Editor/Viewer.

2. This will open the Inline Dialog
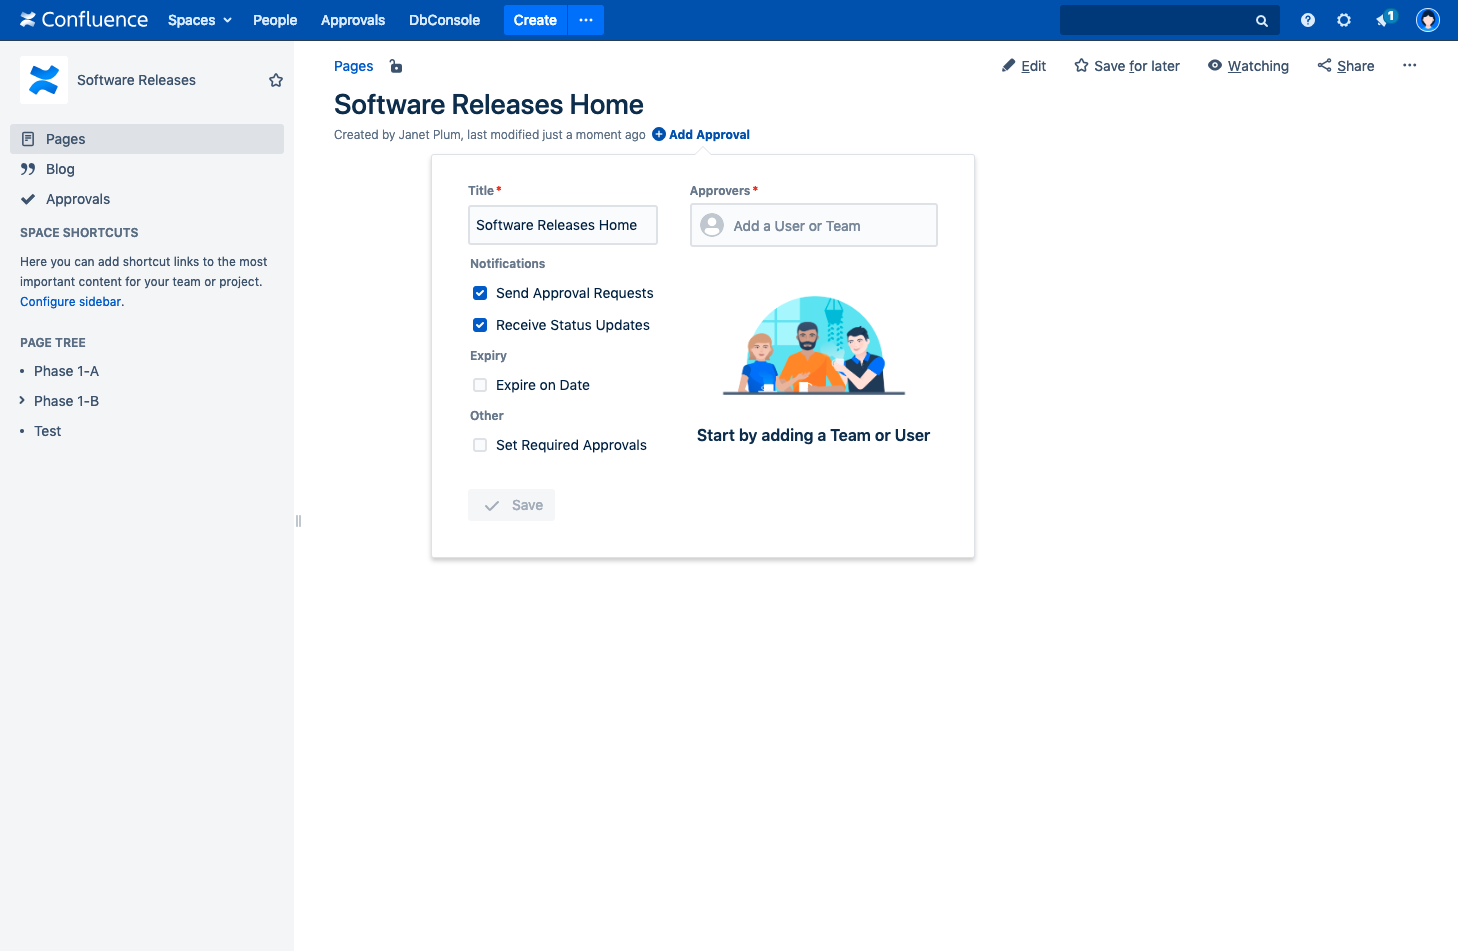
3. Add some Approval Members, either specifying the individual Users, or by specifying an Approval Team.
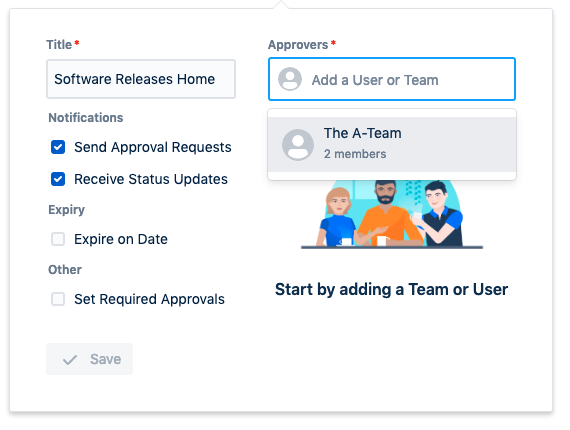
4. Add a title and change the settings as required.

5. Next, click 'Save' to send notifications as configured and go to the Approver list.
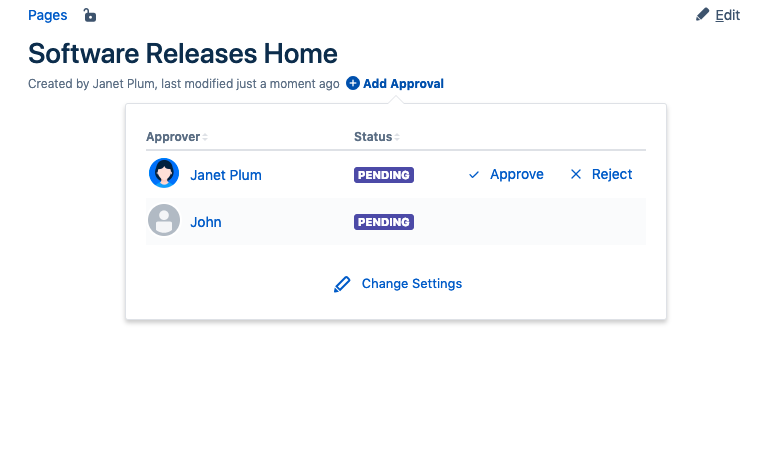
6. Notice how the Status Byline changes in response to the current Approval status

Note: Page Approvals can also be easily be interacted with using the REST API (Page Approvals are more appropriate for this scenario).