.svg)
Setup Default Approvals
You may find yourself using the same approval configuration settings across different page approvals. Instead of setting these up each time, you can use the Default Page Approvals to set a default configuration that can be used across multiple pages and will save you a lot of time.
Note: Default approvals can only be setup by a Space Admin.
Access Default Approvals
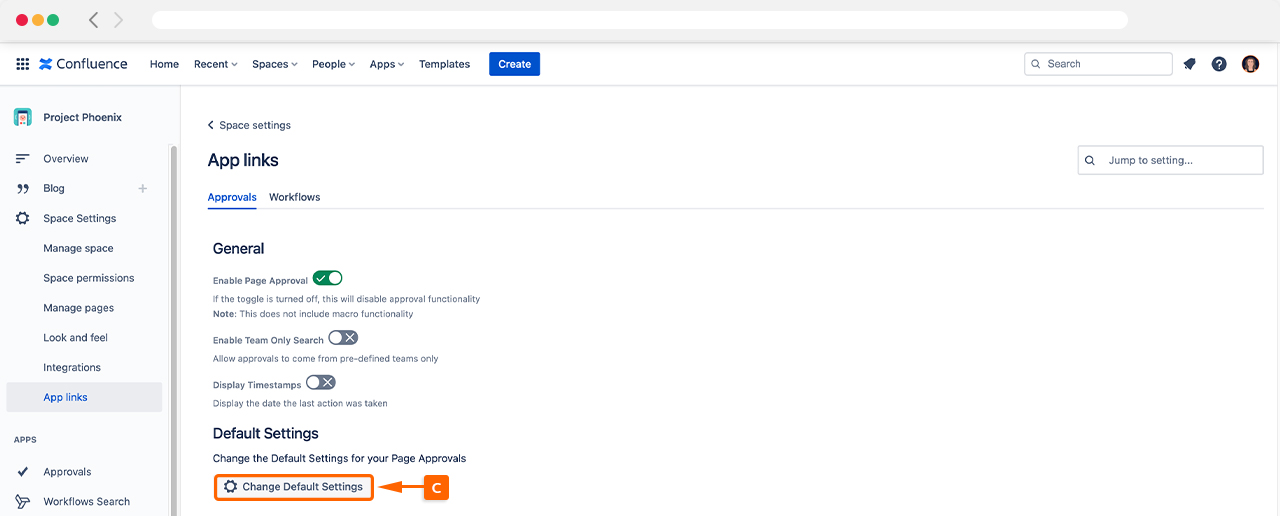
To customize the Default Page Approval settings, start by navigating to Space Settings (A) and then click Approvals under App links (B).

This will open the general settings for Approvals for Confluence.
Once opened, you can adjust the Default Approval Settings by clicking Change Default Settings (C), as shown in the screenshot below.
Configuring your Default Approvals
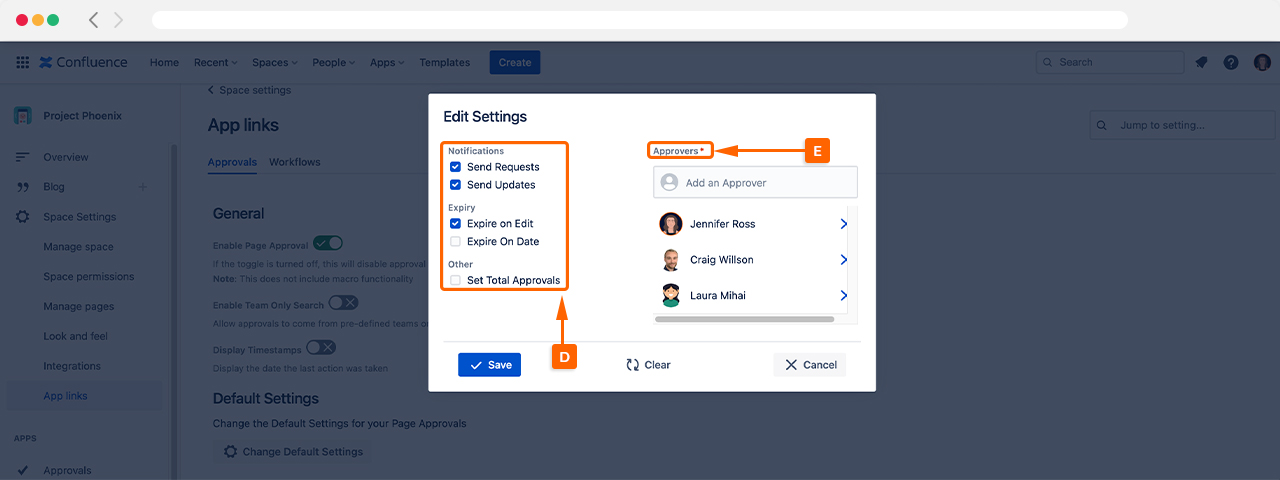
Now you need to set up your default approval settings. As shown in the image below, you can configure the notifications, expiration, and quorum size settings (D), as well as your default approvers within the Approvers (E) section.
If you want to use an Approval Team, you can also search for them using the Approvers search field.
As a reminder, you can adjust the following default settings:
Approvers: Type the name of the desired reviewer’s name in the search field and their name will display. If you have set up an Approval Team, you can type the name of the team in this search field and choose to send the approval to this Approval Team.
Page approvals can have a maximum of 15 approvers.
Send Requests: When enabled, e-mails are sent to the approvers when they are requested to review a page.
Send Updates: When enabled, updates on the approval’s status are sent to the page owner when an approver approves/rejects the page.
Expire on Edit: When enabled, the approval will automatically expire (when the page is edited) if the page’s content has been approved. When an approval expires, its status is reverted to pending.
Expire After Interval: When enabled, the ‘expiry interval’ option will be applied to your newly created page approvals. This means that an expiry date will be applied once the approval enters an approved state, and the time interval will be applied from the date that the page is approved.
Auto Reapply Interval: When enabled, this option will be applied to your newly created page approvals; if the page approval expires, the expiry interval will be re-applied whenever the page approval re-enters an approved state (and will be applied from this new approval date).
Set Total Approvers: This sets the minimum number of approvers required to approve the page.
Once you are happy with the configuration, press Save, and this will now be your setup for future page Approvals in Confluence.
Need support? We’re here to help 🧡
If you have any questions or would like to speak with us about Approvals for Confluence, please reach out to our Customer Support team.