.svg)
Send a Page for Approval
Page Approvals are the core feature of Approvals for Confluence and a much-loved part of this powerful product. In this guide, we’ll explore how to set up page approvals and get your content to the review team for their seal of approval.
https://www.youtube.com/watch?v=lJJWnH1Rr60
Please note: page edit permission is required to approve/reject a page
Please note: page approvals are only available on the ‘Page’ content type
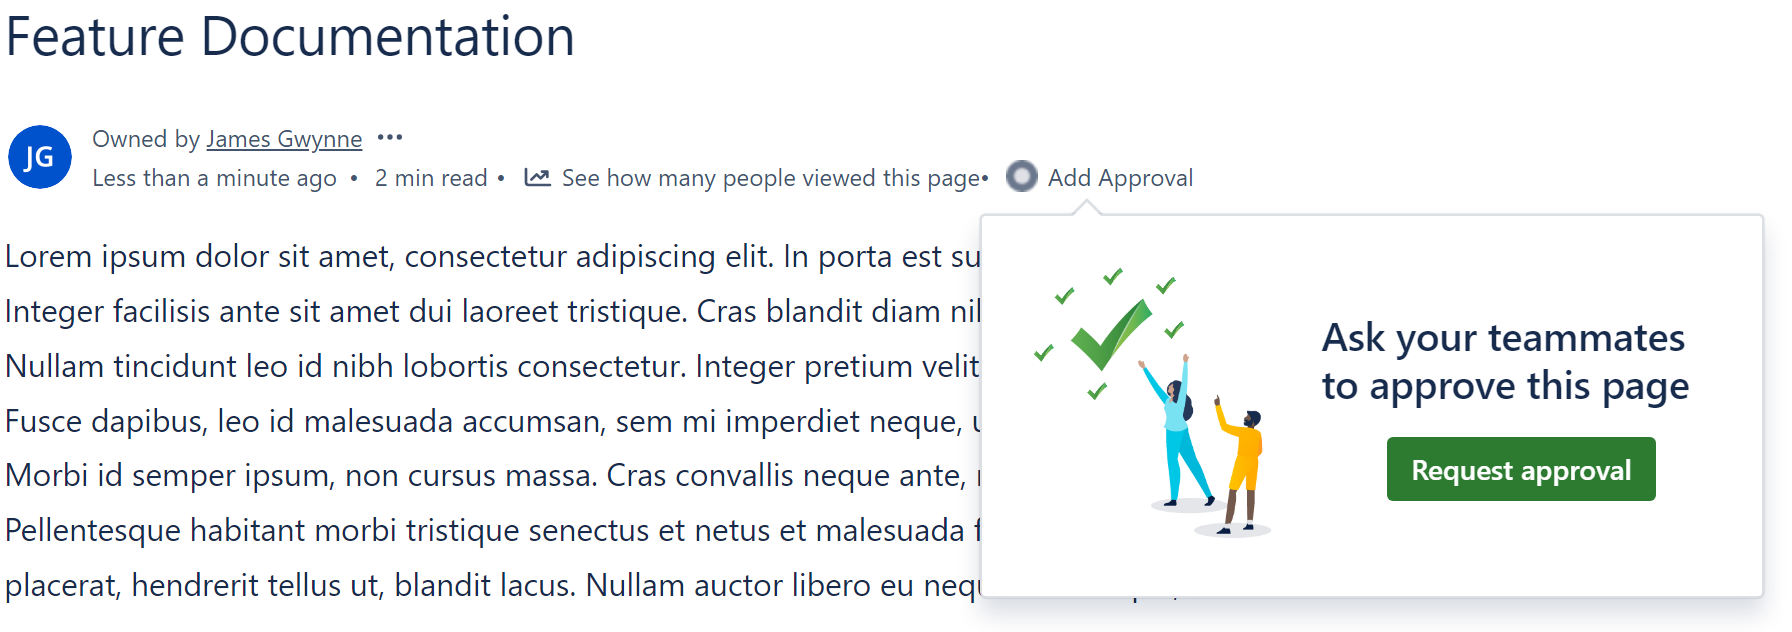
When you are ready to send your page for review and approval, click the “Page Approval” text that appears in the byline at the top of screen - see screenshot below.

Once you have clicked this, a byline window will open and you will need to click “Request approval”
The next screen will give you settings that allow you to configure the page approval to meet your requirements.
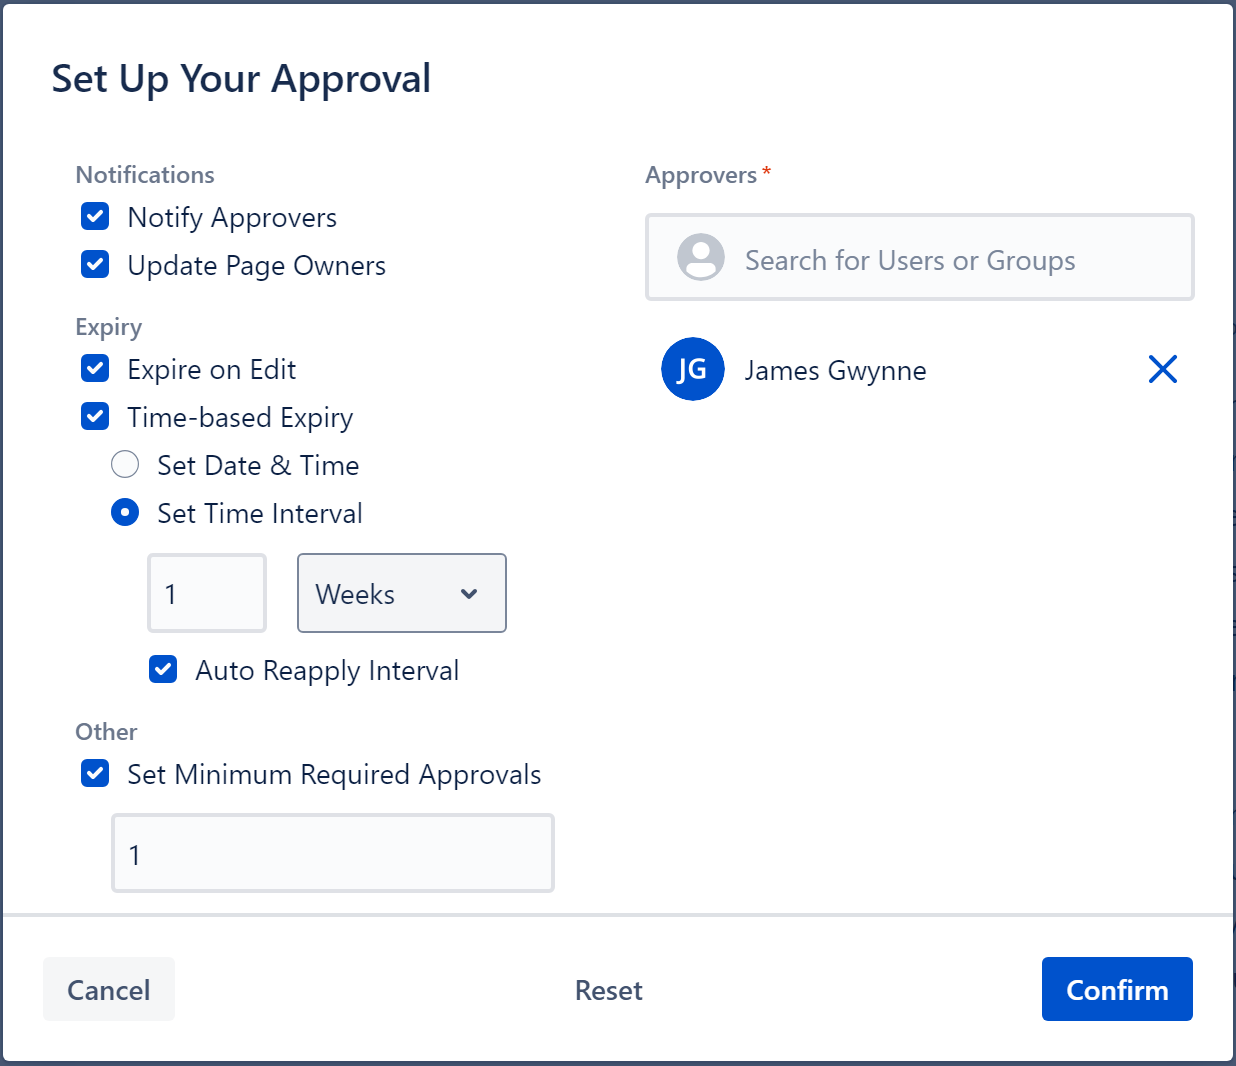
As a reminder, the different settings available are as follows:
Approvers: Type the name of the desired reviewer’s name in the search field and their name will display. If you have set up an Approval Team, you can type the name of the team in this search field and choose to send the approval to this Approval Team.
Page approvals can have a maximum of 15 approvers.
Notify Approvers: When enabled, e-mails are sent to the approvers when they are requested to review a page.
Notify Page Owners: When enabled, updates on the approval’s status are sent to the page owner when an approver approves/rejects the page.
Expire on Edit: When enabled, the approval will automatically expire (when the page is edited) if the page’s content has been approved. When an approval expires, its status is reverted to pending.
Expire on Date: When enabled, the approval can be set to expire on a date and time. There are two ways to specify the expiry date:
Set Date & Time: set an absolute date and time that the approval will expire on, regardless of the approval status.
Set Time Interval: set an interval, e.g. ‘2 Weeks’. An expiry date will only be applied once the approval enters an approved state, and the time interval will be applied from the date that the page is approved.
Auto Reapply Interval: set whether the interval is reapplied when the approval re-enters an approved state, or is only applied once (i.e., an expiry will only occur once)
Set Minimum Required Approvals: This sets the minimum number of approvals required to approve the page.
Reset: This button will reset the settings to your default settings, configured in space settings
Once you have chosen your Page Approval settings, click Confirm and your content will be sent to the chosen reviewers.

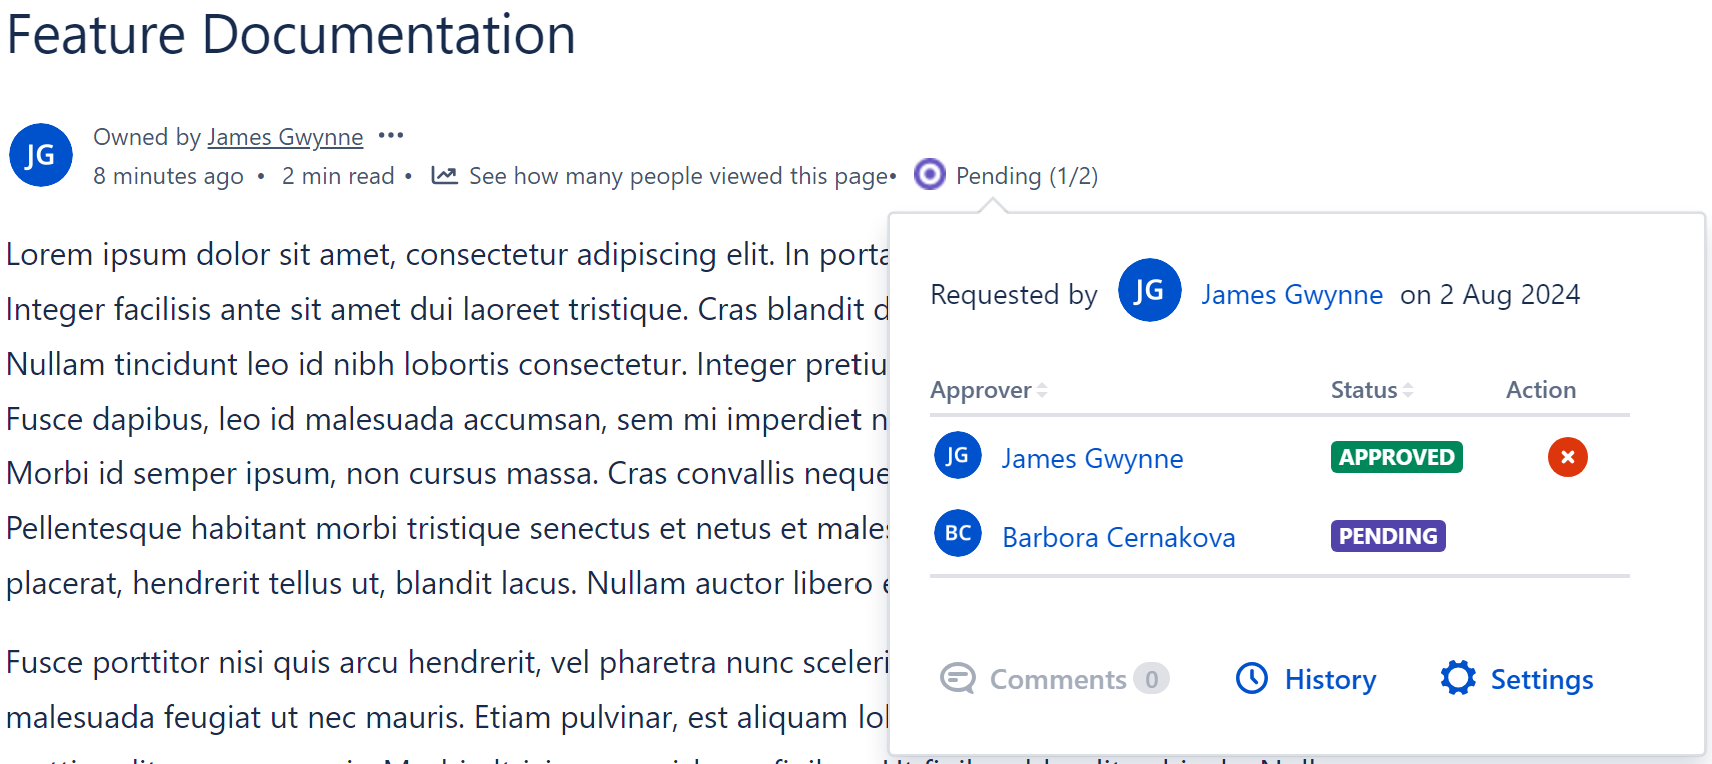
You can keep a track of how the page is progressing through the approval with the byline. As you can see in the screenshots below, the byline shows the status of the approval (Pending, Rejected, Approved) and the number of reviewers who have approved or rejected the content. If you click this status, a dialog box will display giving you more detail on the exact status of a page approval.

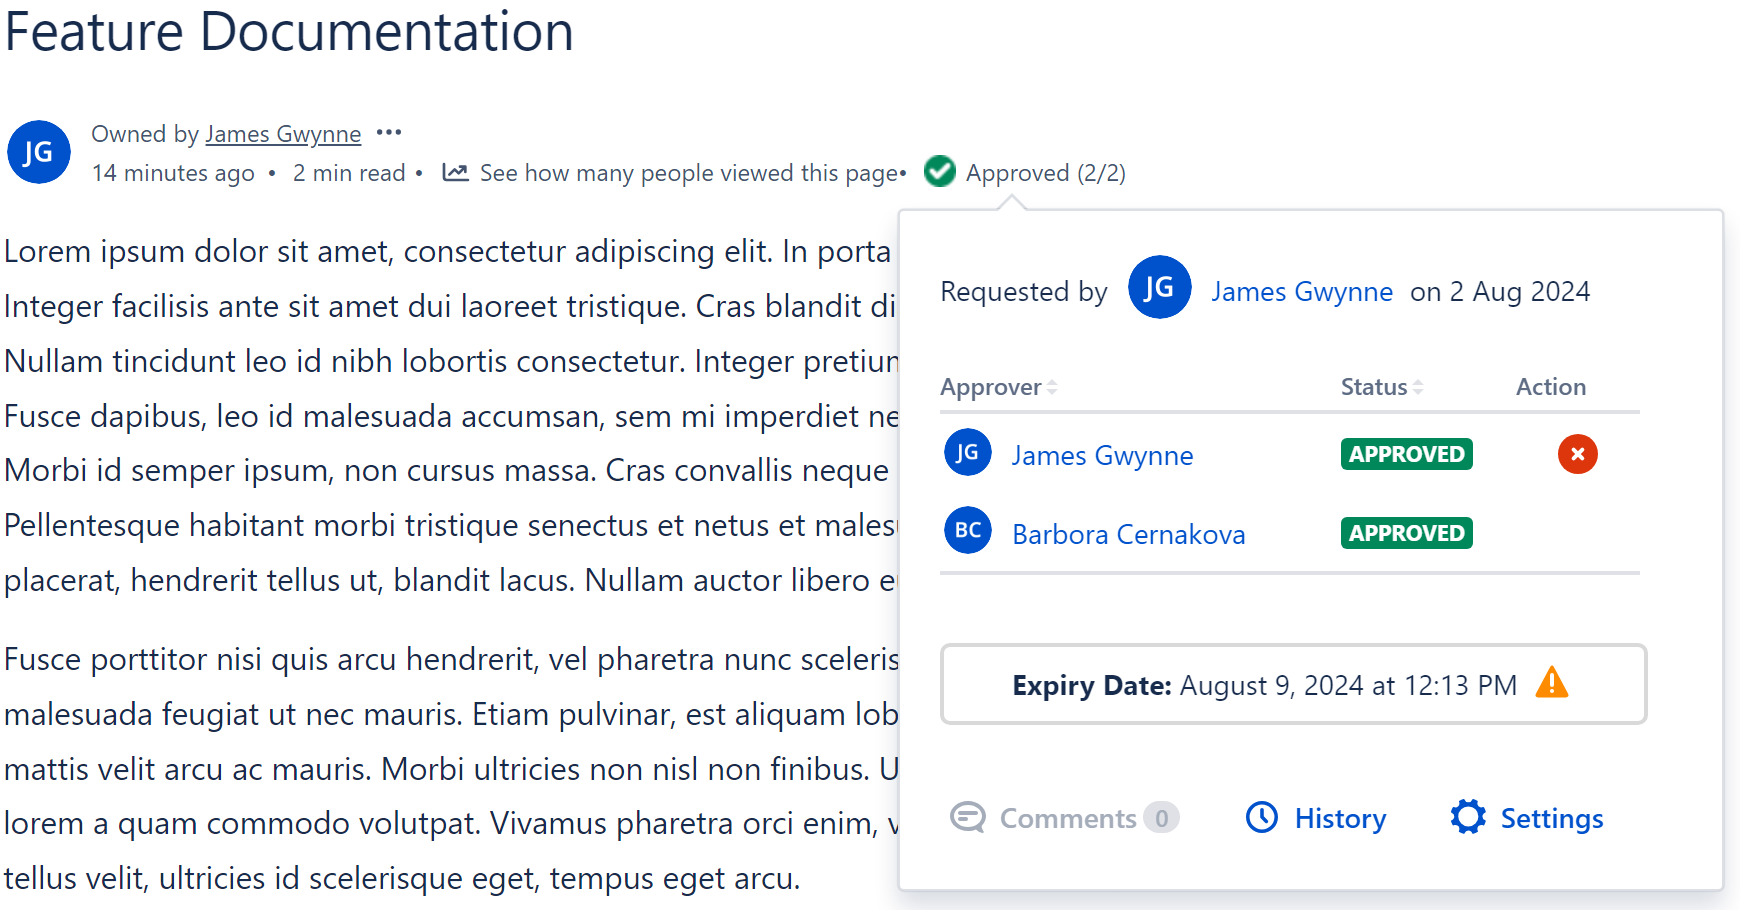
Additionally, you can view when an approval will expire in the byline. If a page approval has an expiry date set, it will be visible with an additional warning icon if the expiry will occur within 7 days.
Need support? We’re here to help 🧡
If you have any questions or would like to speak with us about Approvals for Confluence, please reach out to our Customer Support team.