-20250819-084018.svg)
Automations in monday.com save teams valuable time by automating repetitive tasks, allowing for more productive work. When combined with Approvals, project management is elevated.
If your team spends too much time manually customizing actions in monday.com, automation is the solution. By automating specific actions on your board, project management and team collaboration are streamlined.
With so many automations availble, selecting the right one for your team can be overwhelming. To simplify this process, Approvals for monday.com offers ready-to-use automation templates.
In this guide, we'll demonstrate how to implement automation to move items to another board once they're approved.
Adding automation template
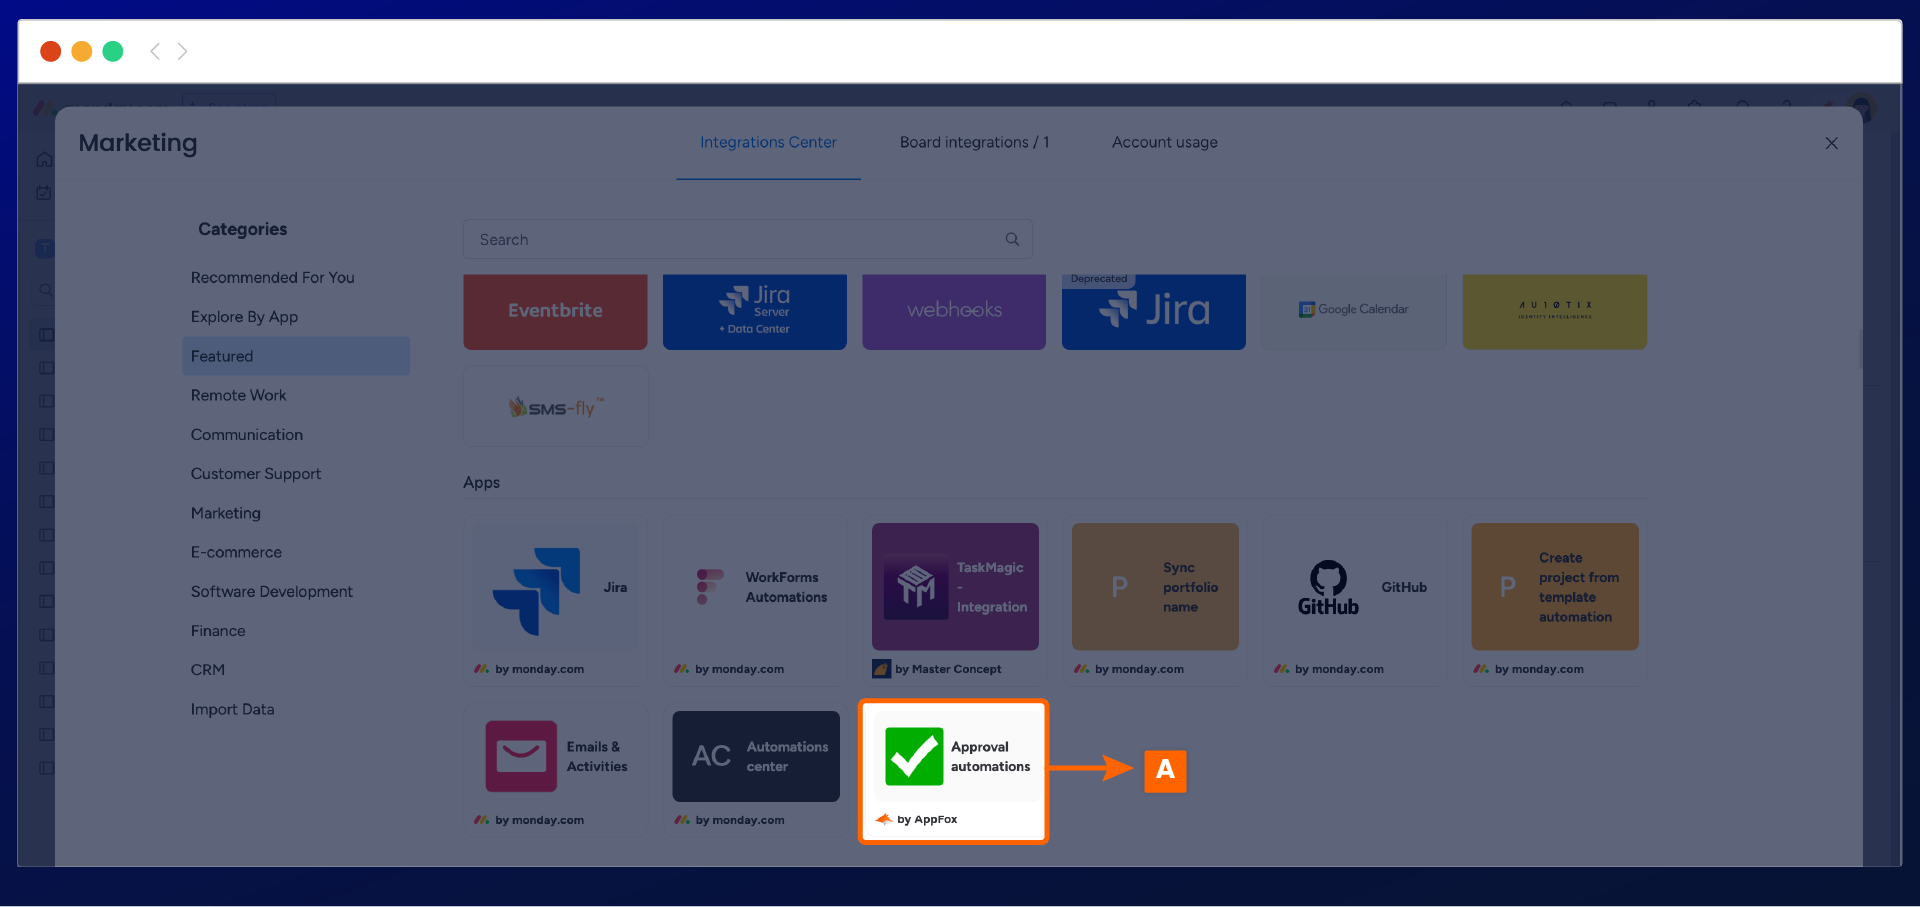
To add the approval automation, navigate to integrations that you can find on your monday.com board. Once the display window has opened, scroll to featured apps where you find approval automations (A) under the app options.
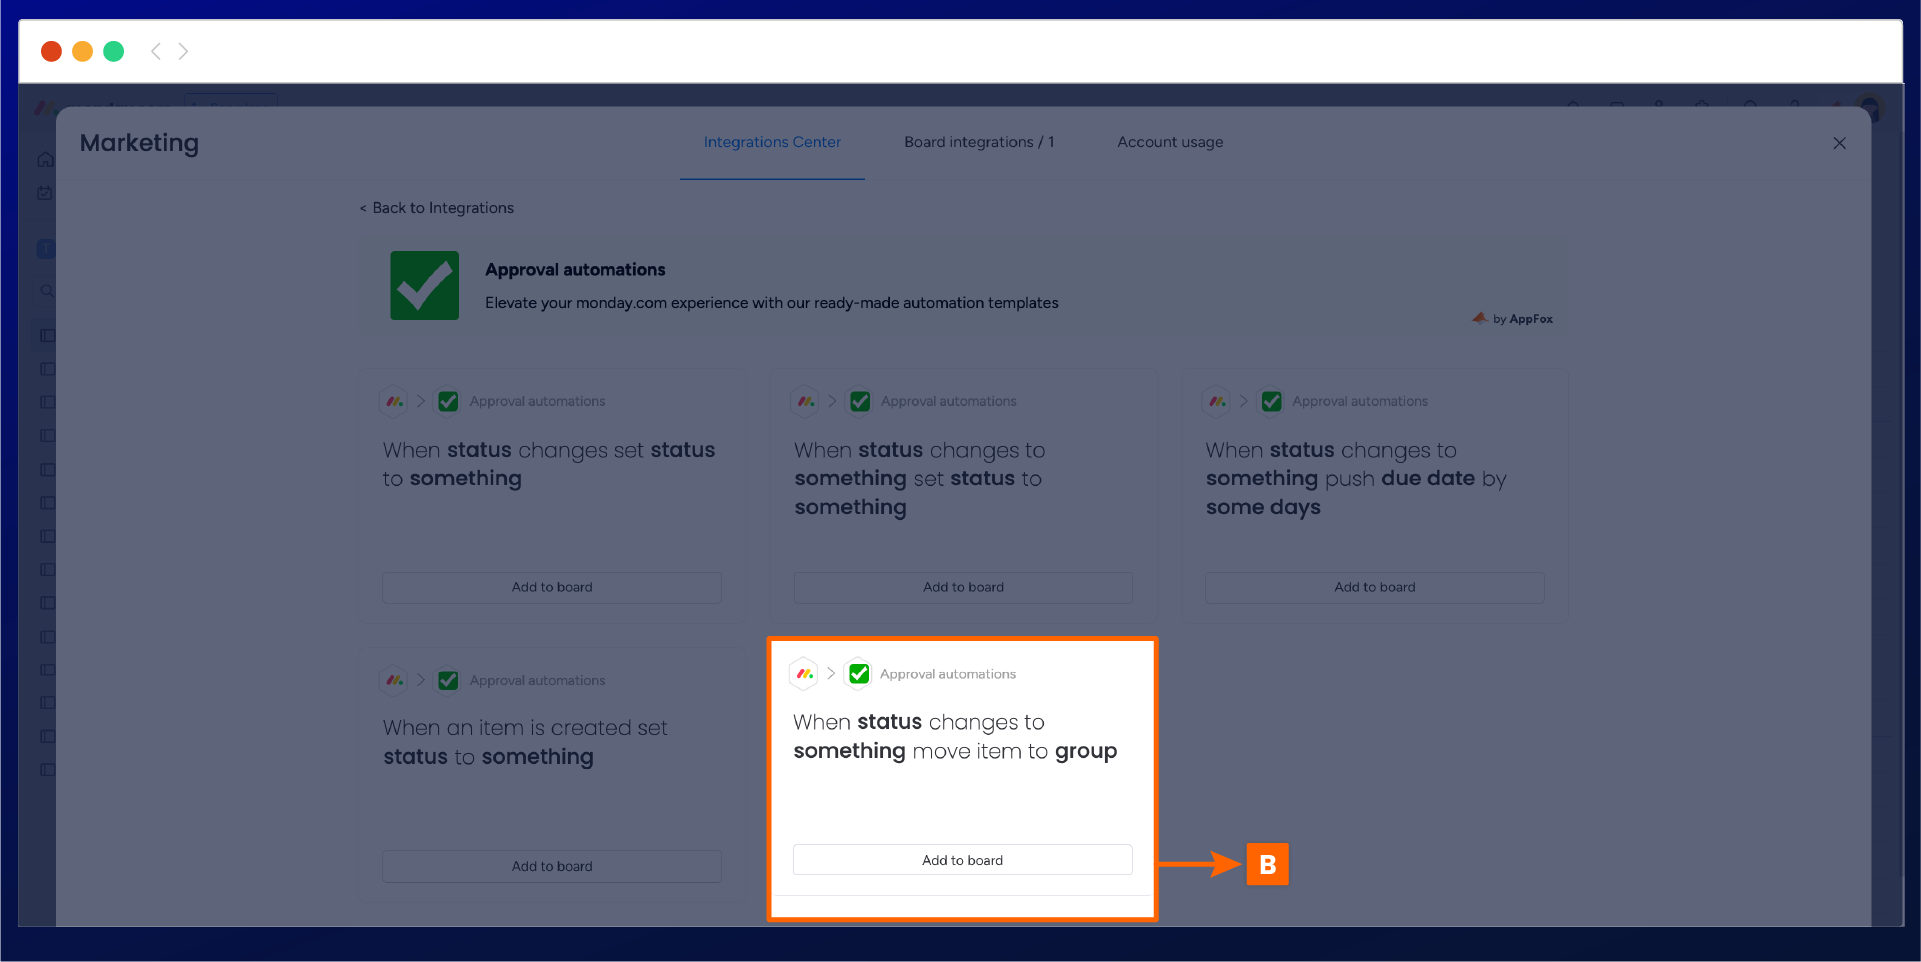
This will open to display the five approval automation templates. Select the ‘when the status changes to something move item to group’ automation and select add to board (B).
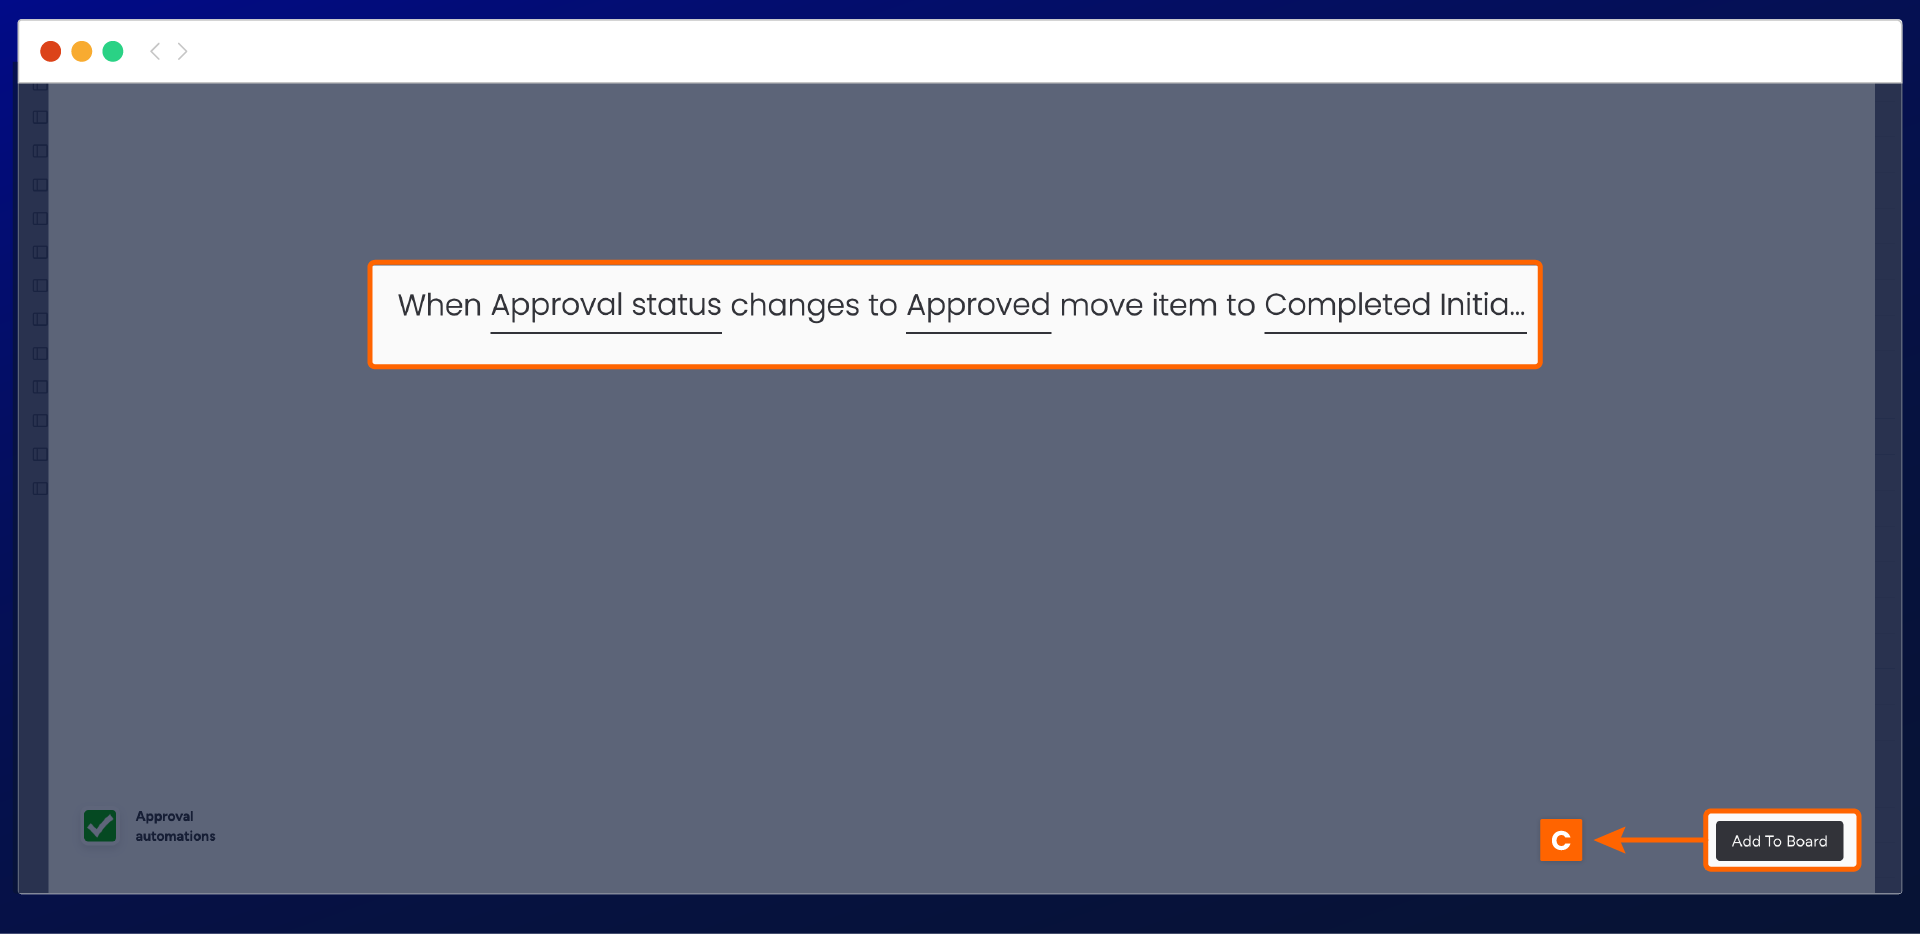
This will open the automation where you can select the status and the board to move approved or rejected items. Once configured, select add to board (C).
The automation will now be displayed under the board integrations (D). This will show all the active automation on your board, which you can disable or delete the automation.

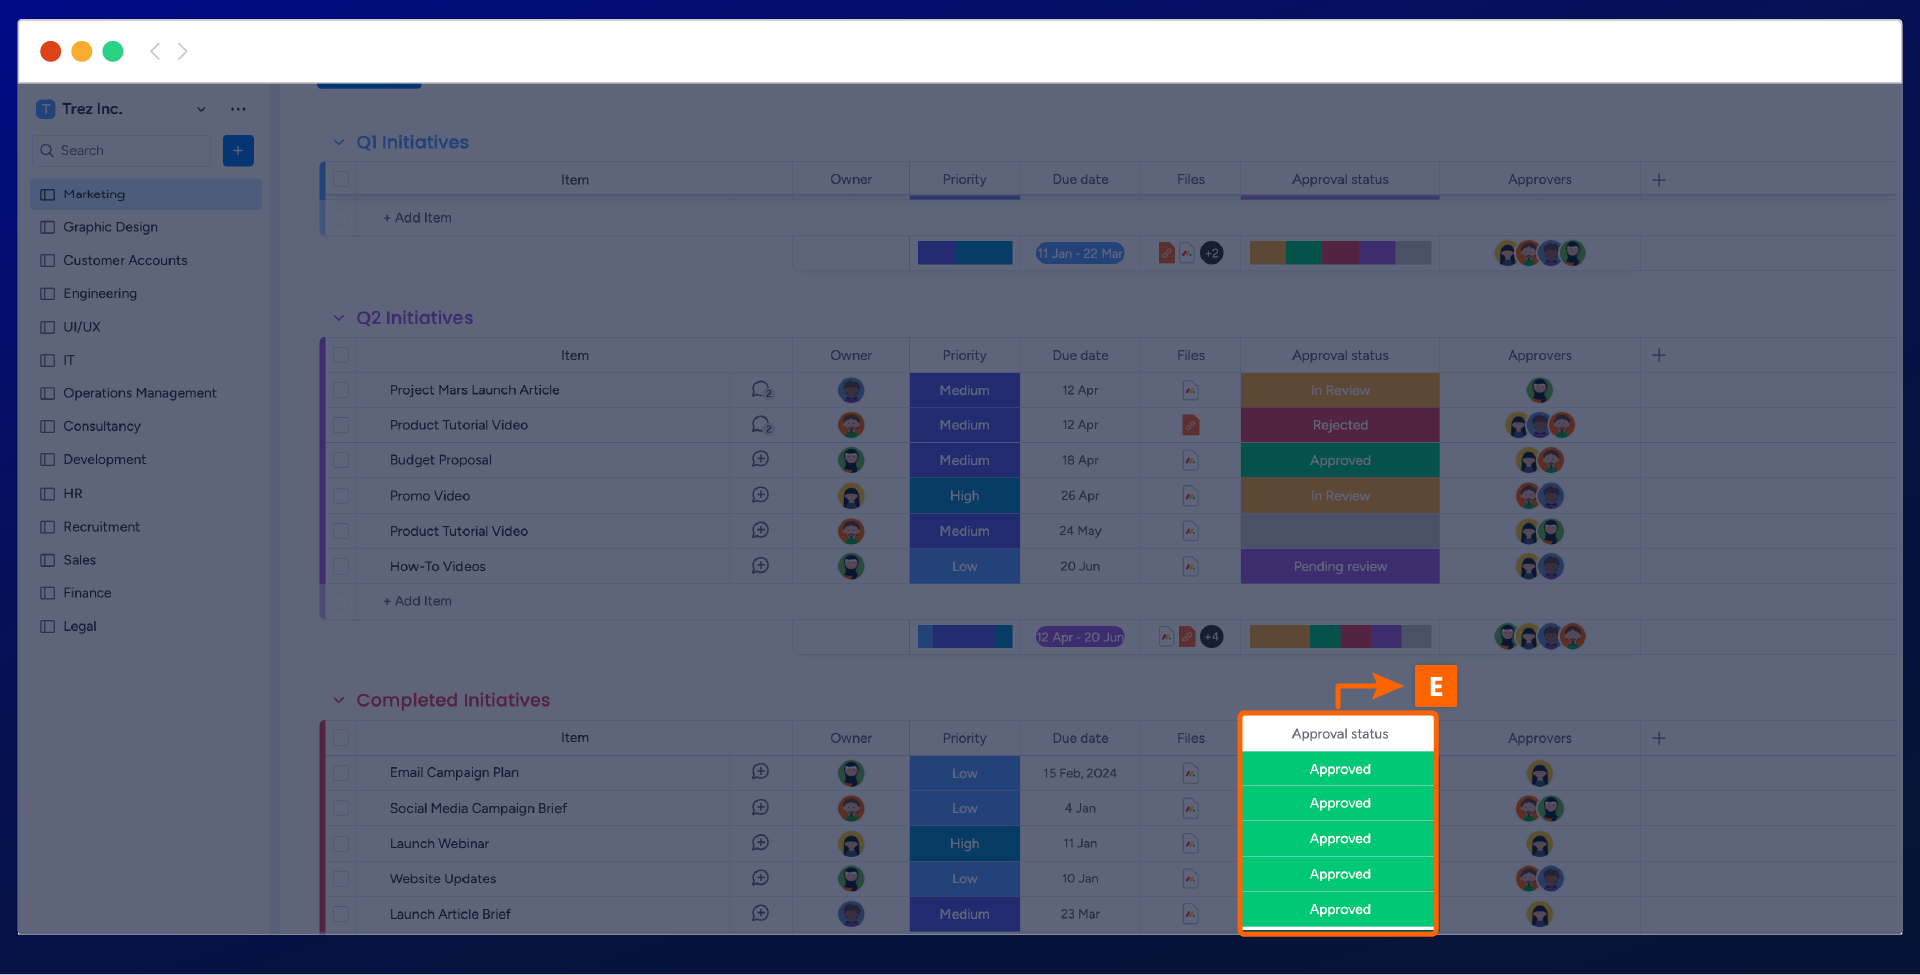
Once the automation is active, any item that has been approved will move to the completed activities group (E) within the board.
Need support? We’re here to help 🧡
If you have any questions or would like to speak with us about Approval for monday.com, please don’t hesitate to contact our Support team.