-20250819-084018.svg)
In many companies, specific approval groups in different departments review and sign off tasks. When transitioning to online project management tools, replicating these existing approval groups is crucial to align with existing company processes.
With Approval for monday.com, you can create and configure approval templates that streamline the review and approval process, ensuring consistency with existing workflows.
In this guide, we will show you how to create and apply approval templates.
Creating approval templates
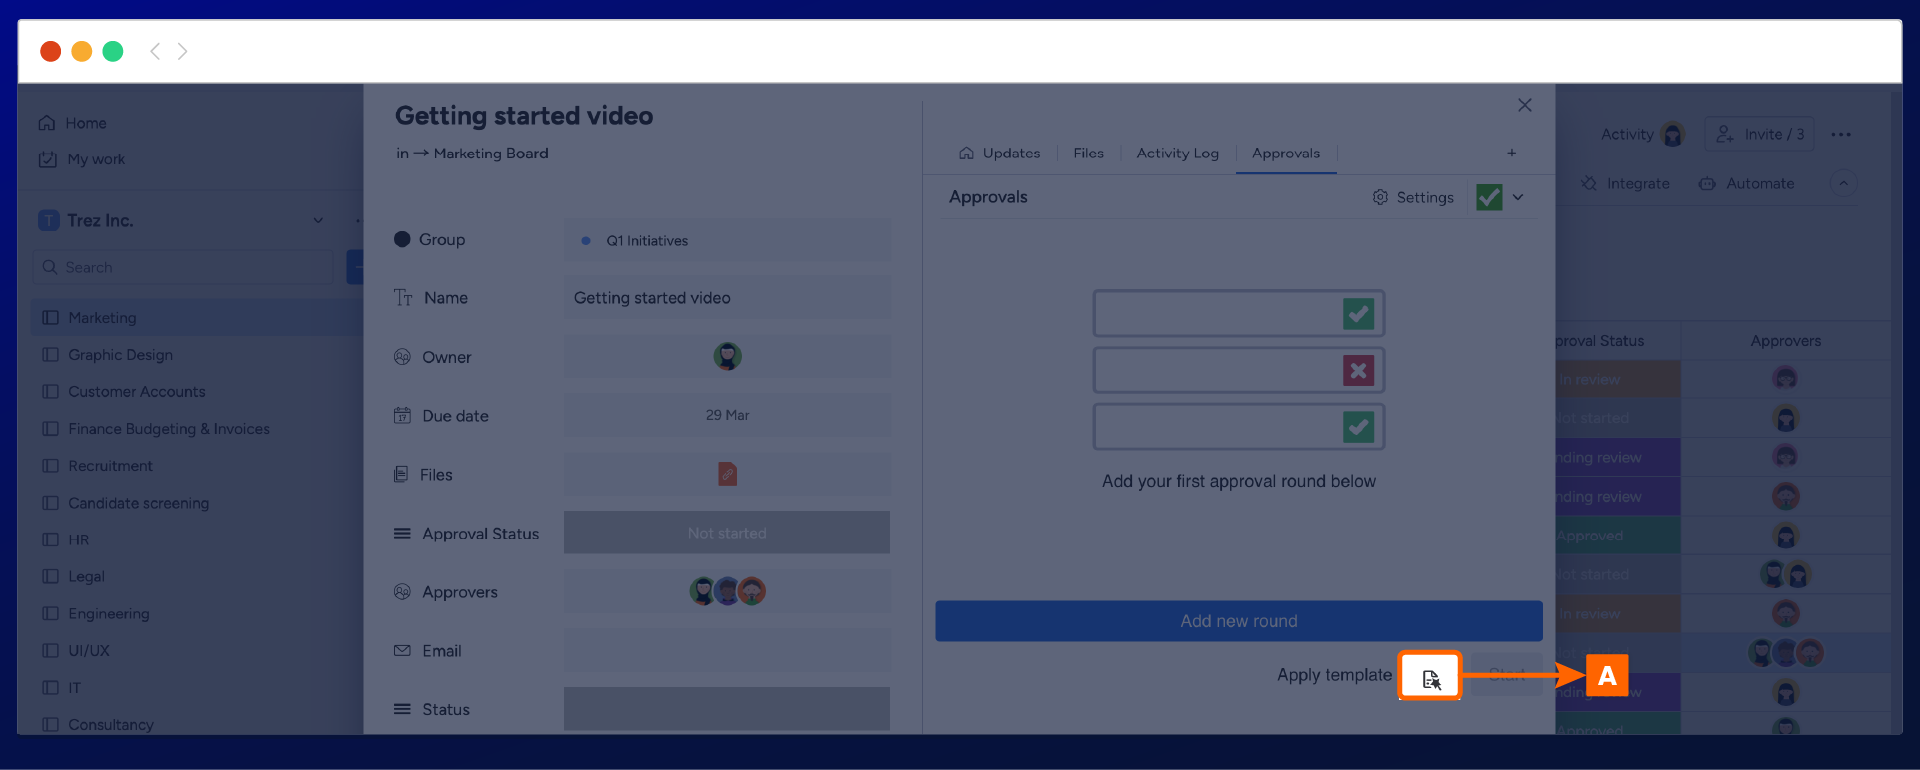
To start creating and customizing an approval template, navigate to Approvals and select the document icon (A) next under the adding a new round.
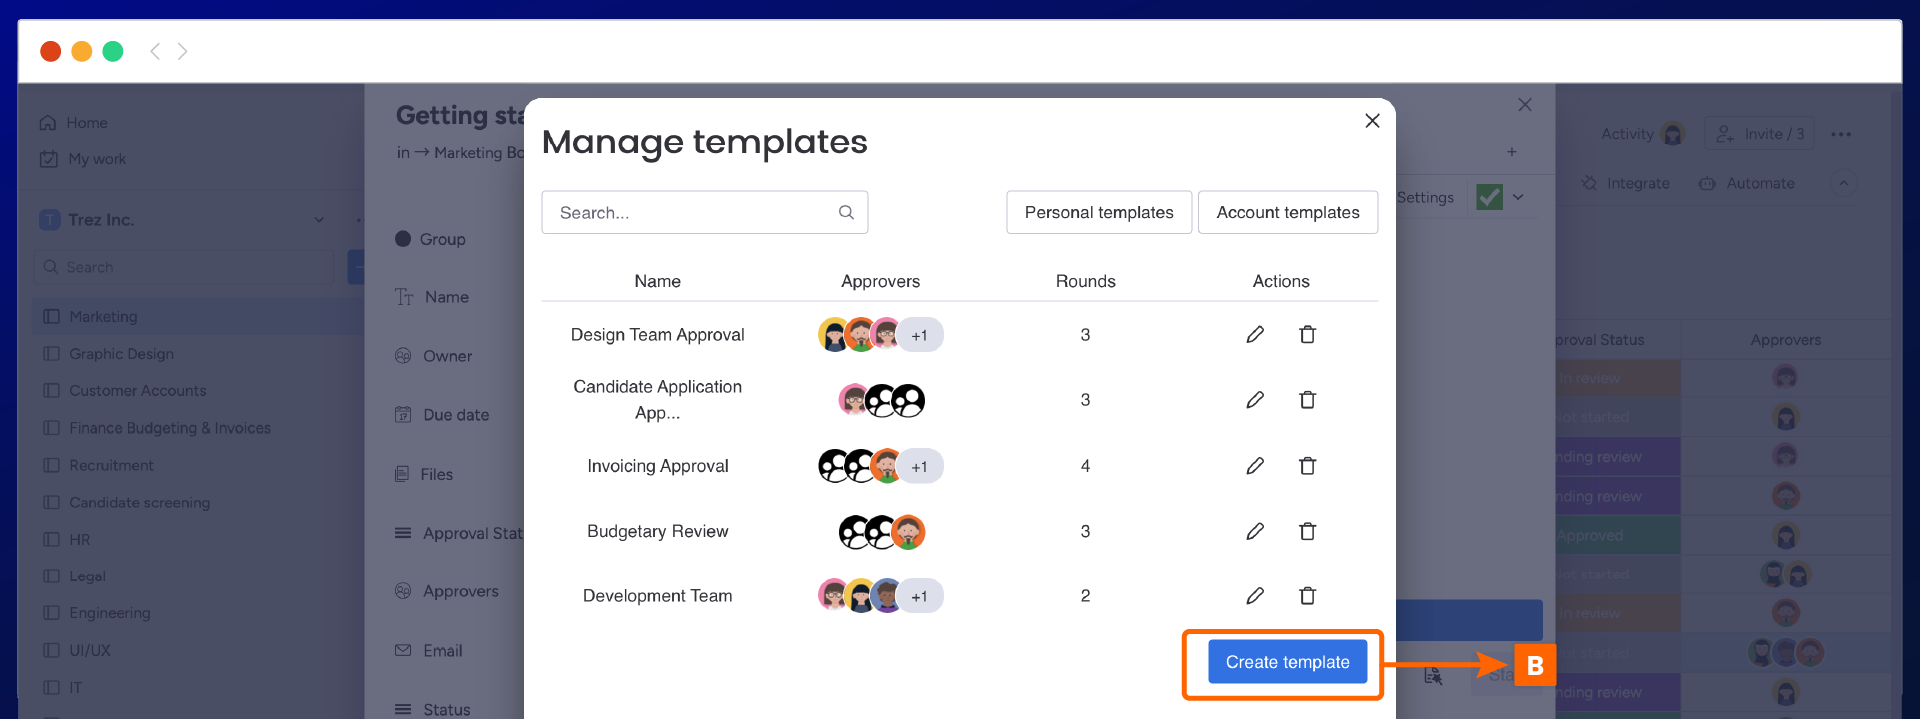
The manage template display window will open, and you will be able to view any existing personal or account templates. Create a new template by selecting Create Template (B). This will open the Approvals display window, where you can start adding your approval rounds and approvals and creating a sequential approval process.
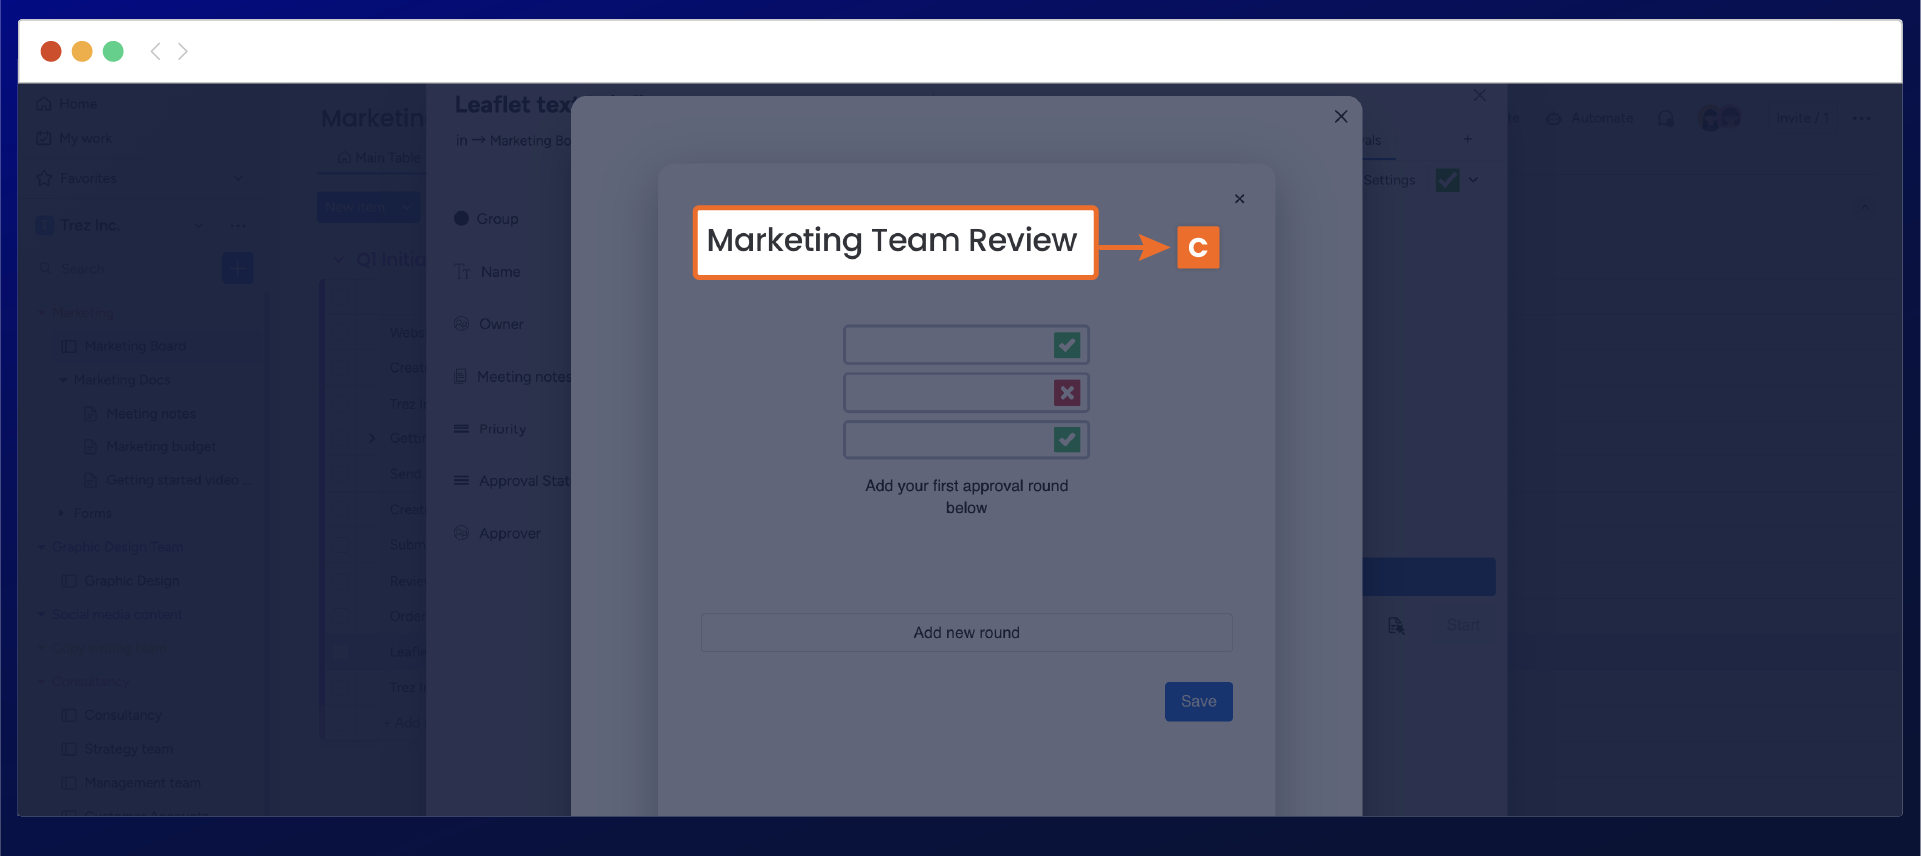
Start the configuration process by renaming the approval template title by clicking in the title field ‘new template’ (C). Once you have updated the title, click out of the field, and your changes will automatically be saved.
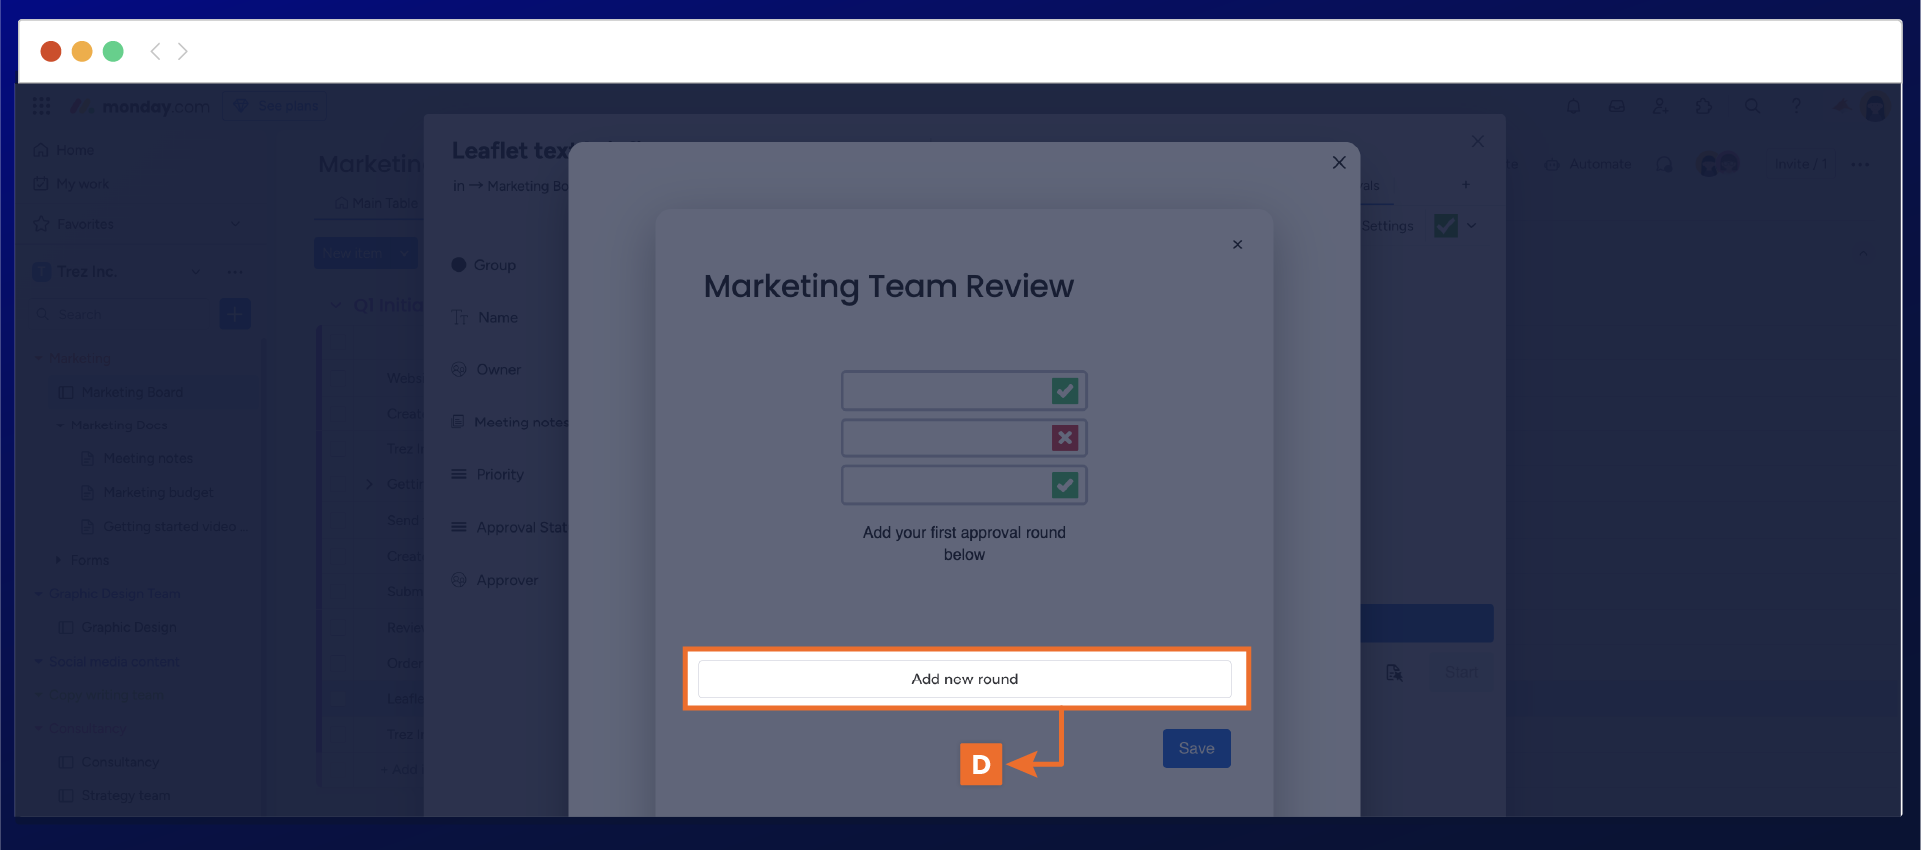
Now, you can start to add your approval rounds by selecting the add new round (D) field.
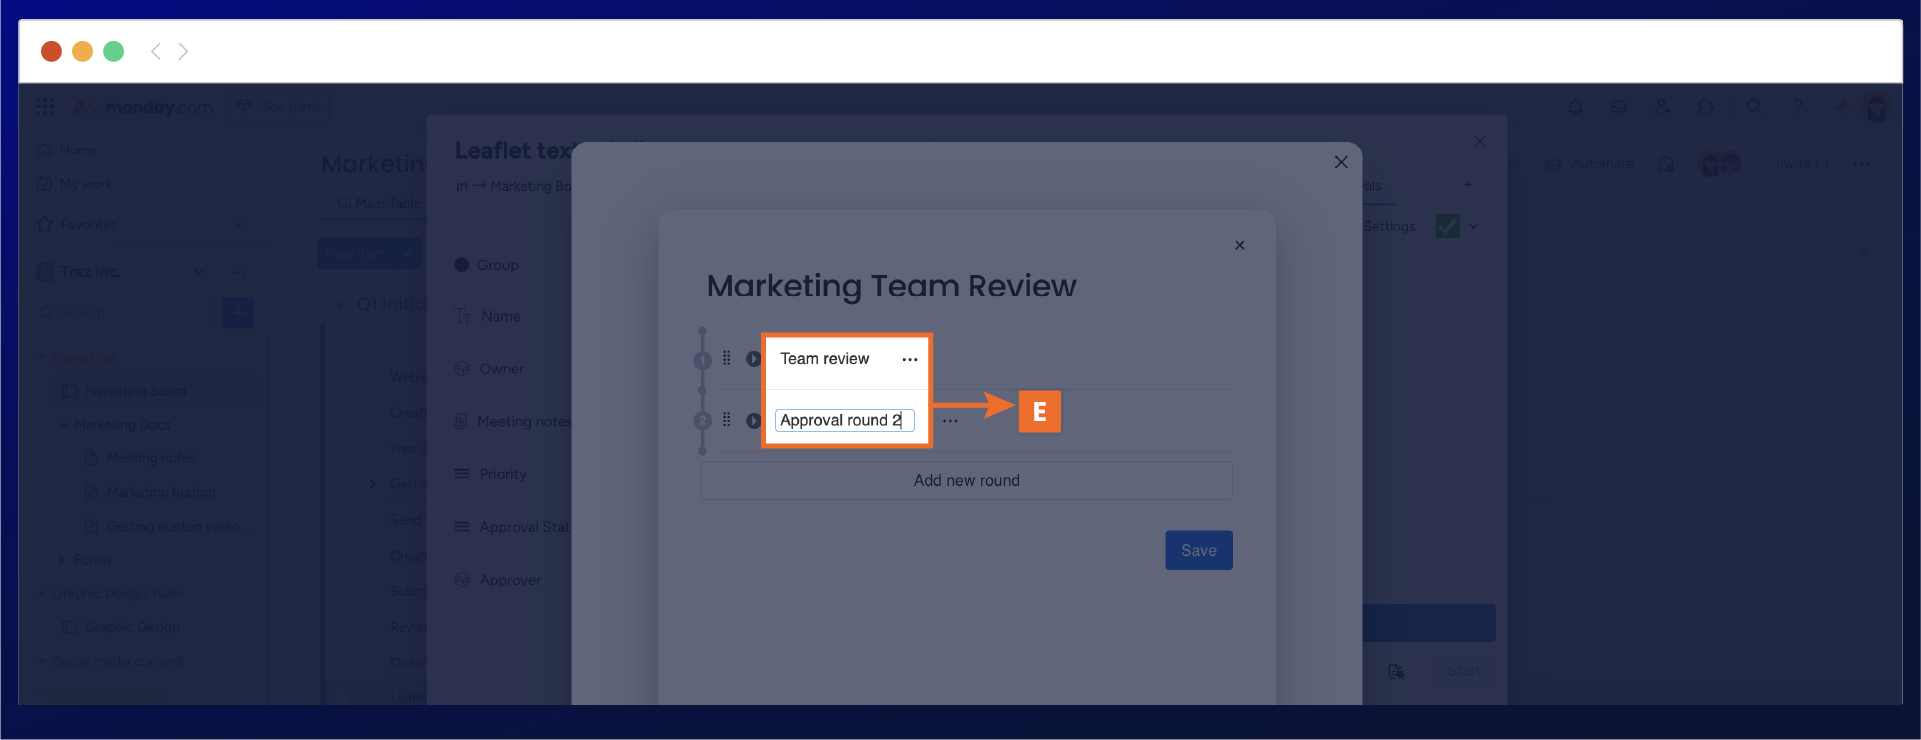
To configure the titles of approval rounds, click on the text within the approval round to edit it. This will allow you to assign specific review names, and the approval title will be updated automatically (E).

Once you have added and configured the approval rounds you need, you can start adding your reviewers or approval teams within the individual rounds. Simply open the approval round and either search for or select the individuals within the add approver field (F).
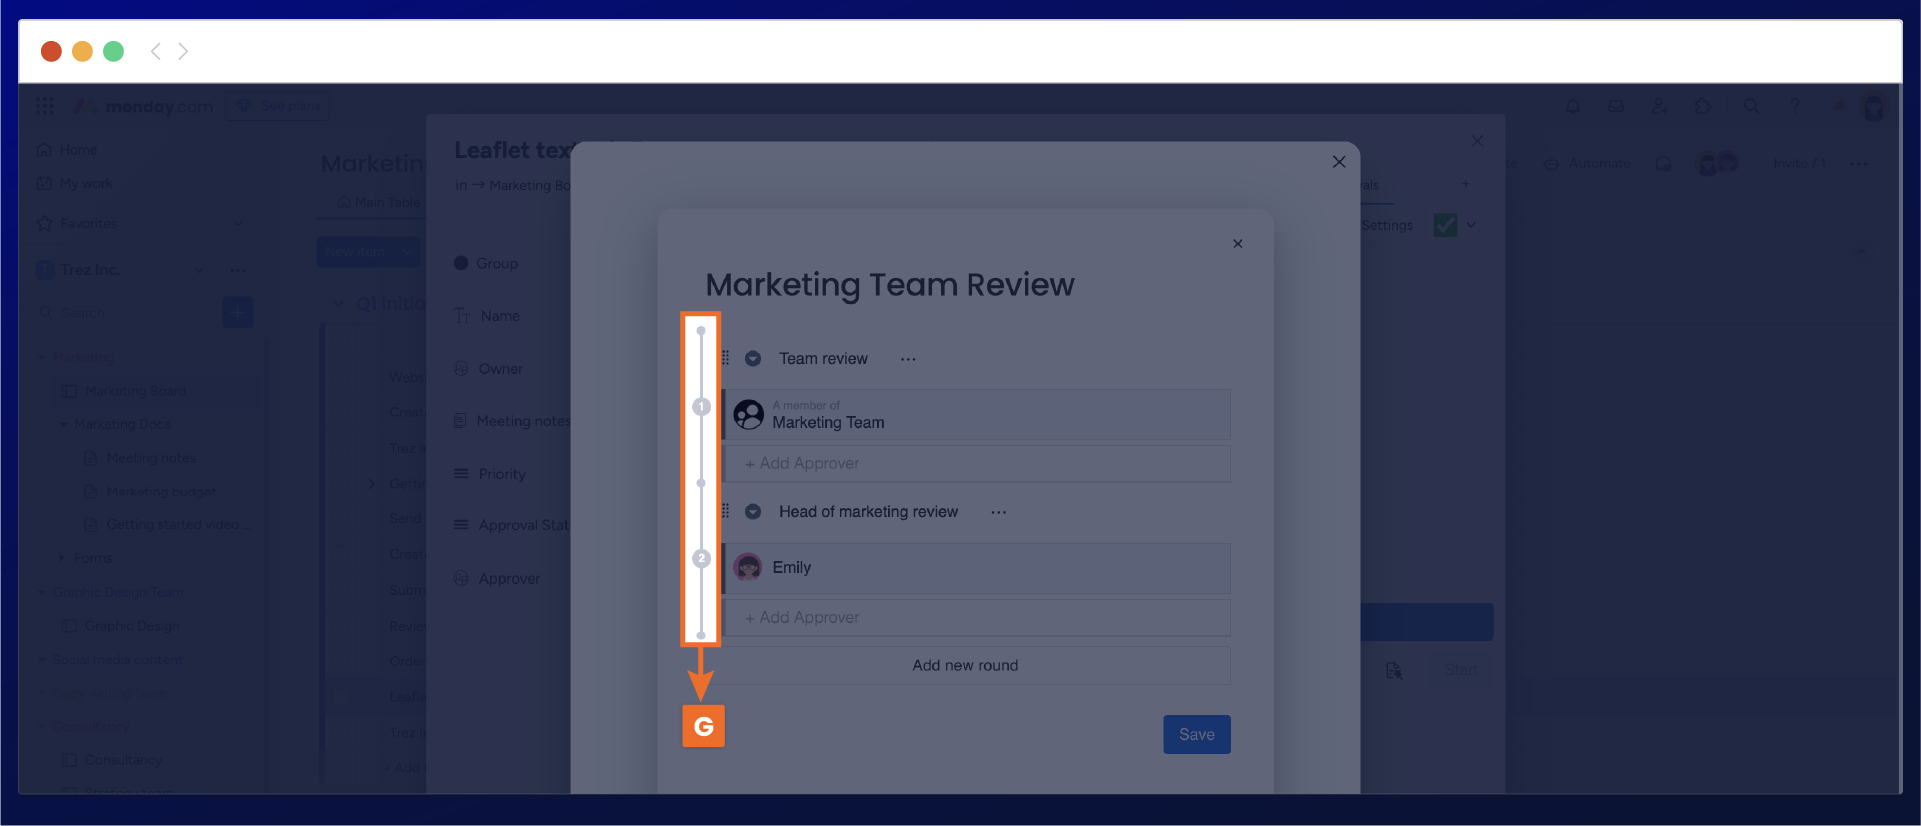
You can define the approval process by ordering your approval rounds to run sequentially. The sequential process is added automatically to each new approval round numbered by the left-hand side panel (G). For instance, the screenshot below shows the approval rounds numbered from 1 to 3 to indicate their order of approval when active.
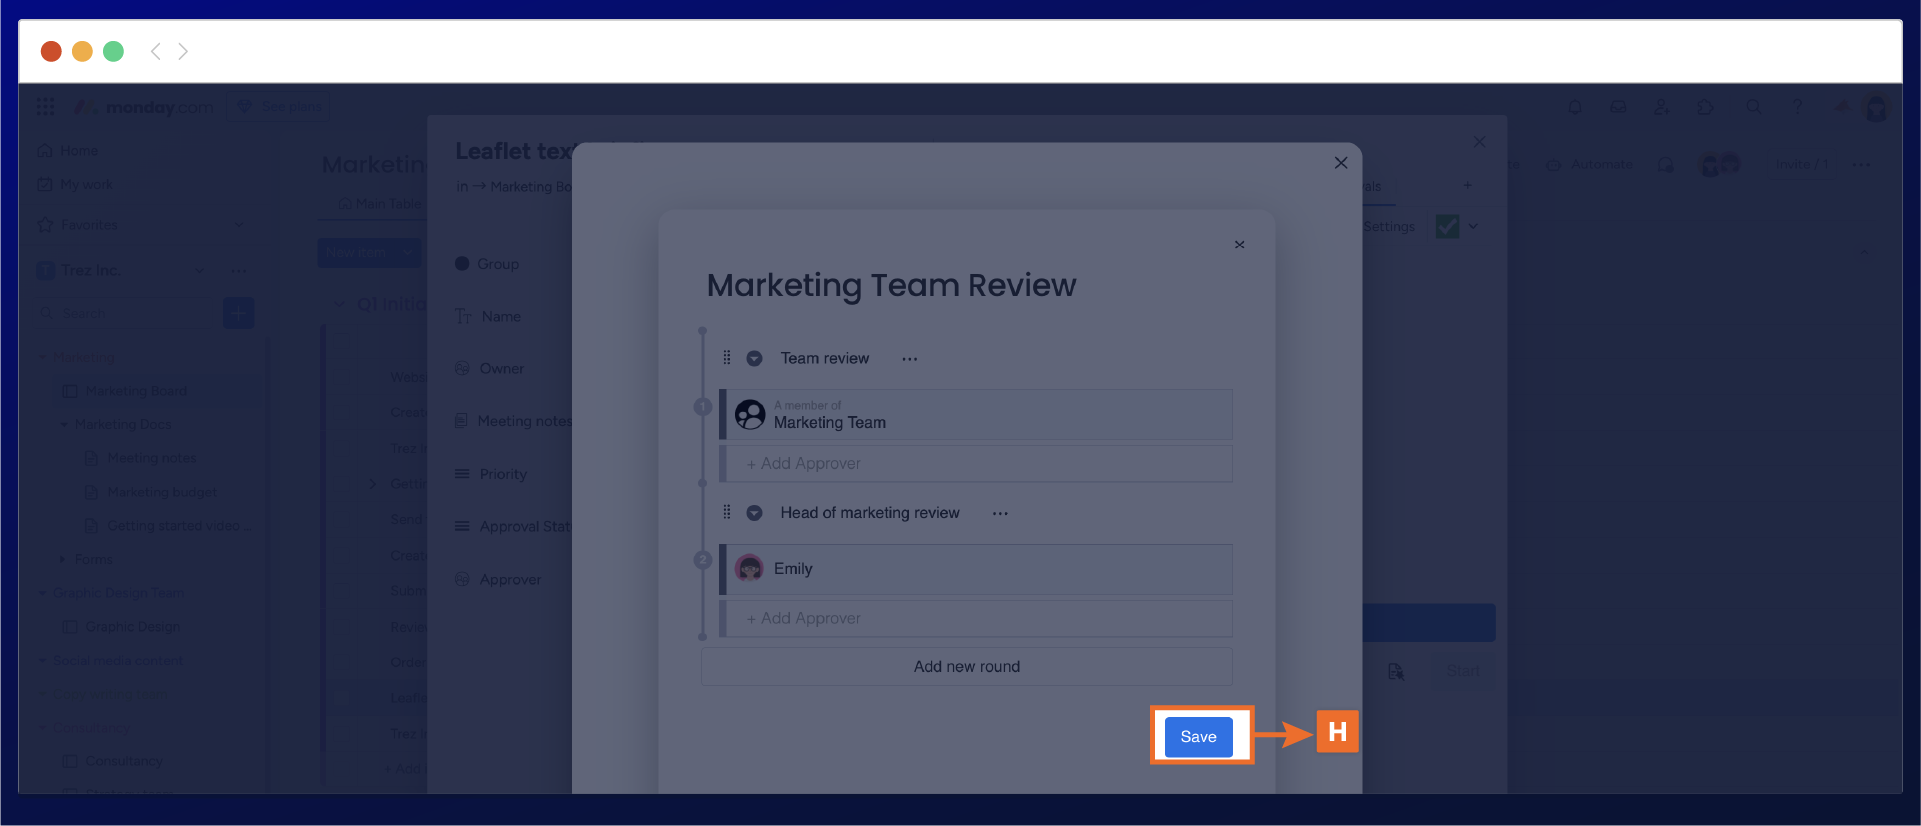
That's it! Once you have configured your approval template and are ready to proceed, click save (H), and your approval template will be added to the manage templates display window.
Applying an approval template
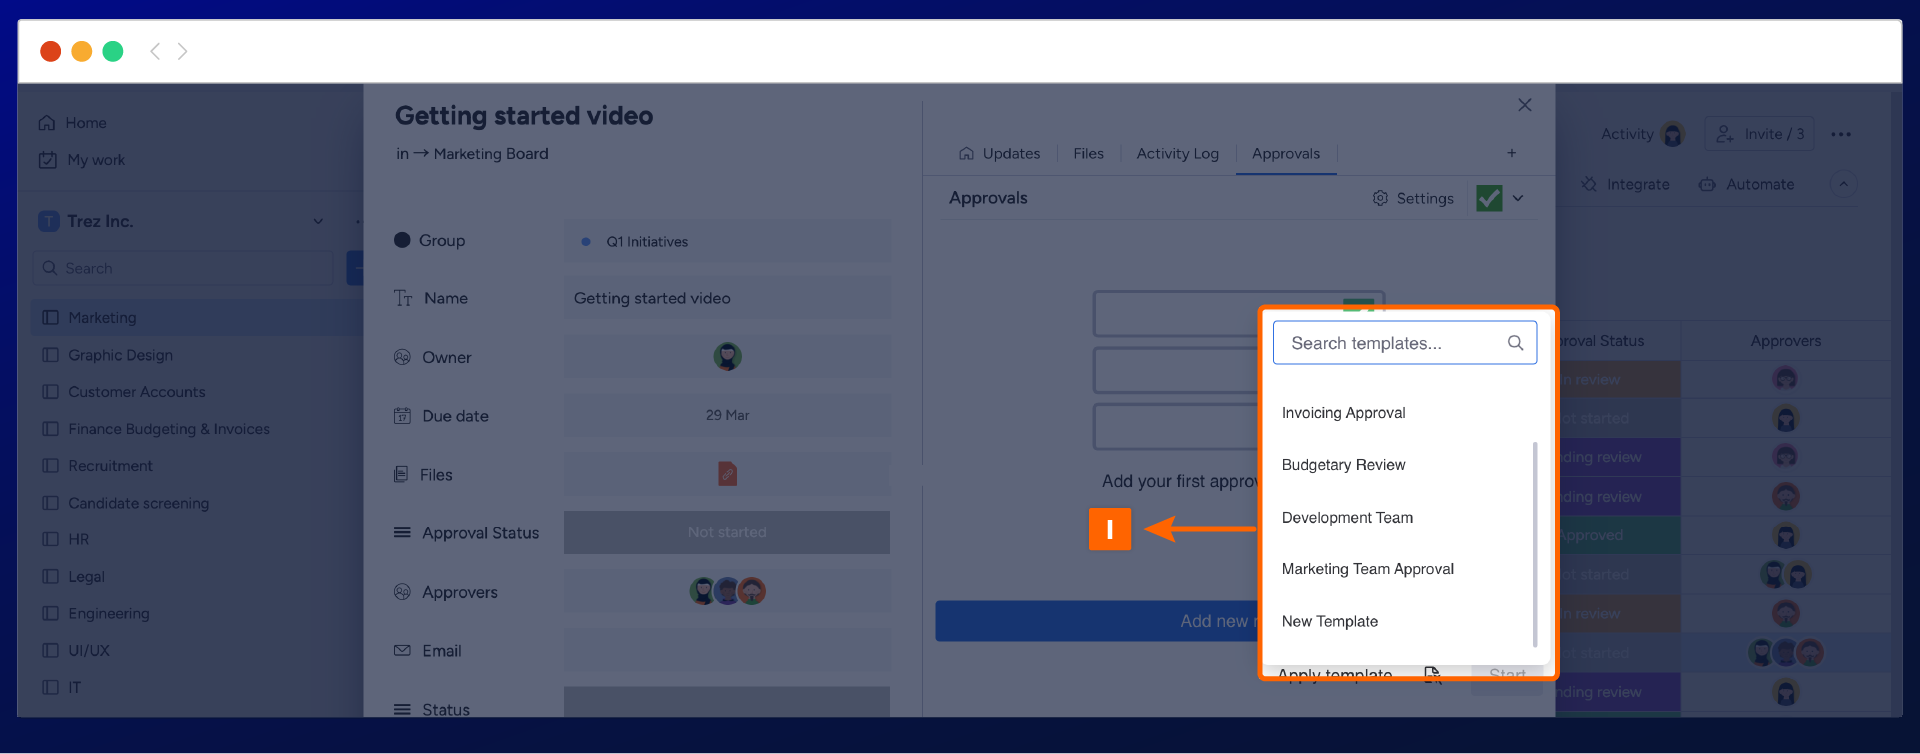
Adding a template to an item that needs to be sent for review takes no time and enhances your approval setup process. Begin by opening the item for review and navigating to apply template (I). The template pop-up will appear, listing all existing approval templates. You can search for your template either by typing its name or selecting it from the list.
Configuring existing approval templates
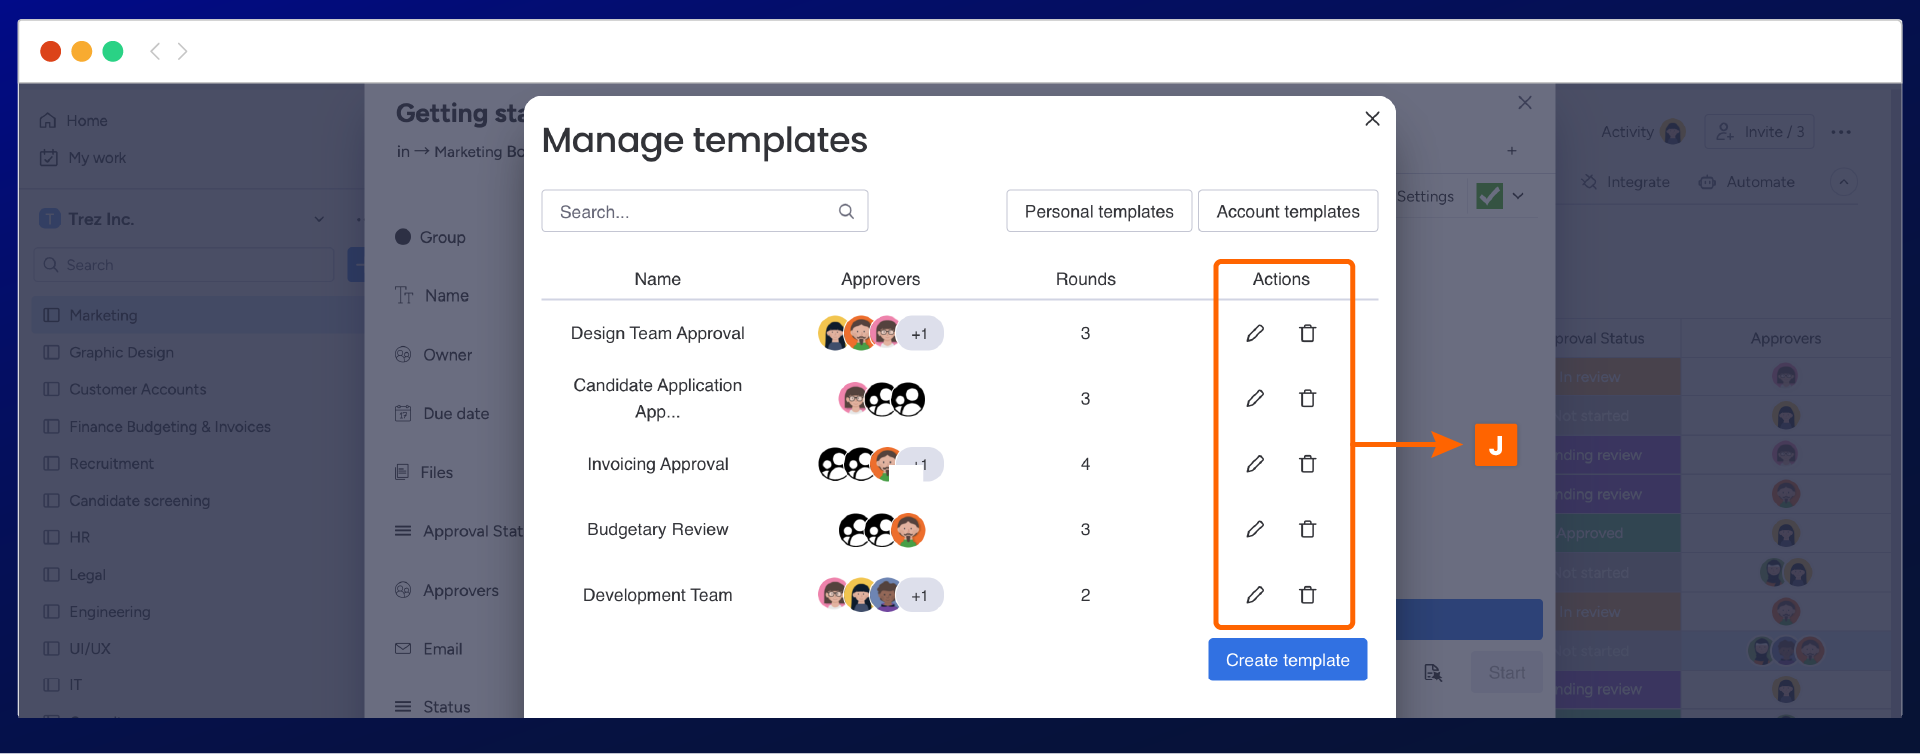
If you need to customize or delete any existing approval templates by adding a new approval round or including more reviewers, simply navigate back to the manage template option within any item.
Once the display window is open, navigate to the template for configuration and select the pen icon (J) located in the action section. This will open the template window allowing you to begin making your desired modifications.
Need support? We’re here to help 🧡
If you have any questions or would like to speak with us about Approval for monday.com, please don’t hesitate to contact our Support team.