Configuring Default Approvals
Default Approvals are an essential feature in Approvals for monday.com that enable you to create seamless, consistent workflows for your team. With Default Approvals, you can set up a template approval process and apply it automatically to new items added to your board, ensuring that your approval workflows run smoothly without needing manual intervention.
This guide will help you understand Default Approvals, show you how to configure them, and explore example use cases to get you started.
What Are Default Approvals?
Default Approvals allow you to pre-define an approval process that is automatically applied when:
New items are added to a specific board.
Items are moved to particular groups within a board.
This ensures that your organization maintains consistency across approval processes and reduces the need for repetitive manual setup.
Automations for Default Approvals
Automations are key to enabling Default Approvals, but keep in mind:
Automations are only available with Approvals Pro.
With the Pro plan, you can set up an unlimited number of automations to suit your needs.
Automatic approvals cannot be applied to any items that have an existing Approval Process which has been started and received decisions from approvers. This is to ensure an auditable record of all approvals can be maintained.
Available Automations
Here are the custom automations we currently offer for Default Approvals:
Apply an approval template to an item
Automatically attach a pre-configured approval template to items based on your setup.Start an approval process
Trigger the start of an approval process for items that meet specific criteria.
Have ideas for additional automations? Let us know! We’re always open to feedback and new feature suggestions.
How to Configure Default Approvals
Follow these steps to set up a Default Approval process:
1. Create an Approval Template
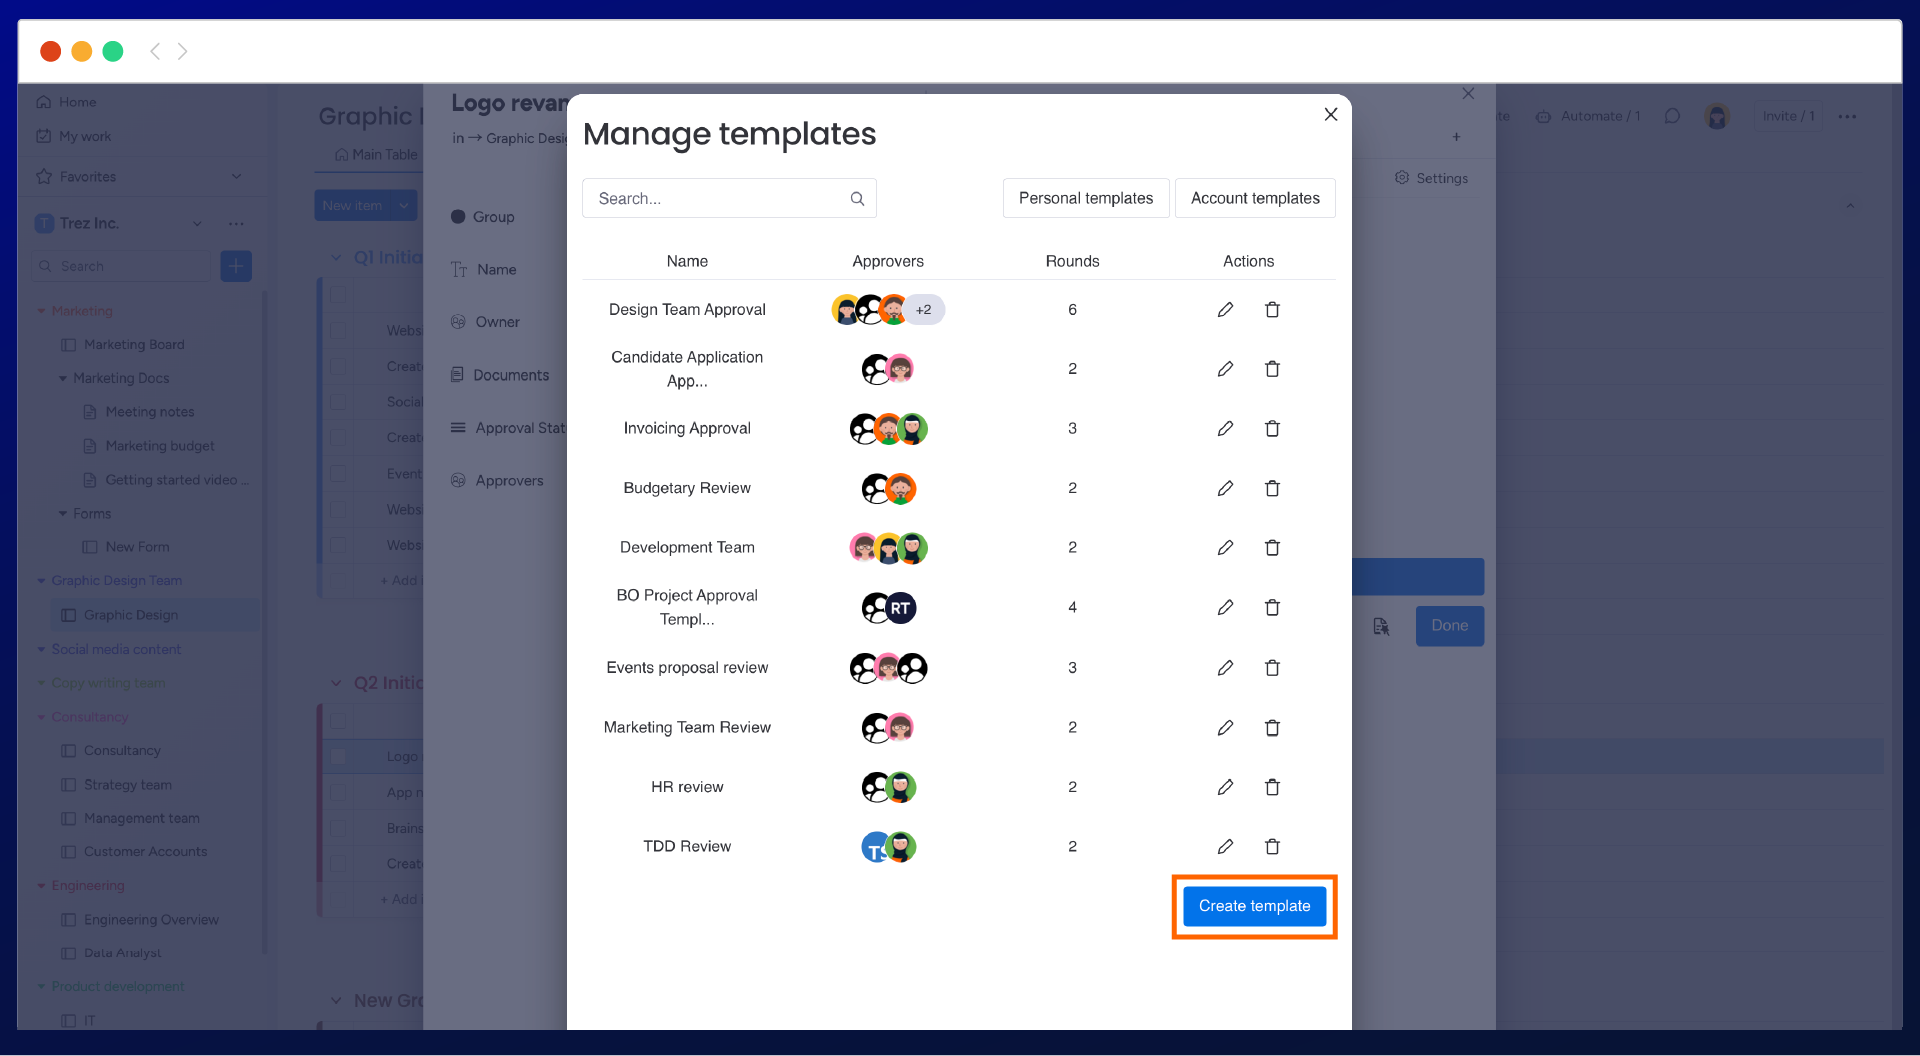
Before you can configure Default Approvals, you’ll need an approval template. Here’s how:
Navigate to the Approvals for monday.com app within the Item View.
Select the Manage Templates button.
Click Create Template and customize your approval process.

2. Set Up an Automation
Once your template is ready, configure an automation to apply the template or start the process:
Open the board where you want to apply the Default Approval.
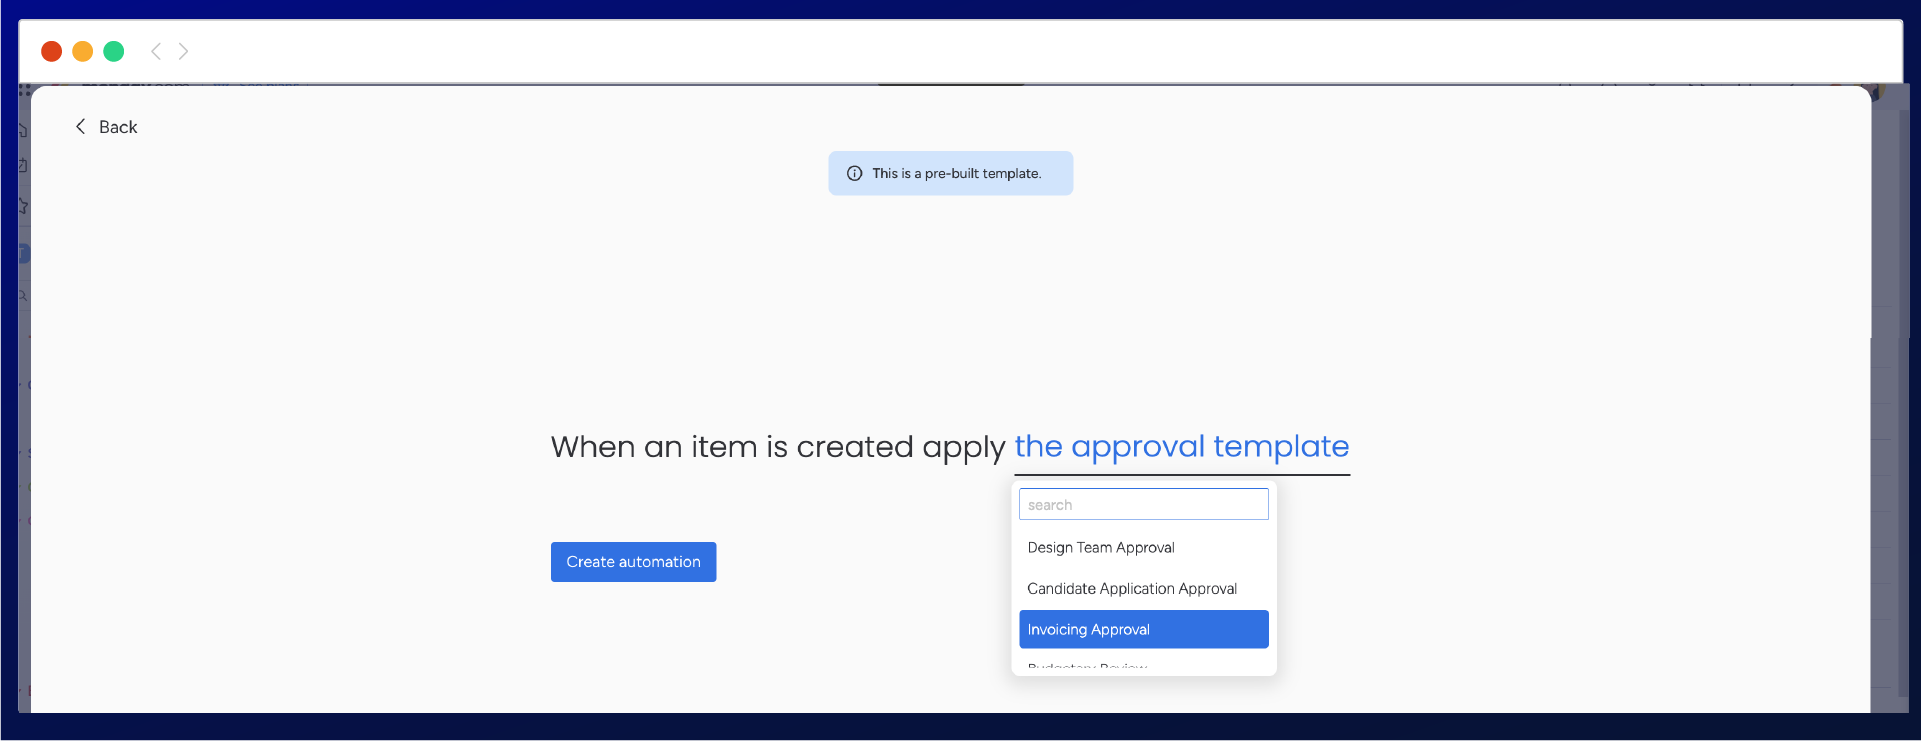
Go to the Automations Center and search for "Approvals".
Select the desired template automation, such as “When an item is created apply the approval template”
Customize the automation by selecting:
The template to apply.
(Optionally) The group you would like to set the default for, if you selected a template with a group filter.

3. Test Your Workflow
After setting up the automation:
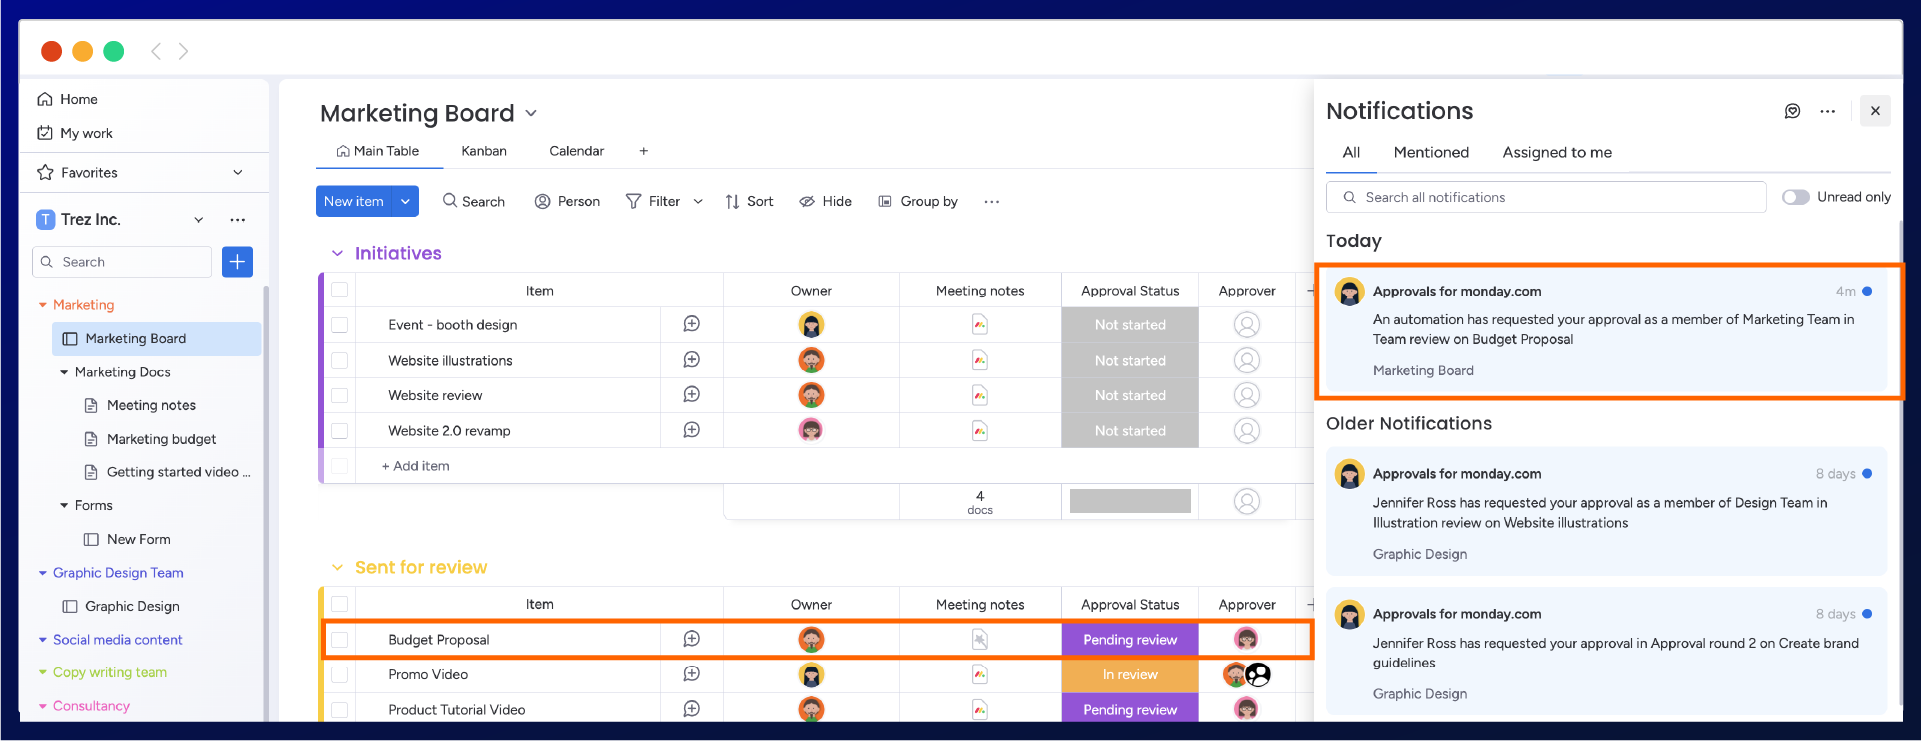
Add or move an item to the specified group or board.
Verify that the Default Approval template is applied correctly.

Example Use Cases
Scenario 1: Automatic approvals for items moved to an “In review” group
In a typical swim lane style board with groups such as “To do”, “In progress”, “In review”, and “Done” you can set up a Default Approval for the “In review” group to automatically apply and start an approval process for all items in the project.
Scenario 2: Department-Specific Approvals
Use Default Approvals to assign tailored workflows to items moved to department-specific groups like “Marketing” or “Finance.”
Scenario 3: Column-based Approvals
You can configure a workflow where items created in a board designed for budget approval can have different approval processes applied based on the amount of funding being requested.
Items with a cost column value of under $100 may be subject to a streamlined process which can be signed off by a direct line manager, while greater amounts automatically involve the Accounts team for financial approval
Ready to Get Started?
Default Approvals are a game-changer for streamlining your team’s workflow. If you need help setting them up, check out our full knowledge base or contact our support team for assistance.
Let us know how you’re using Default Approvals to simplify your approval processes! 🚀
.svg)